Table of Contents

Related Manuals for Midea TC0P042FC-S


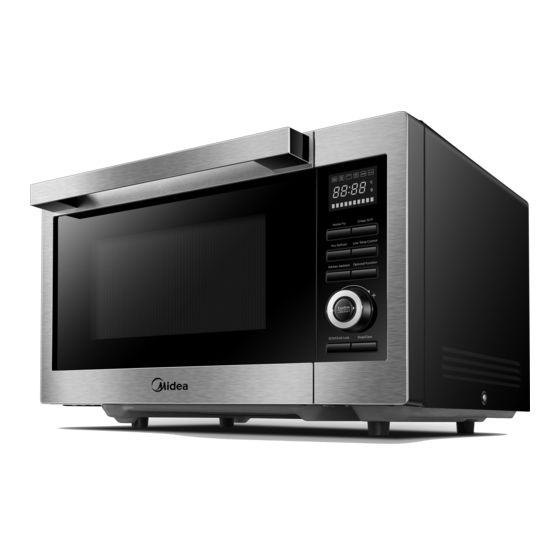
Summary of Contents for Midea TC0P042FC-S
- Page 1 Model:TC0P042FC-S Read these instructions carefully before using your microwave oven, and keep it carefully. If you follow the instructions, your oven will provide you with many years of good service. SAVE THESE INSTRUCTIONS CAREFULLY...
-
Page 2: Precautions To Avoid Possible Exposure To Excessive Microwave Energy
(2) HINGES AND LATCHES (broken or loosened) (3) DOOR SEALS AND SEALING SURFACES (d) The oven should not be adjusted or repaired by anyone except properly qualified service personnel. Specifications Model: TC0P042FC-S Rated Voltage: 120V~ 60Hz Rated Input Power(Microwave): 1600W Rated Output Power(Microwave) :... -
Page 3: Important Safety Instructions
IMPORTANT SAFETY INSTRUCTIONS When using electrical appliances basic safety precautions should be followed, including the following: WARNING - To reduce the risk of burns, electric shock, fire, injury to persons or exposure to excessive microwave energy: 1. Read all instructions before using the appliance. 2. - Page 4 17. Liquids, such as water, coffee, or tea are able to be overheated beyond the boiling point without appearing to be boiling. Visible bubbling or boiling when the container is removed from the microwave oven is not always present. THIS COULD RESULT IN VERY HOT LIQUID SUDDENLY BOILING OVER WHEN THE CONTAINER IS DISTURBED OR A UTENSIL IS INSERTED INTO THE LIQUID.
-
Page 5: Grounding Instructions
GROUNDING INSTRUCTIONS This appliance must be grounded. In the event of an electrical short circuit, grounding reduces the risk of electric shock by providing an escape wire for the electric current. This appliance is equipped with a cord having a grounding wire with a grounding plug. The plug must be plugged into an outlet that is properly installed and grounded. -
Page 6: Radio Interference
RADIO INTERFERENCE 1. Operation of the microwave oven may cause interference to your radio, TV or similar equipment. 2. When there is interference, it may be reduced or eliminated by taking the following measures: 1) Clean door and sealing surface of the oven 2) Reorient the receiving antenna of radio or television. - Page 7 CLEANING Be sure to unplug the appliance from the power supply. 1. Clean the cavity of the oven after using with a slightly damp cloth. 2. Clean the accessories in the usual way in soapy water. 3. The door frame and seal and neighbouring parts must be cleaned carefully with a damp cloth when they are dirty.
-
Page 8: Materials To Be Avoided In Microwave Oven
Plastic wrap Microwave-safe only. Use to cover food during cooking to retain moisture. Do not allow plastic wrap to touch food. Thermometers Microwave-safe only (meat and candy thermometers). Wax paper Use as a cover to prevent splattering and retain moisture. Materials to be avoided in microwave oven Utensils Remarks... -
Page 9: Countertop Installation
Countertop Installation Remove all packing material and accessories. Cabinet: Remove any protective film found Examine the oven for any damage such as on the microwave oven cabinet surface. dents or broken door. Do not install if oven is Do not remove the light brown Mica cover damaged. - Page 10 NAMES OF OVEN PARTS AND ACCESSORIES Remove the oven and all materials from the carton and oven cavity. Your oven comes with the following accessories: Turntable Ring Assembly Glass Tray Lower Wire Rack( For the Grill Rack( Can not be used in Instruction Manual microwave and for baking and microwave function and must be...
- Page 11 NAMES OF OVEN PARTS AND ACCESSORIES Cleaning the cooking compartment and putting the turntable in place. For new installations, make sure all packaging and shipping tape has been removed. Before using the appliance to prepare food for the first time, you will need to put the turntable in place correctly. You must clean the cooking compartment and accessories.
- Page 12 OPERATION INSTRUCTION This microwave oven uses modern electronic control to adjust cooking parameters to meet your needs better for cooking. 1.Kitchen Timer (1) Press “ Timer/Clock ” once and then “00:00” will display. (2) Press number keys or “+30SEC” to set the time.The maximum time value is “99:99”. (3) Press “...
- Page 13 3.Microwave Cooking (1) Press “Micro” and then “00:00” will display. (2) Press number keys or “+30SEC” to set cooking time. The maximum time value is “99:99”. Press “Clear/Lock” could remove the time you have set. (3) Press “Start” to start cooking. Increase a convection function: (1) In setting state,cooking state or paused state of microwave cooking, press “Crisp”...
- Page 14 MENU SUBMENU POWER P100 P100 P100 Notes: (1)In these menus that only has microwave function,press “Crispy” to add convection function during setting or pausing state. (2)In multi-stage menus,press “Crispy” or “Micro ” for 3 seconds to cancel the corresponding function, and then press “Crispy” or “Micro ” again could restore the corresponding function.
- Page 15 7.Speed Cooking (1) In waiting state, press “+30SEC” to cook food with P100 power level for 30 seconds. Each press on the same key can increase 30 seconds and the maximum time value is 99:99 minutes. (2) In waiting state, press number keys “1-9” for 3 seconds to cooking with corresponding time. For example,press “2”...
- Page 16 10.Power Saving Mode To enter the power saving mode: In waiting,setting and paused state,or the end of cooking,the screen only display “End”,the oven will enter to power saving mode within 3 minutes without any operation. To cancel the power saving mode: In power saving mode, press“Start”or open and then close the door.
-
Page 17: Maintenance
MAINTENANCE Troubleshooting Check your problem by using the chart below and try the solutions for each problem. If the microwave oven still does not work properly, contact the nearest authorized service center. TROUBLE POSSIBLE CAUSE POSSIBLE REMEDY a. Electrical cord for oven is a. - Page 18 5.Multi-Stage Cooking (1) Press “Micro”or “Crispy” to set the first stage. (2) Press number keys or “+30SEC” to set cooking time. The maximum time value is “99:99”. (3) Press “Micro”or “Crispy” to set the second stage. (4) Press number keys to set cooking time. The maximum time value is “99:99”. (5) Press “Start”...
Need help?
Do you have a question about the TC0P042FC-S and is the answer not in the manual?
Questions and answers