Table of Contents
Advertisement
Quick Links
Advertisement
Table of Contents

Related Manuals for KitchenAid NESPRESSO my machine KES0503AC0


Summary of Contents for KitchenAid NESPRESSO my machine KES0503AC0
- Page 2 Grand Cru can be extracted, to give the coffee body and create an exceptionally thick and smooth crema. Join us in the kitchen at www.kitchenaid.com and www.nespresso.com/kitchenaid. KES0503 KES0504 KitchenAid.com USA: 1.800.541.6390...
-
Page 3: Table Of Contents
Espresso Machine, please fill out and mail your product registration card packed with the unit, or register online at www.kitchenaid.com. This card will enable us to contact you in the unlikely event of a product safety notification and assist us in complying with the provisions of the Consumer Product Safety Act. -
Page 4: Espresso Machine Safety
ESPRESSO MACHINE SAFETY Your safety and the safety of others are very important. We have provided many important safety messages in this manual and on your appliance. Always read and obey all safety messages. This is the safety alert symbol. This symbol alerts you to potential hazards that can kill or hurt you and others. - Page 5 ESPRESSO MACHINE SAFETY 11. This product is designed for indoor household use only. Not designed for commercial use. 12. The safety precautions are part of the appliance. Read them carefully before using your new appliance for the first time. Keep them in a place where you can find and refer to them later on.
- Page 6 58. When unpacking the machine, remove the plastic film on the drip grid and dispose. 59. This appliance is designed for Nespresso coffee capsules available exclusively through the Nespresso Club or your Nespresso authorized representative. 60. All KitchenAid appliances pass stringent controls.
-
Page 7: Electrical Requirements
61. Reliability tests under practical conditions are randomly performed on selected units. 62. Some units can therefore show traces of previous use. 63. KitchenAid reserves the right to change instructions without prior notice. Descaling 64. Nespresso descaling agent, when used correctly, helps to ensure the proper functioning of your machine over its lifetime and that your coffee experience is as perfect as on the first day. -
Page 8: Parts And Features
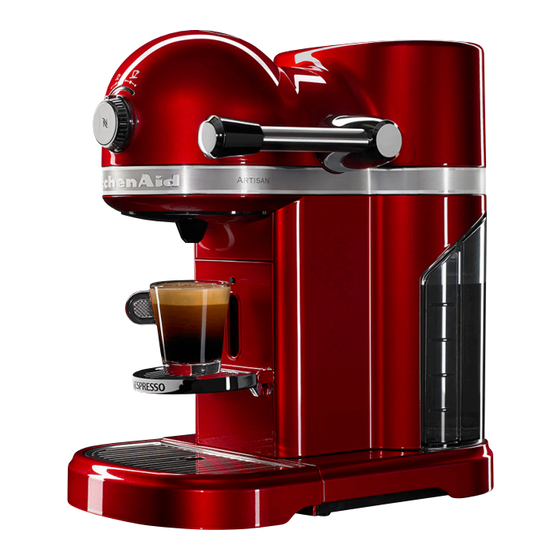
PARTS AND FEATURES Parts and accessories Handle Capsule door (use handle to open) Brewing button/ Selection dial (see details below) Espresso spout Water tank Maintenance unit: Capsule disposal container (not shown) Drip grid Cup holder Drip tray (not shown) SELECTION DIAL Settings SPECIAL FUNCTION Settings 1: 25 ml / 0.8 oz (ristretto) 1: Automatic standby: 15 min. -
Page 9: Assembling The Espresso Machine
ASSEMBLING THE ESPRESSO MACHINE Preparing the Espresso Machine for first use WARNING Electrical Shock Hazard Plug into a grounded 3 prong Place the Espresso Machine on a clean, outlet. dry, level surface. Do not remove ground prong. Do not use an adapter. Do not use an extension cord. -
Page 10: Operating The Espresso Machine Preheating
ASSEMBLING THE ESPRESSO MACHINE Fill the water tank with fresh, cold, Place the water tank back on the drinking water (the water level should Espresso Machine. be at or below the “max” fill line). NOTE: Press water tank in until it snaps completely into place to assure proper function. Before brewing espresso for the first time, make sure to run plain water through the Espresso Machine, on the... -
Page 11: Brewing Espresso
OPERATING THE ESPRESSO MACHINE Brewing espresso Place your cup on the cup holder. Lift the handle to raise the lid on the capsule loading compartment to its fully upright position. NOTE: To avoid damage and injury due to hot vapor when brewing, open the capsule door ONLY by the handle 3 seconds after the brewing cycle has completed. -
Page 12: Automatic Standby Mode
OPERATING THE ESPRESSO MACHINE After your espresso is finished brewing, You can change your selection mid-brew lift the handle to its fully upright position by turning the selection dial to a new to drop the used capsule into the selection before brewing ends. disposal container. -
Page 13: Care And Cleaning
OPERATING THE ESPRESSO MACHINE 15 min. 20 min. 30 min. Turn the selection dial to the left most Press the BREW button again. The position to reset the standby time to Espresso Machine will blink 3 times 15 minutes; turn to the second left to confirm that you have exited the position to reset the standby time to programming mode. - Page 14 CARE AND CLEANING Remove and empty the capsule disposal To separate the drip tray from the container, then remove the drip grid maintenance unit: fold up the cup from the drip tray. holder so you can hold the unit securely in one hand.
-
Page 15: Emptying The Espresso Machine
CARE AND CLEANING Emptying the Espresso Machine Tip the water tank slightly, then Place an empty container under the remove by pulling the water tank out coffee outlet. from the Espresso Machine. Empty the water out of the tank and place it back on the Espresso Machine. -
Page 16: Descaling
Use the Nespresso brand packaged descaling agent available online to remove scale. Follow the directions on the package. KitchenAid does not recommend using home remedies or water and vinegar solutions to descale the Espresso Machine. -
Page 17: Troubleshooting
TROUBLESHOOTING 1. If the power on indicator remains off 2. If coffee does not flow from the and the Espresso Machine fails to heat spout… when the Brewing button is pressed: • Water tank may be empty. • Espresso Machine may need to be descaled. -
Page 18: Warranty And Service
1-800-541-6390. The replacement parts and repair labor costs to correct defects in materials and workmanship. Service must be provided by an Authorized KitchenAid Service Center or in Canada, by a Nespresso Authorized Service Center. KitchenAid Will A. Repairs when Espresso Machine is used in other Not Pay for: than normal single family home use. - Page 19 Outside the United States and Puerto Rico: Consult your local KitchenAid dealer or the store where you purchased the Espresso Machine for information on how to obtain service. ®/™ © 2016 KitchenAid. All rights reserved. Used under license in Canada.
- Page 20 ®/™ © 2016 KitchenAid. All rights reserved. Used under license in Canada. ®/™ © 2016 KitchenAid. Tous droits réservés. Utilisé sous licence au Canada. ®/™ © 2016 KitchenAid. Todos los derechos reservados. Usada en Canadá bajo licencia. W10660371C 03/16...
Need help?
Do you have a question about the NESPRESSO my machine KES0503AC0 and is the answer not in the manual?
Questions and answers