Table of Contents
Advertisement
Advertisement
Table of Contents

Related Manuals for ROE Carbon Series


Summary of Contents for ROE Carbon Series
- Page 1 Carbon Series User Manual Version: 2.1 Updated: 2020-11-10...
-
Page 2: Copyright
Standard products refer to products officially launched by ROE. Customized products refer to ROE standard products which are partially or totally designed in line with customers’ requirements and demands. Customized systems refer to products with special systems required by customers. -
Page 3: Table Of Contents
Locking Plate & Curving Plate ..................21 Side lock ........................23 Add-on Protector ......................24 Cables .......................... 30 Package ..........................32 Flight Case ........................32 Quick-start Guide ....................... 34 2020-11-10 | Copyright © 2020 ROE Visual Co., Ltd. All Rights Reserved. 3 / 64... - Page 4 Service Manual ....................... 54 10.1 Cleaning Tiles ....................... 54 10.2 Installing Tiles ....................... 55 10.3 Replacing the Hub Board ..................... 57 11 Revision History ........................ 64 2020-11-10 | Copyright © 2020 ROE Visual Co., Ltd. All Rights Reserved. 4 / 64...
-
Page 5: Safety
All components should be kept dry, clean, lubricated (only of recommended), coated properly, and otherwise maintained in a manner consistent with the part design. ROE products must be used in a manner consistent with their design and inspected on a routine basis for security, wear, deformation, corrosion and any other circumstances that may affect the loading capacity. - Page 6 2 - 3 h 2 - 3 h 2 - 3 h 120% 2 - 3 h 150% 2 - 3 h 200% 2 - 3 h 2020-11-10 | Copyright © 2020 ROE Visual Co., Ltd. All Rights Reserved. 6 / 64...
-
Page 7: Safety Instructions
(9) Please do not use the product near the sea and / or other places with corrosive environment. (10) The installation must be performed by authorized and qualified technical personnel only. 2020-11-10 | Copyright © 2020 ROE Visual Co., Ltd. All Rights Reserved. 7 / 64... -
Page 8: Consignes De Sécurité
Les produits ROE doivent être utilisés conformément à leur conception et inspectés régulièrement pour vérifier leur sécurité, leur usure, leur déformation, leur corrosion et toute autre circonstance pouvant affecter leur capacité... - Page 9 2 - 3 h 2 - 3 h 2 - 3 h 120% 2 - 3 h 150% 2 - 3 h 200% 2 - 3 h 2020-11-10 | Copyright © 2020 ROE Visual Co., Ltd. All Rights Reserved. 9 / 64...
-
Page 10: Consignes De Sécurité
(9) Veuillez ne pas utiliser le produit près de la mer et / ou d’autres lieux exposés à un environnement corrosif. (10) L'installation doit être effectuée par du personnel technique autorisé et qualifié. 2020-11-10 | Copyright © 2020 ROE Visual Co., Ltd. All Rights Reserved. 10 / 64... -
Page 11: General Introduction
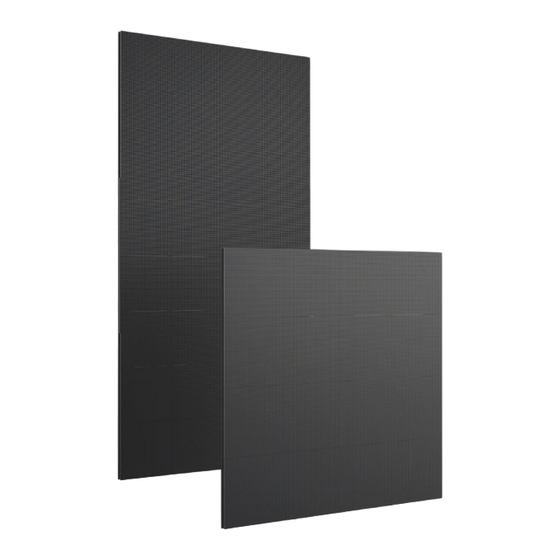
Carbon Series is the ideal cost-effective LED display solution for rental, stage and fixed applications. 2.1.1 Ultra-lightweight The Carbon Series is 600 x 1200 mm, but it’s about 13 kg per tile (Solid). The lightweight Carbon fiber frame ensures the extreme durability. 2.1.2 Superb Visual The sleek design with black LEDs highlights its high contrast and brightness for a vivid visual effect. -
Page 12: Cb 3.75 Specifications
-40 °C to 60 °C / -40 °F to 140 °F Storage Temperature Humidity 10 – 90% RH Certifications CE, ETL, FCC, ROHS Max BTU 1842 AVG BTU 2020-11-10 | Copyright © 2020 ROE Visual Co., Ltd. All Rights Reserved. 12 / 64... -
Page 13: Cb5 Specifications
Storage Temperature Humidity 10 – 90% RH Certifications CE, ETL, FCC Max BTU 1706(White) 2218(Black) 853(White) 1109 (Black) AVG BTU 785(White) 1020(Black) 392(White) 510 (Black) 2020-11-10 | Copyright © 2020 ROE Visual Co., Ltd. All Rights Reserved. 13 / 64... -
Page 14: Cb8 Specifications
-40 °C to 60 °C / -40 °F to 140 °F Temperature Humidity 10 – 90% RH Max BTU 1467 AVG BTU Certifications CE, ETL, FCC, ROHS CE, ETL, FCC 2020-11-10 | Copyright © 2020 ROE Visual Co., Ltd. All Rights Reserved. 14 / 64... -
Page 15: Installation Requirements
Weight Do not underestimate the weight of tiles and frames. Please make sure the floor or truss on which ROE tiles and frames will be installed is capable of handling five times the complete weight of tiles and frames. Do not forget to take into consideration the ballast weight required by the stacking system. -
Page 16: Components
Figure 4-1. CB Series Components Power-in Data Test Button Tile Handle Power Box Side Lock Indicator Locating Pin Power-out Data Figure 4-2. CB Series Parts Information 2020-11-10 | Copyright © 2020 ROE Visual Co., Ltd. All Rights Reserved. 16 / 64... -
Page 17: Module
Dimensions: 300 x 150 mm Figure 4-3. CB Series Module Dimensions Power Box Dimensions: 75 x 975 x 45 mm Figure 4-4. CB Series Power Box Dimensions 2020-11-10 | Copyright © 2020 ROE Visual Co., Ltd. All Rights Reserved. 17 / 64... -
Page 18: Accessories
Weight: 6.9 kg Dimensions: 1189 x 157 x118 mm CB hanging bar, 2W shackle, G3, V1.7 SAP: 207002S0398 Weight: 6.9 kg Dimensions: 1189 x 157 x118 mm 2020-11-10 | Copyright © 2020 ROE Visual Co., Ltd. All Rights Reserved. 18 / 64... -
Page 19: For Stacking
Weight: 1±3% kg Dimensions: 232 x 106.5 x 50 mm CB stacking rear adaptor, V3.0 SAP: 304012-02270 Weight: 0.45 kg Dimensions: 112 x 81 x 92 mm 2020-11-10 | Copyright © 2020 ROE Visual Co., Ltd. All Rights Reserved. 19 / 64... -
Page 20: A Complete Stacking System
Note: The stacking system should be used every two-tile wide at least and it’s will be better to be used every one-tile wide when necessary. 2020-11-10 | Copyright © 2020 ROE Visual Co., Ltd. All Rights Reserved. 20 / 64... -
Page 21: Locking Plate & Curving Plate
Weight: 288.5g Weight: 232g CB lock plate, eyebolt, 1 handle, V1.2 SAP: 206002S0638 Weight: 156g Note: The curving plate can achieve concave 15° and convex 10° 2020-11-10 | Copyright © 2020 ROE Visual Co., Ltd. All Rights Reserved. 21 / 64... - Page 22 How to Calculate How Many Locking Plates You Need Hanging Stacking Project: m (W) x n (H) 4-way Locking Plate: (m-1) x n 2-way Locking Plate: 2 x n + m - 1 2020-11-10 | Copyright © 2020 ROE Visual Co., Ltd. All Rights Reserved. 22 / 64...
-
Page 23: Side Lock
Full Tile Item Sidelock Half Tile Item CB3 Half CB5 Half CB8 Half Sidelock 5.5.1 How to Use the Side Lock Unlock Statue Locking Statue 2020-11-10 | Copyright © 2020 ROE Visual Co., Ltd. All Rights Reserved. 23 / 64... -
Page 24: Add-On Protector
Half Protection Corner Protection 5.6.1 Half Protection Protection on two sides: top and bottom. Step 1: Open the L-shaped protector and unlock the anchor block. 2020-11-10 | Copyright © 2020 ROE Visual Co., Ltd. All Rights Reserved. 24 / 64... - Page 25 Step 6: Screw the anchor with the bracket to fix the locking status. Step 7: Close the L-shaped protector to put it on working status. 2020-11-10 | Copyright © 2020 ROE Visual Co., Ltd. All Rights Reserved. 25 / 64...
- Page 26 CB Series User Manual www.roevisual.com 5.6.2 Corner Protection Protection on all sides: four corners. Four corner protectors are required for one tile. 2020-11-10 | Copyright © 2020 ROE Visual Co., Ltd. All Rights Reserved. 26 / 64...
- Page 27 Step 2: Bolt the corner protector together with CB corner block of the carbon frame Step 3: Mount the other three corner protectors to the tile. Step 4: Rotate the corner protectors to change the status. 2020-11-10 | Copyright © 2020 ROE Visual Co., Ltd. All Rights Reserved. 27 / 64...
- Page 28 CB Series User Manual www.roevisual.com 5.6.3 Full Protection Protection on two sides: top and bottom. 2020-11-10 | Copyright © 2020 ROE Visual Co., Ltd. All Rights Reserved. 28 / 64...
- Page 29 CB Series User Manual www.roevisual.com Put the full protector on the target position and the magnet in the protector will stick with the tile Automatically。 2020-11-10 | Copyright © 2020 ROE Visual Co., Ltd. All Rights Reserved. 29 / 64...
-
Page 30: Cables
Neutrik _ Neutrik Connectors Connect tiles in neighboring columns. Data adapter, RJ45-RJ45, V2.0 SAP: 203000S0137 Weight: 0.09 kg Neutrik _ Neutrik Connectors Connect tiles in neighboring columns. 2020-11-10 | Copyright © 2020 ROE Visual Co., Ltd. All Rights Reserved. 30 / 64... - Page 31 5.7.3 Data Cable Plug in the data cable and you feel a “click”. Press the button on the socket and plug the data cable out. 2020-11-10 | Copyright © 2020 ROE Visual Co., Ltd. All Rights Reserved. 31 / 64...
-
Page 32: Package
Dimensions: 1300 x 800 x 840 mm Capacity: Every flight case can carry 8 pcs tiles. MAX 1300 MAX 800 Figure 6-1. Standard CB Series Flight Case Dimensions 2020-11-10 | Copyright © 2020 ROE Visual Co., Ltd. All Rights Reserved. 32 / 64... - Page 33 CB Series User Manual www.roevisual.com 6.1.2 Labels on the Flight Case Warning: Indoor use. Warning: Keep the flight case upwards. Warning: Maximum stack 3 flight cases. Warning: Fragile 2020-11-10 | Copyright © 2020 ROE Visual Co., Ltd. All Rights Reserved. 33 / 64...
-
Page 34: Quick-Start Guide
(1) The adjusting range of the adjustment wheel is 18.9mm (vertical) and 168mm (horizontal) respectively. (2) Please note that there is a 10 mm gap between neighboring hanging bars. 2020-11-10 | Copyright © 2020 ROE Visual Co., Ltd. All Rights Reserved. 34 / 64... - Page 35 (see 10.2) (4) Before installing more panels, fix hanging bars and tiles with locking plates. (5) Before installing more tiles, fix neighboring tiles with locking plates. 2020-11-10 | Copyright © 2020 ROE Visual Co., Ltd. All Rights Reserved. 35 / 64...
-
Page 36: Stacking System
If it’s even rows, there should be used at both ends. (2) Assemble stacking bars with base trusses 2020-11-10 | Copyright © 2020 ROE Visual Co., Ltd. All Rights Reserved. 36 / 64... - Page 37 Connect the rear bridge with stacking rear adapter and the stacker. (see step5) (4) Keep panels at an angle to avoid damage to LEDs when magnets attract panels. 2020-11-10 | Copyright © 2020 ROE Visual Co., Ltd. All Rights Reserved. 37 / 64...
- Page 38 (6) Install tiles on the second stacking system and fix them with 4-way locking plates. (7) Repeat Step 2 to 5 until installing all stacking systems and keep them at the same horizontal level through the adjustment wheel. 2020-11-10 | Copyright © 2020 ROE Visual Co., Ltd. All Rights Reserved. 38 / 64...
- Page 39 Notes: (1) The adjusting range of the feet (stacking bar) is 48mm. (2) The rear bridge should be used in even rows. 2020-11-10 | Copyright © 2020 ROE Visual Co., Ltd. All Rights Reserved. 39 / 64...
-
Page 40: Ballast Calculation
In order to confirm the correct total ballast weight for your LED screen, we created the stacking system ballast calculator based on the ROE stacking system structural analysis reports. To use, select the corresponding options in the left of the calculator according to the wall build. -
Page 41: Cabling Instruction
CB Series User Manual www.roevisual.com Cabling Instruction General view of LED tiles cabling schematic. 2020-11-10 | Copyright © 2020 ROE Visual Co., Ltd. All Rights Reserved. 41 / 64... - Page 42 (540 W) (320W) (500 W) (650 W) 110V 220V 240V Note: The number in cabling is in line with that of in cables. (See 5.7 Cables.) 2020-11-10 | Copyright © 2020 ROE Visual Co., Ltd. All Rights Reserved. 42 / 64...
- Page 43 (1) The front view is for the setting in the control system. (2) The cascade control data cables should not be more than 100 meters. When it's over 100 meters, please switch to fiber cables. 2020-11-10 | Copyright © 2020 ROE Visual Co., Ltd. All Rights Reserved. 43 / 64...
-
Page 44: Control System
50 Hz 60 Hz CB3.75 Half Color Depth 8 bit 10 bit 12 bit Frame Rate 24 Hz 25 Hz 30 Hz 50 Hz 60 Hz 2020-11-10 | Copyright © 2020 ROE Visual Co., Ltd. All Rights Reserved. 44 / 64... - Page 45 50 Hz 60 Hz CB8 Half Color Depth 8 bit 10 bit 12 bit Frame Rate 24 Hz 25 Hz 30 Hz 50 Hz 60 Hz 2020-11-10 | Copyright © 2020 ROE Visual Co., Ltd. All Rights Reserved. 45 / 64...
- Page 46 30 Hz 50 Hz 60 Hz CB5 Half Color Depth 8 bit 10 bit Frame Rate 24 Hz 25 Hz 30 Hz 50 Hz 60 Hz 2020-11-10 | Copyright © 2020 ROE Visual Co., Ltd. All Rights Reserved. 46 / 64...
- Page 47 30 Hz 50 Hz 60 Hz CB8 Half Color Depth 8 bit 10 bit Frame Rate 24 Hz 25 Hz 30 Hz 50 Hz 60 Hz 2020-11-10 | Copyright © 2020 ROE Visual Co., Ltd. All Rights Reserved. 47 / 64...
-
Page 48: Cb Corner Tile
90-degree corner conflicts with locating pins on the side component. The screw position is shown in the picture. The side component Note: The CB 90° Corner is redesigned, which is different from that of standard CB tiles. 2020-11-10 | Copyright © 2020 ROE Visual Co., Ltd. All Rights Reserved. 48 / 64... - Page 49 Use the 90-degree connection block to connect tiles. The connection block with two screws is used to connect two tiles. Similarly, the four-screw connection block connects four tiles. The installation location of the screws is shown in the picture. 2020-11-10 | Copyright © 2020 ROE Visual Co., Ltd. All Rights Reserved. 49 / 64...
-
Page 50: Connect With The Conventional Carbon
CB tiles by locking plates. Standard CB CB 90° Corner tile Side Component Locking Plate 2020-11-10 | Copyright © 2020 ROE Visual Co., Ltd. All Rights Reserved. 50 / 64... -
Page 51: Accessories Of The Cb Corner
Note: when the 4-way 90-degree connection block connect with the customized hanging bar of right-angle statue and the CB corner tile. The side component of the tile should be removed. 2020-11-10 | Copyright © 2020 ROE Visual Co., Ltd. All Rights Reserved. 51 / 64... - Page 52 Step 1: Remove the screw of the block. Step 2: Take out the block and rotate it as shown below. Step 3: Put the rotated block back on the hanging bar. 2020-11-10 | Copyright © 2020 ROE Visual Co., Ltd. All Rights Reserved. 52 / 64...
- Page 53 Step 5: Finish Note: The transformed hanging bar can be connected with standard locking plate and the hanging bar also compatible with standard Carbon tile. 2020-11-10 | Copyright © 2020 ROE Visual Co., Ltd. All Rights Reserved. 53 / 64...
-
Page 54: Service Manual
Step 2: Spray more and keep cleaning until the tile is clean. Note: In terms of the cleaning frequency, it depends on the actual situation. 2020-11-10 | Copyright © 2020 ROE Visual Co., Ltd. All Rights Reserved. 54 / 64... -
Page 55: Installing Tiles
In order to protect LEDs on edges from damage, the tile frame should be attracted by magnets first then modules (with LEDs mounted on). 10.2.1 Hanging √ × 2020-11-10 | Copyright © 2020 ROE Visual Co., Ltd. All Rights Reserved. 55 / 64... - Page 56 CB Series User Manual www.roevisual.com 10.2.2 Stacking √ × 2020-11-10 | Copyright © 2020 ROE Visual Co., Ltd. All Rights Reserved. 56 / 64...
-
Page 57: Replacing The Hub Board
10.3.1 Remove all the modules. Remove 8 screws on each module as shown in the image below. Remember to mark the module’s position on the panel. (4.8±0.3kgf.cm) 2020-11-10 | Copyright © 2020 ROE Visual Co., Ltd. All Rights Reserved. 57 / 64... - Page 58 Remove 8 screws where locate as shown in the image below and open the power box. (7.0±1.0kgf.cm) Unplug the power cable and signal cable (3 in total) on the hub board in the position shown below, remove the power box. 2020-11-10 | Copyright © 2020 ROE Visual Co., Ltd. All Rights Reserved. 58 / 64...
- Page 59 Loosen the 4 screws to release the power connector on the hub board and remove the power connector. (2.5±0.3kgf.cm) Remove 8 screws on the hub board. (3.8±0.5kgf.cm) 2020-11-10 | Copyright © 2020 ROE Visual Co., Ltd. All Rights Reserved. 59 / 64...
- Page 60 Remove 18 screws in the red circle as shown in the image below. (4.8±0.3kgf.cm) Remove 10 screws in the green circle as shown in the image above. Remove the frame. (4.8±0.3kgf.cm) 2020-11-10 | Copyright © 2020 ROE Visual Co., Ltd. All Rights Reserved. 60 / 64...
- Page 61 CB Series User Manual www.roevisual.com 10.3.4 Take out the hub board Remove 2 screws shown in the image below. (2.5±0.3kgf.cm) 2020-11-10 | Copyright © 2020 ROE Visual Co., Ltd. All Rights Reserved. 61 / 64...
- Page 62 CB Series User Manual www.roevisual.com Flip the frame and remove the 3 screws shown in the image below. (3.8±0.5kgf.cm) 2020-11-10 | Copyright © 2020 ROE Visual Co., Ltd. All Rights Reserved. 62 / 64...
- Page 63 Use a crowbar to lift the dust plug out. Remove the dust plug. Take out the hub board from the position where the dust plug is removed and replace a new one. 2020-11-10 | Copyright © 2020 ROE Visual Co., Ltd. All Rights Reserved. 63 / 64...
-
Page 64: Revision History
CB Series User Manual www.roevisual.com 11 Revision History Revision Update date Remarks Editor 2020.11.10 Update specification, SAP number, stacking pictures, Lance delete CB4 2020-11-10 | Copyright © 2020 ROE Visual Co., Ltd. All Rights Reserved. 64 / 64...
Need help?
Do you have a question about the Carbon Series and is the answer not in the manual?
Questions and answers