Advertisement
Quick Links
Minimum Two
Persons Assembly
90 MIN
Approximate
Assembly Time
Regrettably self-assembly items cannot be returned once assembly is part or fully completed
unless the items are found to be faulty. Should you need to return the unassembled product,
please repack in its original packaging.
Important information
— We suggest you spend a short time reading through this leaflet and then follow the simple
step-by-step instructions.
— Carefully check that you have all the parts before beginning assembly.
— Keep fittings out of children's reach and keep children well away from construction area.
— We suggest you retain these instructions for future reference.
— In the unusual event of an issue with your product would you please quote the batch I.D.
number situated on the main parts of the frame (Head End- Foot End- side Rails).
Product information
— Upholstered Bed Using Fabric Material.Conforms to BS EN1725 & BS 5852.
Care instructions
— Avoid exposing the furniture to excessive heat or direct sunlight as this can cause bleaching
and deterioration of the color.
— Periodically check & re-tighten any fastener .
— Periodically dust lightly with a clean soft cloth.
— Any spills should be removed immediately with a damp cloth.
— TAKE CARE WHEN MOVING THE FURNITURE AND NEVER DRAG THE PIECES ACROSS
THE FLOOR,AS THIS WILL CAUSE DAMAGE TO THE JOINTS.
KT00-12/30/2023
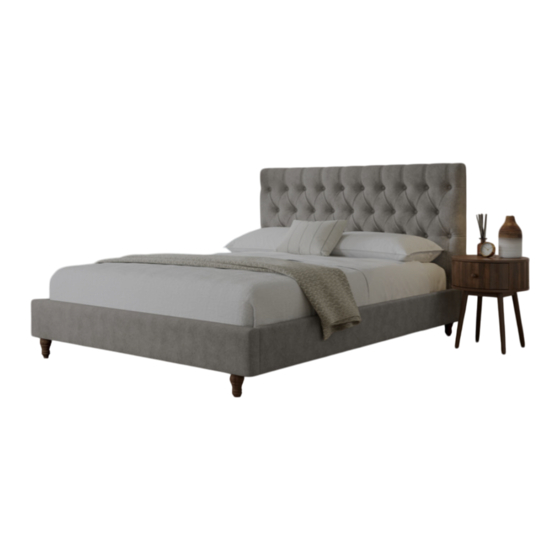
Sandra 180CM Ottoman Bedframe
STK778211/STK778212
Assembly instructions
Please keep these instructions for future reference.
Page 1 of 18
Advertisement

Subscribe to Our Youtube Channel
Related Manuals for Bensons for Beds Sandra STK778211


Summary of Contents for Bensons for Beds Sandra STK778211
- Page 1 Sandra 180CM Ottoman Bedframe Minimum Two STK778211/STK778212 Persons Assembly Assembly instructions Please keep these instructions for future reference. 90 MIN Approximate Assembly Time Regrettably self-assembly items cannot be returned once assembly is part or fully completed unless the items are found to be faulty. Should you need to return the unassembled product, please repack in its original packaging.
- Page 2 Components of Carton A Base Shelf x 2 Headboard x 1 Components of Carton B Footboard x 1 Mattress Support x 2 Page 2 of 18...
- Page 3 Components of Carton B Head End Foot x 2 Cross Rail x 1 Wooden Slats x 51 Left Lifting Arm x 1 Gas Lift x 2 Right Lifting Arm x 1 Slatted Base Lock Strap x 1 Buckle x 2 Footboard Lock Short Support Leg x 1 Buckle x 2...
- Page 4 Components of Carton C Left Side Panel x 1 Right Side Panel x 1 Back Tube x 1 Foot End Foot x 2 Centre Rail x 2 Front Tube x 1 Side Rail x 2 Support Rail x 1 Support Rail x 4 Bottom Centre Rail x 1 Bed Frame Support...
- Page 5 Hardware List in Carton C M6 x 15MM x 10 M6 x 20MM x 54 M6 x 35MM x 10 M6 x 40MM x 3 M6 x 4 M8 x 4 M6 x 8 M8 x 65MM x 4 ALLEN KEY 4MM x 1 WRENCH x 1 Step 1 Attach Foot...
- Page 6 Step 2 Do not completely tighten the bolts, leave half of the bolt exposed. Å Attach Base Support to Headboard Using 20mm Bolt and Allen Key as shown. Å Screw onto Incorrect installation method M6X20mm M6X35mm C X4 I X1 Step 3 Å...
- Page 7 Step 4 Å Attach Right Bracket to Right Side Panel and Left Bracket to Left Side Panel Using 20mm Bolt and Allen Key as shown. M6X20mm Page 7 of 18 I X1...
- Page 8 Step 5 Do not tighten the bolts fully until step 8. Page 8 of 18...
- Page 9 Step 6 Å Attach Bottom Centre Rail Using 20mm Bolt and Allen Key as shown. M6X20mm I X1 Step 7 Å Attach Support Rail Using 15mm Bolt and Allen Key as shown. M6X15mm Page 9 of 18 I X1...
- Page 10 Step 8 Å Attach Support Rail Using 15mm Bolt and Allen Key as shown. Å 13 15 Attach Short Support Leg Using 40mm Bolt and Allen Key as shown. M6X15mm M6X40mm I X1 Step 9 Å Attach Gas Lift to Right Hinge Using M8 Nut and Wrench as shown.
- Page 11 Step 10 Å Attach Gas Lift to Left Hinge Using M8 Nut and Wrench as shown. Incorrect: The orientation of part is upside down. J X1 Step 11 Å Attach Using 20mm Bolt ,M6 Washer and Allen Key as shown. M6X20mm Page 11 of 18 I X1...
- Page 12 Step 12 Step 13 Å Attach Centre Rail Using 20mm Bolt and Allen Key as shown. Å Attach Side Rail Using 35mm Bolt , M6 Nut Allen Key , Wrench as shown. M6X20mm M6X35mm Page 12 of 18 C X4 F X 4 I X1 J X1...
- Page 13 Step 14 Å Attach Cross Rail Using 20mm Bolt and Allen Key as shown. M6X20mm I X1 Step 15 Å Attach Cross Rail Using 40mm Bolt and Allen Key as shown. Turn around the bedbase frame M6X40mm Page 13 of 18 I X1...
- Page 14 Step 16 Å Attach Hinge Using 20mm Bolt and Allen Key as shown. Å Attach Strap M6X20mm I X1 Strap installation steps Step 17 Å Attach Mattress Stopper Using 20mm Bolt and Allen Key as shown. M6X20mm Page 14 of 18 I X1...
- Page 15 Step 18 Å 18.1 Insert Wooden Slats into Single Slat Cap 18.2 Press Single Slat Cap into Side Rail , repeat the same procedure for the opposite side. 18.3 Insert ends of both Wooden Slats into Double Slat Cap ,then press Double Slat into Centre Rail as illustrated.
- Page 16 Step 19 Å Gently place Base Shelf inside the assembled bed base. Step 20 Å 20.1 Attach Silencing Pad to Bed Frame Support Bar Å Attach Bed Frame Support Bar Using 65mm Bolt and Allen Key as shown. 20.2 M8X65mm Page 16 of 18 I X1...
- Page 17 Step 21 Å Close base and attach safety Buckle Page 17 of 18...
- Page 18 ---WARNING: PLEASE DO NOT ALLOW CHILDREN OR PETS INSIDE THE STORAGE AREA. ---WARNING: PLEASE BE CAREFUL WHEN LIFTING. ONLY LIFT WITH MATTRESS ON TOP. TO BE OPERATED BY ADULTS ONLY. ---WARNING: PLEASE DO NOT PRESS DOWN ON THE MATTRESS WHEN THE BED FRAME IS IN THE LIFT UP POSITION.
Need help?
Do you have a question about the Sandra STK778211 and is the answer not in the manual?
Questions and answers