
Related Manuals for Omega OBO9011AM


Summary of Contents for Omega OBO9011AM
- Page 1 Designed to Enhance E S T. � 9 8� Installation + User Manual OBO9011AM Built-in Oven 90cm omegaappliances.com.au V1.5 0324...
-
Page 2: Table Of Contents
User Manual Built-in Oven Contents Welcome Safety Information Your Oven Oven Functions Operating Instructions Cooking Guidelines Installing Your Oven Practical Advice Cleaning & Maintenance Troubleshooting Purchase Details Warranty Information... -
Page 3: Welcome
It is important that you read through the following user manual thoroughly, in order to familiarise yourself with the installation and operation requirements of your appliance, and to ensure optimum performance. Again, thank you for choosing an Omega appliance and we look forward to being of service to you. Kind Regards,... -
Page 4: Safety Information
Before Using Your Appliance Read Carefully and Keep for Future Reference This manual explains the proper use of your new Omega oven. Please read this manual carefully before using the product. Read this manual thoroughly before first use, even if you This manual should be kept in a safe place for handy reference. - Page 5 User Manual Built-in Oven Designed to Enhance Safety Information Children & Vulnerable People Safety • Ensure that the appliance is switched off before replacing the oven lamp to avoid the possibility of electric shock. WARNING: Risk of suffocation, injury or permanent disability. •...
- Page 6 User Manual Built-in Oven Safety Information Appliance Use Disposal of the Appliance WARNING: Risk of fire, explosion, electric shock or damage • Disconnect the appliance from the mains supply. to the appliance. • Cut off the mains cable and discard it. •...
-
Page 7: Your Oven
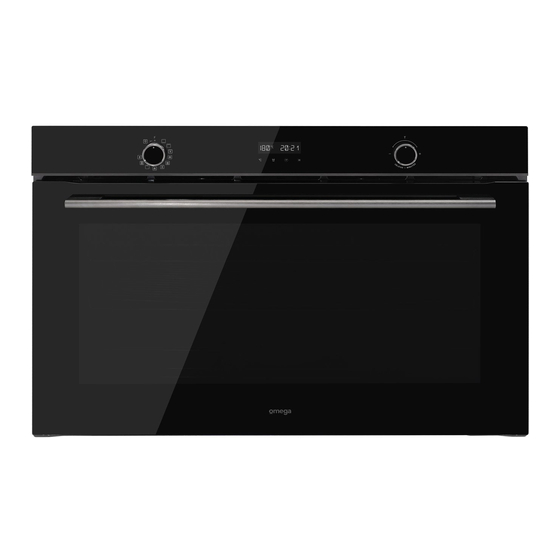
User Manual Built-in Oven Designed to Enhance Your Oven MODEL: OBO9011AM A. Control Panel B. Function Knob C. Touch Control Programmable Timer D. Increase / Decrease Adjustment Knob E. Door Handle F. Door The Controls 1. Temperature Button 3. Clock Button 7. - Page 8 User Manual Built-in Oven Your Oven Parts and Accessories Your Oven comes with the following accessories: A. Chrome Wire Shelves (×2) For roasting and grilling dishes; or for placing trays. B. Enamelled Baking Tray (×1) Designed for cooking large quantities of food such as cakes to pastries and frozen foods.
-
Page 9: Oven Functions
User Manual Built-in Oven Designed to Enhance Oven Functions Fan Forced Light Convection This feature provides visibility into the Temperature Range: 60°C – Max. Temperature Range: 60 – 250°C. oven cavity to monitor your dishes without needing to open the door, ensuring On this setting, the top and bottom The rear heating element and the fan efficient cooking and convenience. - Page 10 User Manual Built-in Oven Oven Functions Air Fry Pizza Fan Bake Set the thermostat knob to 200°C. Temperature Range: 30°C – Max. Set the thermostat knob to 230°C. When in pizza mode, the oven activates Fan bake mode activates both the top In the Air Fry oven function, both the top its bottom and circular heating elements and bottom heating elements in...
-
Page 11: Operating Instructions
User Manual Built-in Oven Designed to Enhance Operating Instructions First Use IMPORTANT: The first time you use your appliance, we Automatic setting recommend you set the thermostat to the highest setting with This setting allows you to select the cooking time ( ), end time the Fan Forced function selected and leave the oven on for half ), temperature (using the temperature knob) and the cooking... - Page 12 User Manual Built-in Oven Operating Instructions Semi-automatic setting Timer There are two methods of semi-automatic cooking: The screen on this oven has a digital countdown timer which can be set up to a maximum of 23 hours and 59 minutes. 1.
-
Page 13: Cooking Guidelines
User Manual Built-in Oven Designed to Enhance Cooking Guidelines Function Food Weight (kg) Shelf Spot* Pre-heat (min.) Temperature Cook Time (min.) Duck 65–75 Roast veal or beef 70–75 Pork roast 70–80 Biscuits (short pastry) 15–20 Tarts 30–35 15–20 Pizza (on 2 racks) 2–4 Lasagna 30–35... - Page 14 User Manual Built-in Oven Cooking Guidelines Function Food Weight (kg) Shelf Spot* Pre-heat (min.) Temperature Cook Time (min.) Flat-fish (flounder) 8–10 Squid and prawn kebabs 6–8 Fillet of thin white-fish Grilled vegetables 10–15 Veal steak 15–20 Cutlets 15–20 7–10 Hamburgers Mackerels 15–20 Toasted sandwiches...
- Page 15 User Manual Built-in Oven Designed to Enhance Cooking Guidelines Function Food Weight (kg) Shelf Spot* Pre-heat (min.) Temperature Cook Time (min.) Pizza 15–20 Roast veal or beef 25–30 Chicken 60–70 Seared Scotch fillet steak Frozen chips Dry rubbed Chicken drumettes or wingettes Crumbed barramundi fillet Wedge-cut potatoes Frozen items...
-
Page 16: Installing Your Oven
User Manual Built-in Oven Installing Your Oven Before Installation After Installation Ensure that: Ensure that: • The oven cavity is level and completely square based on the • The oven door can open fully without making contact with the required dimensions cabinet sides, doors/panels or other obstruction;... - Page 17 User Manual Built-in Oven Designed to Enhance Installing Your Oven Fitting the Oven Into the Kitchen Unit • Once the oven has been lodged inside the unit, electrical parts must be completely insulated; this is a legal safety requirement. • Fit the oven into the space provided in the kitchen unit; it may All guards must be firmly fixed into place so that it is impossible be fitted underneath a work top or into an upright cupboard.
- Page 18 User Manual Built-in Oven Installing Your Oven Installation of Built-in Ovens • In order to ensure adequate ventilation, the back panel of the cabinet unit must be removed. Installing the oven so that it In order to ensure that the built-in appliance functions properly, rests on two strips of wood is preferable.
- Page 19 User Manual Built-in Oven Designed to Enhance Installing Your Oven Electrical Connection Before making the connection, check that: All electrical connections must be made by a suitably qualified • The electrical safety of this appliance can only be guaranteed and licenced person in accordance with local regulations. if the cooker is correctly and efficiently earthed, in compliance Residentia Group will not be held responsible for damages with regulations on electrical safety.
-
Page 20: Practical Advice
User Manual Built-in Oven Practical Advice Baking Cakes The oven offers a wide range of alternatives which allow you to cook any type of food in the best possible way. With time you will learn to make the best use of this versatile cooking appliance When baking cakes, always place them in a preheated oven. -
Page 21: Cleaning & Maintenance
User Manual Built-in Oven Designed to Enhance Cleaning & Maintenance Prior to Cleaning Your Oven • There is a rubber seal surrounding the oven opening which guarantees its perfect functioning. Check the condition of • Before any maintenance and cleaning, turn off the appliance this seal on a regular basis. - Page 22 User Manual Built-in Oven Cleaning & Maintenance How to Remove the Oven Door For a more thorough clean, you can remove the oven door. Choose the remove and assemble method. Proceed as follows: • Oven door structures 1 remove and assemble procedure: •...
-
Page 23: Troubleshooting
User Manual Built-in Oven Designed to Enhance Troubleshooting For Minor Faults Problem Possible Cause Solution The oven is not turning on. There may be a Check the household fuse box for any blown fuses and break in the power replace as necessary. Also ensure that a safety switch supply. -
Page 24: Purchase Details
User Manual Built-in Oven Purchase Details For future reference, please record the following information which can be found on the rating plate and the date of purchase which can be found on your sales invoice. Store Details Store Name Address Telephone | Purchase Date Product Details... - Page 25 User Manual Built-in Oven Designed to Enhance Attach your receipt to this page...
-
Page 26: Warranty Information
User Manual Built-in Oven Warranty Information WARRANTY TERMS AND CONDITIONS In this warranty BUILT-IN OVENS ‘acceptable quality’ as referred to in clause 10 of this warranty has the same meaning referred to in the ACL; This document sets out the terms and conditions of the product ‘... - Page 27 User Manual Built-in Oven Designed to Enhance Warranty Information You will bear the cost of transportation, travel and delivery of For Appliances and services provided by Residentia the Appliance to and from Residentia Group or its ASR. If you Group in Australia, the Appliances come with a guarantee reside outside of the service area, you will bear the cost of: by Residentia Group that cannot be excluded under the travel of an authorised representative;...
- Page 28 E S T . 1 9 8 1 Designed to Enhance Omega is proudly owned, designed and engineered @residentia.group in Australia by Residentia Group Pty. Ltd. www.residentia.group...
Need help?
Do you have a question about the OBO9011AM and is the answer not in the manual?
Questions and answers