Table of Contents
Advertisement
Advertisement
Table of Contents

Related Manuals for Turbo TERO X


Summary of Contents for Turbo TERO X
- Page 1 English USER MANUAL TURBO TERO X Electric Active Bike...
-
Page 2: Table Of Contents
CONTE NTS 9 . S P E C I A L I Z E D A P P ............2 3 9.1. -
Page 3: 4 . R E G U L At O R Y S Tat E M E N T
Congratulations on the purchase of your new Specialized Turbo bike! Before we get you set up for your first ride, a few words about electric bikes. As the name suggests, and unlike regular bicycles, Specialized electric bikes have very sophisticated and carefully engineered high-precision electrical components, including a built-in custom motor drive unit, a high-performance battery integrated into the frame, sensors, one or more display units, and wiring throughout to make sure everything is connected. -
Page 4: Intr Oducti On
(translation of Original instructions). always repeat the warning of possible injury or death. This user manual is specific to your Specialized Tero X bicycle and should be read in addition to the Specialized Bicycle Owner’s Manual (“Owner’s Manual”). It contains important safety,... -
Page 5: Conte Nts 9 . S P E C I A L I Z E D A P
2. TE RO X COM P ONEN TS 20 23 24 35 36 41 39 12/13... -
Page 6: 0 . B At T E R Y A N D C H A R G E
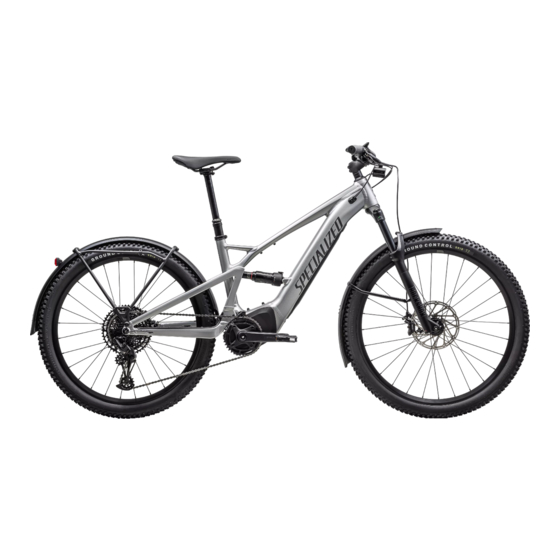
TOP TUBE DROPOUT HANGER FRONT BRAKE CALIPER DOWN TUBE REAR DERAILLEUR FRONT BRAKE ROTOR SEAT TUBE CHAINRING REAR BRAKE CALIPER HEAD TUBE CHAINGUIDE REAR BRAKE ROTOR CHAINSTAY CHAINSTAY PROTECTOR SPOKE SEATSTAY CRANK ARM FRONT FENDER PEDAL FORK HEADSET TIRE SADDLE STEM VALVE SEATPOST / DROPPER... -
Page 7: Geo M Et Ry
3. GEO M ET RY The geometry as summarized in this manual is current as of the date this manual was written and is subject to change. Specialized reserves the right to change the components at any time and without notice, including modifying, reducing, and/or adding features. - Page 8 FRAME SIZE STACK (mm) REACH (mm) HEAD TUBE LENGTH (mm) HEAD TUBE ANGLE (°) 66.5 66.5 66.5 66.5 BB HEIGHT (mm) BB DROP (mm) 22.5 TRAIL (mm) FORK LENGTH (FULL) (mm) FORK RAKE/OFFSET (mm) FRONT CENTER (mm) CHAINSTAY LENGTH (mm) WHEELBASE (mm) 1228 1258...
-
Page 9: G E N E R A L I N F O R M At I O N A B O U T Y O U R T E R O X
4.2 . PEDELEC / EPAC shocks, frames, drive trains) are light-weight, favoring nimble If your Tero X is classified as a Pedelec, your motor support will automatically shut off when speed over brute force. Suspension travel is relatively short you reach a maximum assistance speed depending on the country of purchase. A driver’s since the bike is intended to move quickly on the ground. -
Page 10: G E N E Ra L N Ot Es A Bout Ri D I N G
In case the specified The Tero X motor provides pedal assistance only while you are pedaling and the bicycle is in cargo weight limit differs from the cargo weight limit specified by the rack motion. -
Page 11: Before Riding
MASTERMIND TCD DISPLAY: Are you familiar with the function of the display features? „ CAUTION: The weight of your Tero X is significantly higher than a bicycle REMOTE: Are you familiar with the function of the buttons on the remote? „... - Page 12 WARNING! Riding with kids on your bicycle affects the handling by altering the center of gravity, weight, and balance. It may also negatively impact your The Tero X is a high-performance bicycle. All regular maintenance, troubleshooting, repair, and parts cornering ability, increase your stopping distance, and reduce your ability to replacement must be performed by an Authorized Specialized Retailer.
-
Page 13: Replacement Parts And Accessories
Regularly clean and lubricate the drivetrain according to the drivetrain manufacturer’s „ WARNING! Before your first ride and regularly thereafter, ensure the pedals instructions. are tightened to specification. Pedals can loosen over time depending on the type and frequency of use. This is especially true if they were not installed Do not use a high pressure water spray to wash your bicycle. -
Page 14: Headset Bearings
Tero X specific components should only be used on the Tero X and not on other bicycles, even if they fit. Failure to follow this warning could result in serious injury or death. -
Page 15: Derailleur/Dropout Hanger
The seat tube is reamed to a specified maximum insertion depth for each frame size. This The Tero X is equipped with a 6-bolt rotor mounted speed sensor magnet, located on the rear ream depth limits the insertion depth of the seatpost. Please refer to the table under Fig. 7.1. -
Page 16: Racks And Fenders
7. 5 . RAC KS AN D FE ND ERS Tero X models are equipped with a front fender and a rear fender attached to the rear rack. An optional front rack can be fitted to the bicycle via mounts behind the faceplate on the head tube. - Page 17 7.5 a 7.5 b Fig. 7.6 Insert a 2.5 mm hex key into the screw hole (A) on the faceplate and loosen the bolt hidden „ in the head tube (B), then remove the faceplate. Fig. 7.5 The faceplate covers 4 threaded bores (C) which are used to mount the front rack. See the „...
-
Page 18: Rack Accessory Mounts
After your first Your Tero X bicycle is equipped with an LED headlight and taillight. The lights on the Tero X ride, and consistently thereafter, recheck the tightness of each bolt to ensure turn on automatically when the bicycle is powered on. -
Page 19: S Y S T E M I N T E R Fa C
8.1. MASTERMIND TCD (D IS PLAY) Fig. 7.9a On certain Tero X models, the lights can be turned on and off while riding by long pressing the (F1) button on the remote. Fig. 7.9b Other models are fitted with a dedicated light switch on the handlebar which is used to turn on the strong beam. -
Page 20: Starting The System On The Mastermind Tcd
8 .2. STA RT I NG T H E SYST E M ON T H E MA ST E R MI ND TCD All Tero X models are equipped with the MasterMind TCD display. The display turns on the system and provides information on the display. -
Page 21: Handlebar Remote
Fig. 8.3 • Short press increases the amount of support. The handlebar remote is included on all Tero X models. It controls the level of motor support • Pressing and holding activates the walk-assist mode. and controls the functions and scrolling of the MasterMind TCD. -
Page 22: Support Modes
(+) Button - Increases the amount of support. „ (-) Button - Decreases the amount of support. The Tero X motor offers 6 Bike Assist Modes: TURBO, SPORT, ECO, OFF, SMART CONTROL, „ and MICRO TUNE. On the remote, after reaching the strongest or weakest mode, the system will not continue to switch. -
Page 23: Pedal Pace Bar On The Mastermind Tcd
corner of the display. 8.7. SYST EM SETU P & CU STOMI ZI NG PAGES O N T HE D IS PLAY Short-pressing the F2 button on the remote will switch to Micro Tune mode. The MasterMind TCD has customizable screens that show options such as speed, odometer, „... -
Page 24: Connectivity Options
The Turbo Technology System provides a high degree of interface flexibility through Bluetooth Depending on the type of error message, the system may be switched off automatically. In and/or ANT+ connectivity. -
Page 25: Specialized App Features
8 .1 0 . PE R FO R M IN G A FACTO RY RES E T O N TH E MA ST E RM I ND TCD 9. S PECIAL IZE D APP When a new or used bicycle is sold, the new user should perform a factory reset of the The Specialized app enables you to personalize and enhance your ride. -
Page 26: Sign In To The Specialized App
The TERO X battery is fitted inside the down tube and can be removed by the rider. Any work required on the motor and battery should be FIRMWARE UPDATES carried out by an Authorized Specialized Turbo Retailer. - Page 27 the producer’s instructions or the instructions in the manual of the device. anticorrosive) or chemicals that could impact the surfaces of the battery (i.e., detergents). 7. After a prolonged storage time, it may be necessary to charge and discharge the battery 21.
-
Page 28: Battery Damage
31. In the event of contact with the skin: promptly eliminate any solid particles. It is essential to 10 .2. BAT T E RY DAMAGE swiftly remove any clothing that has come into contact with contaminants. Always keep in mind that when sufficiently charged, your battery has enough energy stored 32. -
Page 29: Battery Installation Instructions
REMOVE THE BATTERY WARNING! If your battery has signs of damage, do not charge it. If possible, bring the charge down to under 50% and do not store it inside your home 10.2 or office. Store it outside in a safe area or in an appropriate specialty battery container. - Page 30 UNHOOK THE BATTERY RE-INSTALL THE BATTERY 10.3 10.4 Fig. 10.3 Fig. 10.4 To prevent the battery from accidentally falling out of the frame, the battery is secured in Re-hook the battery onto the hook (Fig. 10.3) and rotate the battery back into the frame. „...
-
Page 31: Operating Instructions
1 0 .4. OPE RAT I N G I NST R UCTI O NS Locate and open the magnetic charge port lid on the side of the battery located on the „ downtube (B). 1 0.4 .1. CHARGI N G T HE BAT T E RY Insert the charger plug into the socket. - Page 32 CHARGING THE BATTERY OUTSIDE THE FRAME 10.7 10.8 Fig. 10.8 Power off the bicycle on the MasterMind TCD. „ Fig. 10.7 Follow the steps outlined in Section 10.3.1 in this User Manual to remove the battery. „ When charging is complete (A), disconnect the charging plug from the battery charging „...
-
Page 33: Mastermind Tcd Charge Level Display
WARNING! Take care not to drop the battery when removed from the WARNING! When the battery level has dropped low enough for the motor bicycle. A hard enough impact can potentially damage the battery which may system to shut off and the bike to go into power saving mode, wired lights or may not be visible from the outside but can render the battery unsafe. -
Page 34: Storage
• Note: ensure to re-seal the USB C port with the rubber plug. 1 0.5.2. STORAGE BIKE POWERS ON, BUT DOES NOT PROVIDE MOTOR ASSIST: WARNING! When the battery is not in use for an extended period of time, store your battery separately from your bicycle in a dry, cool, and 1. -
Page 35: Moving And Storage Instructions
1 0 . 6 . M OVI N G A N D STO RAG E INSTR UCT I ONS 10 .7. BAT TERY TEC HNI CAL DATA 1 0.6 .1. T RANS P O RT SPECIFICATION WARNING! When shipping or transporting the battery over long distances, DESCRIPTION UNIT SBC - B19... -
Page 36: Charger Technical Data
1 1. S PEC I F I C AT I O NS 10.10 11.1. GEN E RA L S PEC I FI C AT IONS ATTENTION DANGER DO NOT TEMP RANGE NOT FOLLOWING THESE INSTRUCTIONS CAN CAUSE HEAT, FIRE AND SPECIALIZED BICYCLE COMPONENTS INC. -
Page 37: Bearing / Axle / Spacer / Bolt Specifications
11.3 . BEARING / AX LE / S PACER / BOLT S PECI FI CATI O NS STEM TOP CAP BOLT 5 mm Hex TORQUE CRANK BOLTS 8 mm Hex LOCATION / ITEM DIMENSIONS TOOL in-lbf CHAINRING BOLTS 5 mm Hex WATER BOTTLE CAGE BOLT 3 mm Hex MAIN PIVOT BEARING... - Page 38 11.1 EXPLODED VIEW - BEARINGS/SPACERS...
-
Page 39: Suspension Bolt Torque Specifications
11.4. SU SPENSI ON BO LT TO RQUE SPEC IF ICAT IONS 11.2 TORQUE PIVOT LOCATION TOOL in-lbf NON-DRIVE SIDE MAIN PIVOT BOLT 4 mm hex 35.4 REAR SHOCK MOUNTING BOLT 5 mm hex MAIN PIVOT THRU-AXLE 5 mm hex 70.8 MAIN PIVOT AXLE BOLT T25 Torx... -
Page 40: Customization
Use a quality pressure gauge and refer to the tire pressure recommendations written on the 12.1 side of the tires. Because of the extra weight of the Tero X, as a rule of thumb, tire pressure should generally be higher compared to a regular bicycle. SEAL... -
Page 41: Adjusting Rebound
Fig. 12.1 12. 2. ADJU STING REB OUND To check the sag, push the O-ring against the seal (A), then mount the bicycle while Rebound damping (red knob) controls the rate at which the shock returns after it has been „... - Page 42 1 3. DERAILLEUR HANGER 13.3 13.4 WARNING! Correct grease application is critical to rider safety. ONLY apply grease as instructed. INSTALLATION PROCEDURE: 13.1 13.2 Fig. 13.3 Install the UDH washer, then thread the UDH bolt through the washer and into the hanger. „...
- Page 43 14. RE GULATORY STAT EM E NTS 13.5 RoHS: Specialized Bicycle Components, Inc. certifies that this product and its packaging are in compliance with European Union Directive 2011/65/EU on the Restriction of the Use of Certain Hazardous Substances in Electrical and Electronics Equipment, commonly known as RoHS.
-
Page 44: Hmi (Human-Machine Interface) Certifications
j) 분해, 압착, 관통 등의 행위를 하지 말 것 • Consult the dealer or an experienced radio/TV technician for help. k) 높은 곳에서 떨어뜨리는 등 비정상적 충격을 주지 말 것. ISED Statement l) 60℃이상의 고온에 노출하지 말 것 This device complies with Innovation, Science and Economic Development Canada license- m) 습기에... -
Page 45: 6 . U K - D E C L A R At I O N O F C O N F O R M I T
Product description: EPAC Mountain bike Li-ion Battery Charger Model designation: TERO X 4.0 / TERO X 5.0 / TERO X 6.0 SBC-C04 / SBC-C05 / SBC-C07 Model designation: TERO X 4.0 / TERO X 5.0 / TERO X 6.0 SBC-C04 / SBC-C05 / SBC-C07... - Page 46 SPECIALIZED BICYCLE COMPONENTS 15130 Concord Circle, Morgan Hill, CA 95037 (408) 779-6229...
Need help?
Do you have a question about the TERO X and is the answer not in the manual?
Questions and answers
Cannot get bike to connect with phone app
To connect your Turbo TERO X bike to the Specialized app, follow these steps:
1. Sign in to the Specialized app on your phone.
2. Access the pairing option in the app.
3. Follow the in-app instructions to connect your bike.
For detailed guidance, refer to the in-app help guide.
This answer is automatically generated
HOW can i get it back from smart mode to eco trail and turbo
Well, never mind. I see I needed to have to bike turned on for the devices to connect.