Table of Contents
Advertisement
Advertisement
Table of Contents

Related Manuals for Turbo LEVO SL


Summary of Contents for Turbo LEVO SL
- Page 1 English USER MANUAL TURBO LEVO SL Electric Mountain Bicycle...
- Page 2 LANGUAGE VERSIONS This document is available for download in additional languages at www.specialized.com. 本文档的其他语言版本可从 www.specialized.com 下载 。 CNS: 本文件有其他語言版本 , 請至 www.specialized.com 下載 。 CNT: Tento dokument je k dispozici ke stažení v dalších jazycích na adrese www.specialized.com. Dette dokument kan downloades på flere sprog, på www.specialized.com. Dieses Dokument steht in weiteren Sprachen zum Download unter www.specialized.com zur Verfügung.
-
Page 3: Table Of Contents
4. GENERAL INFORMATION ABOUT LEVO SL ........ - Page 4 Congratulations on the purchase of your new Specialized Turbo bicycle! Before we get you set up for your first ride, a few words about electric bicycles. As the name suggests, and unlike regular bicycles, Specialized electric bicycles have very sophisticated and carefully engineered high-precision electrical components, including a built-in custom motor drive unit, a high-performance battery integrated into the frame, sensors, one or more display units, and wiring throughout to make sure everything is connected.
-
Page 5: Introduction
This user manual is specific to your Specialized Turbo Levo SL bicycle and should be read in addition to the Specialized Bicycle Owner's Manual CAUTION: The combination of the safety alert symbol and the (“Owner’s Manual”). -
Page 6: Turbo Levo Sl Components
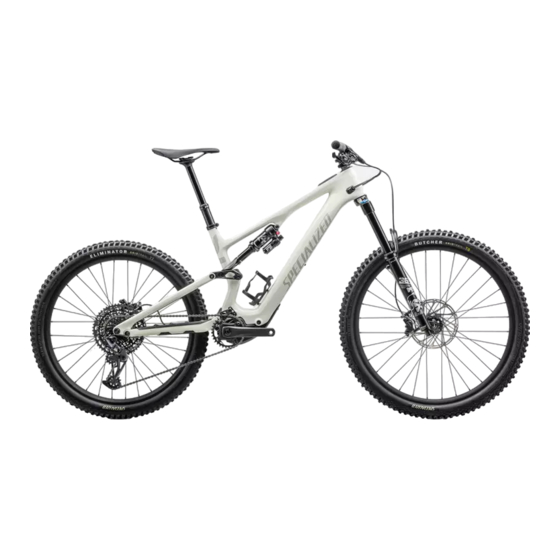
2. TURBO LEVO SL COMPONENTS 39 40 34 33 3 11 10 2 26 27 42 23 22 13 14 15 35 36 38 43 16 7 5 17 20 19 31 32 37 36 39 40... - Page 7 Top tube Chain Front brake caliper Down tube Chainring Front brake rotor Seat tube Chain guide Rear brake caliper Head tube Crank arm Rear brake rotor Chainstay Pedal Spoke Chainstay protector Motor Seatstay Handlebar Tire Fork Shifter Valve Saddle Brake lever Seatpost Remote Thru-axle...
-
Page 8: Geometry: 27.5" Rear Wheel
3. GEOMETRY: 27.5" REAR WHEEL MODEL LENGTH (mm) WIDTH (mm) HEIGHT (mm) WEIGHT (kg) (WITH BATTERY) LEVO SL COMP CARBON 1940 1084 19.1 LEVO SL SW 1940 1084 19.2 ( Including Range extender) - Page 9 FRAME SIZE Stack (mm) Reach (mm) Head tube length (mm) Head tube angle (°) 64.5 Bottom bracket height (mm) Bottom bracket drop (mm) Trail (mm) Fork length (full) (mm) Fork rake/offset (mm) Front center (mm) Wheelbase (mm) Bike standover height (mm) Seat tube length (mm) Seat tube angle (°) 75.8...
-
Page 10: General Information About Levo Sl
The Turbo Levo SL is intended and tested for All Mountain (Condition 4) use only. Depending on the classification, there can be different requirements Bicycles designed for riding Conditions 1, 2, and 3, plus rough technical areas, and regulations affecting your use of the bicycle. -
Page 11: General Notes About Riding
If you stop pedaling, the motor will stop providing any assistance. Comp alloy 136 kg / 300 lb The Turbo Levo SL bicycle can also be ridden as a normal bicycle without motor assistance by switching the display to the OFF mode. The same Comp carbon / Expert carbon / applies if the battery charge drops below 3%. -
Page 12: Before Riding
„ support level from OFF to ECO to TRAIL to TURBO? CAUTION: The weight of your Turbo Levo SL is significantly higher than a bicycle without motor support. Use caution when handling WARNING! If your battery, charger, or other component exhibits... -
Page 13: Know Your Range
Turbo bicycle model, then clicking on the range calculator. In addition to the range calculator, we recommend using the Smart Control feature in WARNING! Riding with kids on your bicycle will affect the handling the Specialized app to control your range. -
Page 14: General Notes About Assembly
Turbo Levo SL specific components should only be used on the Turbo Levo SL and not on other bicycles, even if they fit. Failure to follow this warning could result in serious injury or death. - Page 15 6.2. SEATPOST The fit between the seatpost and the seat tube must allow the seatpost to slide into the seat tube smoothly and without Seatpost minimum insertion twisting, but not so loosely that there’s excessive side-to-side Both the frame and seatpost have play/wiggle.
-
Page 16: Speed Sensor
Section 14, or refer to the SRAM UDH User Manual. 6.4. SPEED SENSOR The Turbo Levo SL is equipped with a speed sensor magnet, located on the rear hub/disc rotor interface. Dirt and/or metal debris may accumulate on the speed sensor magnet. Too much accumulation may result in Setting the chain guide position interruptions in motor support and/or inaccurate speed readings. - Page 17 Place the SWAT CC body (A) in the top of the steerer tube. Position the „ Some Turbo Levo SL models are equipped with an Alloy Trail Stem. top cap so it can rotate 180 degrees without contacting the stem.
-
Page 18: Mastermind Tcu Handlebar Clearance
6.7. HANDLEBAR ASSEMBLY Gradually torque the lower bolts (D) alternating from the left to right „ bolt to evenly increase the torque until the spec is reached. „ Check the handlebar is installed correctly by rotating it up and down, then twisting the handlebar side to side while holding the front wheel. -
Page 19: Rock Guard - Carbon
6.9. ROCK GUARD - CARBON 6.10. ROCK GUARD - ALLOY Removing the rock guard Removing the rock guard „ Using a T30 Torx key, loosen and remove the forward motor bolt (A) Using a 4 mm hex key, loosen and remove the bolt from the underside „... -
Page 20: S1-S2 Frame Size 29" Rear Wheel Saddle Clearance
„ Remove the valve cap from the rear shock valve stem and attach the 6.11. S1-S2 FRAME SIZE 29" REAR WHEEL SADDLE CLEARANCE high-pressure air pump to the valve stem. CAUTION: On S1 and S2 size frames using a 29" rear wheel, „... - Page 21 Step 3 Option 1: Adjust the horizontal position of the saddle. Before installing a 29" rear wheel, set the flip chip at the rear drop out Using a 4 mm hex key, loosen the two saddle rail clamp bolts under the „...
-
Page 22: General Notes About Maintenance
Using a torque wrench and a 4 mm hex bit, torque the forward shock mounting bolt to specification. The Turbo Levo SL is a high-performance bicycle. All regular maintenance, „ Using a torque wrench and a 6 mm hex bit, torque the rear shock troubleshooting, repair, and parts replacement must be performed by mounting bolt to specification. - Page 23 „ Exposure to harsh elements, especially salty air (such as riding WARNING! Use a repair stand to support the bicycle during near the ocean or in the winter), can result in galvanic corrosion of assembly or maintenance, and a bicycle rack for transportation. components such as the crank spindle and bolts, which can accelerate When placing the frame and/or bicycle in a repair stand, clamp wear and shorten the lifespan.
-
Page 24: Replacement Parts And Accessories
8. SYSTEM INTERFACE 7.1. REPLACEMENT PARTS AND ACCESSORIES Depending on the model, your Turbo Levo SL is equipped with either the Specialized replacement parts and accessories are available through your TCU or MasterMind TCU display. Authorized Specialized Retailer. The functionality of the system interface summarized in this 7.2. -
Page 25: Mastermind Tcu
Power off. On/Off Some Turbo Levo SL models are equipped with the MasterMind If the system does not power on after a long period of non-use, TCU display. The MasterMind TCU turns on the system and provides remove the MasterMind TCU from the top tube and charge the information on the display. -
Page 26: Handlebar Remote (Tcu)
8.4. HANDLEBAR REMOTE (TCU) 8.5. REMOTE FUNCTIONS (TCU) „ A: TURBO BUTTON The TCU handlebar remote is included on some Turbo Levo SL models and • controls the level of motor support. Automatically changes to TURBO mode regardless of the mode the bicycle is in. -
Page 27: Handlebar Remote (Mastermind Tcu)
8.6. HANDLEBAR REMOTE (MASTERMIND TCU) 8.7. REMOTE FUNCTIONS (MASTERMIND TCU) A: F1 BUTTON „ • Toggles pages on the MasterMind TCU. • Settings and menu navigating. The MasterMind TCU handlebar remote controls the level of motor support B: F2 BUTTON „... -
Page 28: Support Modes
8.8. SUPPORT MODES 8.9. CHANGING SUPPORT MODES (TCU) The TCU offers five assist modes: TURBO, TRAIL, ECO, OFF, SMART CONTROL. TURBO The MasterMind TCU offers six assist modes: TURBO, TRAIL, ECO, OFF, SMART CONTROL, and MICRO TUNE mode. Bluetooth TRAIL TURBO MODE: Maximum power mode for high speed sections and „... -
Page 29: Micro Tune Mode (Mastermind Tcu)
TRAIL to ECO to OFF, you have to press the (-) button. To increase (+) button. from OFF to ECO to TRAIL to TURBO, you have to press the (+) button. Modes cannot be changed directly on the MasterMind TCU. -
Page 30: System Setup On The Mastermind Tcu
8.12. SYSTEM SETUP ON THE MASTERMIND TCU 8.13. CUSTOMIZING THE MASTERMIND TCU DISPLAY The MasterMind TCU has customizable screens that show options such as The MasterMind TCU is shipped with multiple standard screen speed, odometer, battery charge level, mode, and more. To fully customize configurations. -
Page 31: Connectivity Options
1. CONNECTED ICON: Shows when the bicycle is connected to the Specialized app. The Turbo Technology System provides a high degree of interface flexibility 2. READY TO RECORD ICON: Shows when the bicycle is connected and is through Bluetooth and/or ANT+ connectivity. - Page 32 8.16. ERROR CODES (TCU) ERROR SOLUTION The Turbo Levo SL is equipped with a built-in diagnostic system to Contact your Authorized Specialized Battery and motor automatically check and identify the functionality of the system. If the error Retailer. system detects an error, the TCU display will alert the user with an error...
-
Page 33: Factory Reset
MasterMind TCU and diagnostic reports which can be shared with retailers who can give further advice based on the bicycle serial number. 8.18. FACTORY RESET When a new or used bicycle is sold, a factory reset should be performed. Standard Reset (Only programmed settings) Dual press and hold the (+) and (-) buttons for 20 seconds. -
Page 34: Changing The Coin-Cell Battery (Tcu Only)
8.19. CHANGING THE COIN-CELL BATTERY (TCU ONLY) The MasterMind TCU does not have an interchangeable battery. The battery is kept charged via the main internal battery and will not need to be replaced. The Micro-USB (TCU) or the USB-C (MasterMind TCU) port below the battery port is for Authorized Specialized Retailer and Specialized Service Center diagnostic use only. -
Page 35: Specialized App
9. SPECIALIZED APP Diagnose Diagnose can give you an overview of your bicycles motor, system, and „ The Specialized app enables you to personalize and enhance your ride. battery health, including user guidance with some bike errors. In addition, it gives you tools to unleash your bicycle's full potential and Firmware updates achieve your cycling goals. -
Page 36: Battery And Charger
Lithium-Ion battery integrated into the bicycle frame. The children) with reduced physical, sensory, or mental capabilities or lack Turbo Levo SL battery is fitted inside the down tube and can only be of experience and knowledge unless they have been given supervision removed by first removing the motor. - Page 37 to your charger, charger cord, and output cable. If your charger has touch any live components. Always turn the battery off before working any external damage, do not use it. If the charger cord or output cable on your bicycle, before charging the battery, and when the bicycle is not shows signs of fraying or has damaged insulation, do not use them.
- Page 38 10.2. BATTERY DAMAGE • Ensure everyone moves to a safe location away from the flames, heat, and smoke. Always keep in mind that when sufficiently charged, your battery has 35. Fire Suppression Techniques: enough energy stored inside to cause a fire. Charging, using, handling, or •...
-
Page 39: Battery Removal & Replacement
Any work required on the motor and battery should be in the dropout and initiate charging again by disconnecting and carried out by an Authorized Specialized Turbo Retailer. reconnecting the charger connector. 10.4. OPERATING INSTRUCTIONS 10.4.1. -
Page 40: 10.4.2. Charge Level Display
Please note that Li-ion batteries gradually lose capacity depending on age and use. Strongly reduced operating time after fully charging can be a sign that the battery is reaching the end of its useful life and has to be replaced. Provided the bicycle has been used properly, approximately 75% of the battery’s original capacity should remain after 300 charging cycles or two years. -
Page 41: User Maintenance Instructions
If your bicycle is at a standstill for 15 minutes or longer, the system will WARNING! Be careful not to damage or expose electrical turn itself off to save power. In order to continue riding with support, you components to water. Do not pressure wash your battery, have to turn the system on again. -
Page 42: Moving And Storage Instructions
• 10.6.2. STORAGE It is advisable to keep the MasterMind display connected to a power source for around 30 minutes to charge the internal battery to at least WARNING! When the bicycle is not in use for an extended period 50%;... -
Page 43: Battery Technical Data
10.8. BATTERY TECHNICAL DATA 10.9. CHARGER TECHNICAL DATA SPECIFICATION DESCRIPTION UNIT SPECIFICATION DESCRIPTION UNIT SBC - B16 SBC - B15 (RE) Charger model number SBC-C06 Operating voltage 46.8 46.8 °C 0 — +40 0 — +40 °C -20 — +60 Storage temperature Charging temperature °F... -
Page 44: 11. Specifications
11. SPECIFICATIONS CAUTION: Certain chainrings may not have adequate clearance with the chainstay. Verify spacing and chainline before use. Not all 11.1. GENERAL SPECIFICATIONS chainring designs may work and that chainring bolts of different length may be required. ITEM PART # SPECIFICATION CAUTION: Different aftermarket wheel/tire and/or fork options 45.5 mm anodized black top cover... -
Page 45: Shock Customization
11.2. SHOCK CUSTOMIZATION 11.3. BOLT SIZE / TOOLS / TORQUE SPECIFICATIONS Specialized frames are generally designed and tested to work with the The seat collar torque spec can vary depending on the seatpost suspension components provided as original equipment. When changing or seatpost/shim combination. - Page 46 TORQUE Chainring bolts 5 mm hex LOCATION TOOL in-lbf Chain guide mount bolt T25 Torx Derailleur hanger 8 mm hex Chain guide adjustment nut 5 mm hex 12 mm rear thru-axle 6 mm hex Chainstay cable guide - alloy T10 Torx Speed sensor mount bolt 3 mm hex Charge port screws...
-
Page 47: Bearing And Spacer Specifications
11.4. BEARING AND SPACER SPECIFICATIONS B Q S S Q B R B Q hours... - Page 48 Link at seat tube SPCR,12.1 ID x 19.5 OD PIVOT LOCATION DIMENSION BEARING inner spacer - x 3 W,FSR,A L7075-T6 carbon / alloy Main pivot bearing 12 mm ID X 24 mm OD X Link at seatstay 6901-2RS SPCR,12.1 ID x 19.5 OD - carbon 6 mm W,DBL SLD spacers - carbon...
-
Page 49: Bolt And Axle Specifications
11.5. BOLT AND AXLE SPECIFICATIONS... - Page 50 TORQUE Link at LOCATION / ITEM QTY DIMENSIONS TOOL SCR,CUST,Ml2 x I.O extension bolt - Nm in-lbf x 14,FSR,7075,BLK alloy Main pivot bolt SCR,CUST,M12 drive side - x 1.0 x 20,FSR 2 SCR,SHLDR, Link at seatstay carbon LH,7075,BLK CUST,M12 x 1.0 bolt - carbon Ø12 x 27,7075,BLK SCR,CUST,OD...
-
Page 51: Suspension Bolt Torque Specifications
11.6. SUSPENSION BOLT TORQUE SPECIFICATIONS TORQUE PIVOT LOCATION TOOL in-lbf Main pivot bolt drive side - carbon 6 mm hex Main pivot bolt drive side - alloy 6 mm hex Main pivot bolt non-drive side - 6 mm hex carbon Main pivot bolt non-drive side - 6 mm hex alloy... -
Page 52: Adjustable Geometry
12. ADJUSTABLE GEOMETRY WARNING! Changing the frame configuration (flip chip position, tire size, fork length) will alter the bottom bracket height and/or Depending on terrain or rider preference, the bicycle can be set up with a the head tube angle, which can have negative effects on the bike’s steep head tube angle for short/playful handling or long/slack for stability handling characteristics and ride quality. -
Page 53: Adjustable Geometry Changes
12.1. ADJUSTABLE GEOMETRY CHANGES Head tube angle Adjust using the headset cups. This table reflects the geometry changes as a result of the different flip chip/headset cup(s) configurations. Please note this frame is compatible NEUTRAL 0° STEEP (+) 1° SLACK (-) 1° with 27.5"... -
Page 54: Adjusting The Head Tube Angle
12.3. ADJUSTING THE HEAD TUBE ANGLE -1° +1° 0° +/-1° The head tube angle is adjustable via adjustable headset cups. The bike ships with the "zero" offset cup (A) and a +/- 1 degree headset cup (B) ships in the small parts box. Loosen the stem bolts (2) that attach the stem (3) to the fork steerer „... - Page 55 -1° +1° „ Remove the zero offset cup from the head tube and replace it with the +/- 1° headset cup in the desired position. Headset cap When aligning the headset cup, the etching that at the front of the bike „...
-
Page 56: Adjusting The Bottom Bracket Height
„ Place the bolt and cap assembly through the underside of the steerer tube (4) then thread the bolt into the bottom of the SWAT CC body (1). Once the bolt is threaded all the way in, position the bottom cap (6) „... -
Page 57: Adjusting Rear Wheel Size
Remove the Horst pivot bolts from the frame (A). „ extension, then remove the shock from the frame. Remove all four flip chips (B) and align the Horst pivot spacer in the „ „ Remove the flip chips out of the rear shock mounting hole. slot to either 29"... -
Page 58: Air Shock Setup
13. AIR SHOCK SETUP To check the sag, push the O-ring against the seal (A), then mount „ the bicycle while propped up against a wall and sit in the saddle in a When setting suspension, always set the shock first and fork normal riding position, without bouncing the suspension. -
Page 59: Adjusting Compression
14. DERAILLEUR HANGER „ Counter-clockwise for faster rebound (lighter riders, higher speeds, small bumps, more traction). WARNING! Correct grease application is critical to rider safety. It is best not to veer too far from the recommended clicks since ONLY apply grease as instructed. being too far out of the accepted range can negatively impact the ride experience. - Page 60 Install the UDH washer, then thread the UDH bolt through the washer „ and into the hanger. „ Apply grease to the thru-axle shaft and install the thru-axle and wheel, then torque the rear axle to specification. WARNING! Regularly check and confirm the UDH hanger is tight and has not moved before and after riding the bicycle.
-
Page 61: Range Extender (Re)
15.1. USING THE RE „ Power off your Turbo Levo SL Your Turbo Levo SL is compatible with the Range Extender (RE) to increase bicycle and RE. range and ride time. The RE is securely held in the specified bottle cage „... -
Page 62: Battery Discharge Options
„ Open the charge port lid on the WARNING! When riding with a RE, always keep the RE cable non-drive side of the frame near plugged and locked into the charge port of the bicycle. A loose the bottom bracket and insert cable can cause damage to your bicycle and the RE and can the RE plug into the charge port. -
Page 63: Charging Your Range Extender
15.3. CHARGING YOUR RANGE EXTENDER WARNING! The Y-Splitter cable is designed to charge one RE and one internal battery at the same time. „ When charging the RE, use the standard charger and cable supplied Do not connect the Y-Splitter cable to two REs or two internal with your bicycle to charge the RE. -
Page 64: Regulatory Statements
party responsible for compliance could void the user’s authority to operate Logic: An RE holds half the capacity of the internal battery and the equipment. therefore adds 50% to the internal battery. Operation is subject to the following two conditions: (1) This device may not cause harmful interference, and (2) This device must accept any Range Extender interference received, including interference that may cause undesired... - Page 65 HMI (HUMAN-MACHINE INTERFACE) CERTIFICATIONS The device meets the exemption from the routine evaluation limits in section 2.5 of RSS 102 and compliance with RSS-102 RF exposure, users can obtain Canadian information on RF exposure and compliance. This transmitter must not be co-located or operating in conjunction with any other antenna or transmitter.
-
Page 66: Ec - Declaration Of Conformity
Li-ion Battery Charger Product description: EPAC Mountain bike Li-ion Battery Charger TURBO LEVO SL COMP ALLOY/ TURBO LEVO TURBO LEVO SL COMP ALLOY/ TURBO LEVO SL COMP CARBON/ TURBO LEVO SL EXPERT SL COMP CARBON/ TURBO LEVO SL EXPERT CARBON/ TURBO LEVO SL PRO CARBON/... - Page 67 SPECIALIZED BICYCLE COMPONENTS 15130 Concord Circle, Morgan Hill, CA 95037 (408) 779-6229...
Need help?
Do you have a question about the LEVO SL and is the answer not in the manual?
Questions and answers