Table of Contents
Advertisement
Advertisement
Table of Contents

Subscribe to Our Youtube Channel
Related Manuals for Turbo VADO


Summary of Contents for Turbo VADO
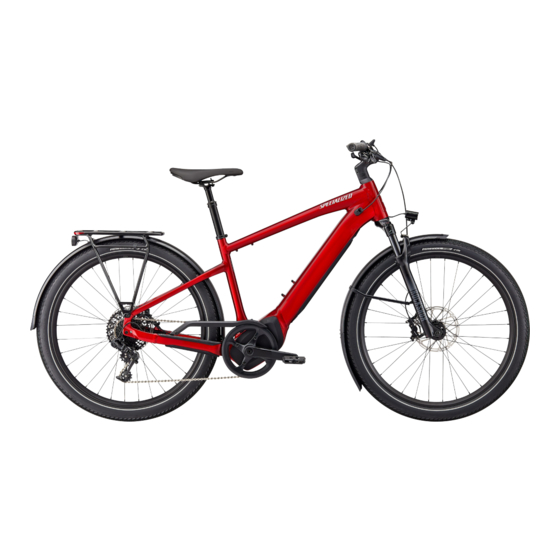
- Page 1 USER MANUAL ENGLISH...
-
Page 2: Table Of Contents
CONTE NTS 8.10. CONNECTIVITY OPTIONS..............................24 8.11. RADAR ..................................... 25 1 . I N T R O D U C T I O N ..............2 8.12. - Page 3 Congratulations on the purchase of your new Specialized Turbo bike! Before we get you set up for your first ride, a few words about electric bikes. As the name suggests, and unlike regular bicycles, Specialized electric bikes have very sophisticated and carefully engineered high-precision electrical components, including a built-in custom motor drive unit, a high-performance battery integrated into the frame, sensors, one or more display units, and wiring throughout to make sure everything is connected.
-
Page 4: Warranty
(translation of Original instructions). warning of possible injury or death. This user manual is specific to your Specialized Turbo Vado bicycle and should be read in CAUTION: The combination of the safety alert symbol and the word CAUTION addition to the Specialized Bicycle Owner’s Manual (“Owner’s Manual”). - Page 5 2. VADO COMP ONE NTS 50 48 20 23 24 36 37 42 43 12/13...
- Page 6 REAR DERAILLEUR / TOP TUBE FRONT BRAKE ROTOR SHIFT INTERFACE* CHAINRING / DOWN TUBE REAR BRAKE CALIPER SPROCKET* SEAT TUBE CHAIN GUARD REAR BRAKE ROTOR HEADTUBE CHAINSTAY PROTECTOR SPOKE CHAINSTAY CRANK ARM SEATSTAY PEDAL L1e-B SEATSTAY COUPLER* HEADSET TIRE FORK STEM VALVE SADDLE...
- Page 7 3. GEO M ET RY The geometry as summarized in this manual is current as of the date this manual was written and is subject to change. Specialized reserves the right to change the components at any time and without notice, including modifying, reducing, and/or adding features.
-
Page 8: 3 . R E P L A C I N G P A R T S O N Y O U R L 1 E - B S - P E D E L E
FRAME SIZE STACK (mm) REACH (mm) HEAD TUBE LENGTH (mm) HEAD TUBE ANGLE (°) 68 ° 68 ° 68 ° 68 ° BB HEIGHT (mm) BB DROP (mm) TRAIL (mm) FORK LENGTH (FULL) (mm) FORK RAKE/OFFSET (mm) FRONT CENTER (mm) CHAINSTAY LENGTH (mm) 470.4 470.4... -
Page 9: Ge Ne Ral Inform At Io N A B O Ut Yo U R Va D O
4. GE NE RAL INFORM AT IO N A B O UT YO U R VA D O 4.2 . PEDELEC / EPAC If your Vado is classified as a Pedelec, your motor support will automatically shut off when you reach 4 .1. I N T E N D E D U S E a maximum assistance speed depending on the country of purchase. -
Page 10: G E N E Ra L N Ot Es A Bout Ri D I N G
Owner’s Manual. The Vado motor provides pedal assistance only while you are pedaling and the bicycle is in motion. The amount of pedal assistance will be higher or lower depending on the amount of Recommended structural weight limits are based on International Standards force applied to the pedals. -
Page 11: Before Riding
SPORT (middle setting) mode. 5.4. KNOW YOU R RANGE CAUTION: The weight of your Vado is significantly higher than a bicycle Know the range of your electric bicycle before you start your ride. You can calculate your range without motor support. - Page 12 WARNING! Carrying a child on your Specialized bicycle is at your own risk. If you choose to install an accessory on your Specialized bicycle such as an The Vado is a high-performance bicycle. All regular maintenance, troubleshooting, repair, and parts axle-mounted trailer, carrier, or trailer cycle, make sure it is compatible and replacement must be performed by an Authorized Specialized Retailer.
-
Page 13: Replacement Parts And Accessories
Regularly clean and lubricate the drivetrain according to the drivetrain manufacturer’s instructions. 6 .2. MOTOR SU PP O RT ACTI VATI ON „ Do not use a high pressure water spray to wash your bicycle. Even water from a garden „... -
Page 14: Headset Bearings
The use of other components or hardware will compromise the integrity and strength of the assembly. Vado specific components should only be used on the Vado and not on other bicycles, even if they fit. Failure to follow this warning could result in serious injury or death. -
Page 15: Derailleur/Dropout Hanger
Once the saddle height is determined, torque the supplied seatpost collar bolt to 6.2 Nm / 55 in-lbf. The Vado is equipped with a speed sensor magnet, located on the rear hub/disc rotor interface with either a 6 bolt rotor mounted (A) or a Centerlock (B) mounted version. -
Page 16: Racks And Fenders
7. 5 . RAC KS AN D FE ND ERS The Vado is equipped with a front fender and a rear fender attached to the rear rack. An optional front rack can be fitted to the bicycle via mounts behind the faceplate on the head tube. - Page 17 7.5 A 7.5 B Fig. 7.6 Insert a 2.5 mm hex key into the screw hole (A) on the faceplate and loosen the bolt hidden „ in the head tube (B), then remove the faceplate. The faceplate covers 4 threaded bores (C) which are used to mount the front rack. See the „...
-
Page 18: Rack Accessory Mounts
7. 6 . RAC K ACCES SO RY MO UN TS All Vado models are equipped with an LED headlight and taillight. The lights on the Vado turn on automatically when the bicycle is powered on.The light can be turned off while riding by long pressing the (F1) button on the remote. - Page 19 Fig. 7.8 Fig. 7.9 On the Vado L1e-B, the rear light is mounted on the rear fender and the headlight is „ For all other models, the rear light is integrated into the rear rack and the headlight is „...
-
Page 20: Mastermind Tcd (Display)
Fig. 8.1 All Vado models are equipped with the MasterMind TCD. The display turns on the system and provides information on the display. The MasterMind TCD is used to power the bike on and off (A). -
Page 21: Starting The System On The Mastermind Tcd
8 .2 . STA RT I N G T H E SYST E M O N TH E MA ST E RM IN D TCD Fig. 8.3 The handlebar remote is included on all Vado models. It controls the level of motor support and controls the functions and scrolling of the MasterMind TCD. -
Page 22: Remote Functions
STANDARD HUB: Long press toggles standard modes and Micro Tune mode. • Settings & menu navigating. The handlebar remote and light is included on all L1e-B Vado models and controls the level of C - (+) BUTTON: motor support and controls the functions and scrolling of the MasterMind TCD. -
Page 23: Support Modes
On the remote, after reaching the strongest or weakest mode, the system will not continue to switch. To reduce from TURBO to SPORT to ECO to OFF, you have to The Vado motor offers 6 Bike Assist Modes: TURBO, SPORT, ECO, OFF, SMART CONTROL, press the (-) button. -
Page 24: Pedal Pace Bar On The Mastermind Tcd
100 - 120 Fig. 8.9 70 -100 Certain Vado models are equipped with the enviolo manual hub. Changing the gear ratio on 40-70 the hub is done via the shifter on the right side of the handlebar. Rotate the controller grip clockwise to shift into low ratios for starting or climbing. -
Page 25: Enviolo Automatiq Hub, Pedal Pace And Gear Index
8 .8 . EN V I O LO AUTO M AT I Q HU B, PE DAL PAC E AN D G EA R I NDEX GEAR INDEX With the enviolo AUTOMATiQ IGH system, you do not need to worry about shifting manually The enviolo AUTOMATiQ IGH system does not have an unlimited gear index and has upper at all. -
Page 26: Connectivity Options
For more information on connecting to and using Mission Control, see section 9 of this manual. 8 .10 . C ONN ECT IV I T Y OPT I ONS The Turbo Technology System provides a high degree of interface flexibility through Bluetooth and/or ANT+ connectivity. Fig. 8.12... -
Page 27: Radar
8 .1 1. RA DA R VISUAL ALERTS 8.15 Some Vado models are fitted with the Garmin radar system designed to warn you of vehicles approaching you from behind. WARNING! Before using the Garmin radar system, please read the applicable sections in the provided manual(s), including all safety warnings and instructions. -
Page 28: Error Messages
SOUND ALERTS Mission Control supports the rider with User Actions for errors and The MasterMind TCD emits an alarm tone for various alerts. diagnostic reports which can be shared with Retailers who can give further advice based on the bike serial number. The alarm tone for an approaching vehicle differs from the tone when the vehicle has „... -
Page 29: Mission Control Functions
Komoot or Strava account. 4: DIAGNOSE System Status tells you, at a glance, if your Turbo system is healthy or if an action is required. Any live system events are shown and a solution is supported through simple steps you can carry out yourself. -
Page 30: In-App Help Guide
When connecting to the Mission Control App for the first time, you need to pair it using a code with your Vado. The code serves as a security measure since it ensures that only you as the bike owner, or entrusted people you share the code with, can connect to the bike. -
Page 31: Customizing The Mastermind Tcd Display
9.6. AUTO START ACTI VATI ON You can manually record your rides in the Mission Control app using the RIDE feature. Rides can also be automatically started, stopped, and recorded in the Mission Control App with the “Auto Start Active” function turned on (A) in the SETTINGS menu. When connected to the Mission Control app, the MasterMind TCD shows the ride recording status icons on the display (B). -
Page 32: Instructions Pertaining To The Risk Of Fire Or Electric Shock
The battery of the Vado is removable from the Do not allow metallic objects such as keys, coins, or screws, to come in contact with the battery, the „... -
Page 33: Charging The Battery
1 0 . 3 . C H A RG I N G T H E BAT T E RY Fig. 10.1 Before charging the battery, make sure it is turned off. The Vado battery can be charged „ with the battery installed in or removed from the bicycle. - Page 34 10.2 10.3 Fig. 10.2 Fig. 10.3 During the charging process, the diode on the charger will glow solid red (1). When the When charging is complete (A), disconnect the charging plug from the battery charging „ „ battery is fully charged, the diode on the charger will turn solid green (2). socket (B) and unplug the charger from the outlet.
-
Page 35: Mastermind Tcd Charge Level Display
1 0 .4. MA ST E R MI N D TCD C H ARG E L EV E L D I S PLAY 10 .5. REMOVI NG & INSTALLI NG TH E BAT TERY UNLOCK AND OPEN THE BATTERY LATCH 10.4 10.5 Fig. - Page 36 REMOVE THE BATTERY UNHOOK THE BATTERY 10.6 10.7 Fig. 10.6 Fig. 10.7 Supporting the battery with one hand, rotate the latch lever clockwise to fully release the To prevent the battery from accidentally falling out of the frame, the battery is secured in „...
-
Page 37: Cleaning
RE-INSTALL THE BATTERY 10 .6. CLEANING Always turn the battery off and remove the charger from the charge port and wall socket 10.8 „ before cleaning the battery or bicycle. Use a dry or slightly damp cloth for cleaning the battery or bicycle frame. If there is dirt „... -
Page 38: Transport
1 0 . 8 . T RA NS P ORT 10 .10 . BAT T E RY T EC H NI C A L DATA WARNING! When shipping or transporting the battery over long distances, SPECIFICATION DESCRIPTION UNIT including air travel, the charge should be reduced to 50% or less in case SBC - B19 SBC - B20 it gets damaged during transit. -
Page 39: Charger Technical Data
1 1. S PECIFICAT IO NS 10.9 11.1. GENERAL S PECI FIC ATIO NS ATTENTION DANGER DO NOT TEMP RANGE NOT FOLLOWING THESE INSTRUCTIONS CAN CAUSE HEAT, FIRE AND SPECIALIZED BICYCLE COMPONENTS INC. EXPLOSION AND CAN RESULT IN SERIOUS INJURY OR DEATH Rechargeable Li-Ion Battery This battery must be disposed of properly SBC-B19 xxx Ah / xxx Wh / 36V... - Page 40 The following is a summary of torque specifications in this manual: ADJUSTABLE DROPOUT MOUNTING BOLTS T30 TORX TORQUE ADJUSTABLE DROPOUT ADJUSTMENT 3 mm HEX LOCATION TOOL BOLTS IN-LBF DROPOUT COUPLER BOLTS T25 TORX SEAT COLLAR 4 mm HEX BATTERY LATCH BOLT 3 mm HEX 26.5 SEATPOST RAIL CLAMP BOLTS...
-
Page 41: Customization
Proper tire pressure is critical for optimal performance. Tires with higher pressure will typically roll Some Vado models are equipped with the enviolo internal geared hub. Depending on the model, the faster and provide less rolling resistance, but provide less traction. Tires with lower pressure will bike is equipped with either a manual hub interface (A) or the AUTOMATiQ hub interface (B), which typically provide increased traction and control at the expense of rolling resistance. -
Page 42: Removing And Re-Installing The Enviolo Equipped Rear Wheel
REMOVE THE REAR WHEEL (ENVIOLO MANUAL IGH) Non-enviolo IGH equipped Vado models are not compatible with an enviolo IGH. 12.3 WARNING! Due to the high degree of complexity of the IGH, proper assembly of the hub requires a high degree of mechanical ability, skill, training, and specialty tools. - Page 43 INSTALL THE REAR WHEEL INSTALL THE REAR WHEEL AXLE NUTS 12.4 12.5 Fig. 12.4 Fig. 12.5 If not already done, remove the rear axle nuts (A) and non-turn washers (B) from the axle Install a non-turn washer (A) on each side. The profiled side of the non-turn Washer must „...
-
Page 44: Drivetrain Tensioning And Rear Wheel Alignment
Do not use the belt as a strap wrench or chain whip. Do not roll on or pry on the belt. Never use any belt that shows signs of damage. The Vado is designed with adjustable sliding dropouts which simultaneously allow for easy tensioning of the belt/chain and alignment of the rear wheel. - Page 45 To access the adjustment bolts you will need to remove the covers located on the rear dropout. ADJUST THE SLIDING DROPOUT „ Using a 2.5 mm hex key, remove both bolts from the rear of the left and right dropouts (A). „...
- Page 46 Fig. 12.10 (A-B) ALIGN THE REAR WHEEL Using a T30 Torx wrench, loosen the sliding dropout locking bolts on both left and right „ 12.11 rear dropouts (A). Using a T30 Torx wrench, loosen but do not remove the kickstand bolts (C). „...
-
Page 47: Seatstay Coupler
Authorized Specialized Retailer. 1 2 . 3 . S EATSTAY CO U PL E R The Vado is equipped with a seatstay coupler which creates a gap in the frame so that a belt can be easily installed or removed. -
Page 48: Enviolo Automatiq Igh Calibration
On the first setup or after system maintenance or incorrect functionality the system has to The Vado bicycle, as originally spec’d, is approved as a Pedelec or an L1e-B S-Pedelec. If you change be calibrated. The first setup calibration should be completed by your Authorized Specialized components on an L1e-B, it may no longer be in compliance with your local regulatory authority. -
Page 49: 4 . R E G U L At O R Y S Tat E M E N T
14. RE GULATORY STATEME N TS ISED Statement This device complies with Innovation, Science and Economic Development Canada license- RoHS: exempt RSS standard(s). Operation is subject to the following two conditions: (1) this device may not cause interference, and (2) this device must accept any interference, including Specialized Bicycle Components, Inc. -
Page 50: 6 . U K - D E C L A R At I O N O F C O N F O R M I T
SBC-C04 / SBC-C05 / SBC-C07 Model designation: SBC-C04 / SBC-C05 / SBC-C07 / Vado 5.0 / Vado 5.0 ST / Vado 5.0 IGH / / Vado 5.0 / Vado 5.0 ST / Vado 5.0 IGH / Vado 5.0 IGH ST Vado 5.0 IGH ST... - Page 51 SPECIALIZED BICYCLE COMPONENTS 15130 Concord Circle, Morgan Hill, CA 95037 (408) 779-6229...
Need help?
Do you have a question about the VADO and is the answer not in the manual?
Questions and answers