Table of Contents
Advertisement
Quick Links
Manuel utilisateur des chargeurs de batteries HPOWER
Manual del usuario de cargadores de baterías HPOWER
S.A.S. CRISTEC
31 rue Marcel Paul - Z.I. Kerdroniou Est
29000 QUIMPER - FRANCE
E-mail:
info@cristec.fr
https://www.cristec.fr
User manual HPOWER battery chargers
HPOWER 12V/90A
HPOWER 24V/45A
HPOWER 24V/60A
HPOWER 24V/80A
HPOWER 24V/100A
HPOWER 48V/30A
HPOWER 48V/50A
.
HPO-1H-2H-F
Advertisement
Table of Contents

Related Manuals for Cristec HPOWER 12V/90A


Summary of Contents for Cristec HPOWER 12V/90A
- Page 1 Manuel utilisateur des chargeurs de batteries HPOWER User manual HPOWER battery chargers Manual del usuario de cargadores de baterías HPOWER HPOWER 12V/90A HPOWER 24V/45A HPOWER 24V/60A HPOWER 24V/80A HPOWER 24V/100A HPOWER 48V/30A HPOWER 48V/50A S.A.S. CRISTEC 31 rue Marcel Paul - Z.I. Kerdroniou Est...
-
Page 2: Table Of Contents
CONTENTS PRECAUTIONS – WARRANTY ........................27 ) – ................27 RECAUTIONS WARNING PROVISIONS RELATING TO SAFETY ............................31 ARRANTY OPERATING-PRESENTATION-INTERFACES ....................32 ..........................32 PERATING PRINCIPLE ......................... 33 VERVIEW PRESENTATION ..........................33 SER INTERFACE AREA INSTALLATION ............................34 ......................... 34 HARGER OVERALL DIMENSIONS .............................. -
Page 3: Precautions - Warranty
This manual should be kept safely and consulted before attempting any repairs because it contains all the information required to use the appliance. This document is the property of CRISTEC; all the information it contains applies to the accompanying product. CRISTEC reserves the right to modify the specifications without notice. - Page 4 Main precaution Before handling the charger, please read carefully this manual. Precautions regarding electric shocks Risk of electric shock and danger of death: it’s strictly forbidden to interfere with the charger when under voltage. Precautions regarding accidental earth leaks The charger's PE terminal must be earthed and connected before any other terminal.
- Page 5 phenomena. Regulations require the presence of a battery switch on the charger outputs of the + and the - poles. Precautions regarding lightning In areas highly exposed to lightning, it may be advisable to install a lightning arrestor upstream of the charger to safeguard it against irreversible damage.
- Page 6 Precautions regarding dust, seepage and falling water The charger should be located so as to prevent penetration of damp, liquid, salt and dust, any of which could cause irreparable damage to the equipment and be potentially hazardous for the user. The appliance should be installed in a dry and well- ventilated place.
-
Page 7: Warranty
CRISTEC waives all liability if the installation rules and instructions for use are not observed. The warranty is valid for 36 months. The warranty applies if the origin of the failure is a fault internal to the charger due to CRISTEC. The warranty applies for equipment returned to the Quimper plant (France). -
Page 8: Operating-Presentation-Interfaces
2 OPERATING-PRESENTATION-INTERFACES PERATING PRINCIPLE The design of the battery chargers in the HPOWER range is based on a high-frequency split converter that transforms the AC signal into regulated and filtered DC current. They can operate as a DC power supply. Once the type of battery and type of charge has been selected, operation of the battery charger is entirely automatic (unless otherwise specified by the supplier or the manufacturer of the batteries). -
Page 9: Overview Presentation
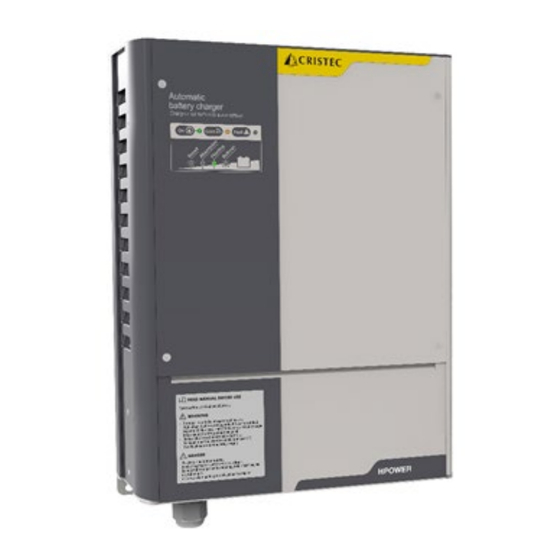
The chargers are divided into 2 zones : The user interface zone The energy conversion zone (all maintenance in this area is forbidden except with CRISTEC authorization, under penalty of warranty termination) Fixing of the charger is made by 4 x M6 round head screws (screw head diameter less than 10 mm). -
Page 10: Installation
47 to 65Hz. Generators The CRISTEC battery chargers are designed to operate from a generator. Be careful : In some cases, the generators can produce high over voltages, in particular during start-up phase. Before connecting the charger, please check its compatibility with the characteristics of the generator : power, voltage, overvoltage, frequency, current, etc. -
Page 11: Battery Cable
Depending on cable lengths, the cross-section of AC power cables must be at least equal to or greater than the values provided in the table below : Minimum cross-section for Minimum cross-section Model 115VAC for 230VAC HPO 12-90 HPO 24-45 3 x 4 mm²... -
Page 12: Precautions Regarding Electromagnetic Disturbance Generated By The Appliance
The installer should choose the type of cable (H07-VK, MX, etc.) according to the type of application and the applicable standards. The DC outputs must use a PHOENIX CONTACT connector type. If you do not have 3 batteries, the terminals non- used bank will remain unconnected. -
Page 13: Switches Setting Adjustment Indicators
WITCHES SETTING ADJUSTMENT INDICATORS 3.3.1 Description SW1201 : Boost (E) and Refresh (F) SW1202 : Battery charger’s ID (1, 2, 3 and 4) SW1200 : Battery settings (A, B, C et D) The HPOWER chargers are equipped with switches to configure the charger according the battery type and the application (see section 3.3.2). -
Page 14: Setting According To The Batteries Type
3.3.2 Setting according to the batteries type Description of the Maximum duration Maximum duration FLOATING BOOST Switches setting battery type of BOOST at of ABSORPTION at VOLTAGE* VOLTAGE* +/- 5% T +/- 5% T BOOST Opened type bat 13,4V / 26,8V 14,1V / 28,2V free electrolyte (wet) / 53,6V... -
Page 15: Interfaces And Accessories
NTERFACES AND ACCESSORIES J1201/J1202 : CAN Bus Connecteur Désignation Détail The battery charger offers two receptacles matching with connectors Molex Microfit 3.0, 6 circuits J1201 BUS CAN (reference 43025-0600). Documentation n° 1336205REG_CAN (hardware and software specification) Is J1202 available upon request. The battery charger supports the remote tactile colour display UNI-DISPLAY-R. -
Page 16: Remote Display
For special batteries, call in a professional installer, who will make the specific settings in accordance with the battery manufacturer's specifications and according to the specifics of the installation. CRISTEC is not liable for any damage caused to the batteries or for inefficient recharging. -
Page 17: Charging Curve
3.4.3 Charging curve BOOST in ON position With this setting the HPOWER charger delivers a 5-step charge curve IUoU + automatic weekly recycling (switch E) + return to automatic BOOST : BOOST, ABSORPTION, FLOATING + REFRESH, REBOOST. V BOOST : BOOST voltage V FLOAT : FLOATING voltage... -
Page 18: Thermal Derating
REFRESH phase : It is an automatic weekly cycle (Inhibited or not by means of switch F) in order to optimize the battery life duration. It will occur only after a complete recharge cycle (BOOST, ABSORPTION and FLOATING).The charger will generate automatically a safe timed voltage step every 7 days whatever the position of BOOST switch. -
Page 19: Indicators
3.4.5 Indicators The following led indicators are visible on the front of the appliance for monitoring. INDICATORS STATE MEANING Charger is ON No or poor quality AC current GREEN LED Input fuse is blown "On" Internal charger malfunction ORANGE LED Charger in BOOST phase Blinking "Boost "... -
Page 20: Equipment Maintenance And Repairs
Disconnect the battery charger from the AC power network and disconnect the batteries before undertaking any repairs. When fuses have blown, only use fuses of the type and size recommended in this manual. Please contact CRISTEC or their distributor for any other repairs. Any repair without CRISTEC prior agreement entails an exclusion of warranty. -
Page 21: Technical Specifications
5 TECHNICAL SPECIFICATIONS HPO 12-90 Part Number HPO12-90 Model 12V/90A recommended battery bank (Ah) 700-1200Ah Input Voltage from 90 to 265VAC single-phase automatic Frequency from 47 to 65Hz automatic Input current consumption 6.0/16.0A 230/115VAC Recommended power for a generator 1600W Power factor Efficiency 87% typical... - Page 22 HPO 24-45, 24-60, 24-80, 24-100 Part Number HPO24-45 HPO24-60 HPO24-80 HPO24-100 Model 24V/45A 24V/60A 24V/80A 24V/100A recommended battery bank (Ah) 300-600Ah 500-800Ah 700-1000h 800-1300Ah Input Voltage from 90 to 265VAC single-phase automatic Frequency from 47 to 65Hz automatic Input current consumption 6.0/16.0A 9.0/20.0A 11.0/20.0A...
- Page 23 HPO 48-30, 48-50 Part Number HPO48-30 HPO48-50 Model 48V/30A 48V/50A recommended battery bank (Ah) 150-400Ah 250-700h Input Voltage from 90 to 265VAC single-phase automatic Frequency from 47 to 65Hz automatic Input current consumption 9.0/20.0A 15.0/30.0A 230/115VAC Recommended power for a generator 2100W 3520W Power factor...
- Page 24 ANNEXE 1 / APPENDIX 1 / ANEXO 1 Entrée / Input / Entrada : • Phase / Phase / Fase • Terre / Earth / Tierra • Neutre / Neutral / Neutro Sorties / Outputs / Salidas: • (-Bat) -Batterie / -Battery / -Batería (+Bat E) +Batterie de démarrage / +Engine battery / +Batería de arranque •...
- Page 25 ANNEXE 2 / APPENDIX 2 / ANEXO 2 HPO 12-90, 24-45, 24-60, 24-80, 48-30 Positionner le chargeur à la verticale, connection vers le bas. Le non respect de cette position peut entrainer une diminution de la puissance disponible, une perte de degré d’IP. Zone de dégagement de 150mm autour du chargeur pour ventilation et ouverture du chargeur.
- Page 26 ANNEXE 3 / APPENDIX 3 / ANEXO 3 HPO 24-100, 48-50 Positionner le chargeur à la verticale, connection vers le bas. Le non respect de cette position peut entrainer une diminution de la puissance disponible, une perte de degré d’IP. Zone de dégagement de 150mm autour du chargeur pour ventilation et ouverture du chargeur.
- Page 27 ANNEXE 4 / APPENDIX 4 / ANEXO 4 Autres Cablages / Other type of installation / Otros cableados • Batterie de démarrage / +Engine battery / Batería de arranque ❶ Montage 1 Batterie de démarrage Mounting 1 Engine Battery Montaje 1 Batería de arranque ❷...
Need help?
Do you have a question about the HPOWER 12V/90A and is the answer not in the manual?
Questions and answers