Table of Contents
Advertisement
Available languages
Available languages
Quick Links
Advertisement
Chapters
Table of Contents

Related Manuals for Progress Lighting AirPro P250121


Summary of Contents for Progress Lighting AirPro P250121
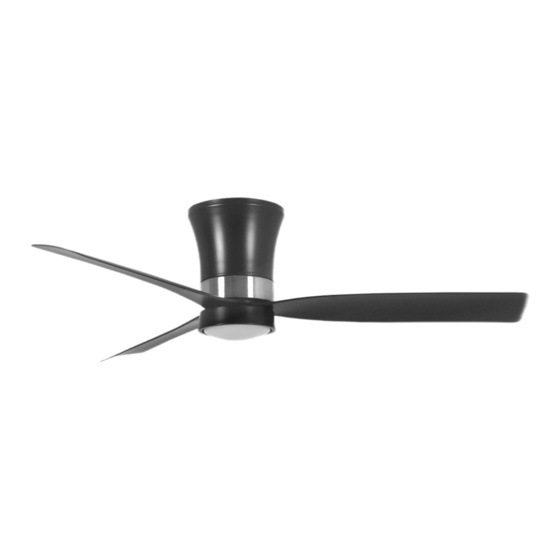
- Page 1 Ceiling Fan Installation Manual P250121 93166473...
- Page 2 Limited Lifetime Warranty Progress Lighting fan motors are warranted to the original purchaser to be free of electrical and/or mechanical defects for so Date Purchas ed long as the original purchaser owns the fan. Pull chain switches, reverse switches, capacitors and metal finishes are warranted to be free from defects in materials or workmanship for a period of 1 year from the date of purchase.
-
Page 3: Table Of Contents
Safety Rules..................................... Unpacking Your Fan ..................................Installing Your Fan ..................................Installing the Light Kit..................................Operating Your Transmitter ................................Care of Your Fan ................................... Troubleshooting .................................... Specifications ....................................Table of Contents... -
Page 4: Safety Rules
1. To reduce the risk of electric shock, insure electricity has been turned off 9. To avoid personal injury or damage to the fan and other items, be at the circuit breaker or fuse box before beginning. cautious when working around or cleaning the fan. 2. -
Page 5: Unpacking Your Fan 2
Unpack your fan and check the contents. You should have the following items: 10. Loose parts bag containing: 1. Fan blades (3) 8. 12V MN21/A23 battery a. Mounting hardware 2. Blade support plate with screw and lock washer (3) 9. Balancing kit Wire nuts (3) 3. -
Page 6: Installing Your Fan
Figure 3 Figure 1 (available at your Progress Lighting Retailer). Secure the outlet box directly to the building structure. Use appropriate fasteners and building materials. The outlet box and its support must be able to fully support the moving weight of the fan (at least 35 lbs). - Page 7 Hanging the Fan Outlet box REMEMBER to turn off the power. Follow the steps below to hang your fan properly. Step 1. Attach the mounting bracket to the outlet box with two screws and washers provided with Rubber packing the outlet box. Make sure the bracket is tight and mounts Screws secured.
- Page 8 Make the Electrical From Fan To Receiver 2-pin connector--------------------- 2-pin connector White (Neutral) Connections 3-pin connector--------------------- 3-pin connector Black (Hot) Ground conductor Step 3. Make wire connections from the fan and WARNING: To avoid possible electrical shock, receiver to the outlet box as follows, using the Outlet Box be sure electricity is turned off at the main fuse wire nut.
- Page 9 Finishing the Fan Step 4. Secure motor housing to fan motor. Install motor housing to fan motor and align the slots Installation with two loosen screw form previous step. Install two screws from previous step and tighten all four Step 1. Remove two of the four mounting plate screws to secure motor housing to fan motor.
-
Page 10: Installing The Light Kit
Attaching the Fan Blades Installing the LED Assembly WARNING: To reduce the risk of personal CAUTION: Before starting installation, disconnect injury, do not insert foreign objects between the power by turning off the circuit breaker or rotating fan blades. removing the fuse at fuse box.Turning power off using the fan switch is not sufficient to Light kit Step 1. -
Page 11: Operating Your Transmitter 8
Installing the battery Remote Control Button Definitions: (Fig. 14) From the back of the transmitter, with the fan’s These six buttons are used to set the fan speed as power off, restore power to the fan. Press and Install a 12V MN21/A23 battery (included) into follows:... - Page 12 Speed settings for warm or cool weather depend on factors such as the room size. Ceiling height, number of fans and so on. NOTE: To operate the reverse function on this fan, press the reverse button while the fan is running. Warm weather - (Forward) A downward airflow creates a cooling effect as shown in Fig.
-
Page 13: Care Of Your Fan
Installing the Remote Here are some suggestions to help IMPORTANT you maintain your fan MAKE SURE THE POWER IS OFF AT THE Control Holder ELECTRICAL PANEL BOX BEFORE YOU ATTEMPT ANY REPAIRS. REFER TO THE 1. Because of the fan's natural movement, some SECTION "MAKING ELECTRICAL Step 1. -
Page 14: Troubleshooting
Problem Solution 1. Check circuit fuses or breakers. Fan will not start. 2. Check line wire connections to the fan and switch wire connections in the switch housing. CAUTION: Make sure main power is off. Fan sounds noisy. 1. Make sure all motor housing screws are snug. 2. -
Page 15: Specifications 12
- Reorient or relocate the receiving antenna. - Increase the separation between the equipment and receiver. - Connect the equipment into an outlet on a circuit different from ©2024 Progress Lighting, Inc. that to which the receiver is connected. 701 Millennium Blvd., - Consult the dealer or an experienced radio/TV technician for help. - Page 16 Manual de Instalación del Ventilador de Techo P250121 93166473...
- Page 17 Los focos que no son LED no cuentan con garantía. Con comprobante de compra, el comprador original podrá devolver el ventilador defectuoso al lugar de compra, durante los primeros 30 días, para su reemplazo. Pasados los 30 días, el comprador original DEBE contactarse con Progress Lighting al (864) 785247258840 678-1000 para la reparación o el reemplazo, que se determinará...
- Page 18 Normas de seguridad ..............................Cómo desembalar el ventilador ............................. Cómo instalar el ventilador ............................Instalación del kit de luces ............................Operando su transmisor ..............................Cómo cuidar del ventilador ............................Resolución de problemas ............................Especificaciones ................................Tabla de Contenido...
-
Page 19: Normas De Seguridad
1. Para reducir el riesgo de eléctrocución, asegurarse de que la eléctricidad se 9. Para evitar lesiones personales o da os al ventilador y otros articulos, tener ha desactivado en el cortacircuitos o caja de fusibles antes de comenzar. cuidado al trabajar cerca del ventilador o al limpiarlo. 2. -
Page 20: Cómo Desembalar El Ventilador 2
10. Dos bolsas de piezas pequeñas: Desembalar el ventilador y revisar el contenido. Debe tener los siguientes elementos: a. Piezas demontaje 1. Juego de aspas (3) 8. 12V MN21/A23 bateria 3 conectores plásticos para cables eléctricos 2. Placa de soporte para las aspa con tornillo y 9. -
Page 21: Cómo Instalar El Ventilador
Figura 1 como se muestra la Figura 3 (disponible en su los fusibles o desactivando los cortacircuitos. distribuidor Progress Lighting). Asegurar la caja de distribución directamente a la estructura del edificio. Usar los sujetadores y meteriales de construcción apropiados. La caja de distribución y su soporte deben ser capaces de... - Page 22 Colocación del ventilador Caja de distribución RECUERDE desconectar la alimentación. Siga estos pasos para colocar correctamente el ventilador: Paso 1. Fije el soporte de montaje a la caja eléctrica Soportes de con dos tornillos y arandelas suministrados con la embalaje de Tornillos caja eléctrica.
- Page 23 Realizar las Conexiones Del ventilador Al receptor Conector de 2-pine ----------- Conector de 2-pine Eléctricas Blanco(neutro) Conector de 3-pine ----------- Conector de 3-pine Negro (caliente) Conductor de tierra Paso 3. Haga las conexiones de los cables desde ADVERTENCIA: Para envitar la posibilidad de un el ventilador y el receptor a la caja eléctrica de la choque eléctrico, asegurese de apagar la corriente Caja de...
- Page 24 Terminando la Instalación Paso 4. Asegure la carcasa del motor al motor del ventilador. Instale la carcasa del motor en el motor del ventilador y alinee las ranuras con los dos Paso 1. Remove two of the four mounting plate tornillos aflojados del paso anterior.
-
Page 25: Instalación Del Kit De Luces
Instalación del conjunto de Instalacion de las Aspas ADVERTENCIA: Para reducir el riesgo de PRECAUCIÓN: Antes de comenzar la instalación, lesiones personales, no insertes objetos extraños desconecte la alimentación colocando el interruptor de entre las aspas en funcionamiento. circuito en la posición de apagado o retirando el Placa de montaje fusible de la caja de fusibles. -
Page 26: Operando Su Transmisor 8
Instalación de la Bateria Defifinición de botón del control remoto: (Fig. Desde la parte posterior del transmisor, con la energía del ventilador apagada, restablezca la Estos seis botones se utilizan para ajustar la alimentación del ventilador. Mantenga presionado Instala una batería MN21/A23 de 12V (incluida) en velocidad del ventilador: el botón "SET"... - Page 27 Los ajustérs de velocidad para clima caliente o frío dependen de factores como el tamano del cuarto, la altura del techo, cantidad de ventiladores, etc. NOTA: Para activar el funcionamiento inverso de este ventilador, pulse el botón reverse (invertir) mientras está en marcha. Clima cálido - (Hacia adelante) Un movimiento descendente de aire crea un efecto de enfriamiento cómo se musetra en la Figura 16.
-
Page 28: Cómo Cuidar Del Ventilador 10
Cómoinstalar el Soporte He aqui algunas sugerencias para ADVERTENCIA ayudarle el mantenimiento del ASEGURARSE DE QUE LA ELECTRICIDAD del Control Remoto ESTÉ DESACTIVADA EN EL TABLERO DE ventilodor. DISTRIBUCIÓN ELÉCTRICA ANTES DE INTENTAR CUALQUIER REPARACIÓN Paso 1. Retira los cubierta desde soporte del control 1. -
Page 29: Resolución De Problemas
Problema Solución El ventilador no 1. Revisar los fusibles o interruptores de circuitos. arranca. 2. Verificar las conexiones de cables de linea al ventilador y conexiones de cable del interruptor. PRECAUCIÓN: Asegurarse de que la fuente pricipal de electricidad esté desactivada. El ventilador hace 1. -
Page 30: Especificaciones 12
- Vuelva a orientar o cambie de lugar la antena receptora. - Aumente la separación entre el equipo y el receptor. - Conecte el equipo en una toma de corriente en un circuito ©2024 Progress Lighting, Inc. diferente al que el receptor está conectado. 701 Millennium Blvd., - Consulte con el distribuidor o con un técnico especialista en...
Need help?
Do you have a question about the AirPro P250121 and is the answer not in the manual?
Questions and answers