Advertisement
CARGADOR AUTOMÁTICO DE BATERÍAS Y FUENTE DE ALIMENTACIÓN
AUTOMATIC BATTERY CHARGER & POWER SUPPLY
5-10-
370
x
310
x
102
7,410 kg
Entrada / nput 220- 4
Salida /
FUENTE DE ALIMENTACIÓN /
Por defecto Default:
220-240 V
AUTOMATIC
12
/ 24
3
0-
50-6
mm
CARGADOR / CHARGER:
I
:
O
utput
: 12
/24
/
+
LIQ
RF
MICROPROCESSOR
D
F-9124
0
-100
2 0 V
~
50/60 Hz
V
5-10- 0-
3 50-6 -100
POWER SUPPLY:
12 V
:
13. V Max.
6
24 V
: 27.2 V Max. 100 A
+
+
+
START
GEL
AGM
STOP
TEST
FROM
3.3V
V
A
3600
W
0
A
10
0 A
+
IUo
LiFePO
4
LITHIUM
POWER
TEST
SUPPLY
12V - 13.6V
24V - 27.2V
Advertisement
Table of Contents

Related Manuals for Ferve F-9124


Summary of Contents for Ferve F-9124
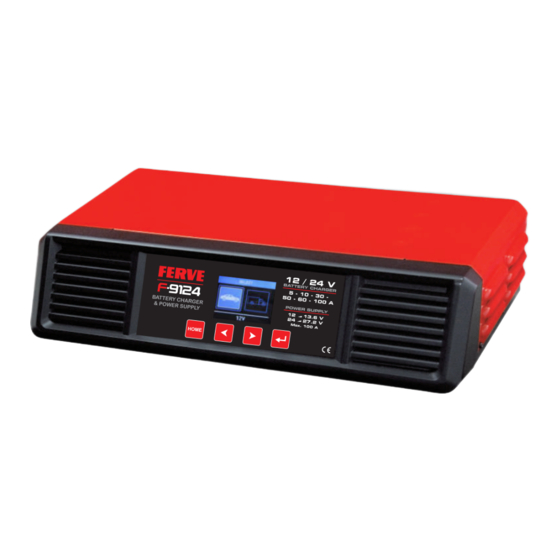
- Page 1 F-9124 CARGADOR AUTOMÁTICO DE BATERÍAS Y FUENTE DE ALIMENTACIÓN AUTOMATIC BATTERY CHARGER & POWER SUPPLY / 24 5-10- 50-6 -100 7,410 kg CARGADOR / CHARGER: Entrada / nput 220- 4 2 0 V 50/60 Hz 3600 Salida / utput : 12...
- Page 2 PRECAUCIONES PRECAUTIONS Lea el manual de instrucciones antes de usar el cargador. Read the instruction manual before using the charger. Evite las llamas y chispas. Avoid flames and sparks. Desconecte el cable de red (1) antes de conectar o desconectar las pinzas (2).
-
Page 3: Table Of Contents
ÍNDICE CONTENTS SELECCIONAR IDIOMA pág. SELECT LANGUAGE page MODO CARGADOR pág. CHARGE MODE page MODO FUENTE DE ALIMENTACIÓN pág. page POWER SUPPLY MODE pág. MODO PRUEBA DEL ALTERNADOR (12 V) page TEST ALTERNATOR MODE (12V) pág. MODO REACONDICIONAMIENTO page RECONDITIONING MODE pág. -
Page 4: Seleccionar Idioma Select Language
SELECT LANGUAGE 230 V ~ Conecte el cargador a una toma de red. Connect the charger to a mains supply. Conecte el F-9124 pulsando el interruptor “– O” de la parte trasera, colóquelo en la posición “–”. Connect the F-91 by pressing the "... -
Page 5: Modo Cargador
9124 to a mains supply ( ). Conecte el F-9124 pulsando el interruptor “– O” de la parte trasera, colóquelo en la p o s i c i ó n “ – ” . S i l a p a n t a l l a i n d i c a “ADVERTENCIA”, vaya a la pág. - Page 6 Final de carga. La batería está totalmente cargada cuando la pantalla indica “CARGADA” Si lo deja conectado, el F-9124 mantendrá la CARGADA batería al 100% (solo para baterías de plomo- ácido: STD, AGM, EFB y GEL .
-
Page 7: Modo Fuente De Alimentación Power Supply Mode
To finish the process, press to return to the main menu Desconecte el F-9124 pulsando el interruptor “– O” de la parte trasera, colóquelo en la posición IMPORTANTE: La pantalla tarda 90 s en “O”. - Page 8 To finish the process, press to return to the main menu Desconecte el F-9124 pulsando el interruptor “– O” de la parte trasera, colóquelo en la posición IMPORTANTE: La pantalla tarda 90 s en “O”.
-
Page 9: Modo Prueba Del Alternador (12 V) Test Alternator Mode (12V)
9124 to a mains supply ( ). Conecte el F-9124 pulsando el interruptor “– O” de la parte trasera, colóquelo en la p o s i c i ó n “ – ” . S i l a p a n t a l l a i n d i c a “ADVERTENCIA”, vaya a la pág. - Page 10 To finish the process, press to return to the main menu Desconecte el F-9124 pulsando el interruptor “– O” de la parte trasera, colóquelo en la posición “O”. La pantalla tarda 90 s en apagarse. Disc onnect the F-91 by pressing the "...
-
Page 11: Modo Reacondicionamiento Reconditioning Mode
9124 to a mains supply ( ). Conecte el F-9124 pulsando el interruptor “– O” de la parte trasera, colóquelo en la p o s i c i ó n “ – ” . S i l a p a n t a l l a i n d i c a “ADVERTENCIA”, vaya a la pág. - Page 12 To finish the process, press to return to the main menu Desconecte el F-9124 pulsando el interruptor “– O” de la parte trasera, colóquelo en la posición “O”. La pantalla tarda 90 s en apagarse. Disc onnect the F-91 by pressing the "...
-
Page 13: Advertencias Warnings
ADVERTENCIAS WARNINGS ADVERTENCIA PINZAS La pantalla indica “INVERTIDAS”. Las pinzas están invertidas (roja en el borne negativo y negra en el borne positivo). Intercambie la posición de las pinzas. INVERTIDAS INVERTIDAS The display shows “REVERSE”. The clamps are reversed (red one connected to the negative terminal, black one to the positive terminal). - Page 14 El F-205 es un cable 100% cobre de 5 m que consta de un conector Anderson y pinzas de 600 A. Puede utilizarse en lugar del cable de salida del F-9124, de 1,9 m. The F-205 is a 5m 100% copper cable with an Anderson connector and 600A clamps.
- Page 15 F- 9124 EN 6035 - 1: 2012/A11:2014 EN 60335 - 2 - 29: 2006/A2: 2010 EN 55014 - 1: 2008/A2:2012 EN 55014 - 2: 2015 El Vendrell, 2024 2014/35/EU 2014/30/EU...
- Page 16 FERVE, S.A. 9124 1 - 01...
Need help?
Do you have a question about the F-9124 and is the answer not in the manual?
Questions and answers