Table of Contents
Advertisement
Quick Links
Advertisement
Table of Contents

Subscribe to Our Youtube Channel
Related Manuals for Thermador DWHD661EFP


Summary of Contents for Thermador DWHD661EFP
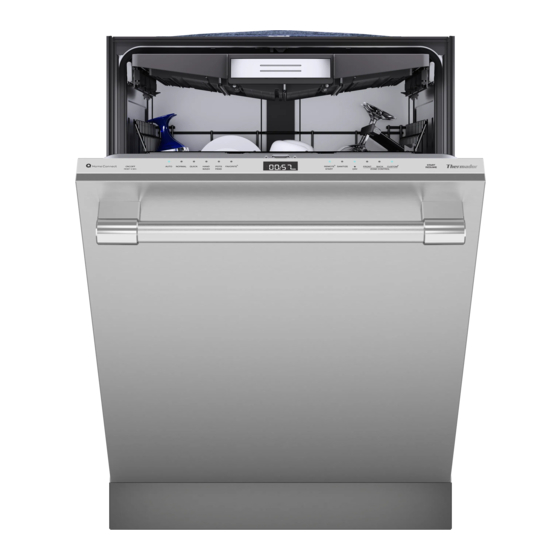
- Page 1 Thermadar. Use and care GUIDE Dishwasher DWHD661EFP THERMADOR.COM...
-
Page 2: Table Of Contents
en-us Further information and explanations are available online: Table of contents 1 IMPORTANT SAFETY INSTRUCTIONS.... 3 11.3 Removing dishware.......... 19 1.1 Safety definitions............ 3 11.4 Loading patterns ............ 19 1.2 General information........... 3 12 Basic Operation............ 20 1.3 Intended use ............. -
Page 3: Important Safety Instructions
en-us IMPORTANT SAFETY INSTRUCTIONS READ AND SAVE THESE INSTRUCTIONS Read all of the instructions carefully before using the 1.4 Restrictive use appliance. In order to reduce the risk of fire, electric This appliance is not intended for use by persons shocks and personal injuries when using the appliance, (including children) with reduced physical, sensory or follow the basic safety precautions, including the following mental capabilities, or lack of experience and knowledge,... -
Page 4: Risk To Children
en-us IMPORTANT SAFETY INSTRUCTIONS READ AND SAVE THESE INSTRUCTIONS WARNING WARNING Under certain conditions, hydrogen gas may be produced For safe care and operation of your appliance, observe in a hot water system that has not been used for two the following. -
Page 5: State Of California Proposition 65 Warnings
en-us IMPORTANT SAFETY INSTRUCTIONS READ AND SAVE THESE INSTRUCTIONS 1.8 State of California Proposition 65 Warnings This product may contain a chemical known to the State of California, which can cause cancer or reproductive harm. Therefore, the packaging of your product may bear the following label as required by California:... -
Page 6: Preventing Material Damage
en-us Preventing material damage Preventing material damage 2 Preventing material damage 3.2 Zeolite drying The appliance features a Zeolite container. Zeolite drying Preventing material damage NOTICE: lets you save energy. Harsh chemicals such as bleach-based products can Zeolite is a mineral that can store moisture and energy damage your dishwasher. -
Page 7: Appliance
Familiarizing yourself with your appliance en-us Familiarizing yourself with your appliance 4 Familiarizing yourself with your appliance Familiarizing yourself with your appliance 4.1 Appliance Detergent dispenser Add detergent to the detergent dispenser. Lower rack Lower rack → Page 13 Dispenser for special salt Add special salt to the special salt dispenser. → ... - Page 8 en-us Familiarizing yourself with your appliance Lower spray arm The lower spray arm washes the dishware in the lower rack. If the dishware has not been washed properly, clean the spray arms. → "Cleaning spray arms", Page 24 Detergent tab collecting tray During the wash cycle, detergent tabs automatically drop out of the detergent dispenser into the tab collecting tray, where they can dissolve fully.
-
Page 9: Controls
Familiarizing yourself with your appliance en-us 4.2 Controls You can use the control panel to configure all functions of your appliance and to obtain information about the operating status. With some buttons you can perform different functions. Button If you press for approx. 3 seconds, you can open the basic settings. -
Page 10: Dishwasher Cycles
en-us Dishwasher Cycles Dishwasher Cycles 5 Dishwasher Cycles Below is an overview of the different cycles available on your dishwasher. Dishwasher Cycles The running time may vary depending on the cycle selected. The running time depends on the water temperature, the quantity of dishware, the level of dirt and the option selected. The running time will change if the rinse aid system is switched off or rinse aid needs to be added. -
Page 11: Energy Guide
Options en-us 5.1 Energy Guide The Energy Guide label was based on the Normal soil sensing cycle. The unit was tested without any rinse aid (liquid) in the rinse aid dispenser. A single dose of detergent was inserted into the detergent dispenser, with no detergent being used in the prewash. -
Page 12: Features
en-us Features Option 7.1 Upper rack This intensive cleaning may ¡ Arrange cups, glasses, and small tableware items in the increase water and energy top rack. consumption. The run time is extended. ¡ The lower spray arm provides ¡ intensive cleaning for dishware in back the back of the lower rack. -
Page 13: Cup Shelf
Features en-us Raise or lower the rack evenly to the right level. 7.3 Lower rack Arrange pans and plates in the lower rack. Check that the rack is level on both sides. Release the levers. The rack clicks into position. Silverware basket Slide the rack in. -
Page 14: Silverware Basket
en-us Features Push the lever forward and fold down the tines . 7.6 Silverware drawer Arrange silverware in the silverware drawer. To use the tines again, fold them back up. The tines click into position. Arrange silverware with the points and sharp edges down. 7.5 Silverware Basket You can reorganize the silverware drawer to make more space for longer or wider utensils. -
Page 15: Rack Heights
Before using for the first time en-us To fold down the tines, push the lever forward and fold down the tines . If you want to return the cutlery tray to its original position, fold the side shelf upward until it clicks into position. 7.7 Rack heights Set the racks at the right height. -
Page 16: Water Softening System
en-us Water softening system Set the amount of rinse aid. → Page 17 Water softening system 9 Water softening system Start the Cycle with the highest cleaning temperature Hard water leaves limescale on dishware as well as the Water softening system → Page 10 without dishware. washing tank, and parts of the appliance may become Operate the appliance without dishware before using it blocked. -
Page 17: Rinse Aid System
Rinse aid system en-us Note: Only use special salt specified for dishwashers. Add rinse aid up to the max mark. Do not use salt tablets. Do not use table salt. Add the special dishwasher salt to the dispenser. If rinse aid spills out, remove it from the tub. Spilled rinse aid can cause excessive frothing during the wash cycle. -
Page 18: Dishware
en-us Dishware To store the settings, press button and hold for 3 11.2 Loading dishware seconds. Arrange dishware correctly to optimize the dishwashing The rinse aid system is switched off and the rinse aid result and prevent damage to both dishware and the refill indicator is deactivated. -
Page 19: Removing Dishware
Dishware en-us – Put heavily soiled dishware in the lower rack, e.g. 11.4 Loading patterns pans. The more powerful spray jet ensures that the dishwashing result will be better. Recommended loading patterns. – To avoid damage to dishware, arrange it so it is 12 place settings: stable and cannot tip over. -
Page 20: Basic Operation
en-us Basic Operation Third rack Additional loading patterns for 10 place settings: Lower rack Basic Operation 12 Basic Operation Basic Operation 12.1 Protection against unintentional operation Your dishwasher has a built in feature to help prevent unintentional operation, e.g. by children. After starting the appliance, the door has to be closed within 4 seconds, otherwise the operation will be paused. -
Page 21: Setting The Time Delay
Basic settings en-us As soon as the displays are off, the display shows 12.3 Setting the time delay "00h:01m" and the residual water is pumped out. You can delay the start of the wash cycle via the The cycle is cancelled and ends after approx. 1 minute. Home Connect®... - Page 22 en-us Basic settings Basic setting Display text Selection Description Rinse aid disp. r:05 r:00 - r:06 Set the amount of rinse aid. → "Setting the amount of rinse aid", Page 17 Switch the rinse aid system off with level r:00. Sensor setting SE:00 SE:00 - SE:02 Set the water sensor for identifying soiling.
- Page 23 Basic settings en-us Basic setting Display text Selection Description TimeLight® S:01 S:00 - S:01 Switch TimeLight on or off. While the wash cycle is running, status information (delay time, cycle indicator or time remaining) is projected onto the floor below the appliance door. If the base panel is pulled forward or if the appliance is installed at eye level with the cabinet front fitted flush, the display is not visible.
-
Page 24: Home Connect
en-us Home Connect® Home Connect® 14 Home Connect® 15.1 Filter system Check the filters for residues after each dishwashing This appliance is network-capable. Connecting your Home Connect® cycle. appliance to a mobile device lets you control its functions via the Home Connect® app. To see how to clean the filters, scan the following QR code. -
Page 25: Troubleshooting
Customer Service. This may avoid unnecessary repair costs. Tip: You can find further information and explanations on troubleshooting online by scanning the QR code in the table of contents and on our website www.thermador.com. Issue Cause and troubleshooting E:20-60 lights up alternately. - Page 26 en-us Troubleshooting Issue Cause and troubleshooting E:61-02 lights up alternately. Not an appliance error. The drain pump cover is loose or a foreign object is blocking the pump. Secure the cover of the drain pump so it clicks into place or clean the drain ▶...
- Page 27 Troubleshooting en-us Issue Cause and troubleshooting E:92-10 lights up alternately. E:92-40 lights up alternately. Filters are soiled or blocked. Clean the filters. ▶ → "Filter system", Page 24 All LEDs light up or flash. A software update is possibly installing. Wait until the software update has been installed. This process can take approx.
- Page 28 en-us Troubleshooting Issue Cause and troubleshooting Food remnants on dishware. Adjust the sensitivity of the sensors. ▶ → "Sensors", Page 6 Tall narrow containers in corner areas are not rinsed out adequately. Do not position tall narrow containers at too great an angle or in corner areas. ▶...
-
Page 29: Clean Drain Pump
Transportation, storage and disposal en-us 16.1 Clean drain pump Large food remnants or foreign objects can block the drain 17 Transportation, storage and Transportation, storage and disposal pump. As soon as the dishwashing water no longer drains disposal properly, the drain pump must be cleaned. Transportation, storage and disposal CAUTION 17.1 Transporting the appliance... -
Page 30: Customer Service
Warranty, from your retailer, or on our website. If you contact Customer Service, you will need the model number (E-Nr.), the production number (FD) and the consecutive numbering (Z-Nr.) of your appliance. USA: 1-800-735-4328 www.thermador.com/support www.thermador.com/us/accessories 1-800-735-4328 www.thermador.ca www.thermador.ca/en/support/filters-cleaners-accessories For assistance with connecting to Home Connect®, you can also view instructions here: www.home-connect.com/us/en/help-support/set-up... -
Page 31: Technical Specifications
Technical specifications en-us Technical specifications 19 Technical specifications Technical specifications Weight Max.: 60 kg/132 lbs Voltage 120 V, 60 Hz Power rating 1440 W Fuse 12 A Water pressure Min. 7.25 psi (50 kPa) ¡ Max. 145 psi (1000 kPa) ¡ Inlet rate Min. 2.6 gal/min Water temperature Cold water. Hot water max.: 140 °F/ (60 °C) Load capacity 16 place settings... - Page 32 Browse our vast collection of recipes. 1901 MAIN STREET, SUITE 600 IRVINE, CA 92614 USA // 1-800-735-4328 // WWW.THERMADOR.COM © 2024 BSH HOME APPLIANCES CORPORATION 9001864199 // en-us // 040617 *9001864199*...
Need help?
Do you have a question about the DWHD661EFP and is the answer not in the manual?
Questions and answers