Kirby AVALIR PLATINUM G10D Owner's Manual
Hide thumbs
Also See for AVALIR PLATINUM G10D:
- Service manual (79 pages) ,
- Owner's manual (68 pages) ,
- Service manual (78 pages)
Table of Contents
Advertisement
Advertisement
Table of Contents

Related Manuals for Kirby AVALIR PLATINUM G10D


Summary of Contents for Kirby AVALIR PLATINUM G10D
- Page 1 OWNER’S MANUAL OWNER’S MANUAL...
- Page 2 Kirby Home Cleaning System will provide many years of superior performance and have your home the cleanest it’s ever been! Each Kirby is handcrafted in the United States, and our team takes great pride in delivering on the Quality, Reliability, and Performance that has made the Kirby famous for more than 100 years.
-
Page 3: Table Of Contents
® DECLARATION OF CONFORMITY Upright & Portable Cleaner ................17 We, Kirby Opco, LLC, declare under our sole responsibility that, where applicable, Upright Cord Management ......................17 the Kirby Model G10E Vacuum Cleaner is in conformity with the following standards or standardized documents: Adjusting the Cleaning Height .....................18... - Page 4 Children should be supervised to ensure that they The Kirby Company is used, you must ensure that the product will not be damaged or be do not play with the appliance. Cleaning and user maintenance shall not be made made unsafe by the operation, maintenance, or repair procedures that you choose.
-
Page 5: Parts Of The Kirby Home Cleaning System
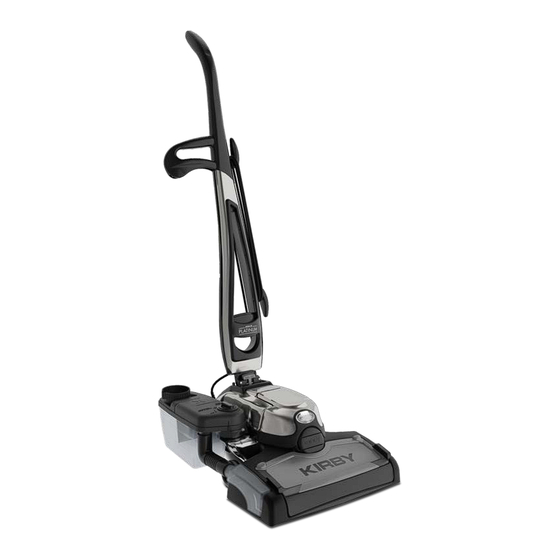
PARTS OF THE KIRBY HOME CLEANING SYSTEM ® Part Outer Permanent Bag Bag Clip Bag Support Strap Disposable Filter Bag Top Adaptor Mini Em-Tor Collector ® Brush Roll Performance Indicator Light Belt Lifter Air Exhaust Port Lower Carrying Grip Upper Carrying Grip... - Page 6 ACCESSORIES & ATTACHMENTS Part Attachment Kaddy Portable Sprayer Portable Carry Handle Portable Shampooer Nozzle Utility Tool Inflator/Deflator Tool Extension Tubes Replacement Belt Duster Brush Upholstery Nozzle Wall and Ceiling Brush Suction Control Grip Crevice Tool Surface Nozzle Attachment Hose Air Intake Guard Zippbrush (optional) Turbo Accessory (optional) Turbo Accessory Pads (optional)
-
Page 7: Assembling The Unit
Assembling the Unit Disposable Filter Bag The Upright Handle comes in two pieces. Remove the screw For best performance, use only genuine Kirby Disposable ® from the Handle and slide the two pieces together. Filter Bags and replace them when dirt reaches the “FULL” line. -
Page 8: Attaching The Power Nozzle
Attaching the Power Nozzle Moving the Unit with the Power Off Press the bottom pedal on the Toe-Touch Control all the way Tech Drive Power Assist makes it easy to push or pull the unit when ® down to raise the front of the unit. Raise the Headlight Hood. the motor is on. -
Page 9: Locking The Upright Handle
Locking the Upright Handle Lifting The Unit This unit has a Handle Lock which locks the Upright Handle for Move the Handle Lock away from Outer Permanent Bag to lock carrying and storage. the base in place. Use the Upper Carrying Grip to lift the unit. Firmly grasp the Upright Handle BEFORE unlocking the Handle Lock. -
Page 10: Straight Suction Cleaning
Straight Suction Cleaning Upright Cord Management Disengage the Brush Roll to use the Kirby for straight suction clean- A series of holders keeps the Cord attached to the Upright Handle. ing when vacuuming hard floors, throw rugs, and delicate carpets. -
Page 11: Adjusting The Cleaning Height
Insert the Portable Handle into the slot where the Upright ® Handle was connected. Tech Drive Power Assist makes it easy to push or pull the Kirby when the motor is on. When vacuuming carpet, turn Tech Drive Power Assist on by pressing down on the side of the pedal marked “D”... -
Page 12: Cleaning Carpeted Stairs
Lower the Headlight Hood. Place the unit Motor Shaft may be hot. Allow to cool before touching or on the mattress, and turn on the Kirby after it is in place. removing lint, hair, or debris. - Page 13 Suction Control Grip Wall and Ceiling Brush Use with any of the attachments to control the airflow on the Kirby. Rotates 180° to provide the perfect angle for cleaning walls, Slide the valve on the Suction Control Grip to adjust the level ceilings, door frames, and shelves.
-
Page 14: Inflator
Inflator Portable Sprayer Convert the Kirby system to an inflator by attaching the Hose to The Portable Sprayer can be used to water plants, apply a disin- ® the Exhaust Port. fectant to your home, etc. It can only be used in the inflator mode. -
Page 15: Portable Shampooer
Attach the Portable Shampooer Nozzle to the end of the Portable Sprayer. Turn the Kirby on and pull the trigger to make suds; you can adjust the suds volume by turning the control on the trigger. Press the two latches on the front of the Nozzle jet, pull it out, and thoroughly rinse. -
Page 16: Zippbrush
The Zippbrush is perfect for vacuuming furniture and stairs, or The Multi-Surface Shampoo System expands the versatility of your cleaning your car. It’s a must-have for pet owners! Kirby so you can shampoo carpets, clean & polish hard floors, and ®... - Page 17 Make sure that the Carpet Brush Roll ends are inserted evenly way down to raise the front of the unit. and completely into the end grips before starting the Kirby. and completely into the end grips before starting the Kirby.
- Page 18 1st Line on Shampoo Tank 1 Capful Medium 2nd Line on Shampoo Tank 2 Capfuls Turn the Suds Control Valve to the carpet setting. Turn the Kirby Large 3rd Line on Shampoo Tank 3 Capfuls on. As the unit is moved back and forth, foam will release, and the Brush will work it into the carpet.
- Page 19 When liquid begins to fill the area below the indicators, it is time to empty the Waste Tray. Turn off the Kirby. Lift the Waste Tray and carry to a sink to empty. Replace the Waste Tray before turning the system back on and resuming shampooing.
-
Page 20: Multi-Surface Shampoo System: Hard Floors
Belt to loosen and remove the Carpet Brush Roll. The Multi-Surface Shampoo System can be used to clean hard floors by inserting the Rotary Mop and cleaning with Kirby ® Hard Floor Cleaner. Before cleaning hard floors, vacuum or sweep the floor. -
Page 21: Cleaning Hard Floors
Accessory Lock clockwise to lock in place. Use the handle on the Shampoo Nozzle Belt Lifter to turn it clockwise until the green arrows line up. Spray a fine mist of Kirby Hard Floor Cleaner Ready to Use ®... - Page 22 Rotary Mop contacts the floor. Move the ® Fill the Shampoo Tank with warm water to the first line. Add Kirby over the area to be cleaned. Spray additional cleaner one cap full of Kirby Hard Floor Cleaner Concentrate. as needed.
-
Page 23: Miracle Shine Kit
You do not need to attach the Elbow Hose. Allow all parts, especially the Rotary Mop, to dry thoroughly before storage. Working in small sections, lightly spray Kirby Miracle Shine directly on the floor. NOTICE Test Kirby Miracle Shine in an inconspicuous area... -
Page 24: Tile & Grout Kit
Press the Toe-Touch Control down arrow (upper pedal) and lower the Kirby until the Miracle Shine Mop contacts the floor. Convert the Kirby system to a cleaner for hard floors (p. 36). Immediately move the cleaner over the sprayed area to spread Instead of using the Rotary Mop, insert the Tile &... -
Page 25: Hard Floor Pad
Hard Floor Pad can be used when vacuuming bare floors. NOTICE For use on dry floors only. Turn the Kirby off. Step on the up arrow (bottom pedal) of the Toe-Touch Control to raise the Power Nozzle. Slide the... -
Page 26: Turbo Accessory
Turbo Accessory Hold the Turbo Accessory and turn the Kirby on. Press the button on the top of the Turbo Accessory to turn on. The Turbo Accessory can be used as a sander, a polisher, or for scouring. The Turbo Accessory is used with the Hose on the front While applying light pressure, move it over the surface slowly. - Page 27 After removing the Power Nozzle, Rotate the Belt Lifter clock- wise until the green arrows line up in the “BELT ON” position. NOTICE Property Damage Risk. Use only genuine Kirby replacement parts. Failure to follow this notice could result in property damage.
-
Page 28: Maintenance
Reinsert the Brush Roll and attach the Rug Plate. Headlight Replacement If one or more of the LED lights in the Headlight burn out, contact a Kirby Authorized Service Center for replacement. Servicing a Double Insulated Appliance Service Tips In a double insulated appliance, two systems of insulation are provided instead of a grounding. -
Page 29: Troubleshooting
2. Make sure the Cord is fully inserted into the unit. ends. Unplug the unit. Then, remove the Brush Roll and make sure it rotates freely at both ends. 3. Check the Power Cord for damage. If it is damaged, have it replaced by a Kirby Authorized ®... - Page 30 Brush Roll Height ....52 Multi-Surface Shampoo System Kirby®162067 30-0679501 Adjusting....52 Tank.
- Page 31 Russia: Scandinavia: 80014747 or 0200895477 80014747 or 0200895477 Scandinavia: South Africa: 0800-203-222 or 0800-983-044 0800-203-222 or 0800-983-044 South Africa: United Kingdom: 0800-328-1247 0800-328-1247 United Kingdom: www.kirby.com www.kirby.com P/N 260023 Rev. A - English Printed in U.S.A. ©2023 Kirby Opco, LLC...
Need help?
Do you have a question about the AVALIR PLATINUM G10D and is the answer not in the manual?
Questions and answers