Table of Contents
Advertisement
Congratulations
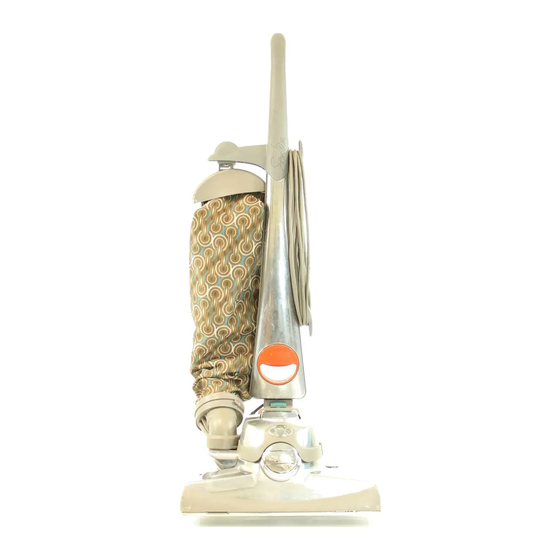
Kirby Sentria in Moscow - $2000 - Tel: (495) 506-9032
This manual is written for use with the Kirby® Sentria™ home care system.
For assistance, contact your local authorized distributor.
The Kirby Company, 1920 West 114th Street, Cleveland, Ohio 44102, U.S.A.
USA Parts and Supplies (1-800-437-7170),
USA Consumer Relations (1-800-494-8586),
Russia Parts and Supplies (7-495-506-9032),
www.kirby.com, Russia:
Kirby, Micron Magic, Splitsecond, Splitsecond 2, Scuttle, Odorific, Tech Drive, Miracle Waxer, Handi-Bulter and Mini Em-Tor are
registered trademarks of The Scott Fetzer Company.
Sentria is a trademark of The Scott Fetzer Company.
Dear Kirby Customer,
Congratulations on your purchase. You now own a superior,
complete home care system designed to help make your home
and furnishings look better and last longer. Most importantly,
repeated use of your Kirby
type of clean in-home environment you want and deserve.
This use and care manual is designed to help you get the most out
of your new Sentria home care system and enjoy its numerous ben-
efits and features. The Owner's DVD (where available) will give you
step-by-step instructions on your machine's operation. Your local
distributor is available should you have any further questions.
The Kirby Company, the hallmark of innovation and quality for
over 90 years, sells through the in-home sales method in over 70
countries. We want you to know that every customer is important
to us and that we sincerely appreciate your business.
Please enjoy your Sentria home care system to its fullest!
www.kirby.by.ru
Sentria
imd@kirbywhq.com
consumer@kirbywhq.com
info@kirby.by.ru
1
™
system will give you the
Advertisement
Table of Contents

Related Manuals for Kirby Sentria


Summary of Contents for Kirby Sentria
- Page 1 Russia Parts and Supplies (7-495-506-9032), info@kirby.by.ru www.kirby.com, Russia: www.kirby.by.ru Kirby, Micron Magic, Splitsecond, Splitsecond 2, Scuttle, Odorific, Tech Drive, Miracle Waxer, Handi-Bulter and Mini Em-Tor are registered trademarks of The Scott Fetzer Company. Sentria is a trademark of The Scott Fetzer Company.
-
Page 2: Important Safety Instructions
• Do not leave appliance unattended when running or plugged in. Unplug from outlet when not in use and before servicing. • Do not use outdoors. Use only on dry surfaces or with the Kirby Carpet Shampoo System. Do not expose to rain. Store indoors. -
Page 3: Table Of Contents
Index Expanded Illustration of the Sentria model & Accessories If you have any questions regarding your purchase or the operation of your Kirby Home Care System, please contact your local authorized distributorship: You may contact The Kirby Company's Consumer Relations Department by: e-mail consumer@kirbywhq.com... -
Page 4: About This Manual
Sentria system and its many attachments and optional accessories. Please note: Illustrations and descriptions of each part of your new Sentria home care system can be found in the rear of the manual. Please refer to these illustrations and corresponding (#'s) as you read the manual. -
Page 5: Kirby® Micron Magic® Hepa Filtration
• • • • H E P A F I L T R A T I O N With MicroAllergen Technology You bought the best; you expect the best. That's why the Kirby Company developed the Micron Magic HEPA (High Efficiency Particle Arrest) Filtration System featuring the latest in clean air technology without sacrificing tremendous airflow. -
Page 6: Part 1 - Getting Started
Proper Power Nozzle Height ® Using Tech Drive Power Assist Installing/Changing Disposable Filter Bags ® Emptying the Mini Em-Tor Collector Understanding the Belt Lifter Please read this section (as well as all other sections) carefully before using your new Sentria home care system. -
Page 7: Moving Your System/Handle Tilt Latch Lock/Toe-Touch Control
HANDLE TILT LATCH LOCK The Handle Tilt Latch Lock (10) serves two purposes: To allow you to lift the front of the Sentria system over door thresholds or throw rugs. To do so, move the Tilt Latch Lock towards the bag. By doing this, the handle will only lower part way. -
Page 8: Power Nozzle Height Adjustment/Tech Drive® Power Assist
Sentria system. • ® TECH DRIVE POWER ASSIST Your new Sentria system is equipped with Tech Drive power assist. This innovative feature eliminates most of the effort required to move your Sentria system back and forth. • TURNING TECH DRIVE POWER ASSIST ON (DRIVE) To engage Tech Drive power assist push down the red "D"... -
Page 9: Installing/Changing Disposable Filter Bags
Getting Started TURNING TECH DRIVE POWER ASSIST OFF (NEUTRAL) ™ To move your Sentria system with the motor OFF or to vacuum without power assist, Tech Drive power assist must be put in Neutral. To place Tech Drive power assist in Neutral, push down the gray "N"... -
Page 10: Bag Support Strap/Mini Em-Tor® Collector/The Belt Lifter
NOTE: The Mini Em-Tor collector must be securely locked in place or the unit will not operate. • USING THE BELT LIFTER The Belt Lifter (20) on your Sentria system is used for two purposes: 1) To engage or disengage the Brush Roll. When the Brush Roll is disengaged, the Sentria system can be used as a straight suc- tion cleaner (page 15), and;... - Page 11 Make sure the green arrows line up for storage. > Your Sentria system is equipped with a Brush Roll Performance Indicator Light (7), located on the top right side of the Power Nozzle. The purpose of this light is to show if the Brush Roll is rotating properly.
-
Page 12: Part 2 - Upright & Portable Cleaner
™ Your Sentria home care system is extremely versatile. In this section, we will discuss the following: Upright Cord Management Using your Sentria System as an Upright Cleaner Using your Upright as a Straight Suction Cleaner Cleaning Hard-Surface Floors Using your Sentria System as a... -
Page 13: Upright Cord Management
Upright & Portable Cleaner UPRIGHT CORD MANAGEMENT The Sentria system Upright handle incorporates a series of hooks and fasteners to keep the cord off the floor and attached to the upright handle for your convenience. When using your Sentria system as an upright, snap the power cord into the two cord holders located on the back of the handle. -
Page 14: The Upright Cleaner
ON, raise the Power Nozzle by stepping on the Toe Touch Control Bottom Pedal (9) all the way down. > Turn the Sentria system ON by pressing the Power Switch (13). > Press the Toe-Touch Control Upper Pedal 4 times. -
Page 15: Straight Suction Cleaner
Disengage Tech Drive power assist by stepping on the gray "N" side (marked "N" for Neutral) of the Tech Drive N/D Pedal (11). Turn the Sentria system OFF by pressing the Power Switch (13) and then unplugging. • STRAIGHT SUCTION CLEANER Straight Suction Cleaning allows you to vacuum hard floors, throw rugs and delicate carpets without use of the Brush Roll. -
Page 16: The Portable Cleaner
THE HARD FLOOR PAD (optional) ™ By attaching the optional Hard Floor Pad to your Sentria system you may dust bare floors. While the unit is turned OFF, raise the Power Nozzle (25) as far as it will go by press- ing the Toe-Touch Control Bottom Pedal (9). - Page 17 Power Nozzle to its lowest setting. • To reduce risk of injury in the portable mode, keep hair and loose clothing /!\ CAUTION: away from the Sentria system while in operation. ® Also make sure Tech Drive pedal is in the neutral position when vacuuming stairs and mattresses.
-
Page 18: Part 3 - Canister Cleaner & Attachments
Canister Cleaner & Attachments PART THREE ® ™ Your Kirby Sentria system comes with a wide variety of attachments for added versatility. In this section, we will discuss the following: Removing the Power Nozzle to Convert to a Canister Cleaner... -
Page 19: Converting To A Canister Cleaner/Installing The Attachment Hose
Disengage Tech Drive power assist by stepping on the gray "N" side (marked "N" for ™ Neutral) of the Tech Drive N/D Pedal (11). Turn the Sentria system OFF by pressing the Power Switch (13) and then unplugging. >... -
Page 20: Extension Tubes/Surface Nozzle/Duster Brush
Canister Cleaner & Attachments INSTALLING ATTACHMENTS ON THE ATTACHMENT HOSE To attach tools to the hose, push lightly while twisting the smaller end of the hose into the tool. • EXTENSION TUBES One or two Extension Tubes can be attached to the end of the hose to extend your reach and efficiently use various attachments. -
Page 21: Upholstery Nozzle/Crevice Tool/Wall & Ceiling Brash
Canister Cleaner & Attachments UPHOLSTERY NOZZLE The Upholstery Nozzle is used for cleaning upholstered furniture, carpeted steps, and clothing. It can also be used to clean the inside of cars. • CREVICE TOOL WITH REMOVABLE BRUSH Without the removable brush, the Crevice Tool can be used for cleaning cracks, crevices, corners, grooves and narrow openings. -
Page 22: Massage Cup/Suction Control Grip
Canister Cleaner & Attachments MASSAGE CUP Used with the Attachment Hose, the Massage Cup provides an invigorating skin or scalp massage. It can also be used to clean the floors of cars. • CONTROLLING AIRFLOW WITH THE SUCTION CONTROL GRIP Sometimes when using the attachments, vacuuming drapes or delicate lamp shades, for example, you might wish to control the amount of suction. -
Page 23: Using Your Sentria System As A Blower
Canister Cleaner & Attachments BLOWER SET-UP Your Sentria system can also be used as a blower. To do so, you must first remove the Power Nozzle (25). NOTE: When using your Sentria system as a blower, you may choose between the Upright Handle (17) or the Portable Handle (15). - Page 24 ® Em-Tor collector (6) in the hand-hold provided and rotate it out and away from the Sentria system as far as it will go. Then lift it off. Release the Outer Permanent Bag Top from the Bag Support by pressing the Bag Release Button (16) and sliding the bag top down.
-
Page 25: The Portable Sprayer
Exhaust Port (19). • USING THE PORTABLE SPRAYER Holding the Portable Sprayer horizontally, aim it toward a sheet of newspaper. Turn the Sentria system ON and squeeze the Portable Sprayer trigger, spraying your non-flammable solution onto the newspaper to check spray pattern. - Page 26 Canister Cleaner & Attachments USING THE PORTABLE SPRAYER (cont) With the nozzle pointed away from you, adjust the spray by turning the Spray Adjustment Control on the trigger of the Portable Sprayer. > Use slow, sweeping motions to spray the desired area with solution.
-
Page 27: The Portable Shampooer
Shampooer cap to the end of the Portable Sprayer. > Remove the jar from the Portable Sprayer and fill ® the jar about 3/4 full with Kirby Carpet Shampoo mixture (Mix according to the instructions on the bottle.) USE ONLY KIRBY CARPET SHAMPOO for best results. - Page 28 Canister Cleaner & Attachments USING THE PORTABLE SHAMPOOER Before shampooing, vacuum surface thoroughly. ™ To make suds, turn the Sentria system ON and pull the trigger of the Portable Sprayer. A stream of suds will come out of the cap.
-
Page 29: Part 4 - Optional Accessories
Optional Accessories PART FOUR ® Optional Kirby Accessories greatly enhance the usefulness of your new Sentria™ system. In this section, we will discuss the following: Using the Carpet Shampoo System Using Kirby Guard Carpet & Upholstery Protector Using the Floor Care System... -
Page 30: The Carpet Shampoo System
(The Belt Lifter Hook will catch and stretch the belt.) > Press the Toe-Touch Control Bottom Pedal (9) all ™ the way down to raise the front of the Sentria system. >... -
Page 31: Optional Accessories
CARPET SHAMPOO SYSTEM SET-UP (cont) While sliding the Carpet Shampoo System Nozzle/ ™ Tray Assembly toward the Sentria system and over the Motor Shaft (23), connect the hooks on the bottom rear of the nozzle to the Attaching Bar (24). >... -
Page 32: Using The Carpet Shampoo System
Optional Accessories CARPET SHAMPOO SYSTEM SET-UP (cont) ™ Taking care to avoid spilling liquid on the Sentria system or the floor, place the opening in the bottom front of the Shampoo Tank over the Air Exhaust Port (19) on the unit. Angle the Shampoo Tank outward from the unit until the arrows line up. - Page 33 With the unit at its lowest height level, move the Shampooer over the foam until the foam is picked up. Some moisture will accumulate in the front of the tray. Once the ® carpet is thoroughly dry, vacuum with the Kirby Upright. • CLEANING THE CARPET SHAMPOO SYSTEM...
- Page 34 Turn the Accessory Lock (22) to the left (counter- clockwise). The Carpet Shampoo System Nozzle/Tray Assembly will tip forward. ™ Lift the Nozzle/Tray Assembly off the Sentria system and carry it to the sink. > Remove the hose from the tray and rinse.
- Page 35 SYSTEM (cont) To remove the Shampoo Tank from the Air Exhaust ™ Port (19), rotate it away from the Sentria system as far as it will go, then lift it upwards. > Remove and clean the Suds Screen Cap, Cup and Sponge Filter.
-
Page 36: Kirby Guard Carpet & Upholstery Protector
Portable Sprayer, refer to p. 25) > Spray evenly with a 50% overlapping spray pattern. > Test for color fastness. Using a clean white cloth, rub Kirby Guard on Test for color fastness. Using a clean white cloth, rub Kirby Guard on Test for color fastness. -
Page 37: The Miracle Waxer® - Floor Polisher
#4. However, buff immediately, avoiding any in #4. However, buff immediately, avoiding any 3. For best results, apply a very thin coat of Kirby 3. For best results, apply a very thin coat of Kirby 3. For best results, apply a very thin coat of Kirby 3. - Page 38 Optional Accessories ® USING THE MIRACLE WAXER FLOOR POLISHER (cont) With the wax roller bag facing the hooked end of the long roller handle, push the wax roller over the connector on the bottom of the handle until secure. > Pull the roller bag off the wax roller and save the packing bag.
-
Page 39: The Floor Care System - Floor Buffer
Optional Accessories FLOOR BUFFER SET-UP ™ Your Sentria system can be used as an effective floor buf- fer for wood or tile floors. To use the Floor Buffer, you must first insert the Buffer Brush into the Floor Buffer Nozzle. - Page 40 Bottom Pedal (9) all the way down to raise the Buffer Nozzle all the way up. While holding onto the unit's handle, turn the Sentria system ON. > To avoid losing control of the Buffer when brush is on the floor surface,...
-
Page 41: The Floor Care System - Carpet Fluffer
Lower the brush as far as the Toe-Touch Control will allow. ™ With the Buffer running, move the Sentria system over the floor as though you were cleaning a carpet, using slow, steady strokes. -
Page 42: The Turbo Accessory System
Optional Accessories USING THE CARPET FLUFFER (cont) Lower the Carpet Fluffer Nozzle one notch at a time by pushing the Toe-Touch Control Upper Pedal (8). The instant the brush contacts the carpet, stop lowering the brush. > ® Then engage Tech Drive power assist by pressing down on the red "D"... - Page 43 Insert the Attachment Hose into the end of the Turbo Accessory. Grip the Sander at the front and rear and turn the ™ Sentria system ON. Then press the ON button on the top of the Sander. While applying light pressure, move it over the surface slowly.
- Page 44 Optional Accessories TURBO POLISHING Attach the synthetic lamb's wool pad using the same procedure as attaching sandpaper (see page 42). The Turbo Accessory now becomes a polisher. Use it for polishing hard waxed surfaces, such as table tops, paneling, and large flat surfaces.
-
Page 45: The Zippbrush
Optional Accessories USING THE ZIPPBRUSH When attached to the Attachment Hose, the Zippbrush can be used for a wide variety of cleaning surfaces, includ- ing upholstery, and carpeted steps. It can be used to clean automotive interiors. For optimum results, do not press down heavily on the Zippbrush. - Page 46 • Use Safety Equipment. Always wear safety glasses or goggles when using the Handi- Butler tool. Wear a dust mask for dusty operations. • Avoid accidental starting. Ensure the switch on the Sentria system and the air vents on the Handi-Butler tool are in the off position before plugging in. Plugging in tools that have the switch on invites accidents.
- Page 47 • Do not use drill bits or cutting tools with the Handi-Butler tool. Use only genuine Kirby® Parts. Service: • Have your Handi-Butler tool serviced by an authorized Kirby Distributor using only identical replacement parts. This will ensure the safety of the Handi-Butler tool is maintained.
-
Page 48: The Handi-Butler® Tool
Optional Accessories FUNCTIONAL DESCRIPTION The Handi-Butler tool is an air-powered rotary tool that can be used for a wide variety of fine, detailed cleaning and polishing tasks. It can be used as a hand-held tool or as a stationary, table-top tool. The Handi-Butler tool includes: Handi-Butler Tool Mounting Cradle... - Page 49 To use the Handi-Butler tool in the hand-held mode, begin with the hose attached to the front of your ™ Sentria system. > For ease of use, attach the bit to the Flexible Shaft (B) before assembling the Handi-Butler tool.
- Page 50 Handi-Butler tool (A) are CLOSED before turning your Sentria system on. Then, turn your Sentria system on. To start the Handi-Butler tool, rotate the Air Valve of the Handi-Butler tool to expose the two air inlet openings. You are now ready to gently pol- ish and clean.
- Page 51 >• Attach the Air Intake Guard (included with your Sentria system) to the front of the unit. > Attach the Handi-Butler tool (A) to the Air Intake Guard. >...
- Page 52 ™ before turning your Sentria system on. Turn your Sentria system on. Then, rotate the Air Valve on the Handi-Butler tool (A) to expose the two air-inlet open- ings. You are now ready to gently polish and clean. Allow the speed of the tool to do all the work. Avoid putting exces-...
- Page 53 Optional Accessories MAINTENANCE Kirby recommends that all tools be serviced by an authorized Kirby Distributor. The polishing tips and brushes in the Handi-Butler tool have been designed for many hours of use. Check them regularly ® for wear and replace when necessary. Only genuine Kirby ®...
-
Page 54: Part 5 - Operating/Maintenance Tips
With the unit securely seated in the Mounting Cradle (G), insert the tines of the Lockout Bar (I) in to the slots at the base of the On-Off pedal of the Sentria unit. Then, slide the hole on the Lockout Bar over the eyelet on the Mounting Cradle. The... -
Page 55: Changing The Power Nozzle Belt
Operating/Maintenance Tips CHANGING THE POWER NOZZLE BELT ™ After extended use, the Power Nozzle Belt on your Sentria system may become stretched and worn causing the belt to slip.(See page 11 - Brush Roll Performance Indicator Light.) If this condition exists, simply replace the old belt with a new one. -
Page 56: Adjusting The Brush Roll Height
However, the ends of the Brush Roll are adjustable, so you can extend the bristles, allowing the brush to work like new again. ™ The Brush Roll on a new Sentria system has three settings: one notch, two notches and three notches. The greater the num- ber of notches, the farther the bristles are extended. - Page 57 Operating/Maintenance Tips ADJUSTING THE BRUSH ROLL HEIGHT (cont) Remove the Power Nozzle (25) from the Sentria system. > Release the belt tension by using the handle on the Belt Lifter (20) to turn it all the way to the right (clockwise) until the green arrows line up.
-
Page 58: Miscellaneous Parts Replacement
Avoid damage to your cord by being careful not to run over it with your Sentria system. Also, unplug your unit by grasping the plug at the end of the cord rather than pulling on the cord itself. -
Page 59: Questions And Answers/Troubleshooting
OR DIRT ON THE CARPET? A 1. Check to see if the Brush Roll is turning, when the Sentria system is running. 2. If the Brush Roll is not turning freely, the belt is slipping, broken or not on the Motor Shaft (23). - Page 60 WHAT SHOULD I DO? A 1. Check to see if the Brash Roll is turning when the Sentria system is running. If not, then the Brush Roll may be stalled due to threads around the ends. Remove Brush Roll and make sure it rotates freely at both ends.
- Page 61 & Ceiling Brush to the proper angles for mantles, window ledges, walls and ceilings. Q HOW DO I CLEAN MY CAR ? ™ A Your Sentria system comes equipped with a range of tools to help you clean your car. In addition, you may also use the optional Zippbrush for vacuuming automobile upholstery, carpeting, floor mats and trunks.
- Page 62 II, an odorizer that leaves your room smelling clean and fresh. Place a few drops on a cottonball and toss it in the Outer Permanent Bag. For a list ® of other fine Kirby products, (see page 64 and 65.)
- Page 63 System. The Kirby Company also has Consumer Relations Specialists available to answer any questions you may have about the Sentria Home Care System or provide you with the name of your nearest Kirby distributor. You can contact USA Consumer Relations by: e-mail consumer@kirbywhq.com...
-
Page 64: Other Fine Kirby® Cleaning Products
Allergen Control Shampoo Neutralizes dust mite particles. Reduces allergens caused by pollen. Cleans and brightens carpets. Kirby Guard Carpet & Upholstery Protector Minimizes dirt penetration to keep carpets cleaner, longer. Helps to keep spills from seeping in. Nontoxic and safe for people and pets. - Page 65 ® Scuttle Glass & Surface Cleaner A traditional Kirby favorite; great for hard surfaces such as countertops, appliances as well as windows, mirrors and more. Dries to a streak-free shine. Citrus Scuttle Heavy-duty cleaner for all types of indoor and outdoor surfaces. Great for ovens, grills, machinery and work areas.
-
Page 66: Index
Outer Permanent Bag ..description Top Adaptor Inflator/Deflator Tool ON/OFF Pedal Belts Turning off Changing Belts Turning on ® Kirby Carpet Shampoo ..31,64 Belt Lifter Tilt Latch Lock Blower Toe-Touch Control Maintenance tips set-up Turbo Accessory System Massage Cup... - Page 67 C€ DECLARATION OF CONFORMITY We, Kirby, declare under our sole responsibility that, where applicable, the Kirby Model G10E Vacuum Cleaner is in conformity with the following standards or standardized documents. IEC 60335-1 (EN 60335-1), IEC 60335-2-2 (EN 60335-2-2), EN 55014-1, EN 55014-2, EN 61000-3-2, EN 61000-3-3 and EN 50366...
-
Page 68: Expanded Illustration Of The Sentria Model & Accessories
Sentria™ Part Outer Permanent Bag Bag Latch Tab Disposable Filter Bag Bag Support Strap Top Adaptor ® Mini Em-Tor Collector Performance Indicator Light Toe-Touch Control Upper Pedal Toe-Touch Control Bottom Pedal Handle Tilt Latch Tech Drive Power Assist Neutral Pedal... -
Page 70: Recommended Uses
Aids in cleaning of carpeted stairs and mattress cleaning. Portable Shampooer Cap Attach onto portable sprayer with unit in blower mode ® to apply Kirby Carpet Shampoo for spot cleaning. Massage Cup Skin/scalp massage. Clean the floors of cars. Inflator/Deflator Tool... - Page 72 IMPORTANT ™ The following information need only apply when changing plugs on Sentria models that are used in the U.K., Australia, South Africa and New Zealand. The wires in the main lead are coloured in accordance with the following code:...
Need help?
Do you have a question about the Sentria and is the answer not in the manual?
Questions and answers