Download Print this page
Fnirsi HS-02A User Manual

Fnirsi HS-02A User Manual

Intelligent electric soldering iron

Advertisement

Quick Links

HS-02A / HS-02B
智 能电 烙铁 使 用 说 明书
Intelligent Electric Soldering Iron user Manual

Advertisement

loading
Need help?

Need help?

Do you have a question about the HS-02A and is the answer not in the manual?

Questions and answers

Роман
March 27, 2025

Здравствуйте. Подскажите пожалуйста почему паяльник не работает от Пауэр банка? Как правильно выставить настройки, что начать пользоваться им.

User image 67e5157a50b02
1 comments:
Mr. Anderson
March 27, 2025

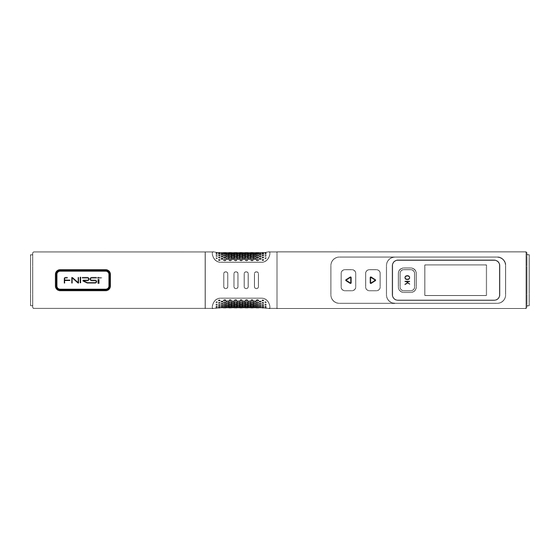
The Fnirsi HS-02A soldering iron may not work with a power bank if the voltage or power output is insufficient, causing the charger to enter overcurrent protection and forcing the device to shut down or display a black screen. To adjust the settings for proper use, enter the settings menu and set the voltage according to the power bank's parameters. The default is 20V, but you can switch between 9V, 12V, 15V, and 20V using the left or right buttons. If the device shuts down, wait for the charger to recover and select an appropriate voltage level when the soldering iron tip is not heated.

This answer is automatically generated

Summary of Contents for Fnirsi HS-02A

  • Page 1 HS-02A / HS-02B 智 能电 烙铁 使 用 说 明书 Intelligent Electric Soldering Iron user Manual...
  • Page 3 CATALOG...
  • Page 4: Notice To Users

    ●This device only supports the official soldering iron tips sold by our company (the soldering iron tips of HS-02A and HS-02B are not compatible). If don’ t use the official soldering iron tips, incompatibility and inability to use may occur, which may seriously lead to short circuits, burns, and other dangers.
  • Page 5: Product Structure

    2.Product Structure Pen cap Pen body Anti static interface Type-c power Soldering iron tip Silica gel Left Right Screen supply interface button button...
  • Page 6: Product Parameters

    HS02B-XX Weight ≈61g ※HS-02A and HS-02B have the same shell, but the internal motherboard and soldering iron tips are different , cannot be compatible or interchangeable for use. 4.Power Selection Using the PD fast charging protocol power adapter, the soldering iron can be set to obtain the working voltage of any level of 9V, 12V, 15, or 20V from the adapter (default setting of 20V), if there is a restart phenomenon, you can enter the adaptive power adjustment page, or manually enter the settings to reduce voltage or power.
  • Page 7: Installation Instructions

    ※ Please note that the soldering iron tips compatible with HS-02A and HS-02B are not compatible; When inserting the soldering iron tip, if it is stuck, then try rotating it before inserting.
  • Page 8 5.2 Workflow instructions Boot logo Standby Main menu Sleep The workflow of HS-02 intelligent soldering iron is shown in the above figure. After power on, the logo is displayed and when the logo disappears, it enters standby mode, short press the OK button to enter the main menu for heating. Entering the main menu, the soldering iron is in a normal working state, divided into the following four types: ●Working state: In this state, the white LED light will remain on, the soldering iron is in the heating or heating completed state, and after the heating temperature reaches the set temperature, there will be a prompt sound...
  • Page 9 Working state Sleep state Standby state Notice When the soldering iron is in heating or heating completed state for use, do not touch high-temperature areas. 5.3 Main menu instructions Soldering iron tip temperature The main menu is shown in the figure, and the top right corner displays the target temperature set by the user, Set temperature below are three channel labels for preset temperatures, the...
  • Page 10: Basic Settings

    6.Operating Instructions 6.1 Basic Settings ●Power on: Power on, the screen displays the boot logo, and then automatically jump to the standby Boot logo standby page interface. If prompted to insert the soldering iron tip page, the interface will automatically jump to the standby page after inserting the soldering iron tip.
  • Page 11 Adaptive power Do not touch the tip of the soldering iron. Press the OK KEY ��% to start long press the right prompt adaptive button to turn on screen appears power mode ●Heating: In standby mode, the blue LED indicator lights on both ends of the OK button are remain on, at this time, short press the OK button to enter the heating page, and the soldering iron will heat up.
  • Page 12 OK button to switch to the preset temperature channels, and set the temperature value of this channel to the set-temperature. The temperature setting range is 100 ℃ -450 ℃. �℃ adjusted step value adjusted pre-set temperature channel short press the left button to subtract one step value long press to quick increase set temperature...
  • Page 13 ●Setting mode: On working state, long press the left and right buttons simultaneously to enter the setting mode; when in standby mode or the soldering iron tip is not inserted, long press the left and right buttons simultaneously, or long press the OK button to enter the setting mode.
  • Page 14: Sleep Settings

    6.2 Sleep settings On the settings menu, short press the left or right button to select the sleep settings, press the OK button to enter the sleep setting, after entering, short press the left or right button to select the sleep parameters that need to be modified, and short press the OK button to enter the parameter modification interface.
  • Page 15 ●Sleep time: On the sleep setting page, short press the left or right button to select the sleep time, and press the OK button to enter the sleep time. Short press the OK button to select whether to turn on or off the sleep function, long press or short press the left or right button to adjust the sleep time, long press the OK button to return to the sleep setting, long press the left and right buttons simultaneously or idle time exceeds 1 minute to exit the setting mode.
  • Page 16 press the OK press the OK button button to enter to turn on or off press left or right button adjust ●Sleep temperature: On the sleep setting page, short press the left or right button to select the sleep tempera- ture, and short press the OK button to enter the sleep temperature.
  • Page 17 ●Pre- set temperature: On the handle setting page, short press the left or right button to select the preset temperature, and short press the OK button to enter the preset temperature. Short press the OK button to switch between three preset temperature channels, long press or short press the left or right button to adjust the preset channel temperature, long press the OK button to return to the handle settings, long press the left and right buttons simultaneously or idle time exceeds 1 minute to exit the setting mode.
  • Page 18: Handle Setting

    6.3 Handle setting On the settings menu page, short press the left or right button to select the handle settings, press the OK button to enter the handle settings menu. After entering, short press the left or right button to select the handle parameters 方法1 that need to be modified, and short press the OK button to enter the parameter modification interface.
  • Page 19 ●Voltage adjustment: On the handle setting page, short press the left or right button to select voltage adjustment, and press the OK button to enter voltage adjustment. Short press the left or right button to switch between the four voltage levels of 9V/12V/15V/20V, short press the OK button or long press the OK button to return to the handle settings menu, long press the left and right buttons simultaneously or idle time exceeds 1 minute to exit the setting mode.
  • Page 20 -100%, you can set it according to your own charger power parameters to avoid the phenomenon of insufficient power causing the charger to start overcurrent protection and force the device to shut down and black screen. When this phenomenon occurs, simply wait for the charger to recover and enter the settings page to select the appropriate gear again when there is no heating or no soldering iron tip.
  • Page 21 ●Temperature calibration: On the handle setting page, short press the left or right button to select temperature calibration, and press the OK button to enter temperature calibration, short press the OK button to switch to the temperature point to be calibrated. Short press the left or right button to adjust the calibration value (positive or negative), after the temperature measured by the soldering iron thermometer stabilizes, when the temperature on the thermometer is greater than the temperature to be calibrated, short press the left button (when the handheld mode is left, then opposite operations) to reduce the calibration value, when it lower than the calibration temperature, short...
  • Page 22: System Settings

    6.4 System settings On the setting menu, short press the left or right button to select system settings, press the OK button to enter the system settings menu. After entering, short press the left or right button to select the system parameters that need to be modified, and short press the OK button to enter the parameter modification interface.
  • Page 23 ●Language setting: On the system settings menu, short press the left or right button to select language setting, and press the OK button to enter the language setting. Short press the left or right button to switch languages, short press the OK button or long press the OK button to return to the system settings menu, long press the left and right buttons simultaneously or idle time exceeds 1 minute to exit the setting mode.
  • Page 24 ●Unit Settings: On the system settings menu, short press the left or right button to select unit settings, and press the OK button to enter unit setting. Short press the left or right buttons to switch between ℃ and ℉, short press the OK button or long press the OK button to return to the system settings menu, long press the left and right buttons simultaneously or idle time exceeds 1 minute to exit the setting mode.
  • Page 25 ●Screen brightness: On the system settings menu, short press the left or right button to select screen brightness, and press the OK button to enter screen brightness. Short press the left or right button to adjust the brightness level of the screen, short press the OK button or long press the OK button to return to the system settings menu, long press the left and right buttons simultaneously or idle time exceeds 1 minute to exit the setting mode.
  • Page 26: Firmware Update

    short press OK button to enter long press OK button to return press left or right button to select 7.Firmware Update Power off the device, press and hold the OK button, then connect the USB Type-c data cable to the computer to power on the device, and enter the Bootloader interface for firmware upgrade.
  • Page 27: Safety Instructions

    ●The normal working temperature of the soldering iron tip is about 300-380 ℃, and it is not advisable to use it for a long time at a high temperature to affect the lifespan . ●Avoid violent tapping of the soldering iron tip during welding. ●...
  • Page 28: Warranty Terms

    10.Warranty Terms ● Service period Shenzhen Finis Technology Co., Ltd. promises good product quality. If the product malfunctions during normal use within 7 days from the date of sale, customers can choose to return it Goods or warranty (can only be returned if it does not affect secondary sales), and free warranty is available if there is a malfunction within one year of normal use.
  • Page 29 11.Contact Us Any FNIRSI's users with any questions who comes to contact us will have our promise to get a satisfactory solution +an extra 6 months warranty to thanks for your support! By the way, we have created an interesting community, welcome to contact FNIRSI staff to join our community.

This manual is also suitable for:

Hs-02b