Advertisement

Quick Links

PASHW008-180LD-NM, PASHW015-270LD, PASHW015-270LD-FL02
180L/270L
INSTALLATION MANUAL
iStore - Installation Manual - 270L/R290-v1.4 June2024
iStore - Installation Manual - 270L/R290-v1.3 May 2024
1

Advertisement

Table of Contents
loading
Need help?

Need help?

Do you have a question about the PASHW008-180LD-NM and is the answer not in the manual?

Questions and answers

Jennie Vartan
July 9, 2025

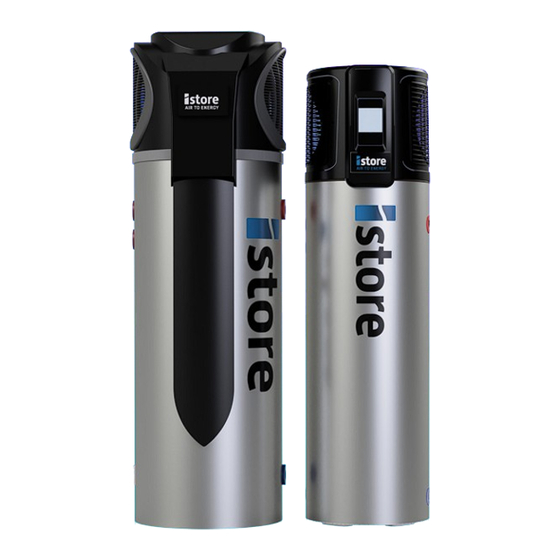
I would like to screen my Istore 180 from view from one side only. Because of the position of the Istore, the screen would have to be fitted approx 250mm from the left side of the Istore. The screen would be the same depth and height as the Istore and would be perforated, as per the example image attached. The Istore is outside the house. Would it be ok to go ahead with a screen of this type or would it have an adverse effect on the performance of the Istore?

User image 686e20fc783c4

Summary of Contents for Istore PASHW008-180LD-NM

  • Page 1 PASHW008-180LD-NM, PASHW015-270LD, PASHW015-270LD-FL02 180L/270L INSTALLATION MANUAL iStore - Installation Manual - 270L/R290-v1.4 June2024 iStore - Installation Manual - 270L/R290-v1.3 May 2024...
  • Page 2 The Installer is to explain to the end user how to operate and maintain the unit in • accordance to this Installation Manual. iStore will not be held responsible for any damages or injuries caused by the incorrect • installation of this hot water system.
  • Page 3: Table Of Contents

    4.4) Mode selection 4.4) Setting the time 4.5) Timer setting p24/25/26 4.6) Cancelling timer 4.7) Vacation mode 4.8) Electric booster setting 5. Maintenance and repair 5.1) Typical Failure and Solutions 7. Troubleshooting iStore - Installation Manual - V2 - June 2024...
  • Page 4: Safety Precautions

    Compulsory - The listed action shall be followed Please pay attention to what is indicated INSTALLATION WARNING The iStore must be installed by qualified persons. Improper installation could result in electrical shock /water leakage or fire Before installation, check the unit for any damage Please ensure that the unit and power connections have a good earth.
  • Page 5 Installer or iStore directly Shut Off Power RE-LOCATION OR REPAIR If the iStore needs to be relocated or installed again, only use an authorised dealer or qualified persons Important It is prohibited for the end user to repair the unit themselves, unless qualified.
  • Page 6 GENERAL SAFETY INSTRUCTIONS The installation of the iStore solar hot water systems requires the expertise of a licensed professional. The installation process must adhere to the guidelines set forth in the National Plumbing code (AS/NZS 3500.4), Australian Electrical Wiring Rules (AS/NZS 3000), as well as all applicable local plumbing and electrical regulations.
  • Page 7: Pre-Installation Checklist

    Adequate overload protection and a residual current device of appropriate size should be installed. • If the iStore is rated below 10amps and is fitted with a 3 pin plug the electrician may remove the plug if required without effecting the warranty.
  • Page 8: Installation

    NOTE – Restricting the air flow on the exhaust side of the iStore can severely effect the performance and longevity of the istore. If the space is restricted then the iStore must be rotated as close to 45 degrees to the exhaust wall.
  • Page 9 1194 HW outlet HW condensation PTR Valve Hot water condensation (mm) Height to PTR Valve (mm) Anode Height to Anode 1094 Net weight (Kg) Top View Cold water inlet 270L iStore iStore - Installation Manual - V2 - June 2024...
  • Page 10: Dimensions P9/10

    1240 HW outlet Hot water condensation (mm) HW condensation PTR Valve Height to PTR Valve (mm) Anode Height to Anode 1140 Net weight (Kg) Top View Cold water inlet 180L iStore iStore - Installation Manual - V2 - June 2024...
  • Page 11 Rotary Rotary Rated outlet water Temp. Air volume Noise - Anechoic Chamber dB(A) 46 @1m 48 @ 1m Water inlet/outlet size inch Auxilary Electric Booster Rated Power Input Rated Current Input iStore - Installation Manual - V2 - June 2024...
  • Page 12 Permissible inclination angle of 60 degree is not exceeded. If transport in an in- clined position cannot be avoided, the unit should be placed into operation one hour after it has been moved into final position. CAUTION: TOP HEAVY. HIGH CENTRE 60º OF GRAVITY iStore - Installation Manual - V2 - June 2024...
  • Page 13 CHV PLV WATER SUPPLY IV (TYP) Multi System cold and hot supplies at opposite ends HOT WATER RETURN HOT WATER SUPPLY TO BUILDING IV (TYP) CHV PLV WATER SUPPLY IV (TYP) iStore - Installation Manual - V2 - June 2024...
  • Page 14 Pressure Temperature Relief Valve (PTR An 850kPa, 10kW and 99°C PTR valve is used on the iStore water tank, which is located on the side of the water tank and is essential for its safe operation. The PTR valve is designed to allow 3-5% of total tank volume to discharge during heating to allow for hot water expansion.
  • Page 15 3. Only after bled via the house tap should the PTR Valve (Pressure relief valve) be activated to ensure system is fully bled of all air. 4. Once the system is fully pressurised with water, thoroughly check all fittings, connections and pipework for water leaks. iStore - Installation Manual - V2 - June 2024...
  • Page 16 Check that all power connections are secure before switching on Trial Running Switch on the unit from the LCD In the case of any unusual noise, switch the power off and consult your iStore technician The parameters have been preset to a temperature of 60 degrees iStore Basics How it works 1.
  • Page 17: Safety Features

    Safety Features and general information Smart Screen Lock Important – If the iStore display does not detect activity for 60 seconds the screen will enter sleep mode which requires a simple palm press AND RELEASE on the LCD to reactivate it.
  • Page 18: Functionality

    Set the clock or the timer. Electric Turn on/off the electric booster. Booster Move up or increase parameter values. Move down or decrease parameter values. Down Find the LCD function video tutorials on our website. https://heatpumps.istore.net.au/lcd-setup-tutorials/ iStore - Installation Manual - V2 - June 2024...
  • Page 19 Lock Shows that the keyboard is locked. The general operation of the iStore is that when the bottom of the tank temperature, the top left number, falls more than 11 degrees below the target temperature, the iStore will commence heating and heat the full tank to the target temperature.
  • Page 20 4.2 The LCD Lock/Unlock function Important – If the iStore display does not detect activity for 60 seconds the screen will enter sleep mode which requires a simple palm press AND RELEASE on the LCD to reactivate it.
  • Page 21 OFF. Eco Mode Press , hold for 0.5s and release. Upper region tank temperature Lower region tank temperature Find the LCD function video tutorials on our website. https://heatpumps.istore.net.au/lcd-setup-tutorials/ iStore - Installation Manual - V2 - June 2024...
  • Page 22: Mode Selection P22

    Vacation Mode For use when away on holidays, enter the date of your return and the smart iStore will reduce usage to the government mandated weekly disinfect cycle only. Vacation mode reduces energy consumption while you are away.
  • Page 23 Functionality Press to select the mode Top tank temperature Hybrid Heating Mode Time Eco Heating Mode PRESS Intelligent Mode Date Vacation Mode PRESS PRESS iStore - Installation Manual - V2 - June 2024...
  • Page 24 C is the default setting for optimal hot water delivery. Top tank temperature Target temperature Time Press once to check the target temperature. Press to confirm cancel, then return to the previous interface. iStore - Installation Manual - V2 - June 2024...
  • Page 25 Tap the up or down arrows to adjust the hour Tap the clock button again and the minutes will flash mm:dd Tap the up or down arrows to adjust the minutes iStore - Installation Manual - V2 - June 2024...
  • Page 26 Tap the up or down arrows adjust the month Tap the clock button again and the day will flash Tap the up or down arrows to adjust the day iStore - Installation Manual - V2 - June 2024...
  • Page 27 Tap the up or down arrows adjust the year Tap the clock button to complete the timer setting Find the LCD function video tutorials on our website. https://heatpumps.istore.net.au/lcd-setup-tutorials/ iStore - Installation Manual - V2 - June 2024...
  • Page 28: Timer Setting P24/25/26

    4.7 Timer Setting (Eco Mode) NOTE: A timer is not mandatory for the iStore operation. Factors such as household demand, time of use, individual supplier peak and offpeak electricity rates, solar panel Feed In Tarrif rates all may influence what heating schedule best suits a household...
  • Page 29 OFF 1 minutes will flash Tap the up or down arrows adjust the OFF 1 minutes Ensure that the OFF 1 minutes are different to the ON 1 minutes iStore - Installation Manual - V2 - June 2024...
  • Page 30 ON and then OFF. When the timer ON time is reached it activates the display and will show the temperatures etc, at the end of the timer window the display will return to the OFF state. Find the LCD function video tutorials on our website. https://heatpumps.istore.net.au/lcd-setup-tutorials/ iStore - Installation Manual - V2 - June 2024...
  • Page 31 When the LCD returns to the default state the display will indicate whether 1 or 2 timers are set just above the digital clock, e.g. Timer settings 1 timer 2 timer Find the LCD function video tutorials on our website. https://heatpumps.istore.net.au/lcd-setup-tutorials/ iStore - Installation Manual - V2 - June 2024...
  • Page 32 NOTE: Do not set the second timer to 00:00 ON and 00:00 OFF as the unit will commence heating at midnight every second night. To leave the second time off simply allow the timer setting to timeout after setting the first timer end time. iStore - Installation Manual - V2 - June 2024...
  • Page 33 The ON, 1 and timer 1 will flash Tap the power button to cancel the timer operation. Find the LCD function video tutorials on our website. https://heatpumps.istore.net.au/lcd-setup-tutorials/ iStore - Installation Manual - V2 - June 2024...
  • Page 34: Vacation Mode P29

    Functionality 4.7 Vacation Mode (Setting the date of your return from your vacation) In the example below the date when the istore is visited is August 20, i.e. 08:20, the return date is then set to September 16, i.e. 09:16 NOTE - the system clock must be set prior to starting this procedure.
  • Page 35 Tap the clock button again, ON and the vacation end day will flash Tap the up or down arrows to set the vacation end day iStore - Installation Manual - V2 - June 2024...
  • Page 36 NOTE THE DATE DISPLAYED IS TODAYS DATE The iStore will remain OFF until the Vacation return date. Find the LCD function video tutorials on our website. https://heatpumps.istore.net.au/lcd-setup-tutorials/ iStore - Installation Manual - V2 - June 2024...
  • Page 37: Electric Booster Setting P30

    The Federal Government mandates a thermostat range of 12 degrees for the iStore, for the electric booster this is measured in the upper region of the tank displayed in the centre of the LCD. The heat cycle will not commence until the water in the upper region falls 12 degrees below the target temperature.
  • Page 38: Maintenance And Repair

    How to Drain the Water Heater Warning: Before commencing this procedure, ensure that building occupants are notified to stay clear of the iStore system components and building perimeter as steam or hot water may be discharged from pipes or components 1.
  • Page 39 The thermal cut-out operation temperature is 85º Celsius. Loosen the screws and open the cover Push the red button Earthing (Applicable where 3 pin plug is either not fitted or removed) iStore - Installation Manual - V2 - June 2024...
  • Page 40: Troubleshooting

    Excessive Hot Water load Increase timer setting if in use. An 850kPa and 99°C PTR valve is used on the iStore water tank, which is located on the side Pressure Temperature of the water tank and is essential for its safe Relief Valve (PTR) / operation.
  • Page 41 2. This Warranty is effective for all iStore Hot Water Systems manufactured and installed after 1st October 2022. 3. If the customer has not paid in full for the iStore Hot Water System then this Warranty does not apply. 4. iStore Hot Water System and its components are covered by a warranty against defective factory parts or workmanship from the date the iStore Hot Water System is installed for the relevant period for such component as outlined in Table 1 - Warranty Periods.
  • Page 42 Hot Water System or any other matter related to the system or its operation. 19. The benefits conferred by this Warranty are in addition to all other rights and remedies in respect of the iStore Hot Water System, which the purchaser has under the Competition and Consumer Act 2010 and consumer protection legislation of the States and Territories.
  • Page 43 Component Warranty Table This warranty is effective for all iStore hot water systems manufactured and installed after 1st October 2022. WARRANTY PERIOD WARRANTY PERIOD COMPONENT (Parts Only) (Parts and Labour) iStore Glass Lined Tank 5 years 5 years Refrigeration 5 years...
  • Page 44 After Sales Service Guaranteed Thank you for joining iStore in our mission to lead the way to a sustainable energy future. __________________________________________________ _______________ Supplier Name: Installation Date: ________________________________________________ _________________ Supplier Address: Supplier Phone: _________________________________________________________________ ___________________________________________ System Model / Type:...

This manual is also suitable for:

Pashw015-270ldPashw015-270ld-fl02180l270l

Table of Contents