DELTA DORE 8000 TAP Master Installation Instructions Manual
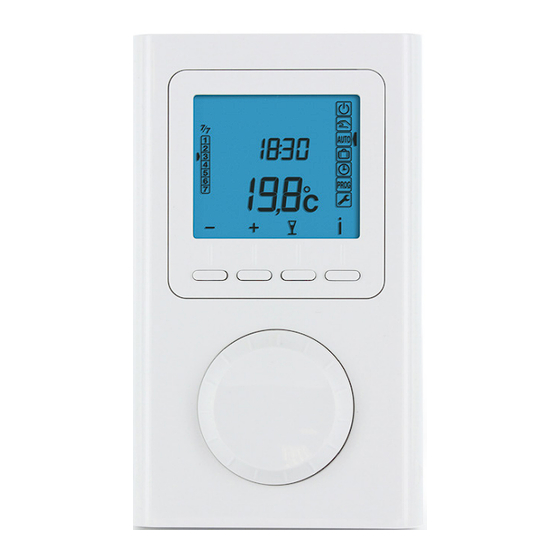
Wireless 8-zone programmer for delta 8000 system
Hide thumbs
Also See for 8000 TAP Master:
- Instructions for use manual (10 pages) ,
- Installation instructions manual (11 pages)

Related Manuals for DELTA DORE 8000 TAP Master


Summary of Contents for DELTA DORE 8000 TAP Master
- Page 1 Delta 8000 TAP Master Wireless 8-zone programmer for Delta 8000 system Installation instructions...
-
Page 2: Table Of Contents
Contents 1/ Installation ..............4 2/ Association of the programmer with the wireless gateway ........6 3/ Programmer configuration ........8 4/ Setting the clock ........... 11 5/ Locking down settings ......... 12 6/ Return to initial settings ........13 6.1 Initialise the programmer settings ......13 6.2 Deleting the association of the thermostat with the wireless gateway .......14 7/ Technical characteristics ........ -
Page 3: 1/ Installation
1/ Installation The unit must be installed at a height where the screen can be read easily and the buttons accessed for all the use, programming or installation operations (about 1.50 m). ❶ Separate the front panel by pushing the pin using a screwdriver. ❷... -
Page 4: 2/ Association Of The Programmer With The Wireless Gateway
2/ Association of the programmer with the wireless gateway ❹ On the programmer: Turn the selector knob All thermostats must be associated prior to associating the , then press and hold the 2nd button programmer. from the left for 3 seconds and release. ❶... -
Page 5: 3/ Programmer Configuration
3/ Programmer configuration Temperature setting display Temperature displayed (default selection) ❶ Turn the selector knob to (after activating the Display of the measured thermostat) room temperature. ❷ Press OK. This menu is only pro- Not flashing posed if the door/window ❸ The screen displays CF02. magnetic contact function is activated on a thermo- Flashes in case of detection... -
Page 6: 4/ Setting The Clock
4/ Setting the clock ❶ Turn the selector knob to ❷ Set the year with + and - and confirm with OK. ❸ Set the day and month with + and - and confirm with OK. ❹ Set the hour value with + and - and confirm with OK. ❺... -
Page 7: 5/ Locking Down Settings
5/ Locking down settings 6/ Return to initial settings 6.1 Initialise the programmer settings From the modes. This menu restores the system to factory settings. Press and hold the ' ' button for 5 seconds. symbol appears. In Lock mode, only the Information button ( i ) is active. ❶... -
Page 8: Deleting The Association Of The Thermostat With The Wireless Gateway
6/ Return to initial settings 7/ Technical characteristics 6.2 Deleting the association of the • Power supplied by 2x 1.5V batteries, type LR03/AAA (provided), thermostat with the wireless gateway or Lithium 1.5 V, LR03 (AAA), 1200 mAh, • Type 1 automatic action ❶... - Page 9 www.deltadore.com...
Need help?
Do you have a question about the 8000 TAP Master and is the answer not in the manual?
Questions and answers