Table of Contents
Advertisement
Original Version
Translation of the original instructions
Version originale
Traduction des instructions d'origine
Versión original
Traducción del manual original
Original Version
Translation of the original instructions
To avoid the wrong operation, please keep the manual available and read the manual
completely before operating the machine.
Pour éviter toute fausse manœuvre, veuillez garder le manuel à portée de main et le lire
entièrement avant d'utiliser la machine.
Para evitar un funcionamiento incorrecto, tenga el manual a la mano y léalo por completo
antes de utilizar la máquina.
Ha alltid manualen till hands och läs igenom hela manualen innan maskinen börjar använ-
das.
(English, French, Spanish) 8:30 AM – 5:30 PM EST Monday – Friday
(Anglais, Français, Espagnol) De 8 h 30 à 17 h 30 HE, du lundi au vendredi
(Teléfono no válido en México, por favor visite tsicustomerservice.com)
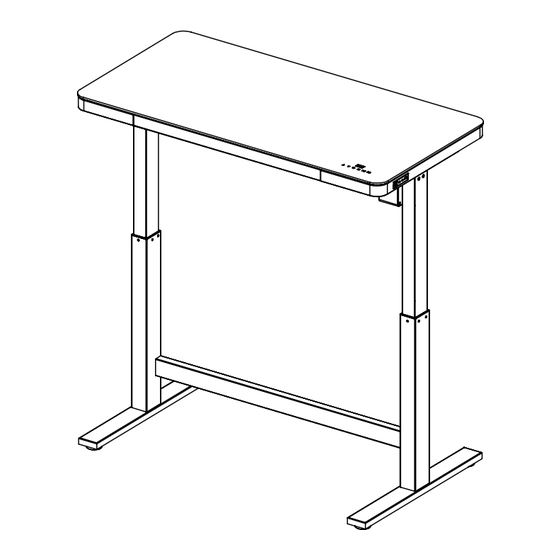
ADJUSTABLE HEIGHT DESK
BUREAU À HAUTEUR RÉGLABLE
ESCRITORIO DE ALTURA AJUSTABLE
JUSTERBART HÖJ- OCH SÄNKBART SKRIVBORD
ODP720-D908
tsicustomerservice.com
1-866-661-1218
Countries serviced: USA, Canada, Mexico, UK
Les pays desservis : États-Unis, Canada, Mexique, Royaume-Uni
Países de servicio: E.U.A., Canadá, México, y el Reino Unido
(Inglés, Francés, Español) 8:30 AM – 5:30 PM EST Lunes – Viernes
Betjäningsländer: USA, Kanada, Mexiko, Storbritannien
(engelska, franska, spanska) 8.30–17.30 EST måndag–fredag
ITM. / ART.499456
Advertisement
Table of Contents

Related Manuals for Tresanti ODP720-D908


Summary of Contents for Tresanti ODP720-D908
- Page 1 BUREAU À HAUTEUR RÉGLABLE ESCRITORIO DE ALTURA AJUSTABLE JUSTERBART HÖJ- OCH SÄNKBART SKRIVBORD ODP720-D908 To avoid the wrong operation, please keep the manual available and read the manual completely before operating the machine. Pour éviter toute fausse manœuvre, veuillez garder le manuel à portée de main et le lire entièrement avant d’utiliser la machine.
- Page 2 REGISTER YOUR NEW PURCHASE online! INSCRIRE VOTRE NOUVEL ACHAT en ligne! REGISTRE SU NUEVA COMPRA en línea! REISTRERA DITT NYA KÖP på webben! Thank you for purchasing our product. Please take a moment to visit tsicustomerservice.com to register your new purchase: Merci d’avoir acheté...
- Page 3 PRODUCT DETAILS AND NOTES DÉTAILS ET NOTES DU PRODUIT/DETALLES DEL PRODUCTO Y NOTAS/ PRODUKTINFORMATION OCH ANTECKNINGAR Place of purchase/Lieu de l’achat/Lugar de compra/Inköpsplats: Date of purchase/Date de l’achat/Fecha de compra/Inköpsdatum: Model #/No de modèle/Número de modelo/Modellnr: Notes/Remarque/Notas/Anteckningar: IMPORTANT: Retain this manual for future reference. Read Carefully. IMPORTANT: À...
-
Page 4: Important Instructions
IMPORTANT INSTRUCTIONS INSTRUCCIONES VIKTIGA INSTRUCTIONS IMPORTANTES IMPORTANTES ANVISNINGAR Lors de l’utilisation des Al utilizar los aparatos When using electrical Följande grundläggande appliances, basic appareils électriques, les eléctricos, debe tomar en försiktighetsåtgärder ska precautions including the précautions élémentaires, cuenta las precauciones alltid vidtas vid användning following should always be notamment celles suivantes... - Page 5 This appliance can be L’appareil peut être utilisé Este producto puede ser Den här produkten får used by children aged par des enfants de 8 ans et utilizado por niños a partir användas av barn från 8 from 8 years and above plus et par des personnes de los 8 años, personas års ålder och uppåt samt...
- Page 6 PRODUCT SPECIFICATIONS SPÉCIFICATIONS DU PRODUIT ESPECIFICACIONES DEL PRODUCTO PRODUKTSPECIFIKATIONER Input Voltage/ Tension d’entrée / Voltaje de entrada / Inmatningsspänning 100-240V Output Voltage / Tension de sortie / Voltaje de salida / Utmatningsspänning 24V DC 2.1A / 24 V växelström 2,1 A USB Output / Sortie USB / Salida de USB / USB-utgång 5V/2.4 A / 5 V/2,4 A USB-C Output/ Port de sortie de USB-C / Salida USB-C / USB-C-utgång...
- Page 7 SYMBOL/ SYMBOLE/ SÍMBOLO / SYMBOL RECYCLING This product bears the selective sorting symbol for Waste electrical and electronic equipment (WEEE). This means that this product must be handled pursuant to European directive 2012/19/EU in order to be recycled or dismantled to minimize its impact on the environment. User has the choice to give his product to a competent recycling organization or to the retailer when he buys an new electrical or electronic equipment.
-
Page 8: Safety Information
SAFETY INFORMATION INFORMACIÓN DE SÄKERHETS INFORMATION DE SÉCURITÉ SEGURIDAD INFORMATION Please read and Assurez-vous de lire et de Lea y comprenda Läs och se till att du har understand this entire comprendre l’intégralité completamente este förstått hela denna manual manual before attempting du présent manuel avant manual antes de intentar innan du försöker montera,... - Page 9 HARDWARE / QUINCAILLERIE / HERRAJE / HÅRDVARA [x4] [x1] [x9+1] [x8+1] 6.3x22mm 8x23mm PH-HEXKEYBE4MM P10556D908-AA P10556D908-BB P720D913-WM (white / blanc / blanco / Vitt) (white/ blanc / blanco / Vitt) Ball End Hex Wrench Clé hexagonale à bout P10556D913-AA P10556D913-BB sphérique (black / noir / negro / Svart) (black/ noir / negro / Svart)
- Page 10 MAXIMUM LOAD 45.4 kg / 100 lbs CHARGE MAXIMALE DE CARGA MÁXIMA MAXBELASTNING 45,4 kg/100 lb MAXIMUM LOAD 6.9 kg / 15.2 lbs CHARGE MAXIMALE DE CARGA MÁXIMA MAXBELASTNING 6,9 kg/15,2 lb ODP720 UKREV1.0...
- Page 11 ODP720 ODP720 UKREV1.0...
- Page 12 Step 1 / Étape 1 / Paso 1 / Steg 1 Note: Lubrication on the inner leg may be present; this is normal to protect the internal moving parts. If excessive lubricant is present on the legs it can be safely wiped away with a soft cloth. Note: Du lubrifiant peut être présent sur le coté...
- Page 13 Step 2 / Étape 2 / Paso 2 / Steg 2 [x8] ODP720 UKREV1.0...
- Page 14 Step 3 / Étape 3 / Paso 3 / Steg 3 To prevent stress and/or damage to the connection pins, ensure all cords are plugged in straight, and not at an angle. Pour éviter les contraintes et / ou d’endommager les broches de connexion, s’assurer de brancher dans l’axe et de ne pas former d’angle.
- Page 15 Step 4 / Étape 4 / Paso 4 / Steg 4 ODP720 UKREV1.0...
- Page 16 Step 5 / Étape 5 / Paso 5 / Steg 5 With help, turn the desk rightside up (as shown) and place in desired location. Avec de l’aide, tournez le bureau à l’endroit (comme indiqué) et placez-le à l’endroit souhaité. Con ayuda, gire el escritorio hacia arriba (como se muestra) y colóquelo en la ubicación deseada.
- Page 17 Step 6 / Étape 6 / Paso 6 / Steg 6 Peel away backings and attach hooks via adhesive pads directly onto the glass surface. As the hooks are intended to simplify cable management, select and attach hooks according to your unique setup so that you may then route cords (from laptops, monitors, or other devices) discreetly through these hooks.
-
Page 18: Operation
OPERATION 1 USB Port (5V/2.4A) 2 USB-C Ports (20V/1A for each port) Lock Button Control Panel Lock Button: NOTE: It is strongly recommended to use this feature to avoid any unexpected/unintentional movement. 1. Press this button to lock the touch-screen. This will prevent accidentally engaging the controls after the desired height has been set. -
Page 19: Opération
OPÉRATION 1 port USB (5V / 2,4A) 2 ports USB-C (20 V/1 A par port) Bouton de verrouillage Panneau de commande Bouton de verrouillage automatique: REMARQUE : Il est fortement recommandé d’utiliser cette fonction pour éviter tout mouvement inattendu ou involontaire. 1. -
Page 20: Operación
OPERACIÓN 1 puerto USB (5V/2.4A, ) 2 Puertos USB-C (20V/1A para cada puerto) Botón de bloqueo Panel de control Botón de bloqueo automático: NOTA: Es altamente recomendable utilizar esta función para evitar cualquier movimiento inesperado/ no intencionado. 1. Presione este botón para bloquear la pantalla táctil. Esto evitará activar accidentalmente los con- troles después de establecida la altura deseada. - Page 21 ANVÄNDNING 1 USB-portar (5V/2,4 A per port) 2 USB-C-portar (20 V/1 A per port) Låsknapp Manöverpanel Låsknapp: OBS: Vi rekommenderar att den här funktionen används för att förhindra oväntade eller ofrivilliga rörelser. 1. Tryck på denna knapp för att låsa pekskärmen. Det förhindrar att du i misstag kommer åt reglagen när önskad höjd har ställts in.
- Page 22 TROUBLESHOOTING DÉPANNAGE / SOLUCIÓN DE PROBLEMAS / FELSÖKNING PROBLEM ROOT CAUSE / ORIGEN DE LA CORRECTIVE ACTION / MEDIDAS PROBLEMA / PROBLÈME /PROBLEM CAUSA / CAUSE PROBABLE / GRUNDORSAK CORRECTIVAS / ACTION CORRECTIVE / ÅTGÄRD Activate the control lock by pushing the button Control lock is not engaged.
- Page 23 The motor has overheated. Unplug the power cord and re-plug after 5 minutes. Display indicates E1 Débrancher le cordon d’alimentation et le réinsérer Le moteur a surchauffé. après 5 minutes. Affichage signale E1 Débrancher le cordon d’alimentation et le réinsérer El motor se ha sobrecalentado.
- Page 24 Ensure that the power adapter is the same as supplied with the desk according to the specifications described on page 6. S’assurer que l’adaptateur de puissance est le même que celui fourni par la table selon les spécifications décrites à la page 6. Display indicates E4 Motor voltage is too low.
-
Page 25: Care & Maintenance
CARE / SOIN / CUIDADO / SKÖTSEL/UNDERHÅLL MAINTENANCE ENTRETIEN MANTENIMIENTO Care and Maintenance Soin / Entretien Cuidado /Mantenimiento Skötsel och underhåll • Use un paño suave y limpio • Use a soft, clean cloth • Lors de l’époussetage, • Använd en mjuk och ren that will not scratch the utilisez un chiffon doux et que no raye la superficie... - Page 26 REPLACEMENT PARTS ODP720 PIÈCES DE REMPLACEMENT ODP720 PARTES DE REPUESTO ODP720 ERSÄTTNINGSDELAR ODP720 [x1] [x1] [x1] H555-MO-01 P720D908CP (white / blanc / blanco / Vit) (white / blanc / blanco / Vit) H555-MO-01B P720D913CP Y18-C96-PO (black / noir / negro / Svart) (black / noir / negro / Svart) [x4] [x4]...
- Page 27 NOTES REMARQUES NOTAS ANTECKNINGAR ODP720 UKREV1.0...
- Page 28 Costco Wholesale UK Ltd / Costco Online UK Ltd Hartspring Lane Watford, Herts WD25 8JS United Kingdom 01923 213113 www.costco.co.uk Costco Wholesale Iceland ehf. Kauptún 3-7, 210 Gardabaer Iceland www.costco.is Costco Wholesale Sweden AB Box 614 114 11 Stockholm Sweden www.costco.se tsicustomerservice.com 1-866-661-1218...
Need help?
Do you have a question about the ODP720-D908 and is the answer not in the manual?
Questions and answers
My desk is stuck about 1/3 of the way up. The reader on the desk thinks it is at the bottom. Is there any way to reset the desk? The image attached shows the desk at “bottom” it is at 33 inches height.
To reset the Tresanti ODP720-D908 desk, press and hold the reset button while simultaneously plugging in the power cord until the control panel lights up.
This answer is automatically generated
@Mr. Anderson, where is the reset button, please.
This desk slowly lowers after raising it to a particular height. I have reset it multiple times and even switched to a different desk and the same problem occurs. Is there a troubleshooting process I could exercise to resolve this issue?
Ensure the desk is properly leveled by adjusting the floor levelers. If the issue persists, reset the desk to default settings by pressing and holding the reset button while simultaneously plugging in the power cord until the control panel lights up.
This answer is automatically generated
All plugged in. Under the table the power light is blinking but no light on desk top. Tried doind the reset process still nothing.
My table isn't moving at all, no matter which buttons I press. How do I fix it?
Can casters or wheels be added to the desk?
What is a haller wire?
I purchased this desk and the table stand was missing. Can I get the cost to get a replacement stand for this desk?