Table of Contents
Advertisement
Quick Links
Advertisement
Table of Contents

Related Manuals for NEFF V6540X0EU


Summary of Contents for NEFF V6540X0EU
- Page 1 Installation and operating instructions WASHER-DRYER...
-
Page 2: Table Of Contents
Please read the Installation and operating instructions and all the other information supplied and handle the appliance accordingly. Keep all documents in a safe place for future reference, or to pass on to the next owner. For further information and a selection of our products, visit our website:... -
Page 3: General Safety Information
– Remove the transport safety bolts and keep them in a safe place. time – Do not operate the washer-dryer if it has any visible damage. If you are in any doubt, please consult our after-sales service or your retailer. -
Page 4: Operating Instructions Environmental Protection/Economy Tips
Environmental protection/economy tips – Separate out the various waste materials of the packaging and take them to the nearest collection point. – Always fill the washer-dryer with the maximum load for the relevant programme. – Wash normally soiled laundry without a prewash. -
Page 5: Your New Washer-Dryer
A safety device prevents the door from being opened during operation. Door Before opening Make sure that there is no water in the drum and that the drum is not moving. Emergency release In the event of a power cut, the door can be released mechanically... -
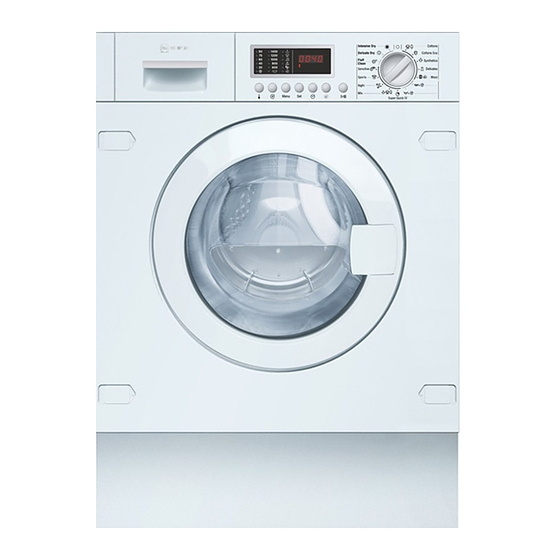
Page 6: Control Panel
Control panel Display panel Shows the settings that have been selected (e.g. spin speed, drying time), the progress of the current programme and the programme status. Programme progress Indicator lamp Pre-wash, Main wash, Rinse, Indicates the settings that have been Final spin, Drying. -
Page 7: Before Washing For The First Time
Before washing for the first time The washer-dryer was tested before leaving the factory. To remove any water that may be left over from the test, do not load any laundry the first time that you run a wash programme. - Page 8 Unfold the laundry and place it loosely in the drum. Load a mixture of small and large items. Observe the maximum drum loads, Programme table –>...
-
Page 9: Detergents And Care Products
Pull out the detergent drawer as far as the stop. Press on the zone labelled PUSH and take out the detergent drawer. Pull the insert in compartment II forwards as far as the stop and push it down. - Page 10 Select (Pre-wash) –> page 13. Add 1/4 of the recommended amount of detergent to compartment I of the detergent drawer and 3/4 of the detergent to compartment II. Only use liquid detergent for the main wash cycle with no prewash.
-
Page 11: Programmes
Synthetics (Easy-care) Washing programme for less hard-wearing fabrics made from cotton, linen, synthetic fibres or blended fabrics. It is advisable to sort the laundry by colour. 8 Delicates (Delicates/Silk) Gentle programme for delicate, washable fabrics, e.g. silk, satin, synthetics or blended fabrics (e.g. -
Page 12: Washing Programmes
' + B An additional rinse cycle with a final spin. If the laundry is to be removed dripping wet, set the Spin speed to $ (Rinse hold) before Programme start –> page 13. -
Page 13: Washing And Drying Options
Press the Set button to switch the option on/off (indicator lamp lights up/does not light up). If you press and hold the Menu ~ button, all the options scroll through. Options (symbols on the display panel) Prewash at 35 °C. Suitable for heavily soiled laundry. - Page 14 – To deactivate, press the 5 (Drying) button repeatedly until shown on the display. Drying options (symbols on the display panel) 0 Time-controlled The drying time can be set to between 2:40 and 0:00 by repeatedly pressing the drying 5 (Drying) button. P Iron-damp The residual moisture in the washing is increased.
-
Page 15: Washing And Drying
Press the 5 (Drying) button to set the drying options –> page 14 – If you do not make a selection, the e (Cupboard-dry) option is set. Load the laundry –> page 8. – Observe the maximum load, Programme table –>... - Page 16 Turn the programme selector to $ (Off). Remove the washing from the drum. Leave the door open to allow the inside of the washer-dryer to dry out. Turn off the tap (not necessary on models with Aqua-Stop).
-
Page 17: Cleaning And Care
– Observe the manufacturer's instructions regarding use and dosage. – After descaling and removing rust from the drum, run the ' + B programme several times to remove any remaining acid. If any remaining metal objects (e.g. coins, paper clips, needles, nails) have caused rust spots: –... -
Page 18: Drain Pump
– Make sure that the impeller can turn freely. Replace the pump cover and screw firmly in place. Place the kick panel in the 4 clip-in slots and secure to the housing using the lock pins. If no water runs into the washer-dryer, or only an insufficient amount, you... -
Page 19: What To Do If
Maximum or minimum drying load not taken into account. HI/End or LO/End flash alternately in the display. See the fault Drying result not satisfactory. Other fault codes are only for use by the after-sales service. Make a note of the fault code to inform the after- sales service. - Page 20 The spin speed together. properly. is automatically reduced for safety reasons. Uncleaned areas worse than expected. Select a suitable programme, e.g. a Washing results not programme with Pre-wash. satisfactory. Pretreat stains if necessary. Too little or incorrect detergent used.
- Page 21 If you cannot correct a fault yourself (switching on/off) or a repair is required: – Turn the programme selector to $ (Off) and unplug the mains plug from the socket. – Turn off the tap and call the after-sales service –> page 22.
-
Page 22: After-Sales Service
(FD) of the appliance. Enter the number of your appliance here. You can find this information on the rating plate in the frame of the door. Please help us to avoid unnecessary call-outs by quoting the product and production numbers. -
Page 23: Installation Instructions
The washer-dryer is very heavy. Take care when lifting it. Safety information Do not operate the washer-dryer if it has any visible damage. If you are in any doubt, please consult our after-sales service or your retailer. Do not install the washer-dryer outdoors or in areas exposed to frost. - Page 24 Positioning installation recess. – Can be ordered from the after-sales service, spare part no. 66 1827. – Moisten the slide sheets with a mixture of water and washing-up liquid before sliding the washer-dryer into place. Do not use grease and/or...
-
Page 25: Hose And Cable Lengths
– All four appliance feet must stand firmly on the ground. – The washer-dryer must not wobble. – Check the levelness of the washer-dryer with a spirit level and correct if necessary. – The washer-dryer must not rest against the sides of the installation recess. -
Page 26: Water Connection
The water supply and Drain hoses can be routed to the left of right, depending on installation conditions. Do not use a used inlet hose. Only use the inlet hose supplied or one which was purchased from an authorised specialist retailer. - Page 27 Only pull the mains plug out by the plug itself. Once the washer-dryer has been installed in a kitchen unit, it can be Fitting the door hinges concealed with a door. If you wish to do this, you must fit the hinges supplied to the washer-dryer. to the washer-dryer...
-
Page 28: Table Of Programmes
Table of programmes Observe the information on care labels, fabric type and load quantity. In order to select the most suitable programme for the laundry, observe the information on the labels that are attached to most items. Type of laundry... -
Page 29: Appendix Consumption Rates
**Programme setting for testing in accordance with valid standard EN60456. Note on comparative tests: For testing the test programmes, wash the specified load using the maximum spin speed. As a short programme for coloureds, select the Mix =D 40 °C programme with the maximum spin speed. -
Page 30: Index
Care information Descaling ......... 18 Easy-iron -Drying .........8 Detergent ........9 -Display panel ......6 -Washing ......7 -Liquid detergent insert . 9, 10 Electrical connection ....27 Liquid detergent insert ..10 Care product .......9 Emergency release ....21 Childproof lock ......16 Detergent drawer End of the programme .....16... - Page 31 Washing programmes ..11, 12 Levelling ........25 Washing temperature ....13 -Washer-dryer ....24 Water ........29 Liquid detergent insert ....9 Water drainage ......26 Safety information ... 3, 17, 19, 23 Water supply ......26 Set ..........13 Water supply hose -Button ........ 6 -Cleaning ......18 Main wash Signal -Display panel ......6...
- Page 32 Constructa-Neff Vertriebs-GmbH Carl-Wery-Straße 34 D-81739 München v6540x0eu 12.2010 9000529496...
Need help?
Do you have a question about the V6540X0EU and is the answer not in the manual?
Questions and answers