Advertisement
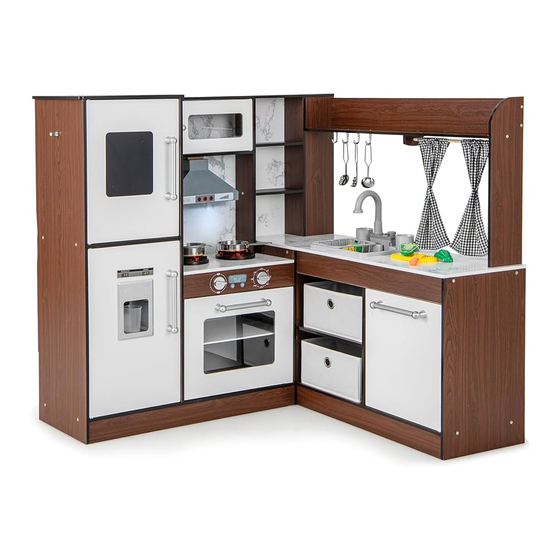
Kids Play Kitchen
Kinder Spielküche
Jeu de Cuisine pour Enfants
Juego de Cocina Infantil
Cucina Giocattolo per Bambini
Kuchnia dla dzieci
TP10167
USA office: Fontana
AUS office: Truganina
GBR office: Ipswich
ITA office: Milano
POL office: Gdańsk
DEU office: FDS GmbH, Neuer Höltigbaum 36, 22143 Hamburg, Deutschland
FRA office: Saint Vigor d'Ymonville
THIS INSTRUCTION BOOKLET CONTAINS IMPORTANT SAFETY INFORMATION. PLEASE READ AND KEEP FOR FUTURE REFERENCE.
Advertisement
Table of Contents

Related Manuals for Costway TP10167


Summary of Contents for Costway TP10167
- Page 1 Kids Play Kitchen Kinder Spielküche Jeu de Cuisine pour Enfants Juego de Cocina Infantil Cucina Giocattolo per Bambini Kuchnia dla dzieci TP10167 USA office: Fontana AUS office: Truganina GBR office: Ipswich ITA office: Milano POL office: Gdańsk DEU office: FDS GmbH, Neuer Höltigbaum 36, 22143 Hamburg, Deutschland FRA office: Saint Vigor d'Ymonville THIS INSTRUCTION BOOKLET CONTAINS IMPORTANT SAFETY INFORMATION.
-
Page 2: Before You Start
Before You Start Bevor Sie beginnen Please read all instructions carefully and keep it for future reference. Bitte sorgfältig lesen und zum späteren Nachschlagen aufbewahren. General Security Warning Allgemeine Sicherheitswarnung Caution: Children should use this product under the parental supervision. Vorsicht: Kinder sollten diesen Artikel unter elterlicher Aufsicht benutzen. -
Page 3: Avant De Commencer
Avant de Commencer Antes de Empezar Veuillez lire attentivement toutes les instructions et les conserver pour la référence ultérieure. Lea atentamente todas las instrucciones y consérvelas para futuras consultas. Avertissement de Sécurité Générale Advertencia de Seguridad General Atención: Los niños deben utilizar este producto bajo la supervisión de sus padres. Attention : Les enfants doivent utiliser ce produit sous la surveillance de leurs parents. -
Page 4: Prima Di Iniziare
Prima di Iniziare Zanim Zaczniesz Si prega di leggere attentamente tutte le istruzioni e conservarle per riferimento futuro. Przeczytaj uważnie wszystkie instrukcje i zachowaj je na przyszłość. Avvertenza di sicurezza generale Ogólne ostrzeżenia dotyczące bezpieczeństwa Attenzione: I bambini devono usare questo prodotto sotto la supervisione dei genitori. Uwaga: Dzieci moga używać... - Page 6 4x35mm 4x16mm 3x8mm 4x8mm 3x8mm 5x30mm 44 X1...
- Page 7 3x16mm...
- Page 8 ATTENTION: ATTENTION : A.Use Phillips screwdriver to open the lid of cooking bench,put a pair of AAA A. Utiliser un tournevis Phillips pour ouvrir le couvercle de la table de cuisson, batteries in the groove, positive to positive, negative to negative, then close placer une paire de piles AAA dans la rainure, le positif au positif, le négatif au the lid of cooking bench,lock it with screwdriver.
- Page 9 ATTENZIONE: A.Utilizzare il cacciavite a croce per aprire il coperchio del banco di cottura, inserire un paio di batterie AAA nella scanalatura, positivo su positivo, negativo su negativo, quindi chiudere il coperchio del banco di cottura, bloccandolo con il cacciavite. B.Utilizzare il cacciavite a croce per aprire il coperchio del ventilatore da cucina, inserire un paio di batterie AAA nella scanalatura, positivo su positivo, negativo su negativo, quindi chiudere il coperchio del ventilatore da cucina,...
- Page 10 PL: Użyj śrub C, aby przymocować element P (zawias żeński) do panelu nr 29. Użyj śrub G, aby przymocować elementy I (plastikowe wsporniki) do panelu nr 29. Użyj śrub B, aby przymocować telefon do panelu nr 29. EN: Use B screw to lock L(burner) on No.24 panel. DE: Mit der Schraube B den L(Brenner) auf dem Paneel Nr.
- Page 11 ES: Inserte H (clavija de madera) en el lado derecho del panel nº 25, conéctelo al panel nº 26, utilice el tornillo A para bloquearlo en el panel nº 26. Inserte H (clavija de madera) en el lado derecho del panel nº 26, conéctelo al panel nº 24, utilice un tornillo A para bloquearlo en el panel nº...
- Page 12 EN: Use C screw to lock O(door pin) on No.7 panel. Put K(bar) between in J(plastic hooks), then use B screw to lock handle on No.7 panel. Use C screw to lock P(male hinge) on No.7 panel. DE: Mit der Schraube C den Türstift O am Paneel Nr. 7 befestigen.
- Page 13 ES: Utilice el tornillo C para bloquear O (pasador de puerta) EN: Use C screw to lock O(door pin) on No.35 panel. Put en el panel nº 21. Coloque K (barra) entre J (gancho de K(bar) between in J(plastic hooks), then use B screw to lock plástico), luego use el tornillo B para bloquear la manija en el handle on No.35 panel.
- Page 14 EN: Put F(ice-maker box) in the No.25 panel, then use D screw across E(metal cushion) to lock it on No.35 panel. DE: F(Eiswürfelbereiter) in die Platte Nr.25 einsetzen, dann mit Schraube D über E(Metallkissen) an Platte Nr.35 EN: Use C screw to lock O(door pin) on No.36 panel. Put befestigen.
- Page 15 ES: Utilice el tornillo C para bloquear O (pasador de puerta) EN: Use C screw to lock O(door pin) on No.27 panel. Use B en el panel nº 36. Coloque K (barra) entre J (ganchos de screw to lock No.42(round handle) on No.27 panel. Use C plástico), luego use el tornillo B para bloquear la manija en el screw to lock P(male hinge) on No.27 panel.
- Page 16 PL: Użyj śrub C, aby zamocować elementy O (zaczepy) na panelu nr 27. Użyj śrub B, aby przymocować element nr 42 (okrągły uchwyt) do panelu nr 27. Użyj śrub C, aby zamocować elementy P (zawiasy męskie) na panelu nr 27. Umieść...
- Page 17 EN: Use C screw to lock P(female hinge) on No.3 panel. Use ES: Inserte H (clavija de madera) en el lado izquierdo del A screw to lock No.3 panel on No.4 panel. Use A screw to panel nº 6, conéctelo al panel nº 1. Utilice un tornillo A para lock No.3 panel on No.2 panel.
- Page 18 EN: Insert H (wooden dowel) in No.5 panel left side, connect it to No.1 panel. Insert H(wooden dowels) in No.3 and 5 panel upside. DE: H (Holzdübel) in Platte Nr. 5 auf der linken Seite EN: Insert No.7 panel in No.2 panel via the door pin. einsetzen und mit Platte Nr.
- Page 19 EN: Insert H(wooden dowel) in No.5 and 6 panel right side, connect it to No.8 panel, use A screw to lock them on No.8 panel. EN: Insert No.9 and 10 panel in backside groove. DE: Setzen Sie H (Holzdübel) in die rechte Seite der Platten Nr.
- Page 20 EN: Use U screw to lock R(hooks)on No.14 panel. Insert H(wooden dowel) in No.17 panel, connect it to No.14 panel, then use A screw to lock it on No.14 panel. EN: Insert H(wooden dowels) in No.16 panel right side, DE: Verwenden Sie die U-Schraube, um die R(Haken) an connect it to No.12 panel, then use A screw to lock them on der Platte Nr.
- Page 21 EN: Turn over the counter-table, put Q(plastic buckle) in No.11 panel, then use C screw to lock it on No.11 panel. DE: Drehen Sie den Gegentresen um, setzen Sie Q EN: Use A screw to lock No.15 panel on No.14 panel. (Kunststoffschnalle) in die Platte Nr.
- Page 22 EN: Insert H(wooden dowel) in No.12 panel downside, connect EN: Insert H(wooden dowel) in No.13 panel downside, connect it to No.11 panel, then use A screw to lock it on No.11 panel. it to No.11 panel, then use A screw to lock it on No.11 panel. DE: Führen Sie H (Holzdübel) in das Paneel Nr.
- Page 23 EN: Insert H(wooden dowels) in No.14 panel left and right side, connect it to No.13 panel, use A screw to lock No.14 and 15 panel on No.13 panel. DE: H(Holzdübel) in Platte Nr. 14 links und rechts einführen, mit Platte Nr. 13 verbinden, mit Schraube A Platte Nr. 14 und EN: Put the bar into the fabric to make it the curtain, then 15 an Platte Nr.
- Page 24 EN: Insert H(wooden dowel) in No.18 panel downside, connect it to No.11 panel, use A screw to lock No.18 panel on No.11,14 and 15 panel. Finished the upper part assembly. DE: H (Holzdübel) unten in das Paneel Nr. 18 einführen, es mit dem Paneel Nr.
- Page 25 EN: Use A screw to lock No.19 panel on No.20 panel. EN: Use A screw to lock No.43 panel on No.1 and 19 panel. DE: Mit Schraube A Platte Nr. 19 auf Platte Nr. 20 befestigen. DE: Die Schraube A verwenden, um die Platte Nr. 43 an den Platten Nr.
- Page 26 EN: Insert No.22 panel in backside groove. Insert H(wooden dowel)in No.23 panel right side, connect it to No.19 panel. EN: Insert No.21 panel in No.20 panel via the door pin. DE: Paneel Nr. 22 in die hintere Nut einsetzen. H (Holzdübel) in Paneel Nr.
- Page 27 EN: Insert H(wooden dowels) in No.16 panel left side, connect it to No.26 panel, use A screw to lock it on No.26 panel. Use A screw to lock No.24 panel to No.19 panel. DE: H(Holzdübel) in Paneel Nr. 16 links einführen, mit Paneel Nr.
- Page 28 ES: Inserte H (clavija de madera) en el panel nº 33 lado EN: Insert H(wooden dowel) in No.23 and 33 left side, izquierdo y derecho, conéctelo al panel nº 19. Utilice el connect it to No.29 panel, then Use A screw to lock No.29 tornillo A para fijar el panel nº...
- Page 29 EN: Insert oil dryer in the No.44 panel, became S, use B screw to lock S on No.25 panel. Insert No.35 panel in No.20 panel via the door pin. DE: Den Öltrockner in die Platte Nr. 44 einsetzen, S wird, mit EN: Use A screw to lock No.39 panel on No.29 panel.
- Page 30 ES: Utilice el tornillo C para bloquear P (bisagra hembra) en el panel nº 41. Utilice el tornillo U para bloquear T (gancho) en el panel nº 41. Utilice el tornillo A para bloquear el panel nº 41 en el lado izquierdo de la cocina. IT: Utilizzare la vite C per bloccare P (cerniera femmina) sul pannello Nu.
- Page 31 EN: Insert H(wooden dowels) in No.28 panel up and downside, connect it to No.25 panel. Insert No.27 and 28 panel in No.25 panel via the door pin and wooden dowel. Insert No.36 panel in No.39 panel via the door pin. DE: H(Holzdübel) in Paneel Nr.
- Page 32 FR: Utilisez la vis pour verrouiller P (charnière femelle) sur le panneau N°34. Insérez H (chevilles en bois) dans le côté gauche du panneau N°34. Insérez H (chevilles en bois) dans le côté supérieur des panneaux N°12, N°13 et N°26, puis reliez-les au panneau N°34.
- Page 33 EN: Use A screw to lock No.40 panel on topside. EN: Put No.38 panel on plastic supports. DE: Mit der Schraube A die Platte Nr. 40 auf der Oberseite DE: Die Platte Nr. 38 auf die Kunststoffstützen legen. befestigen. FR: Placez le panneau N°38 sur les supports en plastique. FR: Utilisez la vis A pour verrouiller le panneau N°40 sur le dessus.
- Page 34 Return / Damage Claim Instructions DO NOT discard the box / original packaging. In case a return is required, the item must be returned in original box. Without this your return will not be accepted. Take a photo of the box markings. A photo of the markings (text) on the side of the box is required in case a part is needed for replacement.
- Page 35 Instructions De Retour / Réclamation De Dommages Istruzioni Per La Restituzione / Reclamo Per Danni NE PAS jeter la boîte/l'emballage d'origine. NON scartare la scatola / confezione originale. Dans le cas où un retour est requis, l'article doit être retourné dans sa boîte Nel caso in cui sia richiesto un reso, l'articolo deve essere restituito nella scatola d'origine.
Need help?
Do you have a question about the TP10167 and is the answer not in the manual?
Questions and answers