
Subscribe to Our Youtube Channel
Related Manuals for LocknCharge Carrier 10


Summary of Contents for LocknCharge Carrier 10
- Page 1 USER INSTRUCTIONS Carrier 10 Charging Station™ Canadian customers, contact Software4Schools.ca with questions. www.Software4Schools.ca www.lockncharge.com...
- Page 2 Carrier 10 Charging Station™ Congratulations on your purchase. Follow these instructions for easy and fast set-up of your Carrier 10 Charging Station. PC Locs, LocknCharge and the Padlock device are Trademarks of IWS Global Pty Ltd. Copyright IWS Global Pty Ltd, May 2014.
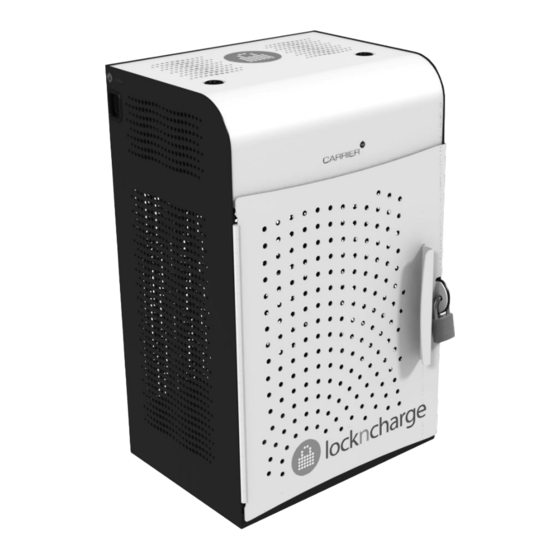
- Page 3 INSTRUCTION MANUAL STEP 1 - Unpacking the Carrier 10 Charging Station After unpacking, open the door and remove the baskets. If you have devices that can fit in the plastic baskets, remove the Stainless Steel Device Rack and mat, otherwise leave it in place.
- Page 4 Push the device connector through the hole and then pull along the rubber grip cable holder. Repeat for the remaining device chargers. STEP 4 - Assembling your devices in the Carrier 10 Charging Station Place the basket with the devices into the Carrier 10 Charging Station.
- Page 5 The power strips can be slid along the track to create space. Replace the lid over the charge compartment. Plug the Carrier 10 Charging Station power cable into the unit, then into the wall socket. Charging will commence automatically (may need to switch Close the door and use a padlock to secure.
- Page 6 Note the mounting holes for desk mounting: STEP 6 - Resetting the Power Strips If there is a power surge and the power is tripped in the Carrier 10 Charging Station, press the red reset button on each power strip to reset.
-
Page 7: Warranty
PC Locs/LocknCharge has been advised of the possibility of such damages. PC Locs/LocknCharge obligation is strictly and exclusively limited to the replacement or repair of any defective products.
Need help?
Do you have a question about the Carrier 10 and is the answer not in the manual?
Questions and answers