EUHOMY BR-110, BR-110H - Beverage Refrigerator Manual
- Instruction manual (16 pages)
Advertisement
Installation
Pre-Operation
TOOLS REQUIRED

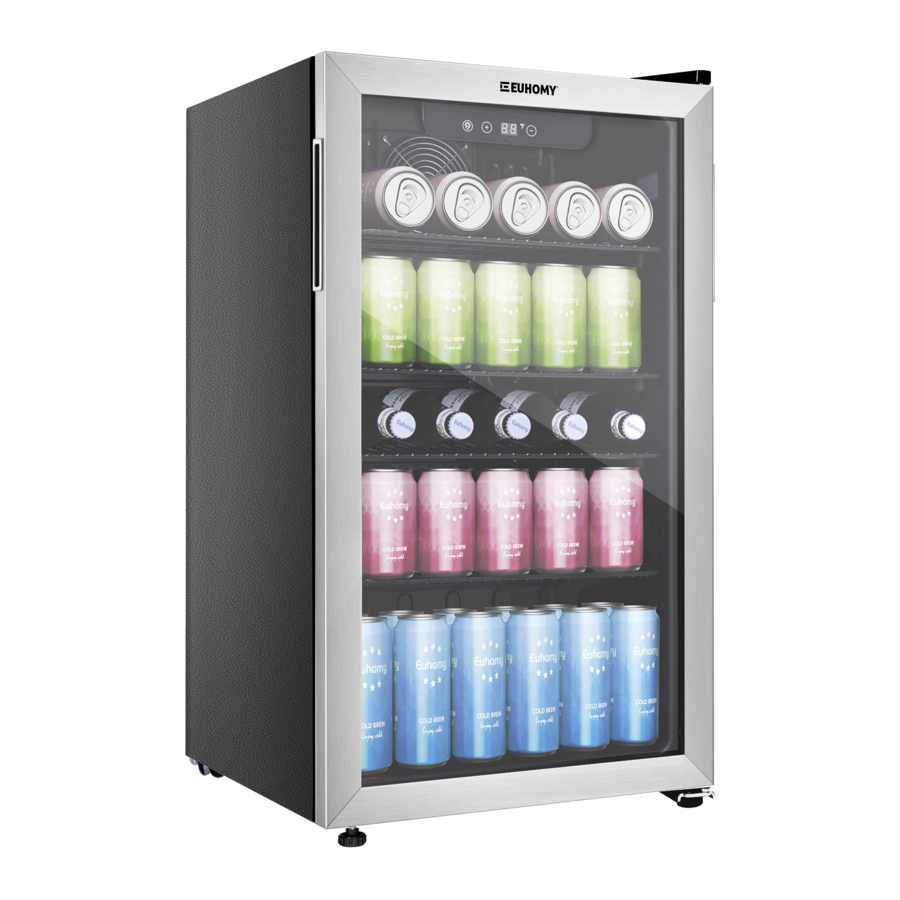
PRODUCT DESCRIPTION

- 3.2 cu ft beverage cooler
- Shelf
- Reversible double-pane glass door with stainless-steel frame
- Adjustable front leveling legs
- Fan
IMPORTANT SAFETY INSTRUCTIONS
 To reduce the risk of fire, electrical shock, or injury when using your appliance, follow these basic precautions:
- Read all instructions before using the appliance.
- DANGER or WARNING: An empty beverage refrigerator can be a hazardous for children or small pets. If disposing of the beverage refrigerator, remove all gasket seals, latches, lids or the entire door from your unused appliance, or take other actions to ensure that the beverage refrigerator is harmless.
- Never allow children to operate, play with, or crawl inside the appliance.
- Never clean appliance parts with flammable fluids or harsh chemicals. The fumes can create a fire or explosion.
- Do not store or use gasoline or any other flammable vapors and liquids in the vicinity of this or any other appliance. The fumes can create a fire or explosion.
INSTALLATION INSTRUCTIONS
BEFORE USING YOUR APPLIANCE
- Remove the exterior and interior packaging.
- Before connecting the appliance to the power source, let it stand upright for approximately 24 hours. This will reduce the possibility of a malfunction in the cooling system from handling during transportation.
- Clean the interior surface using lukewarm water and a soft cloth.
INSTALLATION OF YOUR APPLIANCE
- The appliance is designed for freestanding installation.
![]()
Do not store or install the appliance outdoors.![]()
This appliance is designed for storing and cooling beverage or wines. Do not store perishable food, medicine or other medical products.- Place your appliance on a hard and level floor that is strong enough to support it when it is fully loaded.
- To level your appliance, adjust the levelling legs at the bottom of the appliance, if necessary.
- Allow at least 5 inches (127mm) of space between the back and sides of the appliance are suggested, which allows the proper air circulation to cool the compressor and condenser. We do not recommend installing the appliance on a carpet.
- Do not install the appliance near an oven or other heating source. Direct sunlight may affect the acrylic coating and heat sources may increase electrical consumption. For best performance, do not install the appliance behind a cabinet door or block the base grille.
- Extreme cold ambient temperatures may also prevent the appliance from performing properly.
- Avoid locating the appliance in area that may be exposed to excessive moisture.
- Plug in the appliance into an exclusive, grounded wall power outlet. Do not under any circumstances cut or remove the third (ground) prong from the power cord. Any questions concerning power and/or grounding should be directed toward a qualified electrician or an authorized service center.

INSTALLATION LOCATION
Your beverage refrigerator should be conveniently located for day-to-day use in a dry, well-ventilated room.
Do not install the appliance where the temperature will go below 60°F or above 90°F, because it will not maintain proper temperatures. Be sure to install your beverage refrigerator on a floor strong enough to support it when it is fully loaded.
FREESTANDING INSTALLATION
A freestanding installation will allow you to install the beverage refrigerator in any place you desire provided that the required clearance space around the appliance is respected. In every setting, there must be adequate ventilation and access for service. Never install or operate the unit in an enclosed area, such as a closed cabinet. Allowance of at least 5 inches (127mm) of space between the back and sides of the appliance are suggested, which allows the proper air circulation to cool the compressor and condenser.
ELECTRICAL CONNECTION
 Improper use of the grounded plug may result in the risk of electrical shock. If the power cord is damaged, have it replaced by a qualified electrician or contact EUHOMY Service Department.
This appliance requires a standard 115/120 Volt AC ~/60Hz electrical ground outlet with three-prong. Have the wall outlet and circuit checked by a qualified electrician to ensure that the outlet is properly grounded. The cord should be secured behind the appliance and not left exposed or dangling to prevent accidental injury.
The appliance should always be plugged into its own individual electrical outlet which has a voltage rating that matches the rating label on the appliance. This provides the best performance and also prevents overloading house wiring circuits that could be a fire hazard from overheated. Never unplug the appliance by pulling the power cord. Always grip the plug firmly and pull straight out from the receptacle. Immediately repair or replace all power cords that have become frayed or otherwise damaged.
Do not use a cord that shows cracks or abrasion damage along its length or at either end. When moving the appliance, be careful not to damage the power cord.
EXTENSION CORD
Because of potential safety hazards, it is strongly recommended that you do not use an extension cord with this appliance. However, if you must use an extension cord, it is absolutely necessary that it be a UL-Listed, 3-wire grounding type appliance extension cord having a grounding type plug and outlet and that the electrical rating of the cord be 115 volts and at least 10 amperes.
Instructions
PROPER USE OF BEVERAGE COOLER
Startup
Connect the power cord to a standard wall outlet. Do not use a GFCI outlet to connect the unit. After connection, you will immediately hear a short beep.
Display Controls
The default temperature is 43°F. Use the ![]() and
and ![]() buttons to set the desired temperature between the range of 32°F-61°F.
buttons to set the desired temperature between the range of 32°F-61°F.
The display will flash while the temperature is being set. After a few seconds, it will revert to its current internal temperature reading. The digital display reading will adjust as the unit cools.
While the unit is adjusting to the new setting, press the  or
or  buttons to view the selected temperature setting.
If there is a power outage, the unit will revert to the last temperature setting once power is restored.
LED LIGHT
Press the ![]() button to turn the LED light on and off.
button to turn the LED light on and off.
To enhance the lifespan of the LED light and conserve energy, it is recommended to predominantly utilize the light for loading and selecting beverages.

Loading Beverages
When first loading the beverage cooler to full capacity, we recommend the following steps to effectively cool a large number of beverages.
- Use the Adjustable Thermostat Control to set the temperature to 43°F (also the default temperature).
- Allow the beverage cooler to cool for a minimum of two hours.
- Load the beverages. To achieve maximum capacity, refer to the loading diagrams.
- After initially filing with beverages, the internal temperature will rise as indicated on the display.
- Once the beverage cooler has cooled the beverages to 43°F, use the Adjustable Thermostat Control to select a desired cooler internal temperature (lowest temperature setting is 40°F).
- Allow several hours for the beverage cooler to cool to the desired lower temperature.
Note: It is normal for temperature variances to occur inside the unit, and areas near the door will have slightly warmer temperatures.
Placement
REVERSING THE DOOR SWING
Tools needed: flathead screwdriver, Phillips screwdriver

Before you begin, unplug the beverage refrigerator from power.
To remove the door:

- Using a flathead screw driver, carefully pry the top hinge cover off.
- Using a Phillips screwdriver, remove the screws and take off the top hinge. Keep the parts together and set them aside.
- Lift the door off the bottom hinge and set the door aside.
- Remove the bottom hinge by removing the screws with a Phillips head screwdriver.
To install the door:
- Using a flathead screwdriver, remove the plugs and cover from the opposite cabinet top corner and from the door.
- Install the bottom hinge at the opposite side corner and fasten the screws.
- Position the door on the bottom hinge.
- Align the door on the bottom hinge and install the top hinge.
- Push the plugs and covers into the corresponding holes.
LEVELING THE APPLIANCE

- It is important for the beverage cooler to be levelled in order to work properly.
- It can be raised or lowered by rotating each of the feet on the bottom of the machine.
- If you find that the surface is not level, rotate the feet until the beverage refrigerator becomes level. You may need to make several adjustments to level it. We recommend using a carpenter's level to check the machine.
- Place a carpenter's level on top of the product to see if the beverage refrigerator is level from front to back and side to side.
- Adjust the height of the feet as follows: Turn the levelling feet to the right to lower that side of the refrigerator. Turn the levelling feet to the left to raise that side of the refrigerator.

Once you are ready to install, you must adjust the feet to level the beverage refrigerator.
Defrosting and Normal Sounds
DEFROSTING
Frost may form on the interior back panel of the unit when the temperature setting is very low and the unit is not fully stocked with beverages. The presence of frost may force the unit to run continuously and thus, increase internal temperature.
To defrost the beverage cooler:
- Use the
![]() and
and ![]() buttons to increase the temperature until the compressor turns off.
buttons to increase the temperature until the compressor turns off. - Allow the internal ice/frost build-up to melt. Ensure the internal drain (located at the middle back of the lower shelf) is not clogged.
- During this time, the melted frost flows through an internal drain into a holding pan on top of the compressor. The heat of the compressor evaporates the liquid.
- Reset the temperature to 43°F and allow it to cool for at least one hour.
- Adjust to the desired temperature setting.
 buttons to increase the temperature until the compressor turns off.
NORMAL SOUNDS
The unit is cooled by a compressor. The compressor pumps coolant through the cooling system, producing operating noise. Even when the compressor cuts out, noises caused by changes in temperature and pressure are unavoidable. Operating noise will be most audible immediately after the compressor comes on. It becomes quieter as the operating period continues.
The following noises are normal and occur from time to time:
- Gurgling sound, caused by the refrigerant flowing through the appliance's coils.
- Humming noise, made by the compressor. This noise can get louder for brief periods when the motor is switching on.
- Cracking/popping sounds, resulting from the materials contraction and expansion due to temperature variations, fan operating sound, to circulate the air within the refrigerator cabinet.
NOTE: An individual's perception of noise is directly linked to the environment in which the unit is located, as well the specific type of models. Our appliances are in line with international standards for such appliance and in line with the latest technical developments. Please remember that the noise of the compressor and the coolant circulating in the system is unavoidable.
Maintenance
DISCONNECTING THE BEVERAGE COOLER
Unplug the power plug from the socket to disconnect the cooler.
CLEANING YOUR BEVERAGE COOLER
Dusting behind the cooler and on the ground will improve the cooling effect and save energy. The interior of the cooler should be cleaned to avoid any odors. Follow the cleaning procedure below.
- Unplug the cooler.
- Wipe the door seal clean with warm water.
- Use soap and warm water to clean the cooler.
- Reconnect the cooler when the cooler is clean and dry.
Note: Do not use hard brushes, wire brushes, abrasives, organic solvents, boiling water, acid or alkaline items as this may damage the surface and interior of the cooler.
FREQUENTLY ASKED QUESTIONS
Q: I'm hearing some sounds, what's up with that?
A: Buzzing or any gurgling sound is normal as that can be a result of the unit working properly or refrigerating fluid flowing through the pipeline.
Trouble shooting
| Problem | Possible Causes | Solutions |
| The appliance does not operate |
|
|
| The appliance is not cold enough |
|
|
| The appliance frequently turns on and off |
|
|
| The appliance makes too much noise |
|
|
| The door does not close proper- ly |
|
|
| Condensation builds up on the glass door. |
|
|
Contact us
Email: support@euhomy.com
Facebook: @Euhomy. Official
The Euhomy team is available 24/7 to address your questions, comments, and concerns.
Be sure to register at www.euhomy.com/register for updates, warranty, and other relevant information.
Safety Precaution
SAVE THESE INSTRUCTIONS / For Household Use Only
- Keep ventilation openings, in the appliance enclosure or in the built-in structure, clear of obstruction.
- Do not use mechanical devices or other means to accelerate the defrosting process, other than those recommended by the manufacturer.
- Do not store explosive substances, such as aerosol cans with a flammable propellant, in this appliance.
- Do not use extension cords or ungrounded (two prong) adapters.
- This appliance is intended to be used in households and similar applications such as: staff kitchen areas in shops, offices and other working environments; hotels, motels and other residential type environments; bed and breakfast type environments; catering and similar non-retail applications.
- Do not pull on the power cord when pulling the power plug of the beverage cooler. Firmly grasp the plug and pull it out from the socket directly.
WARNINGS RELATED TO ELECTRICITY
- Do not damage the power cord under any circumstances.
- Please use a dedicated three-hole power socket which is 15A or more and not shared with other electrical appliances.
- Please ensure that the grounding electrode of the power socket is equipped with a reliable grounding line.
- The beverage cooler uses AC power supply of 115V/60 Hz. If the voltage fluctuation exceeds the range of 115V +- 10%, it can cause accidents or damage the cooler.
- In case of leaking gas, turn off the leaking valve and open all doors and windows. Do not unplug the cooler yourself, as it may cause a fire. Contact customer support immediately.
- For your safety, don't place electric any devices on top of the cooler like microwaves or electric kettles, and don't store your beverage cooler inside your pantry.
WARNINGS RELATED TO USE
- Make sure there is ample ventilation space surrounding the beverage cooler.
- Be careful not to get your fingers or any dangling accessories caught in the cooler door.
- This cooler and its packaging are not intended to be played with or used by children. If a child is using the cooler, it must be with adult supervision to avoid injury.
- Keep the cooler away from moist, damp or humid environments and situations so as not to damage the electrical insulation.
- Do not use the base, cooler door, etc. as pedal or support.
- Do not place heavy objects on top of the cooler to prevent accidental damage or injury.
WARNINGS RELATED TO PLACING ITEMS
- Do not put flammable, explosive, volatile and highly corrosive items in the cooler to prevent damages to the product or fire accidents.
- Do not place flammable items near the cooler to avoid fires.
- This product is for household refrigeration appliances, mainly used in the storage of beverage, not for any other purposes, such as storage of blood, drugs or biological products.
- Do not cover or close ventilation and exhaust holes.
Documents / Resources
References

Download manual
Here you can download full pdf version of manual, it may contain additional safety instructions, warranty information, FCC rules, etc.
Download EUHOMY BR-110, BR-110H - Beverage Refrigerator Manual
Advertisement


Need help?
Do you have a question about the BR-110 and is the answer not in the manual?
Questions and answers