Table of Contents
Advertisement
Quick Links
Advertisement
Table of Contents

Subscribe to Our Youtube Channel
Related Manuals for NEFF N50 U1ACI5H 0B Series


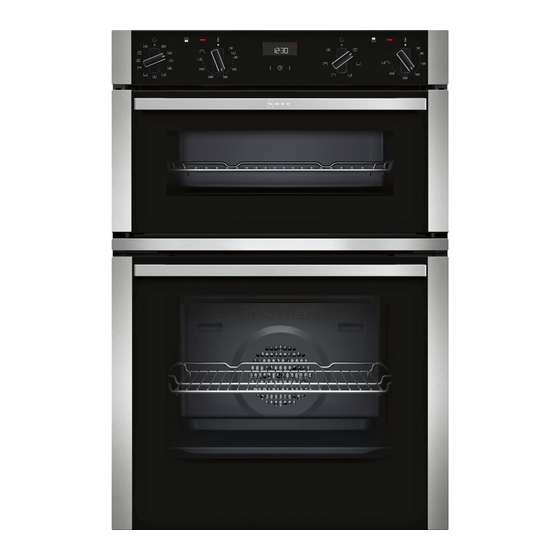
Summary of Contents for NEFF N50 U1ACI5H 0B Series
- Page 1 Double oven [en] User manual and installation instructions U1ACI5H.0B...
-
Page 2: Table Of Contents
en Safety 1.2 Intended use Table of contents This appliance is designed only to be built into kitchen units. Read the special installation instructions. USER MANUAL Only a licensed professional may connect ap- Safety .............. 2 pliances without plugs. Damage caused by in- correct connection is not covered under the Preventing material damage ....... -
Page 3: Safety
Safety en Opening the appliance door creates a The appliance and its parts that can be draught. Greaseproof paper may come into touched may have sharp edges. contact with the heating element and catch ▶ Take care when handling and cleaning fire. -
Page 4: Preventing Material Damage
en Preventing material damage Children may breathe in or swallow small 1.6 Meat probe parts, causing them to suffocate. WARNING ‒ Risk of electric shock! ▶ Keep small parts away from children. Using the wrong meat probe could damage ▶ Do not let children play with small parts. the insulation. -
Page 5: Environmental Protection And Saving En- Ergy
Environmental protection and saving energy en Sitting or placing objects on the appliance door may With certain models, accessories may scratch the door damage it. pane when closing the appliance door. Do not place, hang or support objects on the appli- Always push accessories fully into the cooking com- ▶... - Page 6 en Familiarising yourself with your appliance Buttons Top oven → "Buttons", Page 6 Controls for the top oven Main oven Function selector Controls for the main oven You can turn the function selector clockwise or anti-clockwise from the zero setting. Function selector → "Types of heating", Page 7 → "Functions", You can turn the function selector clockwise or Page 8 anti-clockwise from the zero setting.
-
Page 7: Familiarising Yourself With Your Appliance
Familiarising yourself with your appliance en Symbol Name Ecolysis Clean the appliance using the EcoClean Direct cleaning function → "EcoClean ", Page 18 Childproof lock activ- The childproof lock is activated ated → "Childproof lock", Page 14 Heating-up Appliance is heating indicator ... - Page 8 en Familiarising yourself with your appliance 4.5 Functions Here you can find an overview of the functions. Use the function selector to set the functions. Main oven Symbol Name Rapid heating Rapidly preheat the cooking compartment without accessories. → "Rapid heating", Page 14 Oven light Illuminate the cooking compartment without heating.
- Page 9 Accessories en Main cooking compartment Top cooking compartment The cooking compartment has four shelf positions. The cooking compartment has three shelf positions. Self-cleaning surfaces The self-cleaning surfaces in the cooking compartment are coated with a porous, matt ceramic layer and have a rough surface.
-
Page 10: Accessories
en Accessories Accessories Wire rack ¡ Cake tins ¡ Ovenproof dishes ¡ Cookware ¡ Meat, e.g. roasting joints or steak ¡ Frozen meals Universal pan ¡ Moist cakes ¡ Baked items ¡ Bread ¡ Large roasts ¡ Frozen meals ¡ Catching dripping liquids, e.g. fat when grilling food on the wire rack. -
Page 11: Before Using For The First Time
6 Before using for the first time Configure the settings for initial start-up. Clean the ap- Before heating the appliance, wipe the smooth sur- pliance and accessories. -
Page 12: Time-Setting Options
en Time-setting options 8 Time-setting options Your appliance has different time-setting options, with Requirement: is highlighted on the display. which you can control its operation. Use the button to reset the timer duration to zero. ▶ a After a few seconds, the appliance applies the 8.1 Overview of the time-setting options change and ... -
Page 13: Meat Thermometer
Meat thermometer en Cancelling the end time Requirements ¡ A type of heating and a temperature or setting are You can delete the set end at any time. set for the main oven . is highlighted on the display. Requirement: ... - Page 14 en Childproof lock It is best to place the food in cookware into the The current core temperature of the food is shown centre of the wire rack. on the left, while the set core temperature is shown Plug the meat thermometer into the socket on the on the right, e.g.
-
Page 15: Childproof Lock
Basic settings en Place the food in the cooking compartment. 12 Basic settings You can configure the basic settings for your appliance to meet your needs. 12.1 Overview of the basic settings Here you can find an overview of the basic settings and factory settings. The basic settings depend on the features of your appliance. - Page 16 en Cleaning and servicing 13 Cleaning and servicing To keep your appliance working efficiently for a long ATTENTION! time, it is important to clean and maintain it carefully. Unsuitable cleaning products may damage the sur- faces of the appliance. 13.1 Cleaning products Do not use harsh or abrasive cleaning products.
-
Page 17: Cleaning And Servicing
Cleaning and servicing en Cooking compartment Area Suitable cleaning agents Information Enamel surfaces ¡ Hot soapy water Soak any heavily soiled areas and use a brush or steel wool. Leave the appliance door open to dry the cooking compartment ¡ Vinegar water after cleaning it. - Page 18 en Cleaning function Use the cleaning function. 13.4 Cleaning self-cleaning surfaces in the ▶ → "EcoClean ", Page 18 top cooking compartment The back wall, ceiling and side walls of the top cooking compartment are self-cleaning and have a rough sur- face. ATTENTION! If you do not clean the self-cleaning surfaces regularly, they may become damaged.
-
Page 19: Cleaning Function
Cleaning function en Use a detergent solution and a soft cloth to remove Attach the shelf supports. heavy soiling: → "Shelf supports", Page 20 – From the cooking compartment floor – From the inside of the appliance door 14.2 Base clean – From the glass cover for the oven light Use the Base clean to clean the cooking compartment This prevents stains that cannot be removed. - Page 20 en Shelf supports Remove limescale with a cloth soaked in vinegar. Open the appliance door to the stop position (ap- Then wipe with clean water and rub dry with a soft prox. 30°) for approx. one hour to allow the sur- cloth (including under the door seal).
-
Page 21: Shelf Supports
Shelf supports en Keep the PUSH tab pushed back and swing the Insert the pull-out rail between the two bars. rail outwards . Push the retainer in between the lower and the Pull the rail out towards the front until the retainer at upper bar. - Page 22 en Appliance door 15.5 Detaching the rails in the top cooking 15.6 Attaching the rails in the top cooking compartment compartment Notes WARNING ‒ Risk of burns! ¡ The rails only fit on the right or left. The shelf supports get very hot ¡...
-
Page 23: Appliance Door
Appliance door en Close the appliance door fully . Grab hold of the Open the locking levers on the left- and right-hand appliance door with both hands (on the left and hinges . right) and pull it upwards and out . a The locking levers are open. - Page 24 en Appliance door If necessary, you can remove the condensate Slide the intermediate pane into the left- and right- trough for cleaning. hand retainers . Open the appliance door. ‒ Tilt the condensate trough upwards and remove ‒ Push the intermediate pane upwards until it is in the left- and right-hand retainers ...
- Page 25 Appliance door en Close the locking levers on the left- and right-hand Close the appliance door fully . Grab hold of the hinges . appliance door with both hands (on the left and right) and pull it upwards and out . a The locking levers are closed.
- Page 26 en Appliance door Close the appliance door. Lift out the inner pane and set it down carefully on a flat surface. 16.7 Removing the door panes from the upper the appliance door WARNING ‒ Risk of injury! The hinges on the appliance door move when the door is opened and closed, which could trap your fingers.
-
Page 27: Troubleshooting
Troubleshooting en Push the inner pane upwards until it is in the left- Slide the appliance door straight onto the two and right-hand retainers . hinges. Slide the appliance door on as far as it will go. When doing so, ensure that the hinges are in- serted into the correct opening. -
Page 28: Customer Service
en Troubleshooting Fault Cause and troubleshooting The appliance does At the end of a cooking time, the appliance stops heating up. The oven light and cooling fan not switch off fully at do not switch off. For types of heating with recirculation, the fan continues to run in the back the end of a cooking wall of the cooking compartment. -
Page 29: How It Works
Disposal en Connect the appliance to the power supply. 18 Disposal Find out here how to dispose of old appliances cor- This appliance is labelled in accord- rectly. ance with European Directive 2012/19/EU concerning used elec- trical and electronic appliances 18.1 Disposing of old appliance (waste electrical and electronic equip- Valuable raw materials can be reused by recycling. - Page 30 en How it works ¡ Depending on the size and type of the food to be Baking on three levels Height roasted, add up to 1/2 litre water to the universal Baking tray pan. Universal pan You can make a sauce from the juices that are Baking tray caught.
- Page 31 How it works en 20.4 Food selection Selection for the main oven Food Accessories/cookware Shelf pos- Type of Temperature Cooking ition heating in °C/grill time in mins setting Victoria sponge cake 2 pcs 150-170 15-25 Ø 20 cm cake tin Rich fruit cake Deep 23 cm diameter ...
- Page 32 en How it works Food Accessories/cookware Shelf pos- Type of Temperature Cooking ition heating in °C/grill time in mins setting Pork, gammon joint Cookware without lid 170-180 25+20 Chicken, whole Cookware without lid 170-180 20+20 Preheat the appliance. Do not use the rapid heating function. Preheat the appliance.
- Page 33 How it works en Note: Items that are placed in the oven on baking trays Position baking tins/dishes either next to one another or in baking tins/dishes at the same time will not ne- or offset on different shelves so that they are not dir- cessarily be ready at the same time.
-
Page 34: Installation Instructions
en Installation instructions Recommended settings for grilling Selection for the top oven Food Accessories/cookware Shelf pos- Type of Temperature in Cook- ition heating °C ing time in mins Browning toast Wire rack Grill 21 Installation instructions Observe this information when installing the appliance. ¡... - Page 35 Installation instructions en 21.2 Appliance dimensions 21.4 Corner installation You will find the dimensions of the appliance here Observe the installation dimensions and the installation instructions when installing in a corner. ¡ To ensure that the appliance door can be opened, 21.3 Installation in a tall unit you must take the minimum dimensions into consid- Observe the installation dimensions and the installation eration when installing in a corner.
- Page 36 en Installation instructions Centre the appliance. 21.6 Installing the appliance Remove the transport locks on the right and left and then dispose of them. There must be an air gap of at least 5 mm between the appliance and adjacent unit fronts. Use a spirit level to adjust the appliance so that it is The appliance must be transported by two people perfectly level.
- Page 40 Valid within Great Britain: Imported to Great Britain by BSH Home Appliances Ltd. Grand Union House Old Wolverton Road Wolverton, Milton Keynes MK12 5PT United Kingdom *9001580277* 9001580277 BSH Hausgeräte GmbH Carl-Wery-Straße 34 020218 81739 München, GERMANY...
Need help?
Do you have a question about the N50 U1ACI5H 0B Series and is the answer not in the manual?
Questions and answers