Table of Contents
Advertisement
Quick Links
Advertisement
Table of Contents

Related Manuals for Turing EDGE+ EVC5ZD


Summary of Contents for Turing EDGE+ EVC5ZD
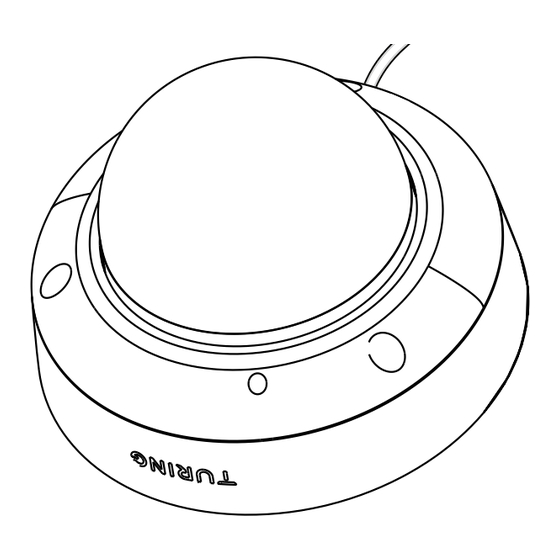
- Page 1 EVC5ZD Cloud Dome Camera...
- Page 2 EVC5ZD Cloud Dome Camera...
- Page 3 What's included Tools you'll need Know your EDGE+ Mount EDGE+ Activate EDGE+ TABLE Safety CONTENT Limited warranty...
-
Page 4: What's Included
WHAT'S INCLUDED Self-Tapping Plastic Screw Screws (x3) Anchors (x3) Cable Gland T10 Security Torx Quick Guide Mounting Template... -
Page 5: Tools You'll Need
TOOLS YOU’LL NEED 24/7 broadband internet connection Connection Ethernet cable Smart phone (iOS or Android) or computer (Mac or Windows) Power PoE switch or PoE injector that is IEEE 802.3af compatible Tip size#2 Philips screwdriver or bit (PH2) Power drill 1/8"... - Page 6 KNOW YOUR Security Screws To adjust the camera angle, loosen the security screws with T10, the supplied Line In/Out security torx, and Connect external open the dome cover. mic/speaker to these 3.5mm jacks for audio. External power required. Backup power connection Power input: DC12V, 1A RJ45 Port...
- Page 7 MOUNT...
- Page 8 Find Installation Spot Mounting a camera requires a little bit of planning. It saves time to plan ahead before drilling holes in your wall. The EVC5ZD, with IP66 and IK10 rating, is weatherproof and vandal resistant. It can be installed indoor and outdoor, operating between -22°F and 140°F. 7 to 10 feet above the ground, tilted downward, is best —...
-
Page 9: Drill Mounting Holes
DRILL MOUNTING HOLES Attach and Secure the Cable... - Page 10 BEST MOUNTING PRACTICE...
- Page 11 POWER IT UP Prepare a mobile Plug the other end of Connect the PoE switch device or computer the Ethernet cable or PoE injector to a with access to the into a PoE switch or router with access to Internet for adding the Internet.
-
Page 12: Adjust The Angle
ADJUST THE ANGLE Pan and tilt the camera and check its video in the Turing Vision app to fine-tune the position. Fasten the tilt screw to fix the tilt angle 0° to 75° 350°... - Page 13 ACTIVATE...
- Page 14 firmware, and monitor their device health remotely from the Partners Portal. My TPP Number is The TPP number is the unique identifier you receive when you join the Turing Partner Program. Not a Turing Partner yet? Join our Turing Partner Program today.
-
Page 15: Create Account
CREATE ACCOUNT Log into the Partner Portal. https://partner-portal.turingvideo.com Get the Partner App by downloading it from the App Store or Google Play. Create a customer account... -
Page 16: Add System
ADD SYSTEM Add Devices Add Devices After setting up the customer account, proceed with the installation steps. Once the installation is finished, make sure to click on "Installation Complete" to send an invitation to the customer to activate their account. Once the customer activates their account, request full admin access to configure or add more systems, and troubleshoot any issues with their account. -
Page 17: Get Started
INSTALL IN 3 CLICKS Get Started Scan the QR Code Enter a MAC Address The QR code and MAC address can be found on the back of your device or the product package. -
Page 18: Auto Search
INSTALL IN 3 CLICKS Auto Search To speed up the setup process, we recommend using the " + Batch-Add" feature to automatically detect other Edge+ cameras on your local network. On the web, simply click the "+ Batch-Add" icon next to a camera to start the search. On mobile, swipe left on any camera and tap the "+ Batch-Add"... - Page 19 INSTALL IN 3 CLICKS Batch Add To add cameras to the customer's account, edit their names and time zone, and click "Add & Activate." If a camera does not meet the minimum firmware requirement, our system will automatically upgrade the camera firmware upon activation. Additionally, any unformatted SD cards will be initialized during this process.
- Page 20 SAFETY The product must be installed and protected in a location that is not easily accessible, and is away from impacts or heavy vibration. Do not install the product on an unstable mount or surface. Do not disassemble the camera or perform maintenance task when power is connected. The product should be used in compliance with local laws and regulations.
-
Page 21: Limited Warranty
LIMITED WARRANTY Turing AI is pleased to offer up to ten (10) years of limited warranty for Turing-branded cameras purchased from our authorized distributors and authorized dealers, with a continuous Turing Video CORE AI license subscriptions. Without Turing Video CORE AI license subscriptions, all Turing-branded cameras, recorders, and bridge devices purchased from our authorized distributors and authorized dealers come standard with a three (3) year limited warranty. - Page 22 CONTACT No worries. We are here for you. Contact us at s u p p o r t @ t u r i n g v i d e o . c o m 8 6 6 . 8 1 6 . 7 4 2 6 Visit h t t p s : / / t u r i n g .
- Page 23 EVC5ZD Cloud Dome Camera...
- Page 24 EVC5ZD Cloud Dome Camera...
Need help?
Do you have a question about the EDGE+ EVC5ZD and is the answer not in the manual?
Questions and answers
what are the sizes/specs for the plastic mounting screws and the self-tapping screws?
The document mentions that the package includes self-tapping plastic screws and screws (x3), but it does not provide specific sizes or detailed specifications for these screws.
This answer is automatically generated