
Related Manuals for Cheminees Philippe CLAIRVAUX


Summary of Contents for Cheminees Philippe CLAIRVAUX
- Page 1 CLAIRVAUX INSTALLATION & USER MANUAL WARMTH FROM FRANCE BY WIGNELLS OF MELBOURNE The Original Home Of Cheminées Philippe Australia since 1982...
- Page 2 We thank and appreciate your trust in welcoming our Cheminées Philippe Clairvaux into your space. Living with a Cheminées Philippe is truly a most satisfying and memorably rewarding experience. You have now joined the family of thousands of proud owners of the For over six decades Cheminées Philippe have been synonymously known for their quality...
-
Page 3: Table Of Contents
1.2 GENERAL SAFETY INFORMATION 1.3 PRE-INSTALLATION GUIDELINES 1.4 GENERAL FLUE REQUIREMENTS 1.5 SUITABLE BASE & HEARTH MATERIALS 2. UNIT DIMENSIONS & SPECIFICATIONS 2.1 CHEMINÉES PHILIPPE CLAIRVAUX 3. FREESTANDING 3.1 STEP BY STEP INSTALL GUIDE 3.2 BASE & HEARTH DIMENSIONS 3.3 FREESTANDING CLEARANCES 3.4 FLUE COMPONENTS OVERVIEW... - Page 4 This document is valid for Australia & New Zealand as of November 27th 2022 for the installation, operation and maintenance of the Cheminées Philippe Clairvaux DISCLAIMER Cheminées Philippe Australia & Wignells of Melbourne bears no liability for installations that do not meet the criteria outlined in this manual, alongside the requirements of Australian &...
- Page 5 SOURCES OR MODIFYING THE DIMENSIONAL SPECIFICATION OF COMPONENTS MAY RESULT IN HAZARDOUS CONDITIONS. WHERE SUCH ACTION IS CONSIDERED THE MANUFACTURER SHOULD BE CONSULTED IN THE FIRST INSTANCE. CAUTION: CRACKED AND BROKEN COMPONENTS, FOR EXAMPLE GLASS PANELS, CAST IRON OR CERAMIC TILES, MAY RENDER THE INSTALLATION UNSAFE. CLAIRVAUX CHEMINÉES PHILIPPE...
- Page 6 If this occurs, the introduction of fresh air is recommended. This could take the form of a vent may also prove to cause downdraught conditions in this case refer to page 29 (AS/NZS 2918:2018 extract), CLAIRVAUX CHEMINÉES PHILIPPE...
- Page 7 FLUE BENDS » Do NOT » » 90 degree bends are NOT to be used MINIMUM EXTERNAL FLUE HEIGHTS & COWL CLEARANCES - AS PER AS/NZS 2918:2018 *All dimensions in mm *Please keep these instructions for future reference. CLAIRVAUX CHEMINÉES PHILIPPE...
- Page 8 It is the responsibility of the purchaser and the installer to ensure that any material componentry. DO NOT USE » Engineered or composite stone » » Thin pre-cast concrete » Timber or any combustible material » Glass CLAIRVAUX CHEMINÉES PHILIPPE...
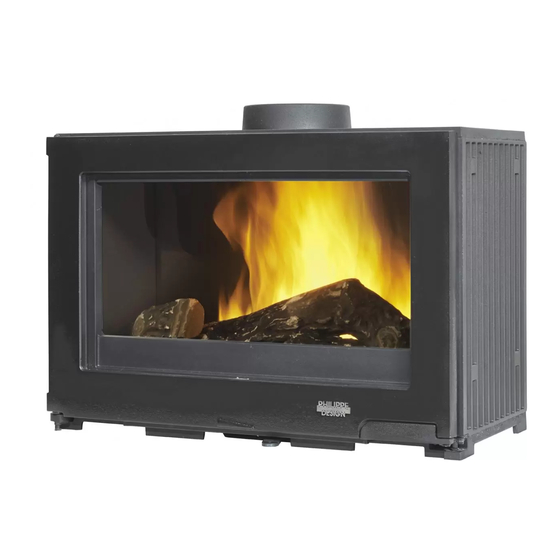
- Page 9 2. UNIT DIMENSIONS & SPECIFICATIONS 2.1 CHEMINÉES PHILIPPE CLAIRVAUX PLEASE NOTE: a slight variance factor of 1-2mm across all unit dimensions and .5kg in unit weight.
- Page 10 CERTIFICATE OF COMPLIANCE #ASFT20C066 atmospheric conditions. This unit has been tested and complies with Australian & New Zealand standards AS/NZS 4012 (2014), AS/NZS 4013 (2014) & AS/NZS2918 (2018), and is recommended to be used with hardwood only. CLAIRVAUX CHEMINÉES PHILIPPE...
-
Page 11: Freestanding 3.1 Step By Step Install Guide
3. FREESTANDING 3.1 STEP BY STEP INSTALL GUIDE 3.2 BASE & HEARTH DIMENSIONS 3.3 FREESTANDING CLEARANCES 3.4 FLUE COMPONENTS OVERVIEW 3.5 FLUE SYSTEM CONFIGURATIONS PLEASE NOTE: All diagrams in this manual are for illustration purposes only, DO NOT scale from any of these diagrams. All measurements are in millimetres unless otherwise stated. - Page 12 » If the draw is adequate, complete the check list on page 33 and return this as well as this entire booklet » If the draw is inadequate please refer to the Balancing Air Pressure section on page 6 CLAIRVAUX CHEMINÉES PHILIPPE...
- Page 13 The unit must be placed centrally in the 940 width hearth Unless forming an abutment with a wall, the back and side hearth dimensions MUST NOT be *For a list of recommended materials and thicknesses refer to page 8 CLAIRVAUX CHEMINÉES PHILIPPE...
- Page 14 Brick/Hebel 450mm 100mm 450mm 150mm 100mm 150mm 110mm 110mm (Refer to page 13) Hearth (Refer to page 13) 450mm Hearth 450mm Combustible Material A minimum 110mm solid brick/hebel thick wall should extend to the ceiling the base CLAIRVAUX CHEMINÉES PHILIPPE...
- Page 15 2 x 6” Active & 8” Solid Decorative Flue (Charcoal) 6”-8”-10” Default Triple Skin Flue 900mm* (Charcoal) 2 x 6”-8”-10” Triple Skin Flue 900mm* 8” Split Ring (Charcoal) 6”-10” Cover Cone 6” Anti Down Draught Cowl FREESTANDING FLUE KIT OVERVIEW - AS PER AS/NZS 2918:2018 CLAIRVAUX CHEMINÉES PHILIPPE...
- Page 16 FREESTANDING FLUE CONFIGURATIONS Flat ceiling with Cathedral ceiling roof space roof space 8. Double storey Flat ceiling with Freestanding with External wall roof space and chimney & offset penetration with single storey offset penetration CLAIRVAUX CHEMINÉES PHILIPPE...
-
Page 17: Mechanisms & Unit Assembly
4. MECHANISMS & UNIT ASSEMBLY 4.1 PARTS & MECHANISM GUIDE 4.2 BAFFLE PLATE ASSEMBLY... - Page 18 Do not operate with the primary air closed for prolonged periods of time. MINIMUM INBUILT FLUE COMPONENTS PARTS Back & Side Plates Rear Air Box Ash Pan Grates *For part numbers and the complete parts list refer to page 38 CLAIRVAUX CHEMINÉES PHILIPPE...
-
Page 19: Baffle Plate Assembly
THIS ASSEMBLY IS DONE PRIOR TO INSTALLING THE FLUE. IT CAN ALSO BE REMOVED AND RE-ASSEMBLED FOR FLUE SWEEPING FROM INSIDE OF THE FIREBOX. See instructions below: IMPORTANT: The ba e MUST sit on the top bracket to be completely fixed into position CLAIRVAUX CHEMINÉES PHILIPPE... - Page 20 NOTES CLAIRVAUX CHEMINÉES PHILIPPE...
-
Page 21: Operation 5.1 Before First Ignition
5. OPERATION 5.1 BEFORE FIRST IGNITION 5.2 RECOMMENDED FIRE WOOD 5.3 HOW TO LIGHT & BURN SAFELY 24 & 25 5.4 WARNINGS LABELS... - Page 22 » Do not burn domestic waste, plastic (eg bottles) or plastic derivatives, rubber, oily products (eg oil soaked rags) etc which not only give off an unpleasant odour but will also pollute the environment and CLAIRVAUX CHEMINÉES PHILIPPE...
- Page 23 SPLITTING COALS VOL. GREY BOX Many RED IRON BARK Excellent RED BOX Excellent YELLOW BOX Excellent RED GUM Excellent BLUE GUM Fair Good STRINGY BARK Good Good NARROW LEAF Good Good PEPPERMINT Good Good PINE Fair Poor CLAIRVAUX CHEMINÉES PHILIPPE...
- Page 24 3.Firestarters should then be evenly positioned between the two layers of kindling on the back, middle and front 4. Once the kindling and hard wood has caught properly close the door adjust the primary and secondary air vents accordingly CLAIRVAUX CHEMINÉES PHILIPPE...
- Page 25 » Always have two pieces of wood burning off each other as one log on its own will struggle to stay » recommended, especially at the start and end of winter and when the temperature rises as this can » » retainers and over all cast iron internal elements CLAIRVAUX CHEMINÉES PHILIPPE...
- Page 26 WARNING: DO NOT BURN WOOD THAT IS PAINTED; OR IS COATED WITH PLASTIC; OR HAS BEEN TREATED WITH ANY CHEMICAL CAUTION: DO NOT OPERATE THIS APPLIANCE IF GLASS IS CRACKED OR BROKEN. CAUTION: THIS APPLIANCE SHOULD BE MAINTAINED AND OPERATED AT ALL TIMES IN ACCORDANCE WITH THESE INSTRUCTIONS. CLAIRVAUX CHEMINÉES PHILIPPE...
-
Page 27: Maintenance 6.1 Servicing Guide
6. MAINTENANCE 6.1 SERVICING GUIDE 6.2 TROUBLE SHOOTING 6.3 SPARE PARTS... - Page 28 SERVICE & ONGOING MAINTENANCE » these » » Once the heating period is over, clean all the internal cast iron elements, scrape off any soot or tar and » After this cleaning, rub all cast iron elements with a suitable Cheminées Philippe touch up paint to protect the unit (carry out as often as necessary) »...
- Page 29 - Ensure the right wood is being used, refer to pages 22 & 23 The window becomes dirty very quickly - Using a moisture meter check the moisture content of the wood, refer to pages 22 & 23 - Check the secondary air in-take is not blocked CLAIRVAUX CHEMINÉES PHILIPPE...
- Page 30 » Only use spare parts, in particular the replacement of glass should only be sourced and supplied by Cheminées Philippe Australia » Please refer to common parts list on page 18, for all other parts refer to diagram below CLAIRVAUX CHEMINÉES PHILIPPE...
-
Page 31: Warranty
7. WARRANTY 7.1 WARRANTY POLICY & EXTENDED WARRANTY 7.2 INSTALLER CHECKLIST FORM... - Page 32 14 days of installation. This can be done online at https://chemphilaust.com.au/product-registration/ In the event of a claim, you must email a copy of your invoice and the installer checklist CLAIRVAUX CHEMINÉES PHILIPPE...
- Page 33 The user has been shown the Mechanisms, Operation & Maintenance guide FIRST & LAST NAME OF INSTALLER: COMPANY NAME (IF APPLICABLE) CONTACT NUMBER COMPLIANCE CERTIFICATE # SERIAL NUMBER OF UNIT (located inside the base of the ashpan chamber) CLAIRVAUX CHEMINÉES PHILIPPE...
- Page 34 CHEMINÉES PHILIPPE AUSTRALIA For more information contact your nearest dealer or visit, www.chemphilaust.com.au...
Need help?
Do you have a question about the CLAIRVAUX and is the answer not in the manual?
Questions and answers