Table of Contents
Advertisement
Quick Links
- 1 Table of Contents
- 2 Section 2. Unit Location Considerations
- 3 Section 5. Refrigerant Line Considerations
- 4 Section 4. Setting the Unit
- 5 Section 11. Electrical - Low Voltage
- 6 Section 12. Electrical - High Voltage
- 7 Section 14. System Charge Adjustment
- 8 Section 17. Wiring Diagrams
- Download this manual
ALL phases of this installation must comply with NATIONAL, STATE AND LOCAL CODES
IMPORTANT - This document is customer property and is to remain with this unit. Please return to service
information pack upon completion of work.
These instructions do not cover all variations in systems or provide for every possible contingency to be met in
connection with the installation. Should further information be desired or should particular problems arise which are
not covered sufficiently for the purchaser's purposes, the matter should be referred to your installing dealer or local
distributor.
Note: The manufacturer recommends installing only approved matched indoor and outdoor systems. Some of
the benefits of installing approved matched indoor and outdoor split systems are maximum efficiency, optimum
performance and the best overall system reliability.
Note: R-454B refrigerant is an "A2L" refrigerant meaning: A = non-toxic, 2 = flammable, L = low burning velocity.
The term "A2L" is used throughout this document.
Table of Contents
Section 1. Safety ..................................................................................... 2
Section 2. Unit Location Considerations.............................................. 3
Section 3. Unit Preparation .................................................................... 4
Section 4. Setting the Unit ..................................................................... 4
Section 5. Refrigerant Line Considerations ......................................... 4
Section 6. Refrigerant Line Routing ..................................................... 5
Section 7. Refrigerant Line Brazing ...................................................... 7
Section 8. Refrigerant Line Leak Check ............................................... 8
Section 9. Evacuation ............................................................................. 8
Section 10. Service Valves ..................................................................... 8
Section 11. Electrical - Low Voltage ..................................................... 9
Section 12. Electrical - High Voltage .................................................. 11
Section 13. Start Up .............................................................................. 12
Section 14. System Charge Adjustment ............................................. 12
Section 15. Checkout Procedures ....................................................... 16
Section 16. Refrigeration Circuits........................................................18
Section 17. Wiring Diagrams................................................................20
Section 18. Pressure Curves................................................................23
Installation and Operation Manual
Condensing Units
5TTA4036 - 060
18-AC132D1-1A-EN
Advertisement
Table of Contents

Related Manuals for Trane 5TTA4036A3


Summary of Contents for Trane 5TTA4036A3
-
Page 1: Table Of Contents
18-AC132D1-1A-EN Installation and Operation Manual Condensing Units 5TTA4036 - 060 ALL phases of this installation must comply with NATIONAL, STATE AND LOCAL CODES IMPORTANT – This document is customer property and is to remain with this unit. Please return to service information pack upon completion of work. -
Page 2: Section 1. Safety
Section 1. Safety The appliance shall be stored in a room without contin- Only qualified personnel should install and service the uously operating ignition sources (for examples: open equipment. The installation, starting up, and servicing flames, an operating gas appliance or an operating of heating, ventilating, and air-conditioning equipment electric heater). -
Page 3: Section 2. Unit Location Considerations
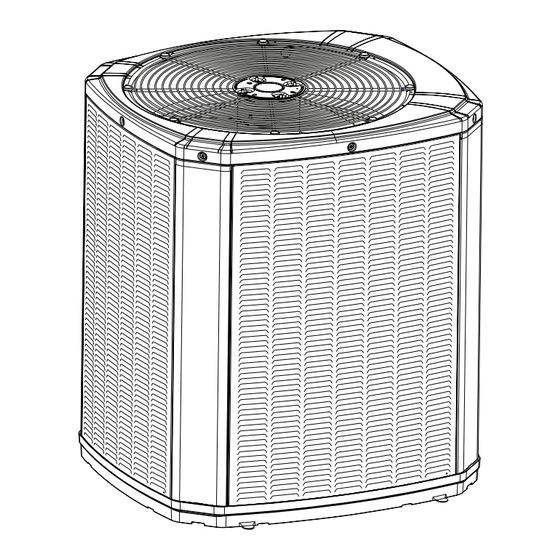
Section 2. Unit Location Considerations 2.1 Unit Dimensions and Weight Table 2.1 Unit Dimensions and Weight Models H x D x W (in) Weight* (lb) 5TTA4036A3 33 x 30 x 33 5TTA4042A3 37 x 34 x 37 5TTA4048A3 45 x 34 x 37 5TTA4060A3... -
Page 4: Section 3. Unit Preparation
5.1 Refrigerant Line and Service Valve Connection Sizes Table 5.1 Rated Line Sizes Alternate Line Sizes Service Valve Connection Sizes Vapor Line Liquid Line Model Vapor Line Liquid Line Liquid Line Connection Connection 5TTA4036A3 5/16 5/16 5/16 5/16 5TTA4042A3 5TTA4048A3 5/16 5/16 5TTA4060A3 1-1/8 5/16... -
Page 5: Section 6. Refrigerant Line Routing
5.4 Refrigerant Line Insulation Important: The Vapor Line must always be Vapor Line Liquid Line insulated. DO NOT allow the Liquid Line and Insulation Vapor Line to come in direct (metal to metal) contact. 5.5 Reuse Existing Refrigerant Lines CAUTION REFRIGERANT! Failure to inspect or use proper service tools may result in equipment damage or personal injury. - Page 6 8 Feet Maximum Joist/Rafter Isolator Line Set Side View 8 Feet Maximum Secure Vapor line from joists using isolators every 8 ft. Secure Liquid Line directly to Vapor line using tape, wire, or other appro- priate method every 8 ft. Isolation From Joist/Rafter 8 Feet Maximum Wall...
-
Page 7: Section 7. Refrigerant Line Brazing
Section 7. Refrigerant Line Brazing 7.1 Braze The Refrigerant Lines STEP 1 - Remove caps or plugs. Use a deburing tool to debur the pipe ends. Clean both internal and external surfaces of the tubing using an emery cloth. STEP 2 - Remove the pressure tap cap and valve cores from both service valves. STEP 3 - Purge the refrigerant lines and indoor coil with dry nitrogen. -
Page 8: Section 8. Refrigerant Line Leak Check
Section 8. Refrigerant Line Leak Check 8.1 Check For Leaks After completion of field piping for split systems, the field pipework shall be pressure tested with nitrogen and then vacuum tested prior to refrigerant charging, according to the following requirements: 1. -
Page 9: Section 11. Electrical - Low Voltage
10.2 Open the Liquid Service Valve WARNING Extreme caution should be exercised when opening the Liquid Line Service Valve. Turn counterclockwise until the valve stem just touches the rolled edge. No torque is required. Failure to follow this warning will result in abrupt release of system charge and may result in personal injury and /or property damage. - Page 10 11.2 Low Voltage Hook-up Diagrams With TEM 3, 4, 6, 8 With TAM 4, 7, 9 Outdoor Outdoor Thermostat Air Handler Thermostat Air Handler Unit Unit 24 VAC HOT 24 VAC HOT • Units with pigtails require wirenuts for connections. Cap all unused wires.
-
Page 11: Section 12. Electrical - High Voltage
2 Stage AC Thermostat AUX 1 AUX 1 AUX 1 AUX 2 AUX 2 INDOOR UNIT OUTDOOR UNIT AUX 2 24VAC HOT COMMON Y1/YIo COOLING Y/Y2 HEATING Section 12. Electrical - High Voltage 12.1 High Voltage Power Supply LIVE ELECTRICAL COMPONENTS! Failure to follow this Warning could result in property damage, severe personal injury, or death. -
Page 12: Section 13. Start Up
Section 13. Start Up 13.1 System Start Up STEP 1 - Ensure Sections 7 through 12 have been completed. STEP 2 - Set System Thermostat to OFF. STEP 3 - Turn on disconnect(s) to apply power to the indoor and outdoor units. STEP 4 - Wait one (1) hour before starting the unit if compressor crankcase heater accessory is used and the Outdoor Ambient is below 70ºF. - Page 13 STEP 2 - Determine the final subcooling target using total Line Length and Lift measured in STEP 1 and the charts below. 036 & 042 Models 048 & 060 Models SUBCOOL CHARGING CHART CORRECTIONS TABLE (FOR LINE LENGTH AND RISE) SUBCOOL CHARGING CHART CORRECTIONS TABLE (FOR LINE LENGTH AND RISE) 4°...
- Page 14 STEP 6 - Adjust refrigerant level to attain proper gage pressure. Add refrigerant if the Liquid Gage Pressure is lower than the chart value. 1. Connect gages to refrigerant bottle and unit as illustrated. 2. Purge all hoses. 3. Open bottle. 4.
- Page 15 STEP 10 - If repairs must be made after system is charged, properly and safely remove and isolate refrigerant and purge the section of the system needing repair with oxygen free nitrogen prior to opening the circuit. The refrigerant charge should be recovered into the correctly marked recovery cylinders. Ensure that the correct number of cylinders for holding the total system charge is available.
-
Page 16: Section 15. Checkout Procedures
14.3 Weigh-In Method for Charging Weigh-In Method can be used for the initial installation, or anytime a system charge is being replaced. Weigh-In Method can also be used when power is not available to the equipment site or operating conditions (indoor/ outdoor temperatures) are not in range to verify with the subcooling charging method. - Page 17 15.2 Markings and Instructions [symbol ISO 7010-W021 (2011-05)] warning; flammable materials service indicator; read technical [symbol ISO 7000-1659 (2004-01)] manual A2L symbol warning; low burning velocity material [symbol ISO 7000-1701 (2004-01)] pressure ultraviolet radiation, [symbol IEC 60417-6040 2010-08)] instructional safeguard operator’s manual;...
-
Page 18: Section 16. Refrigeration Circuits
Section 16. Refrigeration Circuits 036 Models PRINTED FROM D157394P01 042 Models PRINTED FROM D158514P01 18-AC132D1-1A-EN... - Page 19 048 & 060 Models Printed from D159175 16.1 Refrigerant Detection System The approved ID/OD combination will provide sufficient safe ventilation. Airflow provided is sufficient to cover minimum room area including adjustments for altitude. All systems require a refrigerant detection system so no altitude adjustment factors are required. Installer must ensure refrigerant detection system is connected and placed in appropriate orientation per application.
-
Page 20: Section 17. Wiring Diagrams
Section 17. Wiring Diagrams 18-AC132D1-1A-EN... - Page 21 18-AC132D1-1A-EN...
- Page 22 18-AC132D1-1A-EN...
-
Page 23: Section 18. Pressure Curves
Section 18. Pressure Curves COOLING PERFORMANCE CAN BE CHECKED WHEN THE OUTDOOR TEMP IS ABOVE 65 DEG F. TO CHECK COOLING PERFORMANCE, SELECT THE PROPER INDOOR CFM, ALLOW PRESSURES TO STABILIZE. MEASURE INDOOR WET BULB TEMPERATURE, OUTDOOR TEMPERATURE, LIQUID AND SUCTION PRESSURES. ON THE PLOTS LOCATE OUTDOOR TEMPERATURE (1); LOCATE INDOOR WET BULB (2);... - Page 24 The AHRI Certified mark indicates Trane U.S. Inc. participation in the AHRI Certification program. For verification of individual certified products, go to ahridirectory.org. Trane has a policy of continuous data improvement and it reserves the right to change design and specifications without notice. We are committed to using environmentally conscious print practices.
Need help?
Do you have a question about the 5TTA4036A3 and is the answer not in the manual?
Questions and answers