Table of Contents
Advertisement
Advertisement
Table of Contents

Related Manuals for Shark FA200 Series


Summary of Contents for Shark FA200 Series
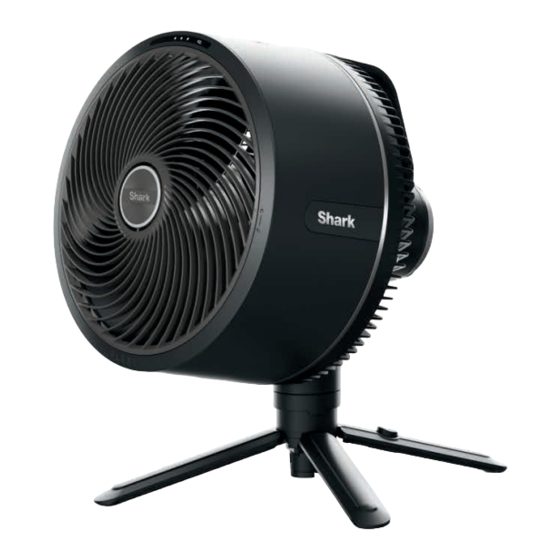
- Page 1 FA200 Series OWNER’S GUIDE...
-
Page 2: Battery Warnings
When your Only use Shark branded accessories. remote battery needs to be replaced, dispose of it or recycle it in Do not use if appliance is not working as it should, or has been accordance with local ordinances or regulations. -
Page 3: Important Safety Instructions
IMPORTANT SAFETY INSTRUCTIONS SUITABLE FOR OUTDOOR USE & HOUSEHOLD USE ONLY. CAR CHARGER FAN COVER SAVE THESE INSTRUCTIONS. READ ALL INSTRUCTIONS BEFORE USE This manual contains The fan cover is not a toy. Children should not play with it as it important safety and may become unsanitary during outdoor use. - Page 4 WHAT’S INCLUDED Base Fan Head (already assembled) Pole Allen Wrench Remote Bolt Charger ACCESSORIES Different fan models come with different accessories. To purchase an accessory that was not included, go to sharkclean.com Mister Car Charger Cover...
-
Page 5: Assembling Your Fan
ASSEMBLING YOUR FAN Upper pole Charging port labeled Align yellow arrow on The upper pole Rotate clockwise to bottom of pole with with has wider end. tighten the bolt. yellow dot on base 1. Align and insert the CAUTION: finger pinch Align the yellow dot Turn the base on its Charge fan to 100%... - Page 6 CHARGING THE FAN PEDESTAL MODE: To charge the fan in TABLETOP MODE: To charge the fan in tabletop mode, insert the CHARGER pedestal mode, insert the CHARGER PLUG PLUG into the charging port under the center shaft of the fan, between the 4 into the charging port near the bottom of support legs.
- Page 7 TABLETOP MODE To convert the fan to portable, tabletop mode: To detach the fan from the pole, press the Spread out the four support legs until they Lift-Away button, then slide the fan head click into place. Place the fan on a flat, level off the pole.
-
Page 8: Power On/Off
SETTINGS • Before first use, pull out the plastic tab from the battery compartment of the remote control. • To preserve battery life, the fan will enter IDLE mode if left unplugged and powered off for 24 hours. In IDLE mode, the remote cannot be used to turn on the fan. - Page 9 FAN SPEEDS Changing the FAN SPEED will increase or decrease the airflow of the fan. There are 5 fan speed settings. To change the speed, press the fan icon on the fan head to cycle though the different speeds. With the remote, press the up or down arrows to change speeds.
- Page 10 OSCILLATION Choose between oscillation settings to best suit your needs. 5-speed models have 3 options for angle of oscillation, while 3-speed models have one option. To change the oscillation settings, press the up/down arrow on the REMOTE. To do so on the fan head, press the oscillation icon to cycle through the settings.
-
Page 11: Cleaning The Fan
The second LED indicator and This error state indicates an issue with the voltage of the the Battery LED (in amber) charger. Please be sure to only use the provided Shark are flashing. What is wrong? charging cable and power supply. -
Page 12: Troubleshooting And Frequently Asked Questions
TROUBLESHOOTING AND FREQUENTLY ASKED QUESTIONS We recommend cleaning the fan every 6 months or as needed. If grill screw, bolt, or Allen wrench have been lost, see the Hardware Specs section for information on how to replace any hardware. • LOCK MODE must be activated prior to performing maintenance. This will temporarily block all fan functions until deactivated. -
Page 13: Hardware Specs
HARDWARE SPECS Grill Screw For securing the grill to the fan Drive Type Phillips Thread Size / Pitch M3 x 0.5mm Length 16mm Screwdriver For driving the screw Drive Type Phillips Size No. 1 Bolt For securing base to pole Drive Type Thread Size / Pitch M6 x 1mm... -
Page 14: Available Accessories
AVAILABLE ACCESSORIES Remote Control Misting Accessory Use the remote control to operate your fan from a distance. Connect the misting accessory to the front grill to produce a fine mist. For assembly instructions and more information, see the Misting Accessory section. Car Charger Fan Cover Charge your fan on the go with the car charger accessory. -
Page 15: Instructions For Maintenance
MISTING ACCESSORY ASSEMBLY: Carefully align the misting accessory with the circle in the center of the fan grill, and push it in to install. Do not use excessive force. Screw the end of the misting accessory into the nozzle of a standard garden hose, Turn on the hose to generate mist. -
Page 16: Car Charger
CAR CHARGER IMPORTANT SAFETY INSTRUCTIONS IMPORTANT SAFETY INSTRUCTIONS INSTRUCTIONS FOR USE: READ ALL INSTRUCTIONS BEFORE USE READ ALL INSTRUCTIONS BEFORE USE Firmly insert the car charger plug into a 12-volt outlet SAVE THESE INSTRUCTIONS. This manual contains important safety SAVE THESE INSTRUCTIONS. This manual contains important safety and operating instructions for battery charger model FA20XCAR and operating instructions for battery charger model FA20XCAR in your vehicle. -
Page 17: Register Your Purchase
PLEASE READ CAREFULLY AND KEEP FOR FUTURE REFERENCE. This Owner’s Guide is designed to help you get a complete understanding of your new Shark® fan. SharkNinja Operating LLC US: Needham, MA 02494...
Need help?
Do you have a question about the FA200 Series and is the answer not in the manual?
Questions and answers