Table of Contents
Advertisement
Available languages
Available languages
Quick Links
Advertisement
Table of Contents

Summary of Contents for Hoover ZOOM MAX HC85-ZM-ME
- Page 1 Zoom User Guide HC85-ZM-ME Hoover.ae Version 1.0...
-
Page 2: Machine Overview
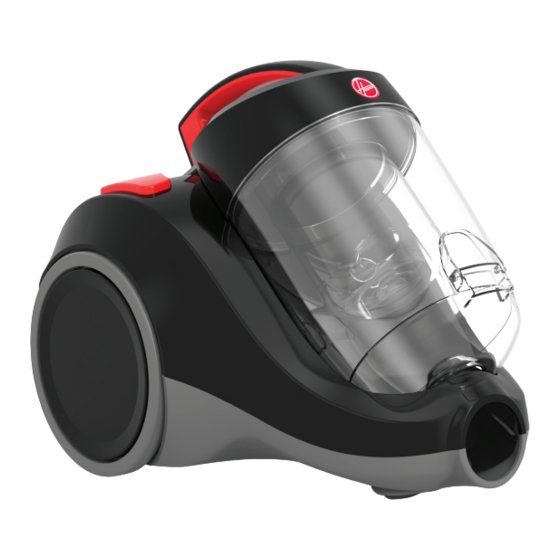
MACHINE OVERVIEW Unit Dirt container lid Dirt container Cyclone separator and shroud Hose connector Carry handle Dirt container release button Floorhead parking slot On/off button Post-motor filter Cord rewind button Wheel Accessory hose and handle Telescopic extension tube Combination floor head Crevice tool Upholstery tool Accessories... -
Page 3: General Safety Information
Don’t run over the power cord or use vacuum cleaner if the power cord or plug is damaged. Please visit hoover.ae. Don’t handle the plug or use the vacuum cleaner with wet hands. Don’t pull or carry this vacuum cleaner by the power cord. -
Page 4: Operation
OPERATION Before you begin cleaning Important: The vacuum cleaner is equipped with a thermal cut-out. If for any reason the vacuum cleaner does overheat the thermostat will automatically turn the vacuum cleaner off. If this happens, switch the vacuum cleaner off and unplug. Remove and empty the dirt container also check the vacuum cleaner for blockages. - Page 5 OPERATION Important: The base of the vacuum cleaner should always be positioned flat on the floor when starting and in use. Caution: When unwinding the power cord do not pull further than the yellow marker. Operating the appliance and accessories Unwind the power Plug into mains and For use on carpets,...
-
Page 6: Maintenance
MAINTENANCE Looking after your machine Emptying and cleaning the dirt container Press the dirt container Hold the dirt container release button and over a bin and press lift to remove the dirt release clip on dirt container. the bottom of the dirt container allowing dirt and debris to fall out. - Page 7 MAINTENANCE Cleaning the shroud Twist the dirt container Pull to remove the shroud Remove the filter and Twist the shroud lid to open. from the container. place aside. separator anti-clockwise. 24hr Important: The shroud is accessed by removing the dirt container lid and is located underneath the pre-motor filter.
- Page 8 • Please check if the damage is with the accessory or the unit. To do this, first remove the accessory from the unit and check if there is suction from the hose. If there is suction from the hose this confirms the damage is with the accessory. Please visit www.hoover.ae or contact your local Hoover service agent.
-
Page 9: Other Information
OTHER INFORMATION Service and Help If you have any queries or concerns about using your Hoover, simply visit hoover.ae Consumables To purchase spares and accessories, please visit hoover.ae The use of genuine Hoover spare parts helps to maintain optimised performance and validates your guarantee. - Page 10 NOTES...
- Page 11 مالحظات...
- Page 12 المواد المستهلكة hoover.ae لشراء قطع الغيار والملحقات، تفضل بزيارة الموقع . األصلية على الحفاظ على مستوى األداء المثالي والتحقق من صحة الضمان الخاص بكHoover يساعد استخدام قطع غيار المواصفات الفنية من 022 إلى 042 فولت، من 05 إلى 06 هرتز...
- Page 13 • إذا وجدت عند االنتهاء من الفحوصات أعاله والتأكد من عدم وجود انسدادات بالخرطوم وتنظيف الفلتر أنه ال يوجد شفط أو يوجد . المحلي لديكHoover شفط محدود من الخرطوم، ف ي ُرجى االتصال بوكيل خدمة لماذا تخرج األتربة من المكنسة الكهربائية؟...
- Page 14 الصيانة تنظيف الغطاء .اسحب إلزالة الغطاء من الحاوية اضغط بقوة على غطاء حاوية .فك الفلتر وضعه جان ب ًا اضغط بقوة على فاصلة الغطاء .األتربة لفتحه .في عكس اتجاه عقارب الساعة 42 ساعة 24hr مهم: يمكن الوصول إلى الغطاء عن طريق إزالة غطاء حاوية األتربة وهو...
- Page 15 الصيانة العناية بالجهاز تفريغ حاوية األتربة وتنظيفها اضغط على زر تحرير حاوية ثبت حاوية األتربة فوق صندوق األتربة وارفع إلزالة حاوية القمامة واضغط على مشبك .األتربة تحرير األتربة الموجود أسفل حاوية األتربة مما يسمح بسقوط .األتربة والحطام تنظيف الفلتر المركب قبل الموتور اضغط...
- Page 16 التشغيل مهم: يجب وضع قاعدة المكنسة الكهربائية دائ م ًا بشكل مسطح على األرضية عند بدء تشغيلها أو أثناء .استخدامها .تنبيه: عند سحب سلك الطاقة، ال تسحب أكثر من العالمة الصفراء تشغيل الجهاز والملحقات ﺍﻟﺳﺟﺎﺩ ﺍﻷﺭﺿﻳﺎﺕ ﺍﻟﺧﺷﻧﺔ لالستخدام على السجاد، انقر صِ...
- Page 17 التشغيل قبل البدء في التنظيف مهم: المكنسة الكهربائية مزودة بقاطع تيار حراري. إذا ارتفعت حرارة المكنسة الكهربائية ألي سبب كان بصورة مفرطة، فستقوم الترموستات .بإيقاف تشغيل المكنسة الكهربائية بصورة تلقائية. إذا حدث ذلك، فأوقف تشغيل المكنسة الكهربائية وافصل القابس قم بفك حاوية األتربة وإفراغها وافحص المكنسة الكهربائية أي ض ًا بحث ً ا عن انسدادات. اترك المكنسة الكهربائية لتبرد لمدة ساعة واحدة تقري ب ًا )إذا .(قمت...
- Page 18 ال تستخدم هذه المكنسة الكهربائية إذا تعرضت للسقوط أو التلف أو إذا ت ُ ركت في أماكن مفتوحة أو إذا لم تكن الفالتر موجودة في .مكانها األصلي .hoover.ae ال تدهس سلك الطاقة وال تستخدم المكنسة الكهربائية إذا كان سلك الطاقة أو القابس تالفين. تفضل بزيارة الموقع .ال تتعامل مع القابس أو تستخدم المكنسة الكهربائية ويداك مبتلتان...
- Page 19 نظرة عامة على الجهاز الوحدة غطاء حاوية األتربة حاوية األتربة فاصلة وغطاء حلزوني موصل الخرطوم مقبض الحمل زر تحرير حاوية األتربة فتحة تخزين رأس األرضية زر تشغيل/إيقاف فلتر مركب بعد الموتور زر سحب السلك عجلة خرطوم ومقبض ملحقان أنبوب تمديد تلسكوبي رأس...
- Page 20 Zoom دليل المستخدم HC85-ZM-ME Hoover.ae...


Need help?
Do you have a question about the ZOOM MAX HC85-ZM-ME and is the answer not in the manual?
Questions and answers