Table of Contents
Advertisement
Available languages
Available languages
Quick Links
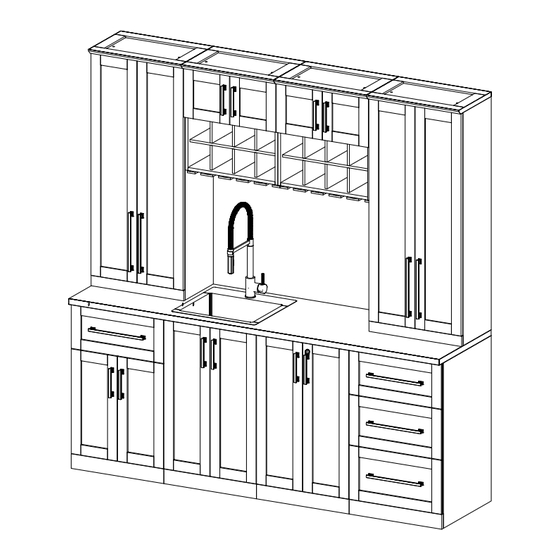
21" Home Bar Series
!
STOP
For the online installation manual and videos regarding this product, please check out our support hub via:
https://newageproducts.com/support-hub/bar-cabinets
MASTER INSTALLATION GUIDE
Warning: Excessive weight hazard!
Use two or more people to move, assemble, or install cabinets
to avoid back injury. Do not leave children unattended near
cabinets. High risk of tipping if cabinets are installed incorrectly:
securely attach cabinets to the wall to avoid serious injury.
ATTENTION:
Need help or spare parts? For fastest service,
contact NewAge Products at 1-877-306-8930;
or support@newageproducts.com.
Do not return to the retailer.
Is
your Cabinet damaged?
IM-HBA.01A-02-Rev2.1
Advertisement
Table of Contents

Related Manuals for NewAge Products 21 Home Bar Series


Summary of Contents for NewAge Products 21 Home Bar Series
- Page 1 Cabinet damaged? STOP Need help or spare parts? For fastest service, contact NewAge Products at 1-877-306-8930; or support@newageproducts.com. Do not return to the retailer. For the online installation manual and videos regarding this product, please check out our support hub via: IM-HBA.01A-02-Rev2.1...
- Page 2 Index Manufacturer Warranty Unpacking Product Specifications Weight Capacity Tools Needed Securing Wall Cabinets To Wall Fastening Wall Cabinets Together Securing Base Cabinets With Drawer To Wall Fastening Base Cabinets Together Installing Countertops Installing the Stone Countertops Adjusting the Door Hinges Removing/Inserting Drawers Installing Shelves Installing Wine Rack for Display Cabinet...
-
Page 3: Lifetime Limited Warranty
WHAT IS NOT COVERED Service calls to correct the installation of any NewAge products or to instruct you how to use or install them. Damages resulting from products caused by accident, misuse, abuse fire, flood improper installation, acts of god, neglect, modification or alteration, normal wear and tear, extreme heat, exposure to the elements including humidity or mishandling. - Page 4 Unpacking 1-877-306 -8930...
-
Page 5: Product Specifications
Product Specifications Note: Handles are included only for selected Cabinets. Large handles (Hole distance 288mm) and Small Handles (Hole distance 128mm). For more information on handles please see our cabinet hardware offerings: https://newageproducts.com/kitchen/cabinet-hardware/ Threaded Washer Lag Screw Threaded Washer Shelf Pins Glass Shelf Pins Cover 6x65 (#12x2 1/2”) - Page 6 Product Specifications Home Bar 21in Short Wall Cabinet S.No. Hardware ENG P/N Qty. Lag Screw 6mmx65mm (#12x2 ½”) H00622A-01 Threaded Washer H00623A-01 Threaded Washer Cover H00624A-01 Wood Screw #8x1” H00621A-01 Glass Shelf HBC-05.002A-01 Shelf Pins H00496A-01 Home Bar 21in Tall Wall Cabinet S.No.
- Page 7 Product Specifications Home Bar 21in Three Drawer Cabinet S.No. Hardware ENG P/N Qty. Lag Screw 6mmx65mm (#12x2 ½”) H00622A-01 Threaded Washer H00623A-01 Threaded Washer Cover H00624A-01 Wood Screw #8x1” H00621A-01 Home Bar 21in Wine Storage Cabinet S.No. Hardware ENG P/N Qty.
- Page 8 Product Specifications Home Bar 21in Two Door Sink Cabinet S.No. Hardware ENG P/N Qty. Wood Screw #8x1” H00621A-01 M6x65mm Lag Screw H00622A-01 Washer for Cover H00623A-01 Cover Cap H00624A-01 Home Bar 21in Sink Cabinet S.No. Hardware ENG P/N Qty. Wood Screw #8x1” H00621A-01 M6x65mm Lag Screw H00622A-01...
- Page 9 Product Specifications Home Bar 42in & 63in Floating Shelves S.No. Hardware ENG P/N 42in Shelf 63in Shelf Lag Screw 6x65mm H00622A-01 Threaded Washer H00623A-01 Threaded Washer Cover H00624A-01 Home Bar 42in Wine Glass Shelf S.No. Hardware ENG P/N 42” Wine Glass Shelf Lag Screw 6x65mm H00622A-01 Threaded Washer...
-
Page 10: Weight Capacity
Weight Capacity lbs. 220 lbs lbs. lbs. lbs. lbs. lbs. lbs. lbs. 200 lbs lbs. lbs. Display Cabinets Short Display Cabinets Sink Cabinets lbs. lbs. lbs. lbs. lbs. lbs. lbs. lbs. lbs. lbs. lbs. Base Cabinets Split Base Cabinets 3 Drawer Base Cabinet lbs. -
Page 11: Tools Needed
Tools Needed 1x 24in-48in 1x 2# 1x 2# Phillips Level Phillips Head 1x Cordless Screwdriver Power Drill (Optional) 1x 3mm or 1x 6.5mm or 1x 2.5mm or 1x Stud 1/8” Drill Bit 1/4” Drill Bit Finder 3/32” Drill Bit 1x Flashlight 1x Tape Pencil (optional) - Page 12 Securing Wall Cabinets To Wall Use the stud finder to locate the studs and Gather parts. mark the wall with a pencil. 4 x Lag Screw 4 x Threaded 4 x Threaded 6mm x 55mm Washer Caps Near the top of the cabinet, drill 1/4” holes through the back of the cabinet that is in line with marked studs.
- Page 13 Fastening Wall Cabinets Together Note: All shelves must be removed prior to fastening cabinets together. Drill 3/32” pilot holes on the interior wall of the Parts Needed cabinet being fastened. 4 - #8 x 25mm screws Using pilot hole as guides, screw into the second cabinet. Do Not Over-tighten screws and Punch through the other side! Note: Refer to the LED Light installation section for a detailed process for installing lights.
- Page 14 Securing Base Cabinets With Drawer To Wall Note: Only base cabinets with drawers are required to be secured with the wall, to prevent tipping. To securely fasten the cabinet to the wall, drill 1/4” pilot holes on the back inside the wall of the cabinet.
- Page 15 Fastening Base Cabinets Together Note: All shelves/drawers must be removed before fastening cabinets together. Drill 3/32” pilot holes on the interior wall of the Parts Needed cabinet being fastened. 4 - #8 x 25mm screws Using pilot hole as guides, screw into the second cabinet. Do Not Over-tighten screws and Punch through the other side!
- Page 16 Installing the Countertops Parts Needed. Place worktop over cabinets 4 - #8 x 25mm screws Drill 3/32” pilot holes on the interior Tighten screws to secure cabinets. roof of the cabinet.
- Page 17 Installing the Stone Countertops Using a caulking gun with100% silicone Using two people, lift countertop carefully. (not included), apply a bead of silicone on the top panel of the cabinets. Align the back edge of the engineered stone top with the back edge of the cabinets and then slowly place it on top.
-
Page 18: Adjusting The Door Hinges
Adjusting the Door Hinges Using a Philips screwdriver, the doors can be adjusted: Left, right, upwards, and downwards. To adjust the doors left or right, turn the screw (A) clockwise or counter clockwise To adjust the doors Up or Down, turn the screw (B) clockwise or counter clockwise... - Page 19 Removing/Inserting Drawers Press plastic triggers on the underside Extend drawer fully. of the drawer according to arrows in the image. Tilt and remove shelf rack Inserting Drawers Put drawer on slides and slide each Partially extend drawer slides drawer slide forward until you hear a click sound.
-
Page 20: Installing Shelves
Installing Shelves For horizontal placement of shelf, make Open cabinet doors. sure shelf supports are located at the Attach shelf clips to desired height. same height Insert shelf/ rack at a slight angle Position over shelf supports Lower shelf down onto shelf supports. Insert remaining shelves. - Page 21 Installing Wine Rack for Display Cabinets NOTE: Wine Rack can be installed horizontally or at an angle. For placement at an angle, Shelf supports are inserted to the front and middle Open cabinet doors. hole provided on side panels for Display Attach shelf clips to desired height.
-
Page 22: Installing The Handles
Installing The Handles Parts Needed Drawer Frame Screws Door Frame Screws Handle(s) #8x30 mm #8x25 mm Note: Handles are included only for selected Cabinets. Installing On Door: Align the holes on the door face with the holes on the handle. Using the #8 x 25mm Screws, insert from the backside of door and tighten with a #2 Philips screwdriver. - Page 23 Installing NewAge Sink 21in Standard Sink Installation Using two persons, lift the sink and Using a caulking gun and 100% silicone centre on top frame of the sink cabinet. (not included), apply a bead along top Align the back edge of the sink with frame of the cabinet.
- Page 24 Installing LED Light (Base/Wall Cabinets) LED Light with power Adapter LED Light with Connector wire SKU# 60836 SKU# 60837 • The connector kit is used when • The adapter kit is used to connect to the additional light units (up to 4) will be electrical outlet, and contains the power connected together.
- Page 25 Connecting the LED Lights Parts required Double Sided LED Light(s) Power Adapter Connector Wire Plastic Clip Tape For LED Lights to work correctly, the Use connector cords (B) to connect adapter cable (A) must be connected to additional lights. Up to 4 LED lights can be the end with the on/off switch, for the LED connected to one Power adapter cord(A).
- Page 26 Installing LED Lights for Base Cabinets Remove backing paper from one side of Drill holes on back panel following double sided tape (1) and apply to clear Diagram 1. The hole can be placed on plastic clip (2). Attach plastic clip to LED Light either side of cabinet at point A.
- Page 27 Installing LED Lights for Wall Cabinets Method 1. Using double sided tape provided. Remove backing paper from one side of double sided tape (1) and apply to clear Center and press firmly 5.5”, in from walls plastic clip (2). Attach plastic clip to LED Light and 7.5”, in from back wall.
- Page 28 Installing Floating Shelf Fastening the Shelf System to drywall The shelf system must be secured to wall Use stud finder to locate the studs and mark studs. the wall with a pencil. Begin by measuring up from the countertop to the desired height of the shelf position. Using a level, mark a horizontal line.
- Page 29 Installing Floating Shelf Using a ¼” drill bit, pre-drill through the shelf backer and into the wall stud. The 63” length shelf must be fastened with minimum three lag screws, the 42” length shelf must be fastened with minimum 2 lag screws. Using a 9/16 wrench fasten the shelf to Finish by screwing on the threaded screw the wall with lag screws and threaded...
- Page 30 Installing Entertainment Set Shelf To secure cabinet to the wall, refer to page14. Note: Only base cabinets with drawers are required to be secured with the wall, to prevent tipping. Place the cabinets at a distance 42in apart and secure the cabinets to the wall. 42 in Height Begin by measuring up from the ground level to the desired height of the shelf position.
- Page 31 Installing Entertainment Set Shelf Using a ¼” drill bit, pre-drill through the shelf backer and into the wall stud. The 42” length shelf must be fastened with minimum 2 lag screws. Using a 9/16 wrench fasten the shelf to Finish by screwing on the threaded screw the wall with lag screws and threaded head cover.
- Page 32 Installing Entertainment Set Shelf Follow the same process as mentioned in above steps to install the second floating shelf. Place the melamine worktop over the cabinets. Follow the instructions as mentioned in the Installing of countertops section Page16...
-
Page 33: Spare Parts
Spare Parts #8x1” (4x25mm)Screw Shelf pins - H00491A-01 Wall Mounting Hardware Pack Glass Shelf pins - H00621A-01 Lag Screw - H00622A-01 SKU#60813 H00496A-01 Threaded Washer - H00623A-01 SKU#60812 SKU#60823 Washer Cover - H00624A-01 SKU#60811 Lock Unit For Display Cabinet- H00481A-01 Drawer Slide Set - H00485A-01 Hinges - H00458A-01 H00482A-01... - Page 34 Spare Parts SKU# SKU# SKU# SKU# Spare Part SKU# SKU# Engineering Part Dark Natural Balanced Graphite Number Description White Espresso Walnut Beige Grey Walnut 42in Double Display HBC-04.002A-01-XX-item05 63841 63842 63844 63843 63846 63845 Cabinet RH Door 21in Display Cabinet HBC-04.001A-01-XX-item04 63847 63848...
- Page 35 Spare Parts SKU# SKU# SKU# SKU# Spare Part SKU# SKU# Engineering Part Dark Natural Balanced Graphite Number White Espresso Description Walnut Beige Grey Walnut 42in Double Display Cabinet RH Door HBC-33.002A-01-XX-item05 63937 63938 63940 63939 63942 63941 (Solid Color) 21in Display Cabinet HBC-33.001A-01-XX-item04 63943 63944...
- Page 36 Est votre armoire endommagée? Avez vous besoin d’aide ou de pièces de rechange? ARRÊT Contactez NewAge Products a 1-877-306-8930; ou support@newageproducts. com. Ne pas retourner au détaillant. Pour le manuel d’installation en ligne et les vidéos concernant ce produit, veuillez consulter notre centre IM-HBA.01A-02-Rev2.1...
- Page 37 Index GARANTIE DU FABRICANT Déballage Spécifications du produit Capacité de poids Outils nécessaires Fixation des armoires murales au mur Fixation des armoires murales ensemble Fixation des armoires de base avec tiroir au mur Fixation des armoires de base ensemble Installation des comptoirs Installation des comptoirs en pierre Réglage des charnières de portes Extraction/ Insertion du tiroir...
-
Page 38: Garantie À Vie Limitée
Pendant la durée de la garantie à compter de la date d’achat, lorsque ce produit est installé, utilisé et entretenu conformément aux instructions fournies, NewAge Products Inc. remplacera les pièces ou le produit défectueux, si le bris provient d’un défaut de matériau ou de fabrication. - Page 39 Déballage 1-877-306 -8930...
-
Page 40: Spécifications Du Produit
Spécifications du produit Remarque : Les poignées sont incluses uniquement pour les armoires sélectionnées. Grandes poignées (distance des trous 288 mm) et petites poignées (distance des trous 128 mm). Pour plus d’informations sur les poignées, veuillez consulter nos offres de quincaillerie d’armoire : https://newageproducts.com/kitchen/cabinet-hardware/ Couvercle de Vis tire-fond... - Page 41 Spécifications du produit Série de bar Petite Armoire Mural 21po de pièce Matériels Qté. série d’ingénierie Vis tire-fond 6mmx65mm (#12x2 ½”) H00622A-01 Rondelle filetée H00623A-01 Couvercle de rondelle filetée H00624A-01 Vis à bois #8x1” H00621A-01 Étagère en verre HBC-05.002A-01 Goupilles d’étagère H00496A-01 Série de bar Grande Armoire 21po de pièce...
- Page 42 Spécifications du produit Série de bar Armoire 21 po À Tiroirs de pièce Matériels Qté. série d’ingénierie Vis tire-fond 6mmx65mm (#12x2 ½”) H00622A-01 Rondelle filetée H00623A-01 Couvercle de rondelle filetée H00624A-01 Vis à bois #8x1” H00621A-01 Série de bar Armoire À Bouteilles 21po de pièce Matériels Qté.
- Page 43 Spécifications du produit Série de bar Armoire Évier 21po à deux portes de pièce Matériels Qté. série d’ingénierie Vis à bois #8x1” H00621A-01 Vis tire-fond 6mmx65mm (#12x2 ½”) H00622A-01 Rondelle filetée H00623A-01 Couvercle de rondelle filetée H00624A-01 Série de bar 21 po Armoire évier de pièce Matériels Qté.
- Page 44 Spécifications du produit Série de bar Étagère flottante de 42po et 63po de pièce Étagère Étagère Matériels série d’ingénierie de 42 po de 63 po Vis tire-fond 6mmx65mm (#12x2 ½”) H00622A-01 Rondelle filetée H00623A-01 Couvercle de rondelle filetée H00624A-01 Série de bar Étagère à verres à vin de 42 po Étagère à...
- Page 45 Capacité de poids lbs. 220 lbs lbs. lbs. lbs. lbs. lbs. lbs. lbs. 200 lbs lbs. lbs. Petite Armoire Armoire Vitreé Armoires d’évier lbs. lbs. lbs. lbs. lbs. lbs. lbs. lbs. lbs. lbs. lbs. Armoire À Tiroirs Armoire Tiroir et Armoires de base Double Porte lbs.
-
Page 46: Outils Nécessaires
Outils nécessaires 1x Niveau 1x Tête 1x Tournevis à tête 1x Perceuse sans 24in-48in Phillips n 2 Phillips n 2 (facultative) fils (facultative) 1x Foret de 3mm 1x Foret de 6.5mm 1x Foret de 2,5 mm 1x Chercheur de ou 1/18 po ou 1/4po ou 3/32 po goujons... - Page 47 Fixation des armoires murales au mur Utiliser le localisateur de montants pour trouver les montants et marquer leur Rassembler les pièces. emplacement avec un crayon. 4 x Tire-fond 4 x Rondelle Couvercle 6mm x 55mm de rondelle letée letée Percer des trous de 1/4 po à proximité du sommet de l’armoire à travers l’arrière de l’armoire au niveau des montants localisés précédemment.
- Page 48 Fixation des armoires murales ensemble Remarque: Toutes les étagères doivent être retirées avant de fixer les armoires ensemble Percer des avant-trous de 3/32 po dans la paroi Pièces nécessaires. intérieure de l’armoire en train d’être fixée. 4 - #8 x 25mm Visser la deuxième armoire en se servant des avant-trous comme guides.
- Page 49 Fixation des armoires de base avec tiroir au mur Remarque: Seules les armoires basses avec tiroirs doivent être fixées au mur pour éviter qu’elles ne basculent. Pour xer solidement le meuble au mur, percez des pré-trous de 1/4po de l’armoirdu mur. Utilisez 2 tirefonds pour xer le meuble aux montants du mur.
- Page 50 Fixation des armoires de base ensemble Remarque: Toutes les étagères/tiroirs doivent être retirés avant de fixer les armoires ensemble. Percer des avant-trous de 3/32 po dans la paroi Pièces nécessaires intérieure de l’armoire en train d’être xée. 4 - #8 x 25mm Visser la deuxième armoire en se servant des pré-trous comme guides.
- Page 51 Installation des comptoirs Pièces nécessaires. Placer le comptoir sur les armoires 4 - #8 x 25mm Percer des pré-trous de 3/32 po dans le Serrer les vis pour xer les plafond de l’armoire, à l’intérieur de armoires. celle-ci.
- Page 52 Installation des comptoirs en pierre À l’aide d’un pistolet à calfeutrer avec Avec l’aide de deux personnes, soulevez le du silicone pur (non compris), appliquez comptoir avec précaution. un cordon sur le panneau supérieur des armoires. Alignez le bord arrière du comptoir en granite avec le bord arrière des armoires, puis placez-le doucement sur le dessus.
- Page 53 Réglage des charnières de portes Il est possible de régler les portes avec un tournevis Phillips : vers la gauche, la droite, l’avant ou l’arrière. Pour régler les portes vers la gauche ou la droite, tourner la vis (A) dans le sens des aiguilles d’une montre ou dans le sens inverse des aiguilles d’une montre.
- Page 54 Extraction/ Insertion du tiroir Appuyer sur les gâchettes en plastique Ouvrir le tiroir complètement. qui se trouvent sous le tiroir aux endroits indiqués par les èches sur l’image. Basculer l’étagère et l’enlever. Poser le tiroir sur les glissières et faire Extraire partiellement les glissières coulisser chacune des glissières vers du tiroir.
-
Page 55: Installation Des Étagères
Installation des étagères Ouvrir les portes de l’armoire. Pour le placement horizontal des étagères, Fixer les goupilles des étagères à Insérer les supports des étagères dans les la hauteur désirée. trous situés à l’avant et à l’arrière. Insérer l’étagère en l’inclinant légèrement Positionner au-dessus des supports. - Page 56 Installation d’un casier à vin pour les vitrines REMARQUE : Le porte-bouteilles peut être installé horizontalement ou en biais. Pour le placement à un angle, le support Ouvrir les portes de l’armoire. d’étagère est inséré dans le trou avant et Fixer les goupilles des étagères à...
-
Page 57: Installation Des Poignées
Installation des poignées Pièces nécessaires. Vis de cadre de tiroir Vis de cadre de porte Poignée(s) #8x30 mm #8x25 mm Remarque : Les poignées sont incluses uniquement pour les armoires sélectionnées. Installation sur porte : Alignez les trous sur la face de la porte avec les trous sur la poignée. À... - Page 58 Installation de l’évier NewAge 21 po Installation d’évier standard À l’aide de deux personnes, soulevez et À l’aide d’un pistolet à calfeutrer et de centrez l’évier sur le meuble. Alignez le silicone pur (non compris), appliquez bord arrière de l’évier avec le bord arrière un cordon le long du bâti supérieur de du meuble.
- Page 59 Installation de la lumière LED (armoires de base/murales) Lumière DEL avec adaptateur Lumière de DEL avec le l de connecteur SKU# 60836 SKU# 60837 • Le kit de connexion est utilisé lorsque • Le kit adaptateur est utilisé pour se des unités d’éclairage supplémentaires connecter à...
- Page 60 Connexion des lumières LED Pièces nécessaires. Ruban adhésif Lumières LED Adaptateur secteur Fil de connexion Pince en plastique double face Pour que les lumières DEL fonctionnent Utilisez les cables de connexion (B) pour correctement, le câble adaptateur (A) doit relier en série les lumières supplémentaires. être connecté...
- Page 61 Installation de lumières LED pour les armoires de base Retirez le papier protecteur d’un côté du Pré-perçage des trous sur le panneau ruban adhésif double face (1) et appliquez- arrière suivant le schéma 1. Le trou peut le sur le clip en plastique transparent (2). être placé...
- Page 62 Installation de lumières LED pour les armoires murales Méthode 1. Utilisation du ruban adhésif double face fourni. Retirez le papier protecteur d’un côté du ruban adhésif double face (1) et appliquez-le sur le clip en plastique transparent (2). Attachez le Centrez et appuyez fermement à...
- Page 63 Installation de l’étagère flottante Fixation du système d’étagères au mur de gypse Utilisez le localisateur de montants pour Le système d’étagères doit être fixé localiser les montants et marquez le mur aux montants du mur. avec un crayon. Commencez par mesurer à partir du comptoir jusqu’à la hauteur souhaitée de la position de la tablette.
- Page 64 Installation de l’étagère flottante À l’aide d’un foret de 1/4 pouce, pré-percer dans le support de l’étagère et dans le montant du mur. La tablette de 63 po de longueur doit être fixée à l’aide de trois tire-fond au minimum, tandis que la tablette de 42 po de longueur doit être xée à...
- Page 65 Installation de l’étagère du set de divertissement Pour fixer l’armoire au mur, reportez-vous à la page14. Remarque: Seules les armoires basses avec tiroirs doivent être fixées au mur pour éviter qu’elles ne basculent. Placez les armoires à une distance de 42 pouces et fixez les armoires au mur. 42 in Height Commencez par mesurer à...
- Page 66 Installation de l’étagère du set de divertissement À l’aide d’un foret de 1/4 pouce, pré-percer dans le support de l’étagère et dans le montant du mur. La tablette de 42 po de longueur doit être xée à deux tirefonds au minimum. Utilisez d’une clé...
- Page 67 Installation de l’étagère du set de divertissement Suivez le même processus que celui mentionné dans les étapes ci-dessus pour installer la deuxième étagère flottante. Placez le plan de travail en mélamine au-dessus des armoires. Suivez les instructions mentionnées dans la section Installation des comptoirs à la Page16...
-
Page 68: Pièces De Rechange
Pièces de rechange #8x1” (4x25mm)Screw Shelf pins - H00491A-01 Wall Mounting Hardware Pack Glass Shelf pins - H00621A-01 Lag Screw - H00622A-01 SKU#60813 H00496A-01 Threaded Washer - H00623A-01 SKU#60812 SKU#60823 Washer Cover - H00624A-01 SKU#60811 Lock Unit For Display Cabinet- H00481A-01 Hinges - H00458A-01 Drawer Slide Set - H00485A-01 H00482A-01... - Page 69 Pièces de rechange UGS# UGS# UGS# UGS# Description UGS# UGS# de pièce d’ingénierie Noyer Noyer Beige Gris de la pièce de rechange Blanc Expresso naturel équilibré Graphite Foncé Vitrine double porte HBC-04.002A-01-XX-item05 63841 63842 63844 63843 63846 63845 droite de 42 po Vitrine 21po porte HBC-04.001A-01-XX-item04 63847...
- Page 70 Pièces de rechange UGS# UGS# UGS# UGS# Description UGS# UGS# de pièce d’ingénierie Noyer Noyer Beige Gris de la pièce de rechange Blanc Expresso naturel équilibré Graphite Foncé Vitrine double 42po porte gauche (couleur HBC-33.001A-01-XX-item05 63931 63932 63934 63933 63936 63935 unie) Vitrine double 42po...
Need help?
Do you have a question about the 21 Home Bar Series and is the answer not in the manual?
Questions and answers