Advertisement
Available languages
Available languages
Quick Links
Advertisement

Related Manuals for Sharp XL-B520D(BK)


Summary of Contents for Sharp XL-B520D(BK)
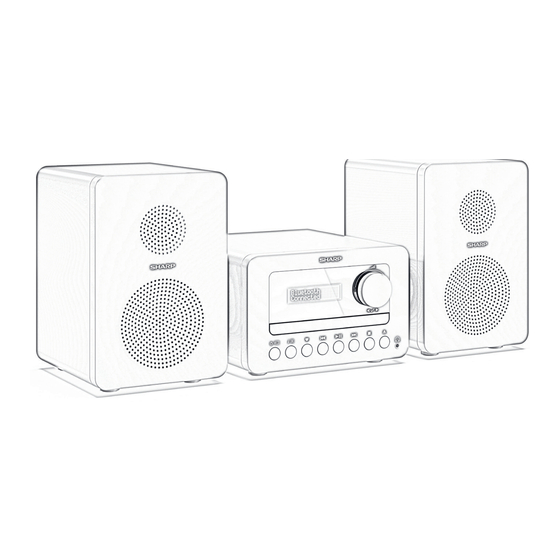
- Page 1 User manual XL-B520D Tokyo DAB+/FM Hi-Fi Micro System...
- Page 2 10 11...
- Page 4 Trademarks: The Bluetooth® word mark and logos are registered trademarks owned by Bluetooth SIG, Inc. and any use of such marks by SHARP is under license. Other trademarks and trade names are those of their respective owners.
- Page 5 Important safety instructions Maintenance • Unplug the power cable from the power source before cleaning the product. Use a soft and clean cloth to clean the outside of the unit. Never clean it with chemicals or detergent. Please follow all safety instructions and heed all Service and repair warnings.
- Page 6 • Short press: Preset recall • Long press: Preset store • Hereby, Sharp Consumer Electronics Poland sp. z o.o. declares that In Bluetooth mode: Long press to disconnect current device and scan this audio device is in compliance with the essential requirements and...
- Page 7 USB. and switch on. The micro system will power on and display <SHARP Equaliser: Press to cycle through EQ options. sharpconsumer.eu> and then go into standby.
- Page 8 Storing a DAB station preset To set the time and date manually, turn on the radio. Long press enter the menu options. Your micro system can store up to 20 DAB radio stations in its preset to select <System> / <Time> / <Set Time/Date>. <Set memories for instant access to your favourite stations.
- Page 9 FM display information the micro system off, this station will automatically be selected when you power the micro system back on. When listening to an FM station you can change the information that Tune to an FM station appears on the second line of the display. Repeatedly short press cycle through the different information options: Long press button to scan up or down the frequency band.
- Page 10 Bluetooth. Set an alarm When found, your micro system will be displayed as ‘SHARP XL-B520D’ on NOTE: Check that the micro system is displaying the your device. Select this to begin pairing. Once done, <Connected> will correct time and date before you set an alarm.
- Page 11 <System> / <Factory reset>. <Factory Reset? <No> Yes> will be displayed. Use scroll and select <Yes>. <Restarting…> will be displayed. After a few seconds, the display will change to <SHARP sharpconsumer.eu> and will then go to standby mode. Troubleshooting If there is no sound or power: •...
- Page 12 Wichtige Sicherheitsanweisungen auch wenn es ausgeschaltet ist, beschädigt werden. Bei einem her- annahenden Gewitter sollten Sie alle Kabel und Stecker des Produkts vom ausstecken. Stromkabel Bitte befolgen Sie alle Sicherheitshinweise und • Das Stromkabel darf nicht beschädigt, gedehnt oder gebogen werden beachten Sie alle Warnungen.
- Page 13 Produkt enthalten sind, die unter die Europäische Richtlinie 2013/56/EU fallen, und diese Batterien können • Sharp Consumer Electronics Poland Sp. z o.o. erklärt hiermit, dass nicht im normalen Hausmüll entsorgt werden. Cd, Hg und Pb unter der dem Symbol der Mülltonne auf Rollen zeigt an, dieses Audiogerät den wesentlichen Anforderungen und weiteren...
- Page 14 Packungsinhalt Im CD/DAB+/FM/USB/Aux-in-Modus: • Kurz drücken, um das CD-Fach zu öffnen • XL-B520D Tokyo DAB+/FM Hi-Fi Micro System • Erneut drücken, um das CD-Fach zu schließen • Fernbedienung (inkl. Batterien) 10. Kopfhöreranschluss • Antenne • Netzteil Drehbare Lautstärke-/Scroll-/Auswahlsteuerung: • Benutzerdokumentation •...
- Page 15 Micro-Systems an und verbinden Sie den Netzadapter mit der Wandsteckdose und schalten Sie es ein. Das Micro-System schaltet sich ein und zeigt <SHARP sharpconsumer.eu> – dann schaltet es in den Stand-by-Modus. HINWEIS: Die hier beschriebenen Vorgänge erfolgen über die Be-...
- Page 16 DAB-Radio-Modus dene Arten von Informationen. Drücken Sie wiederholt , um durch die verschiedenen Informationsoptionen zu blättern: • Dynamic Label Segment (DLS) – dies sind vom Sender bereitgestellte Lauftextinformationen. Dazu gehören beispielsweise Künstlername, DAB-Radio-Modus auswählen Liedtitel, Kontaktdaten des Radiosenders usw. Drücken Sie kurz auf , bis der Bildschirm <DAB+>...
- Page 17 CD-Player • <Alle Radiosender> – der Suchlauf stoppt bei jedem empfangenen Sender, auch bei schlechter Signalstärke. Benutzen Sie die Taste zur Auswahl und wählen Sie aus den zur Um zum CD-Player zu wechseln, drücken Sie kurz auf , bis das Verfügung stehenden Optionen. Micro-System <CD>...
- Page 18 Wenn Ihr Micro-System gefunden wurde, wird es auf Ihrem Gerät als der Aux-Eingangsbuchse abstöpseln, nachdem Sie die Wie- „SHARP XL-B520D“ angezeigt. Wählen Sie es aus, um mit dem Pairen zu dergabe mit Ihrem externen Gerät beendet haben. beginnen. Nach dem Abschluss wird auf Ihrem Radio <BT verbunden>...
- Page 19 Sie <System> / <Werkseinstellung>. <Werkseinstellung? Es wird <Nein> Ja> angezeigt. Scrollen Sie mit und wählen Sie <Ja>. Es wird <Neustart…> angezeigt. Nach wenigen Sekunden ändert sich das Dis- play zu <SHARP sharpconsumer.eu> und danach erfolgt ein Wechseln in den Stand-by-Modus.
- Page 20 Instrucciones de seguridad importantes Daños • Inspeccione la unidad tras desembalarla en busca de posibles daños. Si el producto presenta algún daño, no lo utilice y consulte a su distribuidor. Siga todas las instrucciones de seguridad y preste Mantenimiento atención a todas las advertencias. Conserve el •...
- Page 21 - En modo FM: pulse para recorrer hacia arriba la banda de frecuencias en intervalos 0,05 MHz; mantenga pulsado para buscar • Por la presente, Sharp Consumer Electronics Poland sp. z o.o. declara la banda de frecuencia que este equipo cumple los requisitos esenciales y otras disposiciones...
- Page 22 CD. tador de alimentación a la toma de la pared y encienda. El microsistema se encenderá y mostrará <SHARP sharpconsumer.eu>. A continuación, - En modo DAB: recorra hacia arriba la lista de emisoras DAB pasará...
- Page 23 Búsqueda de emisoras DAB queda automática de emisoras DAB. Una barra de progreso mostrará el avance del proceso de búsqueda y el número de emisoras encontradas. En el entorno de radio DAB, aparecen con regularidad emisoras y Una vez completada la búsqueda, el microsistema seleccionará la prime- servicios nuevos.
- Page 24 Almacenar una emisora FM en memoria • Información de la señal: la velocidad de datos a la que se transmite la señal. Su microsistema puede almacenar hasta 20 emisoras de FM como me- • Hora morias programadas para permitirle acceder al instante a sus emisoras •...
- Page 25 NOTA: Si es necesario, consulte las instrucciones de su dispo- sitivo para añadir o configurar la función Bluetooth Cuando lo encuentre, el microsistema se mostrará SHARP XL-B520D en el dispositivo. Seleccione para iniciar el emparejamiento. Una vez completado el proceso, se mostrará <BT connected> en el microsistema.
- Page 26 Configuración de alarma 2 por defecto? Se mostrará <No> Sí>. Utilice para desplazarse y seleccione <Sí>. Se mostrará <Reiniciando…>. Transcurridos unos segundos, la pantalla cambiará a <SHARP sharpconsumer.eu> y entrará Ajustes de alarma 1 o alarma 2 en modo en espera. Hora Hora Duración...
- Page 27 Aleje el microsistema y el dispositivos Bluetooth de otros dispositivos Bluetooth o equipos eléctricos. Si es posible, apague los dispositivos Bluetooth cercanos o desactive su funcionalidad Bluetooth. Si los botones de función no responden: • Compruebe que la corriente está conectada la parte posterior de la del microsistema.
- Page 28 Consignes de sécurité importantes Dégâts • Veuillez inspecter l'appareil après le déballage. S'il est endommagé de quelque manière que ce soit, n'utilisez pas l'appareil et consultez votre revendeur. Veuillez suivre toutes les consignes de sécurité et Entretien tenir compte de tous les avertissements. Gardez ce •...
- Page 29 • Pression courte : - En mode DAB : Descendez dans la liste des stations DAB • Par la présente, Sharp Consumer Electronics Poland sp. z o.o. déclare - En mode FM : Une pression courte permet d'augmenter la que cet équipement est conforme aux exigences essentielles et aux fréquence de 0,05 MHz ;...
- Page 30 Le micro-système - En mode DAB : Montez dans la liste des stations DAB. s'allume et affiche <SHARP sharpconsumer.eu>, puis se met en veille. - En mode FM : Descendez dans la bande de fréquence de 0,05 MHz.
- Page 31 Configuration initiale lorsque vous avez éteint le micro-système, cette station sera automati- quement sélectionnée lorsque vous rallumerez le micro-système. Déployez l'antenne pour garantir une puissance de signal maximale Changer de station DAB lorsque vous recherchez des stations de radio. Appuyez brièvement sur pour allumer votre micro-système.
- Page 32 Mode audio • Type de programme (PTY) - par exemple, 'Rock' , 'Pop' , 'Chroniques' ou 'Informations' Le micro-système passe automatiquement de stéréo à mono, selon la • Nom du multiplex - Affiche la zone de diffusion et la collection de qualité...
- Page 33 Bluetooth. Placez le CD sur le tiroir à CD. Assurez-vous que le CD est posé à plat sur Une fois trouvé, votre micro-système s'affichera sous le nom « SHARP le tiroir. XL-B520D » sur votre appareil. Sélectionnez-la pour commencer Appuyez sur pour fermer le tiroir à...
- Page 34 <Oui>. Heure <Redémarrage…> s'affichera. Après quelques secondes, l'écran passe à Durée 1, 5, 15, 30 ou 60 minutes <SHARP sharpconsumer.eu> et entre ensuite en mode veille. Source Buzzer, DAB ou FM Fréquence Tous les jours, Une fois, Semaine ou Week-end Dépannage...
- Page 35 Essayez de déplacer votre micro-système à un autre endroit pour voir si la réception s'améliore. Vérifiez que vous n'avez pas posé un autre équipement électrique à proximité de votre micro-système. Cela peut provoquer des interfé- rences. Si un CD n'est pas lu : •...
- Page 36 Importanti istruzioni di sicurezza Danni • Controlla che l'unità non abbia riportato danni dopo aver aperto la confezione. Se è danneggiato in qualsiasi modo, non utilizzare l'unità e consultare il rivenditore. Seguire tutte le istruzioni di sicurezza e fare atten- Manutenzione zione a tutte le avvertenze.
- Page 37 - Pressione breve per Riproduzione/Pausa • Pressione breve: • Con il presente, Sharp Consumer Electronics Poland sp. z o.o. dichiara - In modalità DAB: Scorrere in basso per l'elenco stazioni DAB che il televisore LED soddisfa i requisiti essenziali e le altre disposizioni - In modalità...
- Page 38 Premere nuovamente per aprire/chiudere il cassetto del CD. microsistema e collegare l'adattatore di corrente alla presa sulla parete e accendere. Il microsistema si accende mostrando <SHARP sharpconsu- - In modalità DAB: Scorrere nell'elenco stazioni DAB in alto. mer.eu> quindi passa in standby.
- Page 39 camente a scansionare le stazioni DAB. Una barra del progresso mostrerà Ci sarà un breve ritardo mentre la radio si sintonizza alla stazione l'avanzamento della scansione e il numero di stazioni trovate. selezionata. Quando la scansione è completa, il tuo microsistema selezionerà la prima Scansionare le stazioni DAB stazione disponibile e inizierà...
- Page 40 deve essere inferiore a 30. Aggiustare l'antenna o spostare la radio per zione sarà contrassegnata da un asterisco (*) sul display. migliorare la ricezione. per confermare • Informazioni segnale: la velocità di trasmissione alla quale il segnale Pressione prolungata di per uscire dal menu.
- Page 41 NOTA: Se necessario, consultare le istruzioni del proprio di- spositivo per aggiungere o impostare il Bluetooth. Una volta trovato, il microsistema apparirà sul dispositivo come "SHARP XL-B520D". Selezionare questa voce per iniziare l'accoppiamento. Una volta completato, sulla radio apparirà <Connesso>.
- Page 42 Apparirà <No> Sì>. Usare Impostazioni allarme 1 o 2 per scorrere e selezionare <Sì>. Apparirà <Riavvio…>. Dopo alcuni secondi, il display mostrerà <SHARP sharpconsumer.eu> e quindi entrerà in modalità stand-by. Durata 1, 5, 15, 30 o 60 minuti Sorgente...
- Page 43 Allontanare il microsistema e il dispositivo Bluetooth da altri dispositivi/ apparecchi elettrici Bluetooth. Se possibile, spegnere altri dispositivi Bluetooth vicini o disattivare la funzionalità Bluetooth. Se i pulsanti delle funzioni non rispondono: • Controllare che l’alimentazione di rete sia connessa sul retro del tuo microsistema.
- Page 44 Belangrijke veiligheidsinstructies Voedingskabel • Beschadig de voedingskabel niet, trek deze niet uit, buig deze niet en plaats er gen zware voorwerpen op. Schade Volg alle veiligheidsinstructies op en neem alle • Controleer het product na het uitpakken direct op beschadigingen. waarschuwingen in acht.
- Page 45 - In FM-modus: Kort indrukken verhoogt de frequentie in stappen van 0,05 MHz; lang indrukken om oplopend in de frequentieband te zoeken • Hierbij verklaart Sharp Consumer Electronics Poland sp. Z o.o. dat dit - Bluetooth-/cd-/USB-modus: Volgende track audioapparaat voldoet aan de essentiële vereisten en andere relevante...
- Page 46 Indrukken om de helderheid van het display te kiezen: hoog, tact en zet de microset aan. De microset wordt ingeschakeld en op het medium en laag. display verschijnt <SHARP sharpconsumer.eu>. Vervolgens schakelt de In de cd-/USB-modus: indrukken om het afspelen te stoppen. microset naar de stand-bymodus.
- Page 47 Druk kort op om door de beschikbare zenders te bladeren. In DAB-modus: Om het weergegeven station te selecteren, drukt u kort op . Er zal Lang indrukken . Gebruik om te scrollen en selecteer <Vol- ledige scan>. Op het display verschijnt <Scannen…>. Een voortgangs- een korte vertraging zijn terwijl uw microset afstemt op de door u geselecteerde station.
- Page 48 Dynamic Range Control (DRC) geven. Gebruik om naar de voorinstellingslocatie te gaan waar u het radiostation wilt opslaan (1-20). Het display bevestigt <Station X opgeslagen>, waarbij ‘X’ het nummer van de voorinstelling is (1-20). Niet alle omroepen zenden DRC-gegevens uit. DRC wordt gebruikt om OPMERKING: Als er al een bestaand FM-station is opge- het verschil tussen de luidste en de zachtste geluiden te regelen.
- Page 49 Bluetooth toe te voegen of in te stellen. Als uw apparaat de microset detecteert, dan wordt deze op uw apparaat weergegeven als 'SHARP XL-B520D' . Selecteer dit om het koppelproces te beginnen. Zodra de verbinding tot stand gebracht is, verschijnt <Ver- bonden>...
- Page 50 1, 5, 15, 30 of 60 minuten om te scrollen en selecteer <Ja>. <Herstarten…> wordt weergegeven. Bron Zoemer, DAB of FM Na enkele seconden verandert het display in <SHARP sharpconsumer. Frequentie Dagelijks, eenmalig, werkdagen, weekends. eu>. Vervolgens schakelt de radio over naar de stand-bymodus.
- Page 51 • Controleer of u een originele audio-cd gebruikt en geen kopie. Als de cd geen origineel is, kan het zijn dat afspelen niet wordt ondersteund (afhankelijk van de cd en het type audiobestand dat wordt gebruikt). Als u geen verbinding tot stand kunt brengen met een Blue- tooth-apparaat: Controleer of de Bluetooth-modus geactiveerd is.
- Page 52 Ważne środki ostrożności Uszkodzenia • Po usunięciu opakowania należy sprawdzić, czy urządzenie nie jest uszkodzone. W przypadku jakiegokolwiek uszkodzenia nie korzystaj z urządzenia i skontaktuj się ze sprzedawcą. Należy przestrzegać wszystkich podanych środków Konserwacja ostrożności i ostrzeżeń. Instrukcję należy zachować •...
- Page 53 0,05 MHz; długie naciśnięcie spowoduje wyszukiwanie stacji radiowych w górę pasma częstotliwości • Sharp Consumer Electronics Poland sp. z o.o. niniejszym oświadcza, - Tryb Bluetooth/CD/USB: Przejście do następnego utworu- W że opisywane urządzenia audio jest zgodne z zasadniczymi...
- Page 54 Podłącz przewód zasilacza do gniazda zasilania znajdującego się z tyłu o 0,05 MHz mikrowieży, a następnie podłącz zasilacz do gniazdka elektrycznego - W menu: Przewijanie w górę opcji menu w ścianie i włącz urządzenie. Mikrowieża włączy się i wyświetli napis <SHARP sharpconsumer.eu>, a następnie przełączy do trybu czuwania.
- Page 55 UWAGA: Opisane procedury wykorzystują elementy sterujące także wyświetli się liczba stacji znalezionych podczas skanowania. Jeśli znajdujące się na urządzeniu głównym (o ile nie określono słuchałeś stacji DAB i wyłączyłeś mikrowieżę, po ponownym włączeniu ta inaczej). Informacje na temat obsługi urządzenia za pomocą stacja zostanie automatycznie wybrana.
- Page 56 Tryb emisji dźwięku • Nazwa multipleksu – wyświetlany jest obszar nadawania i zbiór stacji radiowych nadających na danej częstotliwości, np. BBC National DAB, Mikrowieża automatycznie przełączy się między trybem stereo i mono Digital 1 Network w zależności od jakości odbieranego sygnału, ale możesz ręcznie •...
- Page 57 Po znalezieniu mikrowieży zostanie ona wyświetlona w Twoim numer utworu i czas odtwarzania. Naciśnij ponownie przycisk, aby urządzeniu jako „SHARP XL-B520D”. Wybierz tę opcję, aby rozpocząć włączyć pauzę w odtwarzaniu płyty CD. Jeśli odtwarzanie utworu parowanie. Po zakończeniu urządzenie wyświetli komunikat <BT zostanie wstrzymane, czas odtwarzania będzie pulsować.
- Page 58 <Tak>. Wyświetli się komunikat <Wznawianie…>. Po kilku sekundach Budzik Zał. lub wył. na wyświetlaczu pojawi się napis <SHARP sharpconsumer.eu>, a radio UWAGA: Jeśli godzina nie zostanie ustawiona lub aktualizacja przełączy się do trybu czuwania. z sygnału radiowego zakończy się niepowodzeniem, podczas próby ustawienia alarmu wyświetli się...
- Page 59 • Jeśli podłączysz słuchawki, dźwięk będzie przez nie emitowany. Odłącz słuchawki, aby słuchać dźwięku emitowanego przez głośniki mikrowieży. • Upewnij się, że urządzenie zostało przełączone do odpowiedniego trybu i korzystasz z funkcji sterowania odpowiednich do danego trybu. • Jeśli korzystasz z urządzenia podłączonego poprzez Bluetooth lub zewnętrznego źródła dźwięku podłączonego do gniazda AUX IN, zwiększ poziom głośności w urządzeniu zewnętrznym i mikrowieży.
- Page 60 Важные инструкции по технике Грозы и молнии • Грозы представляют опасность для всех электроприборов. Удар безопасности молнии в сетевой или антенный кабель может привести к повреж- дению изделия, даже если оно выключено. Перед грозой следует отключать от изделия все кабели и разъемы. Соблюдайте...
- Page 61 - В режиме DAB: перемещение вниз в списке радиостанций DAB - В режиме FM: Кратковременное нажатие —увеличение часто- ты на 0,05 МГц; продолжительное нажатие — поиск станций с • Настоящим компания Sharp Consumer Electronics Poland sp. z o.o. повышением частоты заявляет, что данное аудиоустройство соответствует обязательным...
- Page 62 В режиме CD/USB нажатие этой кнопки позволяет оста- новить воспроизведение. Повторное ее нажатие приводит к В режиме CD/USB: кратковременное нажатие — остановка. открытию/закрытию лотка компакт-дисков. В режиме CD: двойное кратковременное нажатие — отмена воспроизведения в запрограммированном порядке. - В режиме DAB: перемещение вверх в списке радиостанций DAB. - В...
- Page 63 микросистемы, а сам адаптер питания — в электророзетку, включите находиться в разумных пределах. микросистему. Микросистема включится, и на дисплее появится надпись: <SHARP sharpconsumer.eu>; после этого микросистема Режим DAB-радио перейдет в режим ожидания. ПРИМЕЧАНИЕ. Если не указано иначе, в описанных здесь...
- Page 64 Настройте микросистему на DAB-станцию, которую нужно сохранить ПРИМЕЧАНИЕ. Текущая настройка DRC в памяти. Нажмите и придержите кнопку , пока на дисплее не помечается на дисплее "звездочкой" (*). появится сообщение <Preset Store <1:(Empty)>>. Нажимая кнопки , найдите номер (1 – 20), под которым хотите сохранить текущую Режим...
- Page 65 ПРИМЕЧАНИЕ. О порядке настройки Bluetooth на этом устройстве записи вперед. можно узнать в соответствующей инструкции по эксплуатации. Кратковременное нажатие вызывает переход к предыдущей записи. Продолжительное нажатие приводит к перематыванию После обнаружения микросистема отображается на экране записи назад. устройства под названием "SHARP XL-B520D". Чтобы начался процесс...
- Page 66 установки соединения, выберите этот пункт. После установки наушников (или дополнительный выход) на внешнем устройстве, а соединения на дисплее микросистемы отображается надпись: <BT другой — в гнездо Aux in на задней стенке микросистемы. connected>. Чтобы начать воспроизведение через динамики микросистемы, Устанавливать связь с микросистемой могут подключенные устрой- следует...
- Page 67 появится запрос: <Factory Reset? <No> Yes>. Нажав кнопку , выберите ответ <Yes>. На дисплее появится сообщение: <Restarting…>. Через несколько секунд на дисплее появится над- пись <SHARP sharpconsumer.eu>, и устройство перейдет в режим ожидания. Поиск и устранение неисправностей Если звук отсутствует или слабый: •...
- Page 68 Technical specification | Technische Angaben | Especificación técnica | Specifiche tecniche | Spécification technique | Dane techniczne | Technische specificaties | Технические спецификации Model Modell Modelo Modèle Modello Audio output Audio-Ausgang Salida de audio Sortie audio Uscita audio DAB frequency range DAB-Frequenzbereich Rango de frecuencias DAB Plage de fréquences DAB...
- Page 69 Bluetooth Bluetooth Bluetooth 2,4 GHz - 2 480 GHz Versie Wersja Версия Koppelnaam Nazwa urządzenia Название при установке SHARP XL-B520D stosowana w trybie соединения parowania Vermogensadapter Zasilacz Адаптер питания Inclusief pinopties voor W zestawie opcje wtyczki В комплект входят BS/VDE interchangeable netvoeding przewodu zasilającego...
- Page 72 Sharp Consumer Electronics Poland sp. z o.o. Ostaszewo 57B, 87-148 Łysomice, Poland Made in China SAU/MAN/0178 www.sharpconsumer.eu...
Need help?
Do you have a question about the XL-B520D(BK) and is the answer not in the manual?
Questions and answers