Table of Contents
Advertisement
Quick Links
Advertisement
Table of Contents

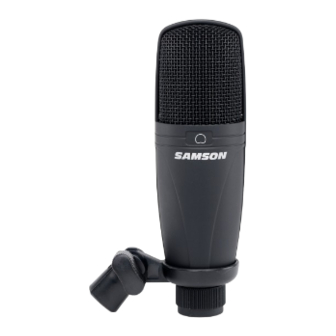
Summary of Contents for Samson c15
- Page 1 Studio Condenser Microphone...
-
Page 2: Table Of Contents
Microphone Placement Setting up the Signal Level P-Popping Stand Mounting Using the Optional SP01 “Spider” Shock-Mount Specifications Copyright 2005, Samson Technologies Corp. Printed June, 2005 Samson Technologies Corp. 575 Underhill Blvd. P.O. Box 9031 Syosset, NY 11791-9031 Phone: 1-800-3-SAMSON (1-800-372-6766) Fax: 516-364-3888 www.samsontech.com... -
Page 3: Introduction
The extended frequency and fast transient response insures an accurate reproduction with linear characteristics from bottom to top. In these pages, you’ll find a detailed description of the features of the C15 Studio Condenser Microphone, as well as step-by-step instructions for its setup and use, and full specifications. -
Page 4: C15 Features
C15 Features C15 Features • Large Diaphragm Studio Condenser • 19mm Capsule with 3-micron Diaphragm • Smooth and transparent sound reproduction • Hyper Cardioid pick-up pattern • 36-52 Volt Phantom Power • Internal Shock-mount • Extended frequency response • Solid ABS construction •... -
Page 5: Operating The C15
In order to maximize the sound quality, you must pay careful attention to the place- ment of your C15 and how it is positioned for the instrument or vocalist that you are micing. All microphones, especially uni-directional or cardioid microphones, exhibit a phenomenon known as “proximity effect. -
Page 6: Setting Up The Signal Level
A good mic pre with trim also will have a PEAK or CLIP LED. To set a good level on the mic, set the C15 up in front of the desired sound source and slowly raise the mic trim control until you see the PEAK LED light up. -
Page 7: Using The Optional Sp01 "Spider" Shock-Mount
Using the Optional SP01 Shock-Mount Using the Optional SP01 “Spider” Shock-Mount For additional isolation the C15 can be fitted on the optional SP01 “Spider” shock mount. Follow the steps below the to install the SP01. • First, screw the SP01 shock mount onto your mic stand or boom arm. -
Page 8: Specifications
Dimensions Height: 6.69" (170 mm) Dia: 2.13" (52 mm) Shipping Weight 0.55 lbs.(250 g) Specifications subject to change without notice. C15 Polar Pattern C15 Frequency Response Samson Technologies Corp. 575 Underhill Blvd. P.O. Box 9031 Syosset, NY 11791-9031 Phone: 1-800-3-SAMSON (1-800-372-6766) Fax: 516-364-3888 www.samsontech.com...


Need help?
Do you have a question about the c15 and is the answer not in the manual?
Questions and answers