Table of Contents
Advertisement
Available languages
Available languages
Grapadora neumática
Set piStola Sparapunti ad aria compreSSa
gRapaDoRa neUmáTiCa
Instrucciones de utilización y de seguridad
aiR STapLeR SeT
Operation and Safety Notes
SeT piSToLa SpaRapUnTi
aD aRia CompReSSa
Indicazioni per l'uso e per la sicurezza
DRUCKLUFT-TaCKeR-SeT
Bedienungs- und Sicherheitshinweise
Advertisement
Chapters
Table of Contents

Related Manuals for Parkside KH 3041 AIR STAPLER SET


Summary of Contents for Parkside KH 3041 AIR STAPLER SET
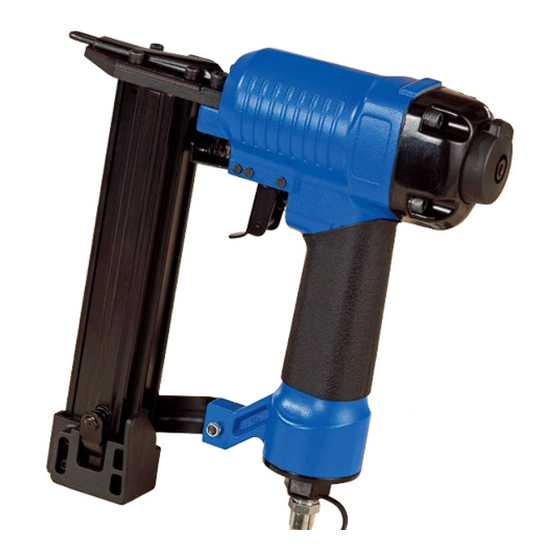
- Page 1 Grapadora neumática Set piStola Sparapunti ad aria compreSSa gRapaDoRa neUmáTiCa SeT piSToLa SpaRapUnTi aD aRia CompReSSa Instrucciones de utilización y de seguridad Indicazioni per l’uso e per la sicurezza aiR STapLeR SeT DRUCKLUFT-TaCKeR-SeT Operation and Safety Notes Bedienungs- und Sicherheitshinweise...
- Page 2 Antes de empezar a leer abra las dos páginas que contienen las imágenes y, en seguida, familiarícese con todas las funciones del dispositivo. Prima di leggere aprire le due pagine con le immagini e prendere confidenza con le diverse funzioni dell’apparecchio.
-
Page 5: Table Of Contents
Datos técnicos .......................Página 6 Seguridad de la remachadora Seguridad laboral ......................Página 7 Indicaciones de seguridad adicionales para la grapadora neumática ....Página 8 Accesorios originales y adicionales ................Página 9 Puesta en funcionamiento Conexión de la fuente de aire comprimido ..............Página 9 Llenado del cargador ....................Página 9... -
Page 6: Introducción
Introducción En estas instrucciones de uso / en el aparato se utilizan los siguientes pictogramas: Mantenga a los niños alejados ¡Lea las instrucciones de uso! de la grapadora. ¡Siga las indicaciones de prevención Seguro de disparo y seguridad! ¡Evacue el embalaje y el aparato Utilice gafas de protección y... -
Page 7: Seguridad De La Remachadora
CONSERVE TODAS LAS INDICACIONES DE Según sea la situación en el puesto de trabajo y la SEGURIDAD Y ADVERTENCIAS POR SI configuración de la pieza de trabajo, deberán ser NECESITA CONSULTARLAS MÁS ADELANTE. -
Page 8: Indicaciones De Seguridad Adicionales Para La Grapadora Neumática
Antes de comenzar los trabajos de reparación Para protegerse es impres- y mantenimiento, así como antes de transpor- cindible utilizar equipos de tar el aparato, retírelo de la fuente de aire protección corporal adecuados, comprimido. como, p. ej., protectores visuales y ¡rIESGO DE LESIOnES! No ponga el apa-... -
Page 9: Accesorios Originales Y Adicionales
Seguridad de la remachadora / Puesta en funcionamiento / Manejo no utilice objetos con puntas. Nunca 1. Presione la palanca del cargador y retraiga introduzca objetos con punta y/o metálicos en el cargador nOtA: tenga en cuenta que solamente las el interior del aparato. -
Page 10: Limpieza Y Mantenimiento
- Si el remache está muy hundido, disminuya la Lubrique el aparato con regularidad. De este presión de aire a pasos de 0,5 bar hasta que modo mantendrá el buen funcionamiento y el resultado sea satisfactorio. alargará la vida útil del producto. -
Page 11: Limpieza
Limpieza y mantenimiento / Asistencia técnica / Garantía / Eliminación Limpieza En caso de un tratamiento inadecuado e indebido, uso de la fuerza bruta e intervenciones por asisten- Para la limpieza del aparato no utilice ningún cia técnica distinta a la nuestra autorizada, se ex- objeto afilado. -
Page 12: Declaración De Conformidad / Fabricante
Declaración de conformidad / Fabricante Declaración de conformidad / Fabricante Nosotros, Kompernaß GmbH, Burgstr. 21, D-44867 Bochum (Alemania), declaramos por el presente documento que este producto cumple las siguientes directivas europeas: normas armonizadas aplicadas: En 12100-1:2004 En 12100-2:2004 En 792-13:2000 tipo / Denominación del aparato:... - Page 13 Dotazione ........................Pagina 14 Dati tecnici ........................Pagina 14 Sicurezza della chiodatrice Sicurezza sul lavoro ......................Pagina 15 Indicazioni di sicurezza aggiuntive per chiodatrici ad aria compressa ....Pagina 16 Accessori / componenti aggiuntivi originali ......................Pagina 17 Avvio Collegamento alla fonti di alimentazione di aria compressa ........Pagina 17 Caricamento del magazzino ..................Pagina 17...
-
Page 14: Introduzione
Introduzione In queste istruzioni d'uso / sull'apparecchio sono riportati i seguenti pittogrammi: Leggere il manuale di istruzioni tenere lontano i bambini per l’uso! dalla chiodatrice! Rispettare le avvertenze e le Sicura di azionamento indicazioni per la sicurezza! Portare occhiali protettivi e cuffie Smaltire l’imballaggio dell’apparec-... -
Page 15: Sicurezza Della Chiodatrice
AttEnzIOnE! Il livello di pressione acustica stimato A ammonta zioni di sicurezze e le istruzioni riportate. tipicamente a 85,7 dB (A). Scostamento K = 3 dB. Eventuali inadempienze nell’osservanza della indi- Il livello di rumore durante il lavoro può superare cazioni di sicurezza e delle istruzioni può... -
Page 16: Indicazioni Di Sicurezza Aggiuntive Per Chiodatrici Ad Aria Compressa
In questo modo si eviterà il pericolo rimanere sempre attenti, fare atten- di chiodi volanti o di un sovraccarico dell‘ap- zione a ciò che si fa e lavorare con la parecchio stesso. chiodatrice in modo assennato. non Se lo si desidera trasportare, l‘appa- utilizzare la chiodatrice quando si è... -
Page 17: Accessori / Componenti Aggiuntivi Originali
Fare attenzione al fatto che nel ma- nell‘interno dell‘apparecchi. gazzino possono essere inserite solamente graffe aventi una lunghezza di 16 - 32 mm e Accessori / componenti chiodi della lunghezza di 15 - 32 mm. aggiuntivi originali 2. Inserire nel magazzino il materiale per chiodatura corrispondente (chiodi, vedi fig. -
Page 18: Manutenzione E Pulizia
0,5 bar fino a quando il questo modo l‘apparecchio funzionerà perfet- risultato non sia soddisfacente. tamente e verrà garantita una sua lunga vita In ogni caso fare in modo che si lavori con la pres- operativa. sione dell‘aria minima possibile. Questo comporta tre vantaggi determinanti:... -
Page 19: Pulizia
La garanzia è limitata a difetti di fabbricazione o non utilizzare in nessun caso benzina, solventi di materiali, non è estesa ai pezzi soggetti ad usura o altre sostanze per la pulizia aggressive per o a danneggiamenti alle parti delicate, p. es. -
Page 20: Dichiarazione Di Conformità / Fabbricante
Dichiarazione di conformità / Fabbricante Dichiarazione di conformità / Fabbricante L’azienda Kompernaß GmbH, Burgstr. 21, D-44867 Bochum, Germania, dichiara la conformi- tà del presente prodotto alle seguenti direttive UE: norme armonizzate applicate: En 12100-1:2004 En 12100-2:2004 En 792-13:2000 tipo / Denominazione dell’apparecchio: Set pistola sparapunti ad aria compressa Bochum, 31.07.2009... - Page 21 Included items .......................Page 22 technical data .......................Page 22 Fastener driving tool safety Safety at work .......................Page 23 Additional safety advice for compressed air tackers ..........Page 24 Original accessories/attachments ................Page 24 Bringing into use Connecting the compressed air source ...............Page 24 Loading the magazine ....................Page 25...
-
Page 22: Introduction
Introduction the following pictograms are used in these operating instructions / on the device: Keep the tacker out of the Read the operating instructions! reach of children! Always heed warning labels and trigger lock safety instructions! Wear hearing protection and... -
Page 23: Fastener Driving Tool Safety
e.g. -
Page 24: Additional Safety Advice For Compressed Air Tackers
Look out for damage on the device. Check the device for damage before bringing WArnInG! DAnGEr OF InJUrY! it into use. Do not use the device if you discover Never exceed the maximum allowable working any defects. air pressure of 7 bar. Use a pressure reducer Do not use pointed implements. -
Page 25: Loading The Magazine
Bringing into use / Operation Operation 7 bar. A pressure reducer must be fitted to the com- pressor to regulate the working air pressure. Connect the device to a suitable source of Load the magazine of the compressed air compressed air. -
Page 26: Maintenance And Cleaning
Warranty the compressed air tacker. An oil mist lubricator gives off fine droplets of oil into the air and thus this appliance is guaranteed for 3 years ensures controlled lubrication. from the date of purchase. It has been care-... -
Page 27: Disposal
Do not dispose of the product with household rubbish! Contact your local refuse disposal authority for more details of how to dispose of your worn out We reserve the right to make technical modifications electrical devices. in the course of further development. - Page 29 Bestimmungsgemäßer Gebrauch .................Seite 30 Ausstattung ........................Seite 30 Lieferumfang ........................Seite 30 technische Daten ......................Seite 30 Sicherheit des Eintreibgerätes Arbeitssicherheit ......................Seite 31 Ergänzende Sicherheitshinweise für Druckluft-tacker ..........Seite 32 Originalzubehör / -zusatzgeräte ..................Seite 32 Inbetriebnahme Druckluftquelle anschließen ..................Seite 33 Magazin laden ......................Seite 33 Bedienung ........................Seite 33...
-
Page 30: Einleitung
Einleitung In dieser Bedienungsanleitung werden folgende Piktogramme / Symbole verwendet: Bedienungsanleitung lesen! Kinder vom Eintreibgerät fernhalten! Warn- und Sicherheitshinweise Auslösesicherung beachten! Entsorgen Sie Verpackung und Gerät tragen Sie einen Gehörschutz und eine Schutzbrille umweltgerecht! Druckluft-tacker-Set Rändelschraube oberer Anschlag Einleitung Lieferumfang... -
Page 31: Sicherheit Des Eintreibgerätes
Gerätes dar. Eine Einwirkung auf das Hand-Arm-System bei der Anwendung des Gerätes richten Sie ein betriebsbereites Ein- hängt z. B. ab von der Greifkraft, der Anpresskraft, treibgerät niemals direkt gegen sich der Arbeitsrichtung, dem eingestellten Luftdruck, selbst oder auf andere Personen. -
Page 32: Ergänzende Sicherheitshinweise Für Druckluft-Tacker
Eintreibgegenstände können even- Eintreibgerät in unerwarteten Situationen besser tuell dünne Werkstücke durchschlagen oder kontrollieren. beim Arbeiten an Ecken und Kanten von Werk- Entfernen Sie vor Reparatur- und Instandhal- stücken abgleiten und dabei Personen gefährden. tungsarbeiten sowie vor einem transport das Verwenden Sie für Ihren per-... -
Page 33: Druckluftquelle Anschließen
HInWEIS: Beachten Sie, dass Klammern nur gestattet. Das Eintreibmaterial verlässt mit der Länge von 16 - 32 mm und Nägel mit das Gerät erst, wenn die Mündung des Druck- der Länge 15 - 32 mm in das Magazin einge- luft-tackers gegen das Werkstück gedrückt und... -
Page 34: Bedienung Wartung Und Reinigung
Bedienung / Wartung und Reinigung Wartung Auf jeden Fall sollten Sie bemüht sein, mit dem je- weils geringsten Luftdruck zu arbeiten. Das bringt für Sie drei wesentliche Vorteile: Schmieren Sie das Gerät regelmäßig. 1) Sie sparen Energie, So erhalten Sie eine einwandfreie Funktion 2) Sie verringern den Geräuschpegel,... -
Page 35: Service
Gmundner Strasse 10 reparieren. Damit wird sichergestellt, dass 4816 Gschwandt (Austria) die Sicherheit des Eintreibgeräts erhalten bleibt. tel.: (+43) 0 76 12 / 6 26 05 16 Fax: (+43) 0 76 12 / 62 60 56 e-mail: support.at@kompernass.com Garantie Sie erhalten auf dieses Gerät 3 Jahre Ga- rantie ab Kaufdatum. -
Page 36: Konformitätserklärung / Hersteller
Konformitätserklärung / Hersteller Konformitätserklärung / Hersteller Wir, Kompernaß GmbH, Burgstr. 21, D-44867 Bochum, Deutschland, erklären hiermit für dieses Produkt die Übereinstimmung mit folgenden EG-Richtlinien: Angewandte harmonisierte normen: En 12100-1:2004 En 12100-2:2004 En 792-13:2000 typ / Gerätebezeichnung: Parkside Druckluft-tacker-Set Bochum, 31.07.2009 Hans Kompernaß... - Page 37 Burgstraße 21 D-44867 Bochum © by orFGen marketing Estado de las informaciones · Versione delle informazioni · Last Information Update Stand der Informationen: 07 / 2009 · Ident.-No.: 072009-ES / IT / MT / GB / DE / AT / CH...
Need help?
Do you have a question about the KH 3041 AIR STAPLER SET and is the answer not in the manual?
Questions and answers
Hi, In the manual there is no parts list.