
Related Manuals for ALAULM 02C67SG-24-BG

Summary of Contents for ALAULM 02C67SG-24-BG
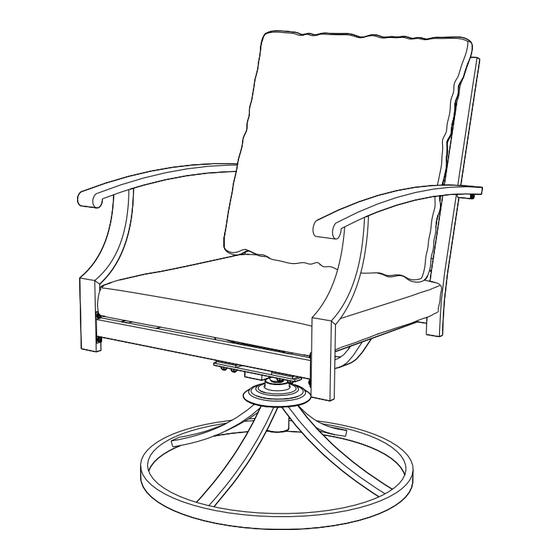
- Page 1 Iron Vertical Back Dining Room Swivel Chair Assembly & Care instructions SKU: 02C67SG-24-BG Please read & retain for future reference...
-
Page 2: Table Of Contents
CATALOGS Care & Instructions ............3 Parts List ................4 Screw Set List ..............5 Extra ................6 Specifications ..............7 Installation Instructions .............8 Manuel d'instruction (français) ........13... -
Page 3: Care & Instructions
4.In order to prolong the service life of sofa cover, we suggest that you put all cushions indoors in rainy days. 5.We hope you can like our products, if you have any other ques�ons, please contact us. How to contact us: Email:service@alaulm.com Web:www.alaulm.com You can scan the QR code to explore more products. -
Page 4: Parts List
PARTS LIST Part Description Part Name Seat Plate Part Back Plate Part Right Armrest Part Left Armrest Part Seat Cushion Back Cushion T-shaped metal parts Spring Steel Spring Tabs Bottom Turntable... -
Page 5: Screw Set List
Screw Set List Part Name Part Description Bolt M6 × 20 8PCS Bolt M6 × 30 10PCS M6 Gaskets 16PCS Bolt M8 × 25 8PCS Bolt M8 × 30 8PCS Jam Nuts M8 16PCS M6 Large Gaskets 2PCS Bolt Cap 16PCS M8 Gaskets 16PCS... -
Page 6: Extra
Screw Set List Part Name Part Description Hexagon Bolt Cap 16PCS 12PCS Footrest Extra Part Description Part Name Bolt M6 × 20 2PCS Bolt M6 × 30 2PCS M6 Gaskets 4PCS Footrest 2PCS WARNING : Failure to locate parts in accordance with these diagrams, or failure to use special parts provided with this equipment, may result in property damage or personal injury. -
Page 7: Specifications
SPECIFICATIONS... -
Page 8: Installation Instructions
Align the two holes on the rear side of the Seat Plate Part (A) with the Back Step 1 Plate Part (B) and secure with Bolts (L) to the M6 Gaskets (M). Note: Do not �ghten the Bolt. A×2 B×2 L×4 M×4 V×1... - Page 9 The Le� Armrest Part (D) is fi�ed in the same way as Step 2. Step 3 Note: Do not �ghten the Bolt. D×2 K×4 M×4 V×1 Align the outer holes of the armrests on both sides with the outer holes of (B) Step 4 and secure using Bolts (L) with M6 Gaskets (M).
- Page 10 Assemble the T-shaped Metal Parts (G), Spring Steel (H), and Spring Tabs (I) in Step 5 the order shown, and thread a Bolt (O) through the Retaining Ring (T) and M8 Gaskets (S) as shown, locking it in place with the jam nut (P) underneath. T×8 S×8 G×2...
- Page 11 Combine the upper and lower parts, align the lower holes in (A) with the holes Step 7 in (GHI), install the Spring Tabs (I), the Blot (N), the M8 Gaskets (S), the Retaining Ring (T), and the Jam Nut M8 (P) in the order of the way, and �ghten the bolts and nuts with the Wrench (U).
- Page 12 Step 9 Put all bolt caps(R&W) on the bolts. Finish by placing the Back Cushion(F) in the chair. F×2 R×2 W×2 WARM WINTER SET: This product can be paired with our store's Outdoor square table heater, so that your winter is no longer cold and you can enjoy a warm winter outdoor a�ernoon tea.
-
Page 13: Manuel D'instruction (Français)
Chaise de salle à manger pivotante à dossier vertical en fer Instructions de montage et d'entretien SKU: 02C67SG-24-BG À lire et à conserver pour référence ultérieure... - Page 14 à l'intérieur les jours de pluie. 5. nous espérons que vous aimerez nos produits, si vous avez d'autres ques�ons, n'hésitez pas à nous contacter. Comment nous contacter : Email:service@alaulm.com Web:www.alaulm.com Vous pouvez scanner le code QR pour découvrir d'autres produits.
- Page 15 LISTE DES PIÈCES Partie Description Nom de la pièce Qté Plaque de siège Pièce Plaque arrière Partie Partie de l'accoudoir droit Partie gauche de l'accoudoir Coussin de siège Coussin de dossier Pièces métalliques en forme de T Acier à ressort Languettes à...
- Page 16 Liste des jeux de vis Partie Description Nom de la pièce Qté Boulon M6 × 20 8PCS Boulon M6 × 30 10PCS M6 Joints 16PCS Boulon M8 × 25 8PCS Boulon M8 × 30 8PCS Noix de confiture M8 16PCS M6 Grands joints 2PCS Capuchon de boulon...
- Page 17 Liste des jeux de vis Partie Description Nom de la pièce Qté Capuchon de 16PCS boulon hexagonal 12PCS Repose-pieds Extra Partie Description Nom de la pièce Qté Boulon M6 × 20 Boulon M6 × 30 M6 Joints 2PCS Repose-pieds 2PCS AVERTISSEMENT : Le fait de ne pas localiser les pièces conformément à...
- Page 18 CARACTÉRISTIQUES TECHNIQUES...
- Page 19 Aligner les deux trous situés à l'arrière de la par�e de la plaque d'assise (A) Step 1 avec la par�e de la plaque arrière (B) et fixer les boulons (L) aux joints M6 (M). Remarque : ne pas serrer le boulon. A×2 B×2 L×4...
- Page 20 La par�e de l'accoudoir gauche (D) est montée de la même manière qu'à Step 3 l'étape 2. Remarque : ne pas serrer le boulon. D×2 K×4 M×4 V×1 Aligner les trous extérieurs des accoudoirs des deux côtés avec les trous Step 4 extérieurs de (B) et fixer à...
- Page 21 Assemblez les pièces métalliques en forme de T (G), l'acier à ressort (H) et les Step 5 langue�es à ressort (I) dans l'ordre indiqué, et faites passer un boulon (O) à travers l'anneau de retenue (T) et les joints M8 (S) comme indiqué, en le bloquant en place à...
- Page 22 Combinez les par�es supérieure et inférieure, alignez les trous inférieurs de (A) Step 7 avec les trous de (GHI), installez les langue�es à ressort (I), le bouchon (N), les joints M8 (S), l'anneau de retenue (T) et le contre-écrou M8 (P) dans l'ordre, et serrez les boulons et les écrous à...
- Page 23 Step 9 Put all bolt caps(R&W) on the bolts. Finish by placing the Back Cushion(F) in the chair. F×2 R×2 W×2 OUTDOOR DINING SET: This product can be used in conjunc�on with our outdoor x-legs longboard table, allowing you to enjoy a high-end outdoor dining experience. ENSEMBLE DE SALLE À...
Need help?
Do you have a question about the 02C67SG-24-BG and is the answer not in the manual?
Questions and answers
Missing nuts - item P