Table of Contents
Advertisement
Quick Links
Advertisement
Table of Contents

Related Manuals for Parrot ANAFI USA FreeFlight 6 USA


Summary of Contents for Parrot ANAFI USA FreeFlight 6 USA
- Page 1 ANAFI USA FreeFlight 6 USA User Guide Version: 6.10.3.1 Updated: May 16 , 2024...
- Page 2 Documentation changelog This section details the major changes to Parrot’s technical documentation since the previous update. What changed Where Warning added about the impact on warranty support of private mode/no data Page 9 sharing. Warning added about ensuring drone calibrations are performed prior to flying.
-
Page 3: Using This Guide
Release Notes ANAFI USA available on the Parrot website, to ensure that you have the latest versions of the drone and controller firmware, and FreeFlight 6 USA App. If you are an offline user, you must contact your local Parrot Partner or Parrot Contact to obtain the .apk file to perform an offline system update. -
Page 4: Prerequisites
A to USB-C cables and the enclosed charger. The battery’s LEDs start to flash indicating that the battery is awake. Let it charge. Parrot recommends you always run a full charge of the smart battery, and the Skycontroller 4 before flying ANAFI USA. - Page 5 This operation takes a few minutes. When the update is complete, the screen displays Your drone is ready. 12. Tap CONTINUE to return to the FreeFlight 6 USA homescreen. All systems are ready for flight. © 2024 Parrot Drones SAS. All Rights Reserved.
-
Page 6: Table Of Contents
Table of contents Hand launch from a moving vehicle ......27 ...... 2 OCUMENTATION CHANGELOG Standard take-off from a moving vehicle ....28 ........3 SING THIS GUIDE ........... 29 LYING .......... 4 REREQUISITES Optimal speeds ............29 ........6 ABLE OF CONTENTS Optimal autonomy (flight time) ....... - Page 7 ......69 HERMAL ANALYZER MODE Drone end of service life .......... 86 ..........70 INESHOTS ....87 REQUENTLY ASKED QUESTIONS 360° ................70 1: O ... 89 Reveal ............... 70 PPENDIX PERATIONAL CHECKLIST © 2024 Parrot Drones SAS. All Rights Reserved.
-
Page 8: Foreword
Foreword ANAFI USA was designed and optimized to fly as is. Parrot strongly discourages the use of any add-on or accessory which could be mounted on, or attached to ANAFI USA (feet extensions, buoys, hulls, etc.). Accessories impose extra weight on the drone and its motors. Electronic accessories may also interfere with the drones’... -
Page 9: 4K Video Formats
Furthermore, for software reasons, the stream broadcast by Skycontroller is better defined in the 1080p video mode than in 4K (or any photo mode), especially when using zoom. For this reason, Parrot recommends favoring default video settings (1080p, 30 fps) for direct observation. 4K video recording should be reserved for post-mission data exploitation. -
Page 10: Disclaimer
IMPORTANT: ANAFI USA’s warranty is void if you fly the drone without the required calibrations. 6. Videos and photos promoted and advertised by Parrot Drones SAS and its affiliates have been made by and with experienced professionals and drone pilots. IN CASE OF DOUBT RELATING TO THE USE OF YOUR ANAFI USA DRONE AND ITS ACCESSORIES, ALWAYS REFER TO THE MOST RECENT VERSION OF THE PARROT DOCUMENTATION. - Page 11 IMPORTANT: Parrot strongly recommends that you regularly refer to the Release Notes ANAFI USA available on the Parrot website, to ensure that you have the latest firmware versions of the drone, controller, and application. If you are an offline user, contact your local Parrot Partner or Parrot contact to obtain the .apk file to perform an offline system update.
-
Page 12: Technical Specifications
Technical specifications • PARROT ANAFI USA Thermal sensitivity: <60 mK • • Photo format: JPEG Size folded: 252 x 104 x 84 mm (9.9 x 4.1 x 3.3”) • • Video format: MP4 (H.264) Size unfolded: 282 x 373 x 84 mm (11.1 x 14.7 x 3.2”) •... -
Page 13: Package Contents
1 USB-C/USB-C cable (for Skycontroller 4 packs only) 1 additional set of joysticks (for Skycontroller 4 packs only) 1 gimbal protection cover A Flight Safety Guide 1 hard case *Pack contents image shows Skycontroller 4 © 2024 Parrot Drones SAS. All Rights Reserved. -
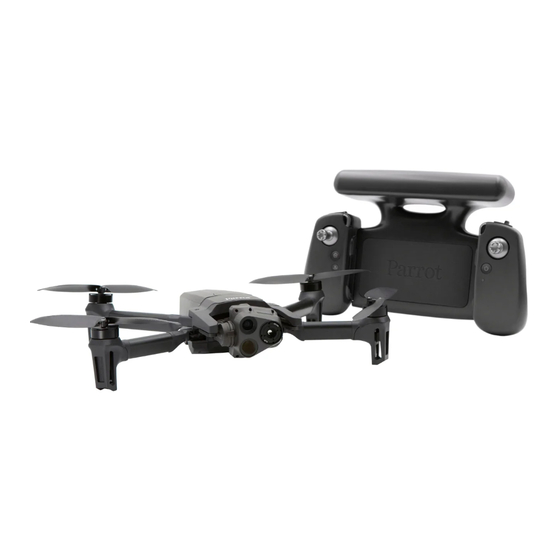
Page 14: Presentation Of Anafi Usa
Presentation of ANAFI USA 1. Front foldable arms and propellers 5. Charge level LED indicators 2. Gimbal protective cover Power button 3. Rear foldable arms and propellers 7. Smart battery 4. USB-C charging port... - Page 15 A N A F I U S A 8. Thermographic camera 10. 21 MP wide angle camera 9. 21 MP telephoto camera 11. Battery extraction button © 2024 Parrot Drones SAS. All Rights Reserved.
-
Page 16: Presentation Of Skycontroller 3
Presentation of Skycontroller 3 1. Left joystick 5. Wi-Fi antenna 2. Right joystick Take-off/Land button 3. Power on foldable arm and device holder RTH (Return to Home) button 4. Status LED... -
Page 17: Led Status Indicator Color Codes
Connected to ANAFI USA Alternating purple/dark blue Autonomous flight in progress Alternating red/any color Low battery alert (ANAFI USA, Skycontroller, or both) Charging LED colors and behavior Steady red Charging Steady green Charged © 2024 Parrot Drones SAS. All Rights Reserved. -
Page 18: Pairing Anafi Usa To A Skycontroller 3
Pairing ANAFI USA to a Skycontroller 3 Follow this procedure to pair a drone and a controller for the first time, and to restore the lost pairing between a drone and a controller. 1. Verify that a compatible microSD card is inserted into ANAFI USA. 2. -
Page 19: Presentation Of Skycontroller 4
3. Left detachable joystick Optics reset 4. Wi-Fi antenna 11. Gimbal tilt trigger 5. Right detachable joystick 12. Zoom trigger Power button Media recording 7. Status LED indicator 14. Right neck strap loop © 2024 Parrot Drones SAS. All Rights Reserved. - Page 20 15. USB – C charging port 18. Left spare joystick storage (1 of 2) 16. Charging LED 19. USB – C device connection port 17. Micro - HDMI port WARNING: If you press Take-Off/Land, RTH, and Media Recording simultaneously, the EMERGENCY MODE on ANAFI USA activates immediately.
-
Page 21: Led Status Indicator Color Codes
FreeFlight 6 USA. Operators can watch the drone’s view on an external screen, while they navigate FreeFlight 6 USA menus (settings or dashboard) on the device associated to the Skycontroller © 2024 Parrot Drones SAS. All Rights Reserved. - Page 22 Piloting HUD Spectrum: Thermal • Thermal settings: Thermal post-processing: No Parrot recommends using a certified micro-HDMI to HDMI cable (not included in the box) to connect external pieces of equipment to the Skycontroller 4. Uncertified cables may impair the ecosystem’s Wi-Fi performance.
-
Page 23: Free Flight
10. Tap OK. FreeFlight 6 USA is now up to date. CAUTION: Ensure that you obtain the APK file from Parrot, or your legitimate Parrot reseller. Your Android device and personal data are more vulnerable to attacks from unknown apps. After you update FreeFlight 6 USA, Parrot recommends that you revert your Android device to the original setting which prevents you from installing unknown apps. -
Page 24: Pre-Flight Checklist
(32.8 mph). • Due to the operating mode of its vertical camera and ultrasonic sensor, Parrot recommends you do not fly ANAFI USA less than 10 m (30 ft) over water, or other reflective surfaces, such as mirrors, glass, etc. -
Page 25: Getting Started
Release Notes ANAFI USA available on the Parrot website, to ensure that you have the latest versions of the drone and controller firmware, and FreeFlight 6 USA App. If you are an offline user, you must contact your local Parrot Partner or Parrot Contact to obtain the .apk file to perform an offline system update. -
Page 26: Taking Off
YOU DO NOT PERFORM A HAND LAUNCH PROCEDURE INDOORS, DUE TO LOW STABILITY, AND INCREASED RISK. Parrot recommends that you work as a team of two people: one person to perform the take-off procedure, while the other person focuses on flying the drone. This eases the pressure of having to multi-task. -
Page 27: Deployment From A Moving Vehicle
Hand launch from a moving vehicle Parrot recommends mobilizing two operators for this procedure: one operator launches the drone while another operator controls the drone with both joysticks of the Skycontroller. WARNING: Be especially careful when hand launching ANAFI USA from a moving vehicle. It requires complete focus. -
Page 28: Standard Take-Off From A Moving Vehicle
Standard take-off from a moving vehicle WARNING: Be especially careful when performing a standard take-off from a moving vehicle. It requires complete focus. Do not allow yourself to become distracted and stay aware of your surroundings. Press Power to power on ANAFI USA and position the drone in the palm of your hand. WARNING: Stabilize the speed and direction of the vehicle as much as possible. -
Page 29: Flying
At full throttle, 22° inclination angle (pitch) enables ANAFI USA, at full throttle, to maintain a 12 m/s horizontal speed. This speed, maintained on a full flight, enables the drone to cover the longest distance, on a single battery. © 2024 Parrot Drones SAS. All Rights Reserved. -
Page 30: Wi-Fi Link Optimization
Wi-Fi link optimization ANAFI USA’s ecosystem is designed to optimize, in real time, the Wi-Fi communications between the Skycontroller and the drone. By default, the ecosystem automatically selects the most efficient Wi-Fi channel available. In urban environments, 5 GHz Wi-Fi channels typically suffer less interference than 2.4 GHz channels. Refer to the “PREFERENCES / Network”... -
Page 31: Returning Home: Smart Rth
ANAFI USA has detected. This section explains how to access coordinates on the FreeFlight 6 USA app map, in flight or to prepare a flight. © 2024 Parrot Drones SAS. All Rights Reserved. - Page 32 By default, coordinates are displayed on the FreeFlight 6 USA app map. They can be set as: • latitude and longitude (LATLNG: default value) • MGRS (Military Grid Reference System: NATO’s geocoordinate standard) • UTM (Universal Transverse Mercator) • DMS (degree, minute, second – of arc) Refer to the “PREFERENCES / Interface / Coordinates systems”...
-
Page 33: Advanced Rth Settings
CAUTION: By activating advanced RTH features, the drone might not be able to reach its destination in case of low battery, if you select return to Pilot, or a Custom position. Parrot will not be held responsible in the event that the drone lands in a different location. - Page 34 There are two ways to change this custom point. Paste the coordinates you copied from the map of FreeFlight 6 USA – refer to the earlier section of this guide. If you set up your drone for a flight, apply the following simple procedure to move the Home icon directly on the map of FreeFlight 6 USA.
- Page 35 A N A F I U S A Custom RTH point set (Android tablet) Access Preferences/Safety again and note the Custom point coordinates have been updated. © 2024 Parrot Drones SAS. All Rights Reserved.
-
Page 36: Landing
Do not allow yourself to become distracted and stay aware of your surroundings. Always wear a strong glove to recover ANAFI USA Parrot recommends mobilizing two operators for this procedure: one operator pilots the drone, the second operator recovers ANAFI USA. - Page 37 Let the drone do the work. Do not forcefully grab the drone while it is hovering. Parrot recommends that you work as a team of two people: one person to perform the hand landing procedure, while the other person focuses on flying the drone. This eases the pressure of having to multi-task.
-
Page 38: Smart Lipo Battery
115 minutes. IMPORTANT: Parrot does not recommend ANAFI USA users to invest in a USB-PD power bank, as not all of them support USB-C to USB-C charging of ANAFI USA’s battery. Due to the nature of the USB- C technology, some USB-PD power banks recharge on ANAFI USA’s smart battery, rather than the... -
Page 39: Battery Care And Safety
Always store your battery in a dry, ventilated place, at a temperature close to 20°C; Always carry your battery in a fire-retardant bag or case (unless it is installed on ANAFI USA: it can then be transported with the drone, inside its carrying case). © 2024 Parrot Drones SAS. All Rights Reserved. -
Page 40: Battery State Of Health
IMPORTANT: the ideal long-term storage conditions for the battery are: • at room temperature 23°C +/- 2°C; • at a relative humidity of 65% (rh) +/- 20%; NOTE: ANAFI USA’s smart battery only charges in ambient temperatures between +10°C to +45°C. Flying time is reduced if you fly in temperatures approaching -10°C. -
Page 41: Microsd Card And Media Management
3. Copy the videos and photos taken with ANAFI USA to the computer hard drive to store, edit, and manage the media. TIP: Parrot recommends you backup your photos and videos, and you empty your microSD card after each flight, to ensure you always have available memory space to capture new still or moving images. -
Page 42: Compatible Microsd Cards
Compatible microSD cards Refer to Parrot’s online documentation for an updated list of compatible microSD cards. Direct media retrieval (drone to computer) Alternatively, retrieve the media directly from ANAFI USA, without extracting the microSD card. Use an enclosed USB-A to USB-C cable to connect the drone (USB-C) to a USB-A port on your computer. - Page 43 2. Tap the gray ENCRYPT SD CARD button The Encryption profiles screen opens. 3. Tap CREATE PROFILE to create a new encryption profile. Alternatively, select an existing Profile from the drop-down menu. © 2024 Parrot Drones SAS. All Rights Reserved.
- Page 44 If you create a new profile, the Create profile screen opens. 4. Type your own Password or tap GENERATE PASSWORD. 5. Tap the green ENCRYPT SD CARD button to launch the encryption. The Encryption profiles screen opens again. A green loading circle shows that the encryption process is underway.
-
Page 45: Introducing Freeflight 6 Usa
5. Next available action 13. PHOTO/VIDEO MODE box Controller battery & device GPS statuses 14. Image settings box Drone battery & GPS statuses Soft shutter & timer/No. of media PREFERENCES Map center toggle (Pilot/Drone) © 2024 Parrot Drones SAS. All Rights Reserved. - Page 46 Overview of drone Piloting, Cineshots, Dronies, Photo and Video modes: Piloting modes: Manual flight Cineshots : 360° (left & right) Cameraman Reveal (30 & 60m) Follow Me Spiral (30 & 60m) Smartdronies Epic (30 & 60m) Flight Plan Touch & Fly Video modes: Standard 3-second...
-
Page 47: Preferences
Gimbal: Horizon FIXED / DYNAMIC (DV: FIXED for FILM, and SPORT; DYNAMIC for CINEMATIC, and RACING) Camera tilt speed 1°/s to 180°/s (DV: 20°/s for FILM, SPORT, and RACING; 10°/s for CINEMATIC) © 2024 Parrot Drones SAS. All Rights Reserved. -
Page 48: Thermal
Temperature range DEFAULT / VERY HIGH TEMPERATURES Thermal post-processing Tap Info for more information about Thermal post-processing. Parrot recommends NO for real time operations, and YES for post flight analysis operations. Thermal calibration AUTO mode is recommended for most users. If you select the MANUAL mode, the application will... -
Page 49: Interface
NO / YES Max height 1m to 150m (DV: 30m) Max distance 10m to 4 km (DV: 300m) Minimum height when using RTH 20m to 100m (DV: 30m) End behavior HOVERING / LANDING © 2024 Parrot Drones SAS. All Rights Reserved. -
Page 50: Camera
NOTE: By activating advanced RTH features, if you select return to Pilot or Custom position, the drone might not be able to reach its destination in case of low battery. Parrot will not be held responsible in case the drone lands in a different location. -
Page 51: Network
Wi-Fi band AUTO / MANUAL Tap PASSWORD to define the Wi-Fi key shared by ANAFI USA and the Skycontroller 4. Parrot defines a unique random password for each ANAFI USA and Skycontroller 4 package, but Parrot highly recommends you define your own password. -
Page 52: Videos, Photos, And Panoramas
TIP: You can film and take pictures using your device as ANAFI USA’s controller. However, Parrot recommends that you always use the Skycontroller 3, or Skycontroller 4, and your device, for the best flight experience. -
Page 53: Photo Mode
4:3 aspect ratio, 21MP, up to 84° HFOV – zoom is disabled for this format DNG+JPEG WIDE 4:3 aspect ratio, 21MP, up to 84° HFOV – zoom is disabled for this format © 2024 Parrot Drones SAS. All Rights Reserved. - Page 54 6. Tap a format (JPEG RECT, or JPEG WIDE if available, or any DNG+JPEG if available) to select it. 7. Tap the Image settings box again to close the sub-boxes and confirm your choice. NOTE: The DNG+JPEG option produces at least 2 files: 1 DNG (Digital NeGative), 1 JPEG, for each shutter action.
- Page 55 NOTE: ANAFI USA locks the exposure locking of the frame with which you start your panorama with. For this reason, Parrot recommends you always frame the main subject of the intended panorama before pressing the shutter button. Refer to the “Lock...
- Page 56 Tap the green box of the Panorama you want to generate to start downloading the corresponding series of pictures to your device. When the download is complete, FreeFlight 6 USA displays a page from where you can delete the downloaded photos. Tap Yes to keep the originals on the microSD card. Tap No to delete them.
-
Page 57: Gimbal Tilt Control
Before starting this procedure, you must position ANAFI USA on a flat and perfectly level surface, exactly perpendicular to any pattern containing straight lines you can use as horizon references. A set © 2024 Parrot Drones SAS. All Rights Reserved. - Page 58 square can help you check that a line on your floor is perpendicular to your wall. When ANAFI USA is correctly positioned, perpendicular to its straight horizon reference, press Power to power it on, along with the Skycontroller and your device. Access Camera calibration from the ANAFI USA box of the homescreen or the HUD of FreeFlight 6 USA, or from the PREFERENCES / Camera menu.
- Page 59 Tap + plus or - minus on each axis to align visible and thermal views. Tap < back on the top left of the screen to exit the interface and confirm your settings. © 2024 Parrot Drones SAS. All Rights Reserved.
-
Page 60: Advanced Image Settings
Advanced image settings ANAFI USA is set to deliver high quality and balanced 4K videos and 21MP photos, out of the box. However, there are multiple advanced image settings. This section is designed to help you exploit manual settings and develop your filming and photography styles. To access the advanced image settings: 1. -
Page 61: Hdr
NOTE: You cannot modify s, ISO, or WB values when the HDR mode is activated. However, you always keep control over your EV value. Activating (or deactivating) HDR stops any ongoing video recording. © 2024 Parrot Drones SAS. All Rights Reserved. -
Page 62: Shutter Speed (S)
Shutter speed (s) The s value refers to the exposure time, in fractions of a second, where the shutter stays open to capture a still picture. In Auto mode, ANAFI USA selects the best shutter speed and ISO value couple, in real time, depending on the scene and available light. - Page 63 Select the WB option that is best suited for your shooting conditions, your subject, or both. The HUD reflects the chosen settings and helps you make the best choice. Auto WB Incandescent WB Fluo WB Sunny WB Cloudy WB Shaded WB WB 2 000 K WB 10 000 K © 2024 Parrot Drones SAS. All Rights Reserved.
-
Page 64: Exposure Value (Ev)
Exposure value (EV) The EV expresses the general darkness or lightness of a photograph or video. At +0.0 (zero) EV, ANAFI USA automatically adapts the shutter speed and the ISO value to deliver a perfectly balanced photo or video. Tap the +0.0 EV box to activate the EV slider. Slide your finger on the screen to the negative values on the left to darken your picture or video. -
Page 65: Adjustment
Tap the RESET button, on the right of the screen, to bring all values to 0 (zero). Tap the < back, on the left of the screen, to confirm your settings and exit the ADJUSTMENT menu. © 2024 Parrot Drones SAS. All Rights Reserved. -
Page 66: Thermal Imaging
Thermal Imaging Thermal imaging, or infrared (IR) thermography, is the process of acquiring, measuring and analyzing thermal information from non-contact devices, such as ANAFI USA’s FLIR Boson camera. Thermal imaging devices transform invisible IR radiations, or heat transfers, into colored images the human eye can interpret and analyze. -
Page 67: Relative Thermal Mode
This is especially useful if you must reframe your scene to include part of the sky. The sky always appears as a cold element, which disturbs the scale. © 2024 Parrot Drones SAS. All Rights Reserved. -
Page 68: Spot Thermal Mode
Spot Thermal mode The Spot Thermal mode of ANAFI USA isolates hot or cold. Use the inverted arrows button (under the scale, on the left of the screen) to toggle from hot to cold (or from cold to hot) and slide your finger along the scale to adapt the threshold of the scale to your scene and highlight only the coldest or hottest spots. -
Page 69: Thermal Analyzer Mode
Tap the green ANALYZE box. The photo displays or the video plays in Analyzer mode. The interface gives you access to most options available for filming. Same image, (hot) Spot mode (Android) © 2024 Parrot Drones SAS. All Rights Reserved. -
Page 70: Cineshots
Cineshots ANAFI USA features a series of automated shots, which enable you to capture scenes professionally. Ensure that you have selected the video settings you require and tap CINESHOTS in the bottom bar of the HUD to access Cineshots. NOTE: Cineshots are available for the visible spectrum only. Tap one of the following Cineshots to select it: •... -
Page 71: Epic
After a countdown on the HUD, ANAFI USA starts moving backward and upward. An animation flashes on your screen, and the Epic box progressively fills with green as the Cineshot unfolds. NOTE: Any action on any stick of Skycontroller immediately terminates the current cineshot. © 2024 Parrot Drones SAS. All Rights Reserved. -
Page 72: Piloting Modes
Piloting modes Tap the PILOTING MODE box FreeFlight 6 USA’s HUD to access the 7 piloting modes options: • Manual flight • Cameraman • Follow Me • SmartDronies • • Flight Plan • Touch & Fly Manual flight Manual flight mode is ANAFI USA’s default mode. It enables you to pilot the drone and fully control its camera tilt and zoom. - Page 73 7. Tap the red STOP box in the HUD's top bar, to have ANAFI USA stop tracking you. When no target is selected, or when the tracking has been ended by the pilot, ANAFI USA’s behavior © 2024 Parrot Drones SAS. All Rights Reserved.
-
Page 74: Smartdronies
is similar to that of the Manual flight mode. Follow Me mode dronie options To select a dronie: 1. Follow steps 1 - 5 in the section: Follow Me. 2. Tap the DRONIE in the HUD's bottom bar. 3. Tap 1 of the 4 dronie options. 4. -
Page 75: Fpv
5. Waypoint distance marker 14. SPECTRUM box 6. Currently selected waypoint 15. Undo/Redo 7. Altitude/Speed slider 16. Point of Interest (POI) 8. Camera direction 17. Independent waypoint 18. Linked waypoint Start Flight Plan button © 2024 Parrot Drones SAS. All Rights Reserved. - Page 76 Parrot recommends that you modify the settings of the flight plan before you begin. 3. To start a new flight plan, tap the screen to create the initial waypoint, ideally, very close to your intended take-off point.
- Page 77 2. Total flight duration 9. Gimbal tilt marker 3. Picture mode 10. POI 4. Video mode 11. Drone rotation marker 5. Drone rotation 12. Waypoint 6. Pause recording 13. Individual flight path duration © 2024 Parrot Drones SAS. All Rights Reserved.
-
Page 78: Touch & Fly
7. Gimbal tilt The waypoints are color-coded. The color spectrum displays green for lower altitude waypoints, and red for higher altitude waypoints. Drag buttons 3 - 7 onto the chart to modify the individual flight paths in the flight plan. For picture mode, you can define the picture taking Interval, and the photo Format. - Page 79 CAUTION: Activate Touch & Fly Waypoint with care. After the initial confirmation, any tap on the map will immediately send ANAFI USA to the corresponding spot. Parrot recommends you set your FreeFlight 6 USA filming or photography options before activating the Touch & Fly Waypoint mode. If, by mistake, you send ANAFI USA toward a dangerous area, tap the STOP box in the HUD, or firmly reclaim commands from the Skycontroller3, or Skycontroller 4.
-
Page 80: How To Prepare Your Map
How to prepare your map This chapter describes how to prepare a map for flight. There are 2 ways to prepare a map: • Save your future flying area map on FreeFlight 6 USA while connected to the Internet, then use it offline in the field. - Page 81 IMPORTANT: FreeFlight 6 USA automatically renames duplicate files by adding a number in parentheses after the file name, for example: MyMap(1). Parrot recommends that you name each map file differently before you transfer the map file in order to easily distinguish between 2 regions.
- Page 82 2. Tap the Load map tile from the FreeFlight 6 USA main screen. The Prepare your map screen opens. 3. Tap Download Custom Maps at the bottom right. 4. On the Custom Maps screen, swipe left on the corrupted map until you see the Delete tile. 5.
- Page 83 13. Name the file, and click Save. 14. Click Run. The conversion can take more than one hour, depending on the size of the map and the parameters of the previous steps. © 2024 Parrot Drones SAS. All Rights Reserved.
-
Page 84: Maintenance And Troubleshooting
Maintenance and troubleshooting This section describes basics procedures to maintain your drone and troubleshoot most issues you may encounter using ANAFI USA. In addition, drone and controller reset procedures can be useful before a change of operator or operating structure. Changing propeller blades Propeller blades are delicate pieces of equipment and are instrumental for flight integrity. -
Page 85: Rebooting All Systems
FreeFlight 6 USA media, as media may be deleted along with the application. ANAFI USA drone hard reset Hard resetting ANAFI USA reverts ANAFI USA’s most recent firmware to its original state. Parrot recommends the drone hard reset as a first intent procedure for several issues, notably gimbal calibration troubles. -
Page 86: Anafi Usa's Smart Battery Hard Reset
ANAFI USA’s smart battery hard reset A hard reset of ANAFI USA’s battery can correct battery issues. Parrot recommends a battery hard reset whenever the battery’s behavior is unexpected. You must reset your battery if: • the battery behavior is not consistent with the information in the “Smart LiPo... -
Page 87: Frequently Asked Questions
What do I do if I experience a connectivity issue (black screen, white noise, thermography camera activation failure, frozen or lagging stream)? 1. Check that your device’s Wi-Fi is disabled: Parrot recommends you set your device in Airplane mode when you fly ANAFI USA, to minimize the risks of communication disturbance. - Page 88 FreeFlight 6 USA alert will tell you to contact your Parrot Support Partner. In this case, you must provide the Parrot Support Partner with: a.
-
Page 89: Appendix 1: Operational Checklist
Release Notes ANAFI USA available on the Parrot website, to ensure that you have the latest versions of the drone and controller firmware, and FreeFlight 6 USA App. If you are an offline user, you must contact your local Parrot Partner or Parrot Contact to obtain the .apk file to perform an offline system update. - Page 90 Global reactivity Camera tilt speed Inclination Vertical speed Rotation speed Before take-off ANAFI USA GPS signal Red / Orange / Green Device GPS signal Red / Green Flight mode MANUAL Weather checked and OK Take-off Zone Clear Drone status Check Take-off/Land command Take-off After take-off...
Need help?
Do you have a question about the ANAFI USA FreeFlight 6 USA and is the answer not in the manual?
Questions and answers