Table of Contents
Advertisement
Quick Links
BEIER Variator®
BEIER-CYCLO Variator®
A Type
B Type
D Type (ND Series)
《CAUTION》
■ This product should be handled by only those who have been trained for the work.
Carefully read the maintenance manual before use.
■ Deliver this manual to the customer who will actually use the product.
■ This maintenance manual should be kept by the user for future reference.
Maintenance Manual
No. BM2001E-8
Advertisement
Table of Contents

Related Manuals for Sumitomo BEIER Variator ND Series


Summary of Contents for Sumitomo BEIER Variator ND Series
- Page 1 BEIER Variator® BEIER-CYCLO Variator® A Type B Type D Type (ND Series) 《CAUTION》 ■ This product should be handled by only those who have been trained for the work. Carefully read the maintenance manual before use. ■ Deliver this manual to the customer who will actually use the product. ■...
-
Page 3: Introduction: Safety Precautions
Introduction: Safety Precautions - Carefully read this maintenance manual and all accompanying documents before use (installation, operation, maintenance, inspection, etc.) and use the machine correctly. Use the product after throughly understanding the machine, information about safety, and all precautions for correct operation. After reading, retain this manual for future reference. -
Page 4: Table Of Contents
Introduction: How to Refer to the Maintenance Manual, Table of Contents Common This maintenance manual is common for “Motor Directly Connected” and “Reducer Type”. For handling of the motor brake and the speed setter, refer to the motor maintenance manual (No.MM1001E) and the speed setter maintenance manual (No.BM2301E). -
Page 5: Receiving Inspection
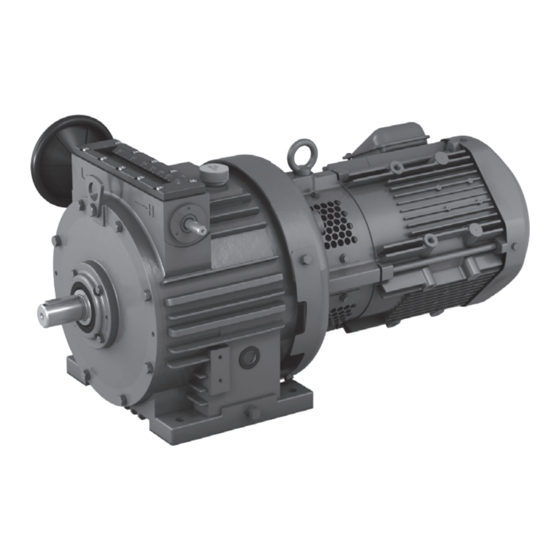
1. Receiving Inspection Common CAUTION - Unpack the unit after verifying that it is positioned correct side up; otherwise, injury may result. - Verify that the unit received is the one you ordered. Installing the wrong unit may result in personal injury or equipment damage. - Page 6 1. Receiving Inspection Common (2) For BEIER-CYCLO Variator [1] BEIER-CYCLO Variator nomenclature (see P5) [2] CYCLO Drive M O D E L reduction ratio R A T I O B E I E R S P E E D R A N G E - Beier unit variable I N P U T r/min...
- Page 7 1. Receiving Inspection Common 1-3 BEIER Variator and BEIER-CYCLO Variator Nomenclature Symbol meanings are shown below. Please confirm that the nomenclature matches your order. (1) BEIER Variator (Basic Type) With or Without Brake Model Symbol BEIER Variator Frame Size BEIER Variator See P6, Table 1-1 Blank Without Brake (Basic Type)
- Page 8 1. Receiving Inspection Common Table 1-1 BEIER Variator Frame Size Table 1-2 BEIER Variator Gear Reducer Table 1-3 CYCLO Drive Frame Size Mechanism Frame Size Frame Size Frame Size Frame Size Single A Type B Type D Type Double Reduction Reduction N02A N02B...
-
Page 9: Storage
2. Storage Common Common If this product is not for immediate use, note the following points when storing it. 2-1 Storage Location Store the product in a clean and dry indoor. Do not store the product outdoors. Store it in a location that is free of moisture, dust, extreme temperature changes, corrosive gases, etc. -
Page 10: Transport
3. Transport Common DANGER - Do not step under a unit suspended by a crane or other lifting mechanism for transport; otherwise, injury or death may result. CAUTION - Be careful not to drop the unit. - When hanging bolts or holes are provided, be sure to use them. After mounting the unit to a machine, do not hoist the entire machine by using the hanging bolts or holes;... -
Page 11: Installation
4. Installation Common DANGER - Do not use a standard unit in an explosive atmosphere. Under such conditions, an explosion proof motor should be used; otherwise, electric shock, personal injury, explosion, fire, or damage to the equipment may result. - For , use a motor with specifications suited for dangerous locations (a location where gas or volatile explosion proof motor vapor is present);... -
Page 12: Coupling With Other Machines
5. Coupling with Other Machines Common CAUTION - Confirm the rotation direction before coupling the unit with the driven machine. Incorrect rotation direction may cause personal injury or damage to the equipment. - When operating the product alone (uncoupled), remove the key that is temporarily attached to the output shaft; otherwise the key could fly off, and injury may result. - Page 13 5. Coupling with Other Machines Common 5-2 Mounting Connector - When mounting Connector, do not apply impact or excessive axial load to the shaft. The bearing could be damaged, or the collar could come off. - Shrinkage fit is recommend. (1) When Using a Coupling The alignment accuracy (A, B, X) in Figure 5-1 should be no greater than that shown in Table 5-3.
-
Page 14: Wiring And Piping
6. Wiring and Piping When using another manufacturer’s motor, refer to the operation manual for that motor. (Motors with a motor capacity of 37kW or more are made by other manufacturers. Also, depending on the motor specification, some motors are made by other manufacturers.) This manual shows wiring for motors with Japanese standard specifications. - Page 15 6. Wiring and Piping 6-1 Removing and Attaching the Resin Terminal Box Cover 3-phase motor 4P: 0.2–0.4kW (1) Removal As shown in Figure 6-1, to remove the cover, grab the sides of the terminal box, and pull it toward you. (2) Attachment Push the terminal box cover from above the terminal box case until it snaps shut.
- Page 16 6. Wiring and Piping 6-5 Motor Wiring In this section, motor wiring, standard specification for terminals, and symbols of lead wires are shown. ■ Without Brake 3-Phase Power Source 3 Lead Wires Motor 6 Lead Wires Direct On-Line Starting Starting −...
- Page 17 Japanese domestic standard specifications. Consult with us for special specifications, such as overseas specifications and motors not manufactured by Sumitomo.) (3) Between the motor for electric trochoid pump and the main motor, install an interlock mechanism that satisfies the following two functions.
- Page 18 6. Wiring and Piping Common 6-7 Lubricating Oil Cooling Device BEIER frame sizes 50A–200A, and 50B–150B come with a lubricating oil cooling device. Install it together with the electric trochoid pump. (1) Piping [1] Install the lubricating oil cooling device horizontally. [2] The piping distance between cooling device and the Beier unit should be within the length shown in Table 6-4.
- Page 19 6. Wiring and Piping Common 6-8 Electric Remote Control Device (RC) BEIER frame sizes 150A, 200A, 100B, and 150B come with an electric remote control device (RC) (This is an option for other frame sizes). Connect the pilot motor (PM) to the power source. (1) Pilot Motor (PM) Wiring Operation power source PB2 PB3 PB4...
-
Page 20: Operation
7. Operation Common DANGER - Do not approach or touch the rotating parts (output shaft, etc.) during operation; otherwise, loose clothing may become caught in these rotating parts and cause serious injury or death. - When the power supply is interrupted, be sure to turn off the power switch; otherwise, restoration of power may cause electric shock, personal injury, or damage to the equipment. - Page 21 7. Operation Common 7-3 Electric Trochoid Pump CAUTION - For models with lubrication method using a electric trochoid pump, always start the electric trochoid pump before starting the main motor. Abnormal temperature rise, seizure, or other damage to the device may result. - For models with a lubricating method using electric trochoid pump, see P15.
- Page 22 7. Operation Common (2) With Variable Speed Indicator (Vertical BEIER Frame Sizes 50A–200A, and 50B–150B) - The scale is attached on the opposite side to the handle. - Calculate the output rotation frequency from the scale (speed ratio) indicated by the pointer. Scale Figure 7-2 Variable Speed Indicator 7-5 Variable Speed Operation/Electric Remote Control Device (RC)
- Page 23 7. Operation Common 7-6 Pilot Motor (PM) Specifications The pilot motor (PM) applies the Warm Gear method and the CYCLO Drive method depending on the Beier frame size. Table 7-4 Pilot Motor Method PM attachment bolt Frame Size PM flange Method A Type B Type...
-
Page 24: Daily Inspection And Maintenance
8. Daily Inspection and Maintenance Common DANGER - Do not handle the unit when cables are energized. Be sure to turn off the power when working on the unit; otherwise, electric shock may result. - Do not touch the rotating parts (output shaft etc.) during maintenance and inspection while operating the unit; otherwise, loose clothing may become caught in these rotating parts and cause serious injury or death. - Page 25 8. Daily Inspection and Maintenance Common 8-1. Daily Inspection Make certain to carry out daily inspections in accordance with Table 8-1. Lack of inspections is a source of trouble. Table 8-1 Daily Inspection Inspection Item Inspection Detail Current value Is the current no greater than the rated value shown on the nameplate? Noise Are there unusual noises, or are there extreme changes in the noises? Vibration...
- Page 26 8. Daily Inspection and Maintenance Common 8-2 Checking Lubrication Method Please look for the relevant items and make certain to do maintenance. Lack of maintenance is a source of trouble. (1) Standard Lubrication Method (When Driven at Standard Input Speed Shown in Table 8-6) - Check Table 8-2 through 8-5 for the lubrication method for the model used by the customer.
- Page 27 8. Daily Inspection and Maintenance Common Table 8-6 Standard Input Speed A Type B Type D Type Standard Input Speed Standard Input Speed Standard Input Speed BEIER Frame Size BEIER Frame Size BEIER Frame Size (r/min) (r/min) (r/min) N02A~15A 1450/1750 N02B~10B 1450/1750 20A~40A...
- Page 28 (2) Recommended Lubricating Oil and Specified Lubricating Oil Always use lubricating oils recommended or specified by Sumitomo Heavy Industries as shown in Table 8-10 and Table 8-11. Table 8-10 Recommended Lubricating Oil for A Type and B Type Beier unit...
- Page 29 8. Daily Inspection and Maintenance Common (3) Oil Fill Quantity Table 8-13 provides approximate oil fill quantities. There are individual differences in actual quantities due to difference in each structure. Make sure to check that the oil level reaches the center point or the upper red line on the oil gauge, because the oil quantity may be more or less than requirement even if the oil is replenished according to Table 8-13.
- Page 30 8. Daily Inspection and Maintenance Common ■ Oil Fill Procedure for Vertical Type [1] Remove the filler plug. [2] Pour oil into the oil filler port, keeping an eye on the oil gauge to check the oil level. [3] Confirm that the oil level is at the specified position on the oil gauge. [4] Attach the filler plug.
- Page 31 (2) Recommended Lubricating Oil - Always use lubricating oils recommended by Sumitomo Heavy Industries as shown in Table 8-16. - In the case of A Type and B Type BEIER-CYCLO Variator, the recommended lubricating oils are the same for the Beier unit and the Cyclo unit.
- Page 32 8. Daily Inspection and Maintenance Common (3) Oil Fill Quantity Table 8-18 provides approximate oil fill quantities. Make sure that the oil level is up to the upper red line on the oil gauge. Table 8-18 Approximate Oil Fill Quantity for Cyclo Unit (L) Frame Size 6135 6145...
- Page 33 8. Daily Inspection and Maintenance Common ■ Oil Fill Procedure for Vertical Type [1] Remove the filler plug. For models other than frame size 6255, 6265 , remove the air vent plug to release air. [2] Pour oil into the oil filler port, keeping an eye on the oil gauge to check the oil level. [3] Confirm that the oil level is up to the upper red line on the oil gauge.
- Page 34 8. Daily Inspection and Maintenance Common 8-5 Grease Replenishment for Grease Cyclo Unit Models (1) Grease Replenishment Intervals Table 8-20 Grease Replenishment Intervals for Cyclo Unit Type Grease Replenishment and Change Intervals Long-life grease lubricated Although these models use long-life grease and can run for a long time without replenishment, models maintenance with disassembly after approximately 20,000 hours or 3 to 5 years will increase lifetime.
- Page 35 8. Daily Inspection and Maintenance Common (4) Procedures for Filling and Discharging Grease replenishment procedure for grease lubricated models (excluding long-life grease lubricated models) [1] Remove the grease discharge plug from the casing. [2] Use a grease gun to replenish the grease from the grease fitting on the internal cover, referring to the quantity of grease shown in Table 8-23 on P32 as guidelines.
- Page 36 8. Daily Inspection and Maintenance Common 8-7 Maintenance for Beier Unit Bearing Vertical type BEIER frame sizes N10A–200A, and N8B–150B adopt the open bearing and grease lubrication method, requiring maintenance of the bearing. Replenish grease periodically. (1) Grease Replenishment Intervals Table 8-24 Grease Replenishment Intervals for Beier Unit Bearing Operation Time Replenishment Interval...
- Page 37 Common 8-8 Motor Bearing Maintenance - Standard motors manufactured by Sumitomo use sealed bearings (without grease filling and discharging structure). - When using another manufacturer’s motor, refer to the operation manual for that motor. (Motors with a motor capacity of 37kW or more are made by other manufacturers. Also, depending on the motor specification, some motors are made by other manufacturers.)
-
Page 38: Troubleshooting
9. Troubleshooting Common If any abnormal condition occurs, refer to Table 9-1, 9-2 and promptly take appropriate measures. If these actions do not solve the issue, immediately contact the nearest authorized maintenance shop. Table 9-1 Troubleshooting Problem Cause Correction Power failure Contact the electric power company. -
Page 39: Construction Drawings
10. Construction Drawings Common 10-1 Construction Drawings for BEIER Variator Figure 10-1 A Type and B Type BEIER Variator (Horizontal, Basic Type) Figure 10-2 A Type and B Type BEIER Variator (Vertical, Basic Type) Note: See P34 for frame sizes with grease fitting ○... - Page 40 10. Construction Drawings Common 10-2 Construction Drawings for BEIER-CYCLO Variator C-6 C-3 C-10 C-12 C-11 Figure 10-3 A Type and B Type BEIER-CYCLO Variator (Horizontal Type) Table 10-1 Main Parts Part Part Part Part Parts Name Parts Name Parts Name Parts Name Number Number...
- Page 41 10. Construction Drawings Common 10-3 Construction Drawings for BEIER Variator Figure 10-4 D Type BEIER Variator (Horizontal, Basic Type) Figure 10-5 D Type BEIER Variator (Vertical, Basic Type) Table 10-2 Main Parts Part Part Part Part Parts Name Parts Name Parts Name Parts Name Number...
- Page 42 10. Construction Drawings 10-4 Construction Drawings for Motor Unit (BEIER Variator and BEIER-CYCLO Variator Direct Connection) Figure 10-6 Configuration Example for Frames 80−112M Figure 10-7 Configuration Example for Frames 180 or more Table10-3 Principal Parts of Motor Part Parts Name Part Parts Name Part...
-
Page 43: Warranty
11. Warranty Common The scope of warranty of our delivered products is limited only to what we manufactured. Warranty (period and description) Warranty The warranty period applies only to new products and represents 18 months after the shipment or 12 months after Period the actual operation, whichever is shorter. - Page 44 SM-Cyclo Italy Srl (SMIT) Sumitomo Industrias Pesadas do Brasil Ltda. (SHIB) Via dell' Artigianato 23, 20010 Cornaredo (MI), Italy Sumitomo (SHI) Cyclo Drive Asia Paci c Pte. Ltd. Philippines Branch O ce (SMPH) Rodovia do Acucar (SP-075) Km 26 TEL (39)293-481101...
Need help?
Do you have a question about the BEIER Variator ND Series and is the answer not in the manual?
Questions and answers