
Related Manuals for mr. steam SPAH2O


Summary of Contents for mr. steam SPAH2O
- Page 1 ____________________ ____________________ IMPORTANT: ____________________ IMPORTANT: ___________ _____ ____ steam steam...
-
Page 2: Table Of Contents
S PAH2 O ELECT R O NI C S HO WE R VA LVE TABLE OF CONTENTS Safety Information ........4 Standards &... -
Page 3: Safety Information
Installation, Operation & Maintenance Manual S A F ETY I N FO RM AT IO N This installation manual cointains essential information to make a full installation of the system. This manual includes a description of the system functions and capabilities, contingencies and alternate modes of operation, and step-by-step procedures Please read it carefully. -
Page 4: Standards & Certifications: Hidraulic
Installation, Operation & Maintenance Manual S TAN D AR DS & C E RT IF I C AT I O N S : H Y D RA UL I C PRESSURE BALANCE STANDARDS ASSE #1016 - Performance requirements for automatic compensating valves for individual showers and tub/shower combinations Including: 4.6.4 - Pressure and temperature variation test T type THERMOSTATIC STANDARDS Pr EN-1111 (2015) - Sanitary Tapware - Thermostatic Mixing Valves. -
Page 5: Components List
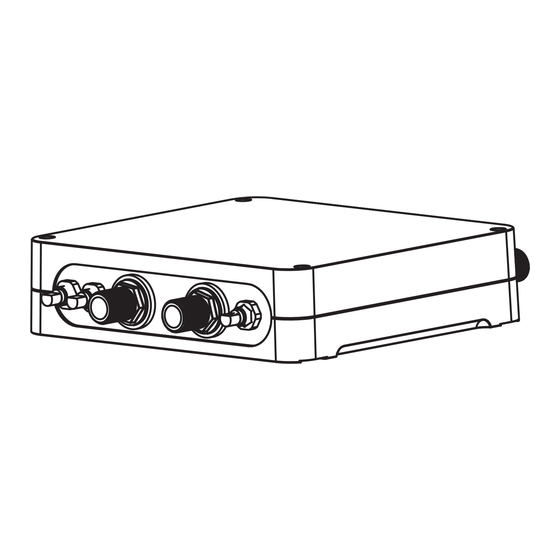
Installation, Operation & Maintenance Manual CO MP ON E N TS L I S T OUTLETS 180º INLETS Shower Valve 104328 27EV000007 CPU_iV2_3 Outlets Inlet Filter (x2) 104436 Control Cable 104548-30 Power Supply 104435 All drawing are for illustrative purposes only... -
Page 6: Dimensions
Installation, Operation & Maintenance Manual DIM EN S I O NS S h o w er Va l ve Pow e r S u p pl y K i t NEMA 1-15P 11 7/8” 6” 51 3/4” All drawing are for illustrative purposes only... -
Page 7: Technical Specifications
Installation, Operation & Maintenance Manual Technology Patent pending Maximum dynamic 20 psi Maximum load 36 W. (Stand-by 1W) Minimum dynamic 73 psi Rated Impulse voltage 12 V Recommended dynamic 43 psi Ingress Protection Rating IP54 Maximum differential supply 5 psi Water Connections 1/2”... -
Page 8: Installation Considerations
Installation, Operation & Maintenance Manual IN S TA L LAT I O N C O N SI D ER ATI O N S must be installed in an accessible location for Flush pipes thoroughly before and after installation. servicing and maintenance. Provide an access panel to allow future maintenance of the Not flushing the water supply pipe or not installing filters may cause damage to the valves by debris, which will cause... -
Page 9: Typical Installation
Installation, Operation & Maintenance Manual T Y PI CA L I N STA L L ATI O N All drawings are for illustrative purposes only iSteamX and Steam Generator are NOT included with SPAH2O... -
Page 10: Installation Considerations
43 psi, install pressure reducing valves as required. To prevent damage Do not solder piping or fittings within 12 inches of the SPAH2O as heat can transfer Test all connections for leaks. along the pipework and damage... - Page 11 Installation, Operation & Maintenance Manual IN S TALL ATI ON G U ID E L I N ES To iSteamX Hub Plug the communication cable into the connector labeled Plug the power supply into the connector labeled Conn. 3 Conn. 1 Control on the valve 12 VDC Plug the communication cable from the vale in the connector labeled SHOWER on the iSteamX Hub.
- Page 12 Installation, Operation & Maintenance Manual I N S TA L LAT I O N G U I D EL I N ES Power Suppy Mark the position of the holes with a pencil. Make the holes in the wall with the appropriate measures. Mark the position of the holes with a pencil.
-
Page 13: Start Up Operation
Installation, Operation & Maintenance Manual S TA RT U P OPE RAT I O N Shower Learning From the start screen, navigate to the features menu by pressing the features icon Navigate to Shower Setup in features menu and press Shower Learning. The hot and cold supply must be on and the shower fixtures MUST be connected. -
Page 14: Installation Guidelines
Installation, Operation & Maintenance Manual Once the shower leaning has been completed, each output can be assigned a fixture icon (note each may only be used once) Select the icon the corresponds to the output, once the selections are made press SAVE. Note: If an output is not plumbed you will not be able to make a selection for it O PERAT I All drawing are for illustrative purposes only... - Page 15 Pressing the icon of an active outlet will turn it off. If two outlets are open, pressing the icon for a 3rd outlet will close the two open outlets and open the third To turn the SPAH2O off, turn off the individual outlets or press the ON/OFF button. SPAH2O automatically turns off after 20 minutes...
-
Page 16: Operation
Installation, Operation & Maintenance Manual OPE R AT I ON Tap Temperature to adjust the temperature of the shower. Use the + and – buttons to adjust the temperature. The maximum allowable set point temperature is 118 *F. iSteamX will not allow a temperature to be set above what the valve is capable of based on water supply temperatures and fixtures flowrates. -
Page 17: Alarm Description & Troubleshooting
Installation, Operation & Maintenance Manual REF. TYPE OF ALARM DESCRIPTION RECOMMENDED ACTION AL 1 Cold water Device on standby mode detects cold water leakage Run the automatic clean-up program. lf leakage This means that the cold water valve is not properly the problem persists replace the device. -
Page 18: Installation & Maintenance
Installation, Operation & Maintenance Manual N S TA LLAT I ON & M A I N TE N AN C E • Avoid installing the system into enclosed locations with extreme environmental conditions. • Install filter and check valves. Inspect them periodically and replace them if necessary. •...
Need help?
Do you have a question about the SPAH2O and is the answer not in the manual?
Questions and answers