Advertisement
Quick Links
Advertisement

Related Manuals for ahead RC Crawler Bog 406 Flatbed


Summary of Contents for ahead RC Crawler Bog 406 Flatbed
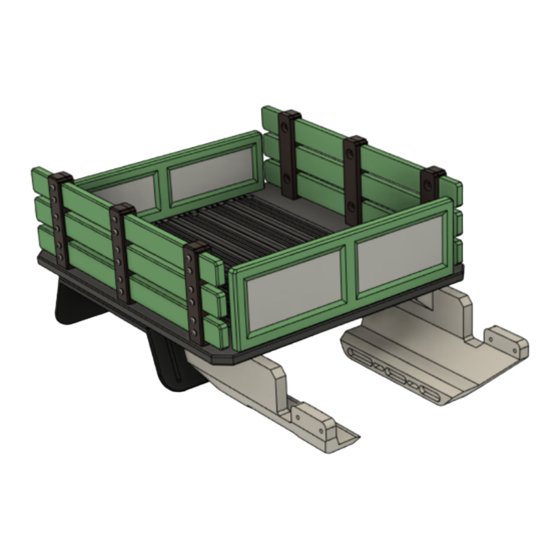
- Page 1 RC Crawler Bog 406 Flatbed Assembly Manual ahead RC...
- Page 2 Required tools and hardware Tools 1.5mm Hex Driver 2.0mm Hex Driver 2.5mm Hex Driver Needle Nosed Pliers Instant Glue Hot Glue 3mm drill bit (if using standard 3 gear transmission) Electronics 5mm LED White x2 5mm LED Orange x2 5mm LED Red x2 Hardware Hardware Quantity Check M2*10 Socket head M3*10 Countersunk (CS) M3*12 Countersunk (CS) M3*12 Socket head M3*15 Socket head (CS) M3*20 Countersunk (CS) M3*20 Grub screw (GS) ahead RC...
- Page 3 Before you begin Be sure to read through the manual and familiarise yourself with the instructions Visualise a plan to assemble all the pieces Make sure you have all of the hardware and tools Be sure to have enough instant glue Dry fit all parts before painting and assembling Tip: It will help to paint all of the parts before final assembly ahead RC...
- Page 4 Assembling the bed M3x20mm GS M3x20mm GS 1. Insert grub 2. Push screws half quarters together and glue to secure ahead RC...
- Page 5 M3x10mm CS Repeat on the other side M3x15mm CS M3x15mm CS FRONT Note direction ahead RC...
- Page 6 Assembling the mounts bed M3x20mm CS Repeat on the other side ahead RC...
- Page 7 Installing the bed M3x15mm CS ahead RC...
- Page 8 Installing the fenders Use these holes for the 313 mm wheelbase fenders M3x10mm CS Repeat on the other side ahead RC...
- Page 9 Installing the rear lights Repeat on the other side M2x10mm x4 5mm White LED 5mm Red LED 5mm Orange ahead RC...
- Page 10 Installing the bed (alt version) M3x15mm CS ahead RC...
- Page 11 Installing the fenders (alt version) Use these holes for 313mm wheelbase fenders Repeat on the other side M3x10mm CS ahead RC...
- Page 12 Installing the bed raiser (for 3 gear transmission only) M3x20mm CS Repeat on the other side Drill through Drill through with 3mm bit with 3mm bit ahead RC...
- Page 13 M3x12mm ahead RC...
- Page 14 M3x12mm CS M3x12mm CS ahead RC...
- Page 15 Body is now fully complete. Thank you for selecting ahead RC products. If you have any questions or need help with the assembly, please do not hesitate to contact us at: aheadrc@gmail.com or visit us at: www.aheadrc.com Best of luck with your build! ahead RC...
Need help?
Do you have a question about the Crawler Bog 406 Flatbed and is the answer not in the manual?
Questions and answers