Advertisement
Quick Links
(5) Connect the camera tail and the extension cable inside the car (Illustration 5).
Note: Jumper wires:
Green loop connected: Parking line off (Default).
Green loop disconnected: Parking line on.
White loop connected: For rear installation (Default).
White loop disconnected: For front installation.
Jumper wires
Direction Arrow
Extension Cable
(6) Loosen the screw between the camera and the fixed U-bracket and adjust the camera to a
best viewing angle (Illustration 6).
Vehicle Body
Angle of the Lens
Camera Tail
Rubber Grommet
(Illustration 5)
Monitor Image
Bumper
Rear of the Vehicle
(Illustration 6)
Owner's Manual
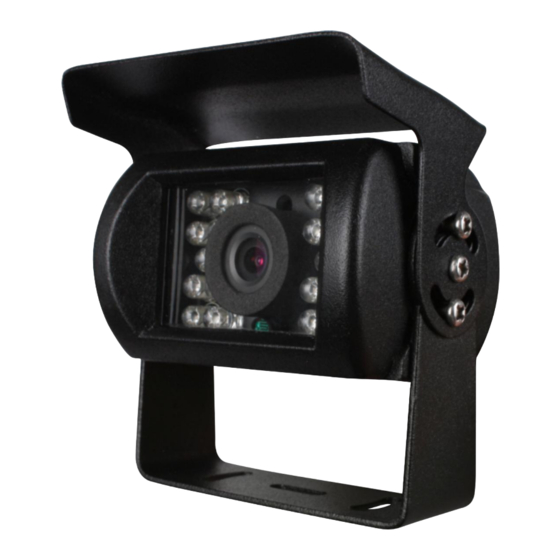
Truck camera
Model: CM-R1000P/W
BLACK
WITHE
Specifications:
Image Device:
1/3" Color CMOS
TV System:
NTSC
Effective Pixels:
976*592
Waterproof:
IP68
Sync. System:
Yes
Resolution:
630 TV Lines
Minimum Illumination:
0.1 Lux (day), 0 Lux (with IR)
Microphone:
Built in microphone
Lens Angle:
120°
Video Output:
1.0 vp-p,75 Ohm
IR Light:
18 lights
AGC:
Auto
S/N Ratio:
+48 dB
White Balance:
Auto
Electronic Shutter:
Auto
BLC:
Auto
Current Consumption:
Day:50 mA, Night:180mA
Power Supply:
DC 12V/24V
Operating Temperature: -40-+85℃(-40℉ ~ 185℉)
Lens:
f=2.5mm, F=2.0
Backlight Compensation: Yes
Parking line:
Parking line ON/OFF Selectable(Default: parking line off)
Image:
Mirror/ Standard Image Selectable(Default: mirror image)
Advertisement

Subscribe to Our Youtube Channel
Related Manuals for Rydeen CM-R1000P


Summary of Contents for Rydeen CM-R1000P
- Page 1 Green loop disconnected: Parking line on. White loop connected: For rear installation (Default). White loop disconnected: For front installation. Owner's Manual Jumper wires Camera Tail Truck camera Model: CM-R1000P/W Direction Arrow BLACK WITHE Extension Cable Specifications: Image Device: 1/3” Color CMOS...
- Page 2 Product features: Installation: 1. Waterproof: IP68 approved (1) Find an appropriate location for installation (Illustration 1). (2) Drill holes according to the size of U-bracket as illustration 3 and fix the U-bracket by 2. Nightvision distance: approx. 3~100m (18 IR lights) PA3*16 of screws and spacer as illustration 2.
Need help?
Do you have a question about the CM-R1000P and is the answer not in the manual?
Questions and answers