Table of Contents
Advertisement
Quick Links
Advertisement
Table of Contents

Related Manuals for Rydeen TOMBO 360


Summary of Contents for Rydeen TOMBO 360
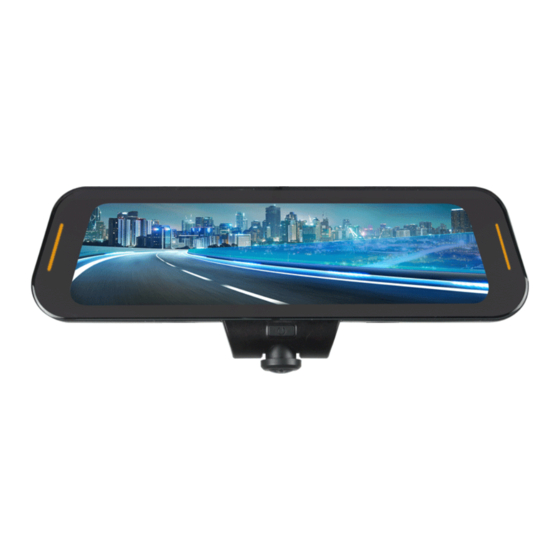
- Page 1 Owner’s Manual TOMBO 360 360° Rearview Mirror Touchscreen 4K HD Dash Camera...
-
Page 3: Table Of Contents
3. Product Overview ................... 8 Wiring Diagram ....................10 4. Installation ..................11 DIY Installation (For TOMBO 360 standard package) ........11 Upgrade Package Installation for TOMBO ProKit 1 (SOLD SEPARATELY) ..13 5. User Interfaces ..................19 Video Recording Icon..................20 Photo Icon ...................... -
Page 4: Welcome Statement & Warnings
TOMBO 360 achieve the best performance and satisfaction. Your TOMBO 360 IS NOT a substitute for personal judgment. The field of view of the backup camera of this product is limited. Some objects, roads and other vehicles may not be visible. - Page 5 Position the unit in a location that does not obstruct the driver’s view of the road, instruments or vehicle controls. Make sure that the TOMBO 360 device and the provided bracket or adhesive are properly attached to the vehicle’s windshield.
- Page 6 This product cannot guarantee to record all incidents. THE FOLLOWING INSTRUCTIONS ARE RECOMMENDED FOR AUTHORIZED RYDEEN MOBILE INSTALLERS. NOTE This icon represents the functionality that can only be achieved by upgrading the product using TOMBO ProKit 1 (sold separately).
-
Page 7: What's In The Box
What’s in the Box 2. What’s in the Box When opening the packaging box of this product, please make sure that all product accessories are complete. Standard Package TOMBO 360 Main Unit Item Description Power Input GPS Input USB Type -C Connector, For External... -
Page 8: Upgrade Package: Tombo Prokit 1 (Sold Separately)
U-Shape Camera L-Shape Mount Stem (K) Bracket (I) Bracket (J) LED Indicators Cable for Power Wire Harness for Hard Wire Rydeen Blind Spot (BSS) Installation (M) Products (for BSS2x, BSS3x, BSS2, BSS3, BSS1LPB, BSS2LPBC, BSS2LPB, please contact tech support for CUB... - Page 9 What’s in the Box Proximity Sensor Backpack Adaptor for Mirror Stem Splice Connector Pry Tool (N) Screw Driver (O) & Zip Ties (N) Universal Mount Package: (All items included below) Universal Mount Universal Mount Adaptor (Large) (P) Adaptor (Small) (Q) Mount Adaptor Inserts Mount Adaptor Inserts 23mm-27mm (P)
-
Page 10: Product Overview
Product Overview 3. Product Overview TOMBO 360 FRONT BACK... - Page 11 It will also adjust the screen brightness automatically. The MIC hole can record sound, which can be turned on or MIC hole off in the setting menu. Reset hole Press and hold within reset hole to restart the TOMBO 360.
-
Page 12: Wiring Diagram
Product Overview Wiring Diagram Note: TOMBO ProKit 1 (sold separately) accessories. -
Page 13: Installation
(For TOMBO 360 standard package) Step 1 Use the provided Velcro straps and insert between the rear slots of the TOMBO 360. Paste the adhesive provide d in the position as shown in the picture below. This will prevent vibration and protect the original rear-view mirror from being scratched. Loop... - Page 14 Installation Adhesive Adhesive Step 2 Connect the cigarette lighter and use p ry tool to route the wires according to the installation diagram. For Cars For Trucks...
-
Page 15: Upgrade Package Installation For Tombo Prokit 1 (Sold Separately)
Installation Inside view *Reverse Trigger: Connect only if TOMBO ProKit 1 is purchased and rear camera is connected. Step 3 Turn the vehicle on and verify that all the functions are working properly. Upgrade Package Installation for TOMBO ProKit 1 (SOLD SEPARATELY) Step 1 Remove the existing mirror and unplug the connector, if one exists. - Page 16 Installation Method 1 (Use VSM-AV Mount Stem) 1) Insert TOMBO 360 Mirror Back Plate for windshield mount onto the back side of the TOMBO 360 mirror, using provided screws. 2) Attach VSM-AV mount onto the TOMBO 360 Back Plate using provided screws.
- Page 17 Method 3 ( Use the L-shape mount stem and universal mount package for rooftop application) 1) Insert TOMBO 360 Mirror Back Plate for windshield mount onto the back side of the TOMBO 360 mirror, using provided screws. 2) Attach the L-Shape Mount Stem to the backpack of the mirror using the provided washers and screws.
- Page 18 Installation provided pry tool to tuck the wires within the panels. Make your ACC, +12V, GND and Reverse Trigger connections. 2) Follow the wiring diagram, install the backup camera and other accessories. For Cars For Trucks Inside View...
- Page 19 Installation 3) Backup camera assembly mount assembly, choose between the two different brackets options below. Box Shape Camera Bracket U-Shape Camera Bracket First, remove the Wing mount. Then, use the screws provided to secure the bracket with the rubber spacer to the backup camera as shown. Select between the Box Shape Camera Bracket or U-Shape Camera Bracket with a rubber spacer using the Screws provided according to the picture and adjust the angle.
- Page 20 Step 3 Turn the vehicle on and verify that all the functions are working properly. NOTE The 6 PIN connector is for BSD blind spot monitoring systems (sold Please contact Rydeen Tech Support (Toll-Free 1-877-777- separately). 8811) for more details.
-
Page 21: User Interfaces
User Interfaces 5. User Interfaces Start-up Screen Power down Screen Main UI When not recording When recording... -
Page 22: Video Recording Icon
The TOMBO 360 recording interval is 1min and 30sec for SOS files. The TOMBO 360 file is recorded in (H.264) format. The following table can be used as a reference for data storage usage. -
Page 23: File Lock Icon
User Interfaces Select the icon to view the recorded videos of the backup camera. Select the icon to view the photos taken by the front and backup camera. File Lock Icon While recording, press the icon to record a 30 -second SOS file. SOS files will be automatically locked. - Page 24 User Interfaces G-sensor----Select the sensitivity of the G-sensor. The higher the selection, the higher the sensitivity of the G-sensor. Selecting "Off" will disable the G-sensor during normal operation. In sleep mode, G-sensor will be enabled. LED Indicator ----Turn on or off the LED indicator. In standby LED flashes. While recording LED is off.
- Page 25 User Interfaces Frequency----Select display refresh rate. Time Setting----Time is determined by GPS positioning, including six manually selected time zones and one automatic time zone. GPS Time Zones for TOMBO 360 Time zone English abbreviations Eastern Time Central Time Mountain Time Pacific Time...
-
Page 26: Display Mode Selection Icon
Display Mode Selection Icon Select this icon to view the different display modes. Screen Display Mode Introduction TOMBO 360 has four screen display modes. With the exception of "Wide Mode", the camera should be positioned downward for the best viewing angle. 360° Mode 360°... -
Page 27: To Ssd Icon
Dash camera will memorize last view setting (ProKit 1 installation). To SSD Icon TOMBO 360 uses loop recording for file management. When the microSD card is full, the newly recorded video will overwrite the previously recorded videos. To prevent files from being overwritten by loop recording. Please select the "To SSD" icon to back up the files to an external storage device (maximum support 2T). - Page 28 Power Off Note: When selecting this option, the TOMBO 360 will completely turn off and features like parking monitoring mode will be disabled. Please choose carefully. For vehicles in which the cigarette lighter retains power when the key is Off.
-
Page 29: Video Player Installation (Pc Only)
Dedicated player 6. Video Player Installation (PC Only) TOMBO 360 uses Pre-allocating file management to provide you with a safer experience. If you need to play the video on your PC, please check the provided microSD card in the mirror. - Page 30 Dedicated player As shown in the example above, the blue squares represent the recorded video files and the black squares represent the pre-allocated storage space. Assuming that the microSD card has only 7 pre -allocated storage spaces and the duration of video "3" and video "8"...
- Page 31 Dedicated player 9) Stop: Stop video playback. . 10) Down: Playback video recording angle in downward facing view. . 11) Top: Playback video recording angle in top facing view. . 12) Front: Playback video recording angle in front facing view. 13) Split2: Display playback video in dual screen mode (front/back).
- Page 32 Dedicated player Conversion Add: Select the video file to be converted. Direction: Select the front camera recorded direction. Quality: Select the resolution of the video. Mode: Select the video displayed mode. Only useful with front 360° camera. Progress: Display the progress of the conversion. Remaining: Displays the remaining time required for the video conversion to complete.
-
Page 33: Specifications
Specifications 7. Specifications Basic Parameters Video Input (backup camera) AHD System Language English, Japanese, French, Spanish Screen Dimensions 10 inches Touch Screen Type Resistive Front Camera 1920*1920/ H360°/27.5 fps Audio Line-Out Built-in 8Ω/ 2W speaker* 1 for audio/voice playback Audio Power (Internal) 4Q2W Power Supply Voltage DC 10V to 24V... -
Page 34: Maintaining Your Gps
3. The display surface is easily scratched. Do not use hard objects to scrape or come in contact with the display surface. 9. Technical Support Contact Info If you have other questions about the TOMBO 360, please contact your retailer or Te chnical Support: Te lephone:... -
Page 35: To Obtain Warranty Service
1. Any products distributed outside of the USA by Rydeen North America Inc. (Rydeen) or which is not purchased in the USA or Canada unless the product is purchased through the USA Military Exchange Service. 2. Any product(s) which are purchased from an unauthorized retailer (in store or online). -
Page 36: Fcc Compliance Statement
RA Number whenever your product is sent for warranty service. 4. Rydeen will pay for all labor and material expenses for covered product during warranty period. 5. Shipping address for Rydeen Customer Service Department is following: Rydeen North America Inc. -
Page 37: Disclaimer
2. On Screen start start-up if display appears green: Please wait a moment as TOMBO 360 will analyze issue and restart. 3. Rydeen logo stuck on screen start-up. Please insert a small pin into the reset hole and restart. 4. "Please Connect Storage Device" is displayed in the upper right corner of the screen: Please confirm whether you have inserted the microSD card. - Page 39 Phone: 1-877-777-8811 Fax: 1-310-943-3778 Copyright © 2021 Rydeen North America Inc. All Rights Reserved. RYDEEN ® is a registered trademark of Rydeen North America Inc. These materials are protected by copyright law and international treaties. Any unauthorized use, reproduction or distribution of these materials, or any portion herein, will result in severe civil and criminal penalties and...
Need help?
Do you have a question about the TOMBO 360 and is the answer not in the manual?
Questions and answers
I can't get out of preview mode even when front camera is being used.
The provided context does not explain how to exit preview mode on the Rydeen TOMBO 360 when using the front camera.
This answer is automatically generated