Advertisement
Table of Contents
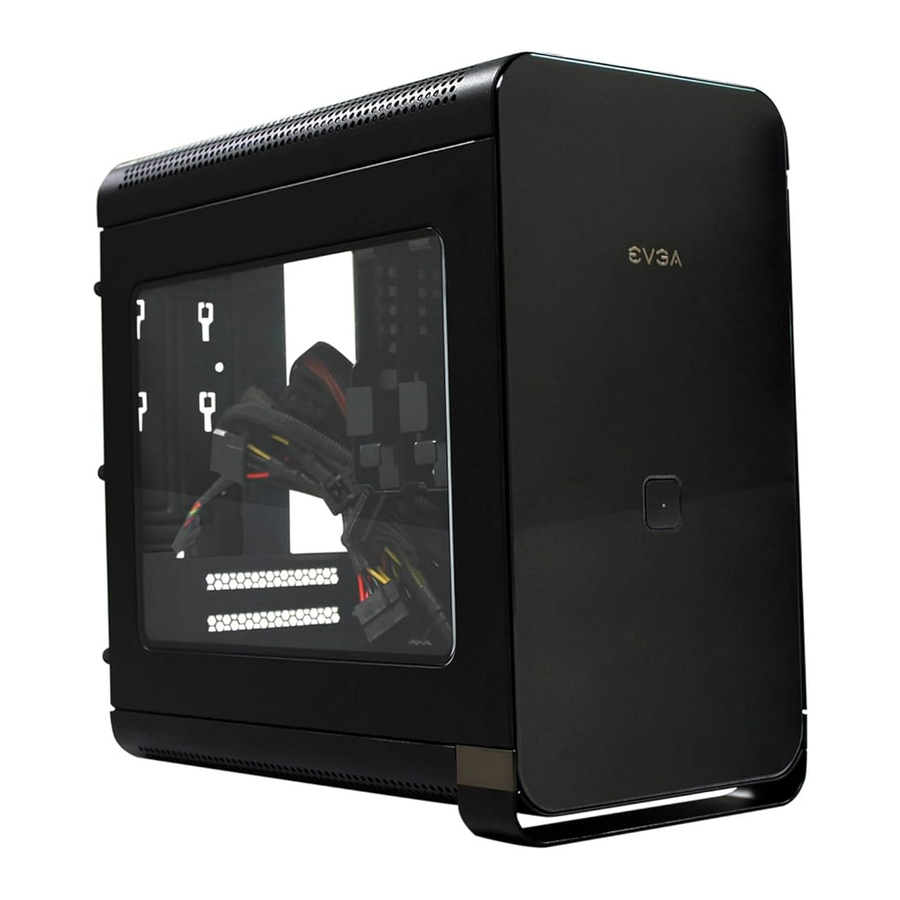
EVGA Hadron Hydro - Computer Case Manual
Before You Begin
Why sacrifice appearance and size when choosing a performance rig? The EVGA Hadron Hydro Mini ITX chassis was designed to not make any compromises.
Featuring a 500W Gold rated power supply, support for a full sized graphics card, sleek looks and enthusiast features, the EVGA Hadron Mini ITX Chassis packs a serious punch.

Chassis Specifications
- Dimensions / Weight
(W x H x D): 169mm x 355mm x 308mm
Weight: 6.4 kg / 14.11lb - Drive Bays
2 x 2.5 / 3.5in
1x Slim Slot Load Optical Drive - Expansion Slots
2 - Fans
2 x 120mm - I/O Ports
USB 3.0 x 2
HD Audio Out
HD Audio In - Form Factor
miniITX - Power Supply
500W Gold Rated
40A on +12V Rail - Motherboard / Graphics Card Support
Supports mITX motherboards.
Supports most high performance graphics cards. - CPU Cooler Support
Supports EVGA Water Cooling kit.
Parts Descriptions
Equipment
The following accessories are included with the Hadron Chassis:
- EVGA Hadron Chassis
The star of the show!
![]()
- 8pcs M3 x 5mm
These screws are used for the motherboard, and 2.5" hard drives.
![]()
- 4pcs M2 x 2.5mm
These screws are used for the optical disc drive and are optional.
![]()
- Power Cable
Connects to an AC power source.
![]()
- SATA Cable x 2
Use these to connect your hard drive.
![]()
- Optical Disc Drive Tray
A tray for your slim slot load optical drive.
![]()
- Manual
All the important information. You should know, you are reading it right now!
![]()


Removing the Side Panel

- Losen the screws with a phillips screwdriver.
- Slide the side panel off in a straight motion.
Installing the Motherboard
- Lay the motherboard at a 45 degree angle inside the chassis and ensure the screw holes lineup with the standoffs.

- Tighten the screws.

Installing the Hard Drive

- Pull out the removable hard drive tray by squeezing together the outer clips.
- For 2.5in hard drive: Attach 4 screws to the bottom of the hard drive tray.
- For 3.5in hard drive – Stretch each side of the hard drive tray and insert the drive.
- Slide in the hard drive tray.
Installing the PCI-E Graphics Card

- Unscrew the retention clip on the backside of the chassis, and flip the clip down.
- Unscrew the screw.
- Insert the graphics card.
- Place screw back in, flip up retention clip and screw in.
- Connect power adapters to graphics card.
Connecting Front Panel LED / USB / Audio Headers
- Connect the Power LED and Power Switch cables. Make sure that the Power LED is in the correct +/- orientation. Please consult your motherboard documentation on the proper location for connection.
![]()
- The USB 3.0 Internal Cable allows for full support of USB 3.0 devices, please consult your motherboard documentation to properly connect this.
![]()
- The HD audio connector supports HD Audio, please consult your motherboard documentation on the proper location of connection.
![]()
- The bundled fans connect to standard 3pin fan headers on your motherboard.


Optical drive installation
(Optional)
- If you wish to install a slim slot load optical drive, you can by first removing the opposite cover.
- Insert the optical drive into the optical drive tray and attach four screws.

- Slide in the optical disc tray.
- EVGA recommends using the Panasonic UJ8C5ADPK1-C Slot Load Optical drive.

Fan installation / replacing

- If you need to service / replace the included fans, you can do so by first removing the top cover.
- Remove both screws located on the backside of the chassis.
- Slide out the top cover in a horizontal fashion.
www.evga.com
Documents / ResourcesDownload manual
Here you can download full pdf version of manual, it may contain additional safety instructions, warranty information, FCC rules, etc.
Advertisement


Need help?
Do you have a question about the Hadron Hydro and is the answer not in the manual?
Questions and answers