Advertisement
- 1 Included Accessories
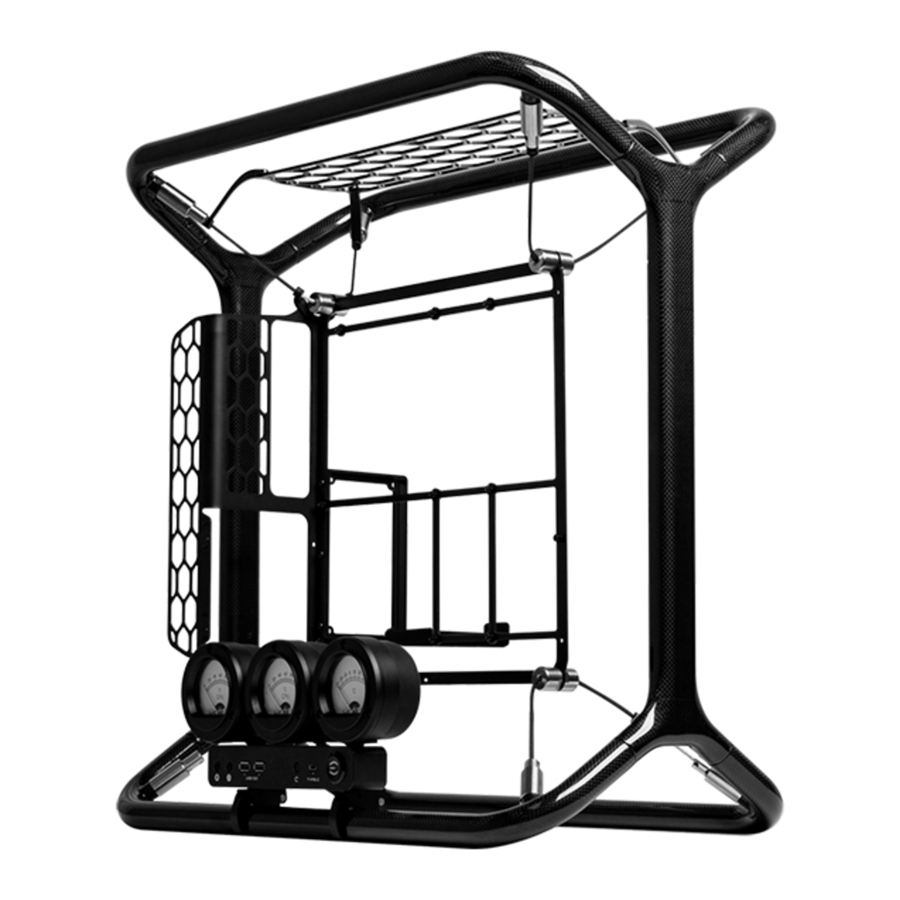
- 2 Product Overview
- 3 PSU Bracket & PSU Installation
- 4 Motherboard Installation
- 5 VGA Vertical Kit & Vertical VGA Installation
- 6 Top & Front Radiator Installation
- 7 Analog Gauge & Front I/O Installation
- 8 Front I/O Installation
- 9 EVGA E1 Control Software
- 10 Suspension System Overview
- 11 Suspension System Maintenance
- 12 Radiator Mount Installation
- 13 Documents / Resources
Included Accessories

Product Overview


PSU Bracket & PSU Installation

- Use 3x M3x6mm screws(B) to fasten the PSU Bracket(A).

- Use 2x M3x10mm screws(C) to fasten the PSU Holder(D).

- Place your PSU on the PSU holder(D) and slide it into the PSU Bracket(A). Use the mounting screws provided with your PSU to fasten your PSU to the bracket(A)


Motherboard Installation

- Use 9x M3x6mm screws(B) with included hex key(A) to install your motherboard.
*Please note that these directions apply to the EVGA Z690 DARK motherboard. Please consult your motherboard manual if using a different motherboard.


VGA Vertical Kit & Vertical VGA Installation
*Compatible only with 2 Slot PCI brackets or smaller.

- Use 3x M3x10mm screws(B) to fasten the baseplate(A).

- Use the 2x M3x6mm flat head screws(D) to fasten the rear bracket(C).

- Align the baseplate(A), Vertical plate(F), Vertical Cushion(E) and PCIe 4.0 x16 Riser Cable(H), then fasten with 2x M3x6mm Screws(G).

- Install your graphics card and fasten 1x M3x6mm screw(G) to the rear bracket(C).


Top & Front Radiator Installation


Fasten your radiator to an available mount location using the screws provided by your radiator or AIO device.
*The EVGA E1 top and front radiator mounts provide the best compatibility with a 360mm radiator. 240mm and 120mm radiators can also be mounted, but will only be supported by two screws. EVGA does not recommend to use a 240mm or 120mm radiator.
Analog Gauge & Front I/O Installation

- With the clasp open, attach the Analog Gauge and front I/O to the E1 Carbon Fiber frame.

- Once the module is in position, lift up the clasps to lock the module in place.


Front I/O Installation

- USB Type-C Extension
- Front Panel Connector
- USB Connector
- Meter Connector
- HD AUDIO Connector
- USB Extension x2
Plug (A)-(F) to the backside of the front I/O panel and connect the other end of the cables to your motherboard.
*Meter connector(D) originates from the Analog Gauges and only needs to be installed into the front I/O panel.

*This connector layout applies to the EVGA Z690 DARK motherboard. Please consult your motherboard manual if using a different motherboard.
EVGA E1 Control Software
To activate the Analog Gauges, you must connect the USB 2.0 cable from the Front I/O to the USB 2.0 Header on your motherboard(C), and run the E1 Control Software. If the Analog Gauges are not active, please confirm that the E1 Control Software is running.

Scan to download E1 Control
Suspension System Overview


Suspension System Maintenance
- Use both hex keys(D) – use one to hold the sleeve holder(B) and use the other hex key as leverage to spin the metal sleeve(A) clock-wise until loose.

- Use hex key(D) to loosen all 3x M4x5mm full threaded screws(C) on the sleeve holder(B) and loosen the steel cable(E).

- Pull out the steel cable(E) and install or remove the front/top radiator mount.


EVGA highly recommends to avoid loosening the suspension system unless you need to install or remove the top and/or front radiator mounts, or other components. Each time you reconfigure the suspension system, it is recommended to install a new steel cable(E) to ensure maximum tension.
Radiator Mount Installation
- Put rubber grommet(G) into the hook(F).
![]()
- Fasten M3x6mm screw(H) to fix the hook(F) and radiator mount.

- Slide the steel cable(E) thru the hook(F) and rubber grommet(G).

- Thread the steel cable(E) into the sleeve holder(B), tighten the full threaded screws(C), and use the 2x hex keys(D) to fasten the sleeve holder(B) to the metal sleeve(A) in a counterclockwise direction. (Please refer to previous section)


www.evga.com
Documents / ResourcesDownload manual
Here you can download full pdf version of manual, it may contain additional safety instructions, warranty information, FCC rules, etc.
Advertisement


Need help?
Do you have a question about the E1 and is the answer not in the manual?
Questions and answers