
Related Manuals for Cameo F Series


Summary of Contents for Cameo F Series
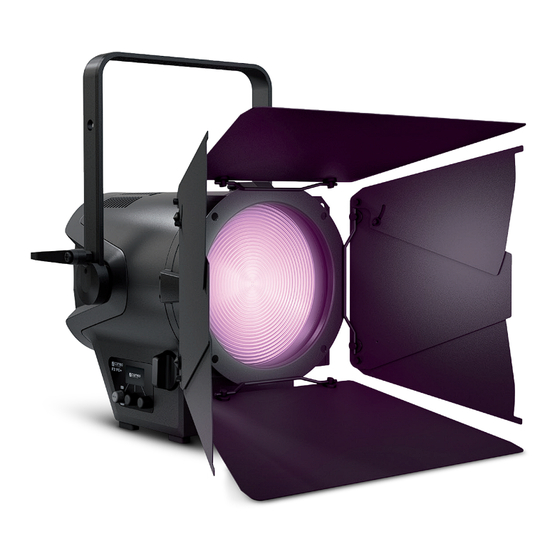
- Page 1 USER´S MANUAL BEDIENUNGSANLEITUNG MANUEL D`UTILISATION MANUAL DE USUARIO INSTRUKCJA OBSŁUGI MANUALE D‘ USO F2 FC PLUS PROFESSIONAL HIGH-POWER FRESNEL WITH RGBAL LED CLF2FCPLUS...
-
Page 2: Table Of Contents
CONTENTS / INHALTSVERZEICHNIS / CONTENU / CONTENIDO / TREŚĆ / CONTENUTO ENGLISH INFORMATION ON THIS USER MANUAL INTENDED USE DEFINITIONS AND SYMBOL EXPLANATIONS SAFETY INSTRUCTIONS NOTES FOR PORTABLE INDOOR DEVICES PACKAGING CONTENT INTRODUCTION CONNECTIONS, OPERATING AND DISPLAY ELEMENTS OPERATION SETUP AND INSTALLATION BARNDOOR AND FILTER FRAME ASSEMBLY / DISASSEMBLY / LENS CLEANING CARE, MAINTENANCE AND REPAIR... - Page 3 ENTSORGUNG HERSTELLERERKLÄRUNGEN FRANÇAIS INFORMATIONS SUR CE MANUEL D'UTILISATION UTILISATION PRÉVUE EXPLICATION DES TERMES ET PICTOGRAMMES CONSIGNES DE SÉCURITÉ NOTES POUR LES APPAREILS PORTABLES D'INTÉRIEUR CONTENU DU CARTON INTRODUCTION CONNECTEURS, UTILISATION ET INDICATEURS UTILISATION MONTAGE ET INSTALLATION COUPE-FLUX ET PORTE-FILTRE MONTAGE / DÉMONTAGE / NETTOYAGE DES LENTILLES ENTRETIEN, MAINTENANCE ET RÉPARATION CARACTÉRISTIQUES TECHNIQUES DISTANCE MINIMALE PAR RAPPORT À...
- Page 4 CONTENTS / INHALTSVERZEICHNIS / CONTENU / CONTENIDO / TREŚĆ / CONTENUTO CARACTERÍSTICAS TÉCNICAS DISTANCIA MÍNIMA A LA SUPERFICIE ILUMINADA DISTANCIA MÍNIMA A MATERIALES NORMALMENTE INFLAMABLES ELIMINACIÓN DECLARACIÓN DEL FABRICANTE POLSKI INFORMACJE NA TEMAT NINIEJSZEJ INSTRUKCJI OBSŁUGI ZAMIERZONE ZASTOSOWANIE OBJAŚNIENIA TERMINÓW I SYMBOLI INSTRUKCJE BEZPIECZEŃSTWA UWAGI DOTYCZĄCE PRZENOŚNYCH URZĄDZEŃ...
- Page 5 DEFLETTORE AD ALETTE E PORTAFILTRO MONTAGGIO, SMONTAGGIO, PULIZIA DELLE LENTI CURA, MANUTENZIONE E RIPARAZIONE DATI TECNICI DISTANZA MINIMA DALLA SUPERFICIE ILLUMINATA DISTANZA MINIMA DA MATERIALI NORMALMENTE INFIAMMABILI SMALTIMENTO DICHIARAZIONI DEL FABBRICANTE DMX CONTROL / DMX STEUERUNG / PILOTAGE DMX / CONTROL DMX / STEROWANIE DMX / CONTROLLO DMX...
-
Page 6: Information On This User Manual
This device has been developed and manufactured to the highest quality standards to ensure many years of trouble-free operation. Please read this user manual carefully to be able to quickly put your new Cameo Light product to optimum use. Further information about Cameo Light is available on our website CAMEOLIGHT.COM. -
Page 7: Safety Instructions
This symbol identifies hazards that can cause electric shock. This symbol identifies hazardous areas or hazardous situations. This symbol indicates hazards caused by hot surfaces. This symbol indicates hazards caused by intense light sources. This symbol indicates a device in which there are no user-replaceable parts. This symbol indicates additional information on the operation of the product. - Page 8 ATTENTION: 1. Do not operate the device if it has been exposed to large temperature fluctuations (for example, after transport). Moisture and condensation can damage the device. Switch on the device only when it has reached ambient temperature. 2. Make sure that the voltage and frequency of the mains supply correspond to the values indicated on the device.
- Page 9 3. The exterior surface of the device can become very hot during regular operation. Ensure that accidental touching of the housing is not possible. Always allow the device to cool sufficiently before removal, maintenance work and charging etc. ATTENTION: 1. Do not install or operate the device near any radiators, heat registers, stoves or other heat sources.
-
Page 10: Notes For Portable Indoor Devices
ATTENTION! POTENTIAL DAMAGE FROM EXTERNAL LIGHT SOURCES! Solar radiation, laser radiation and bundled light beams from other lights can damage the housing and internal components such as filters, gobo and colour wheels, motors, cables, belts, etc., as well as light sources! Do not expose the device and especially the lens opening to direct sunlight, laser radiation and bundled light beams from other lights during installation, prolonged periods of non-use and during operation! Always point the lens opening... - Page 11 CONTROL FUNCTIONS: 1CH Dim, 2CH Dim 16Bit, 2CH CCT, 3CH RGB cal., 5CH Direct, 4CH CCT 16Bit, 6CH HSI-CCT, 7CH RGB-CCT, 10CH Direct 16Bit, 10CH HSI-CCT, 18CH Direct CCT, 18CH Full Access DMX control Master/slave operation Stand-alone functions FEATURES: 1 x High Power RGBAL LED. 18° - 53° dispersion, manual zoom. 200 mm Fresnel lens. Adjustable PWM frequency (flicker-free).
-
Page 12: Connections, Operating And Display Elements
CAN ICES-005(B) / NMB-005(B) Cameo ® is a brand of the Adam Hall Group · Adam-Hall-Str.1· 61267 Neu-Anspach · Germany · Designed and Engineered in Germany. Assembled in PRC. www.adamhall.com Adam Hall Ltd.The Seedbed Business Centre SS3 9QY Essex | United Kingdom POWER IN Neutrik powerCON TRUE1 mains input socket. -
Page 13: Operation
• As soon as the light is correctly connected to the power supply, the following will be displayed in succession: "Welcome to Cameo", model name and software version. After this process, the light is operational and starts up in the previously selected mode. - Page 14 = DMX signal is present = no DMX signal Currently activated operating mode Fan mode DMX start address and DMX mode 5CH RGBAL Press encoder = Press encoder = Select operating mode (Mode) Open main menu (Menu) SET DMX START ADDRESS (DMX Address) Starting from the main screen, press the right rotary-push encoder to enter the main menu.
- Page 15 left encoder. Confirm the selection by pressing the left encoder (ENTER); this will also automati- cally take you back to the main screen and the DMX mode will be activated. Tables showing the channel assignment of the different DMX modes can be found in these instructions under DMX CONTROL.
- Page 16 Currently activated operating mode Fan mode Turn encoder = Turn encoder = Set brightness (DIM) Set colour saturation (SAT) Press encoder = Press encoder = Select operating mode (Mode) Open main menu (Menu) Turn encoder = Set colour tone (HUE) DIRECT LED STAND-ALONE MODE (RGBAL colour mixing) Starting from the main screen, press the left encoder to access the menu for selecting the opera- ting mode (Mode).
- Page 17 Currently activated operating mode Fan mode Turn encoder = Press encoder = Set total brightness (DIM) Open main menu (Menu) Press encoder = Select operating mode (Mode) Turn encoder = Select filter preset USER COLOUR STAND-ALONE MODE (Custom colour presets 1 - 8) Starting from the main screen, press the left encoder to access the menu for selecting the opera- ting mode (Mode).
- Page 18 To give the preset a custom name with up to 12 characters (Edit User Color Name), turn the left encoder to select a letter, underscore or number for the first character and confirm by pressing the left encoder. Repeat this process for the second and following characters. Once the preset name is complete, press the centre encoder (Save&Next) to go to the next editing step.
- Page 19 Currently activated operating mode Fan mode Turn encoder = Turn encoder = Set brightness (DIM) Set fade time (t-fade) Press encoder = Press encoder = Select operating mode (Mode) Open main menu (Menu) Turn encoder = Set step duration (t-step) Press encoder = back to colour sequence selection (Back) EDIT PLAY LOOP STAND-ALONE MODE (Edit Loop)
- Page 20 SLAVE MODE Starting from the main screen, press the left encoder to access the menu for selecting the ope- rating mode (Mode). Turn the left encoder to select Slave (note the selection arrow on the left) and confirm by pressing the encoder (ENTER). Slave mode is now enabled, and the main screen is automatically displayed.
- Page 21 No display rotation = Display rotation Rotate display by 180° (e.g. for overhead installation) Permanently on = Display lighting Deactivates after approximately 20 seconds of inactivity Operational sta- Last command is retained tus in the event Activates blackout the DMX signal is Activates User Colour 8 interrupted Light intensity increases linearly...
- Page 22 LED PWM Set LED PWM frequency frequency R, G, B, A and L (maximum value: 255) Press the centre encoder = switch RAW - Adjust between R+G, B+A and L (colour) (individual Turn the centre encoder = set the adjustment of value of R, B or L R, G, B, A and L with values...
- Page 23 Reset to factory settings (without Reset to factory settings: confirm resetting the with ENTER, cancel with ESC user colours and loops) Reset the user Reset to factory settings: confirm colours and loops with ENTER, cancel with ESC to factory settings DIMMER CURVES Linear Exponential...
-
Page 24: Setup And Installation
MANUAL LOCKING FUNCTION In addition to the ability to automatically protect the light from accidental and unauthorised operation (see "Settings" - "Auto-lock"), the controls can also be locked manually. Press and hold the centre and right rotary-push encoders simultaneously for approx. 3 seconds. If an attempt is made to change settings, "Locked!"... -
Page 25: Care, Maintenance And Repair
upwards out of the angle brackets. Clean the Fresnel lens with a damp, lint-free cloth and the glass lens with a special lens cloth. Now place the Fresnel lens in front of the glass lens and fold the bracket back downward until the locking pin engages. Important safety notice! For safety reasons, the filter frame must always be in the respective bracket on the light, even if no filter sheet is inserted! CARE, MAINTENANCE AND REPAIR... -
Page 26: Technical Specifications
4. In general, no cleaning agents or abrasive agents may be used, otherwise the surface finish may be damaged. 5. Devices must be stored in a dry environment and protected from dust and dirt. 6. To ensure correct and safe operation, all accessible or removable lenses and light-emitting apertures must be cleaned regularly. - Page 27 CCT, Color macros, Device Settings, Dimmer, Dimmer Curve, Dimmer Fine, DMX functions: RGBAL, RGBAL Fine, strobe, Dim to Warm, Hue Saturation Standalone Loop, Master / Slave mode, Static functions: Display Flip, Display Off Time, DMX-Fail, Dimmer Curve, Dimmer Response, System settings: Red-Shift, PWM Frequency, Color Calibration, Autolock, Fan, Factory Reset, UC/Loops Reset Control elements: 3 x Push-Encoder knobs...
-
Page 28: Minimum Distance To Illuminated Surface
MINIMUM DISTANCE TO ILLUMINATED SURFACE This symbol with the distance stated in metres (m) indicates the minimum 0.5 m distance of the light fixture to the illuminated surface. In this example, the distance is 0.5 m. The value valid for this device can be found in the technical specifications in this manual and is printed on the device! MINIMUM DISTANCE TO NORMALLY FLAMMABLE MATERIALS This symbol with the distance stated in metres (m) indicates the minimum distance... - Page 29 CE conformity Adam Hall GmbH hereby confirms that this product meets the following guidelines (where applicable): Low-Voltage Directive (2014/35/EU) EMC Directive (2014/30/EU) RoHS (2011/65/EU) RED (2014/53/EU) EC Declaration of Conformity Declarations of conformity for products subject to the LVD, EMC, and RoHS Directives can be requested from info@adamhall.com Declarations of conformity for products subject to RED can be downloaded from www.adamhall.
-
Page 30: Deutsch
Dieses Gerät wurde unter hohen Qualitätsanforderungen entwickelt und gefertigt, um viele Jahre einen reibungslosen Betrieb zu gewährleisten. Bitte lesen Sie diese Bedienungsanleitung sorgfäl- tig, damit Sie Ihr neues Produkt von Cameo Light schnell und optimal einsetzen können. Weitere Informationen über Cameo Light erhalten Sie auf unserer Website CAMEOLIGHT.COM. -
Page 31: Sicherheitshinweise
Dieses Symbol kennzeichnet Gefahren, die einen elektrischen Schlag verursachen können. Dieses Symbol kennzeichnet Gefahrenstellen oder gefährliche Situationen. Dieses Symbol kennzeichnet Gefahren durch heiße Oberflächen. Dieses Symbol kennzeichnet Gefahren durch intensive Lichtquellen. Dieses Symbol kennzeichnet ein Gerät, in dem sich keine vom Benutzer austauschba- ren Teile befinden. - Page 32 ACHTUNG: 1. Nehmen Sie das Gerät nicht in Betrieb, wenn es starken Temperaturschwankungen ausgesetzt war (beispielsweise nach dem Transport). Feuchtigkeit und Kondensat könnten das Gerät beschädigen. Schalten Sie das Gerät erst ein, wenn es Umge- bungstemperatur erreicht hat. 2. Stellen Sie sicher, dass die Spannung und die Frequenz des Stromnetzes mit den auf dem Gerät angegebenen Werten übereinstimmen.
- Page 33 VORSICHT: 1. Bei beweglichen Bauteilen wie Montagebügeln, oder sonstigen beweglichen Bau- teilen besteht die Möglichkeit sich zu klemmen. 2. Bei Geräten mit motorisch angetriebenen Bauteilen besteht Verletzungsgefahr durch die Bewegung des Gerätes. Plötzliche Gerätebewegungen können zu Schreckreaktionen führen. 3. Die Gehäuseoberfläche des Geräts kann sich im regulären Betrieb stark erwärmen. Stellen Sie sicher, dass ein versehentliches Berühren des Gehäuses ausgeschlos- sen ist.
-
Page 34: Hinweise Für Ortsveränderliche Indoor-Geräte
ACHTUNG! POTENTIELLE BESCHÄDIGUNG DURCH EXTERNE LICHTQUELLEN! Sonneneinstrahlung, Laserstrahlung und gebündelte Lichtstrahlen anderer Scheinwerfer können das Gehäuse und interne Komponenten, wie Filter, Gobo- und Farbräder, Motoren, Kabel, Riemen etc., sowie Leuchtmittel beschädigen! Setzen Sie das Gerät und vor allem die Linsenöffnung während des Auspackens, der Installation, längerem Nichtgebrauch und im Betrieb nicht direkter Sonneneinstrahl- ung, Laserstrahlung und gebündelten Lichtstrahlen anderer Scheinwerfer aus! Richten Sie die Linsenöffnung stets Richtung Boden, wenn das Gerät nicht in... - Page 35 STEUERUNGSFUNKTIONEN: 1-Kanal Dim, 2-Kanal Dim 16 Bit, 2-Kanal CCT, 3-Kanal RGB, 4-Kanal CCT, 5-Kanal RGBAL, 6-Kanal HSI CCT, 7-Kanal RGB CCT, 9-Kanal RGB CCT, 10-Kanal HSI CCT, 10-Kanal RGBAL 16 Bit, 11-Kanal Direct CCT, 18-Kanal Full Access DMX-Steuerung Master / Slave Betrieb Standalone Funktionen EIGENSCHAFTEN: 1 x High Power RGBAL LED.
-
Page 36: Anschlüsse, Bedien- Und Anzeigeelemente
CAN ICES-005(B) / NMB-005(B) Cameo ® is a brand of the Adam Hall Group · Adam-Hall-Str.1· 61267 Neu-Anspach · Germany · Designed and Engineered in Germany. Assembled in PRC. www.adamhall.com Adam Hall Ltd.The Seedbed Business Centre SS3 9QY Essex | United Kingdom POWER IN Neutrik powerCON TRUE1 Netzeingangsbuchse. -
Page 37: Bedienung
BEDIENUNG • Sobald der Scheinwerfer korrekt am Stromnetz angeschlossen ist, werden wäh- rend des Startvorgangs nacheinander „Welcome to Cameo“, die Modellbezeich- nung und die Software Version im Display angezeigt. Nach diesem Vorgang ist der Scheinwerfer betriebsbereit und startet in der Betriebsart, die zuvor aktiviert war. - Page 38 DISPLAY HAUPTANZEIGE DMX-BETRIEBSART Die Hauptanzeige in der DMX-Betriebsart zeigt die aktuell eingestellte DMX-Startadresse, den DMX-Modus und weitere Informationen an (siehe Abbildung). = DMX-Signal liegt an = kein DMX-Signal Aktuell aktivierte Betriebsart Lüftermodus DMX-Startadresse und DMX-Modus 5CH RGBAL Encoder drücken = Encoder drücken = Auswahl der Betriebsart (Mode) Hauptmenü...
- Page 39 DMX-MODUS EINSTELLEN (DMX Mode) Ausgehend von der Hauptanzeige gelangen Sie durch Drücken auf den rechten Dreh-Drück- Encoder in das Hauptmenü. Durch Drehen des linken Encoders (SELECT) wählen Sie nun den Menüpunkt DMX Mode aus (Auswahlpfeil links beachten) und bestätigen durch Drücken auf den linken Encoder (ENTER).
- Page 40 STANDALONE BETRIEBSART HSI (Hue - Saturation - Intensity) Ausgehend von der Hauptanzeige gelangen Sie durch Drücken auf den linken Dreh-Drück-En- coder in das Menü zum Auswählen der Betriebsart (Mode). Durch Drehen des linken Encoders (SELECT) wählen Sie nun die Betriebsart HSI aus (Auswahlpfeil links beachten) und bestätigen durch Drücken auf den linken Encoder (ENTER).
- Page 41 STANDALONE BETRIEBSART GEL (Farbfilter-Presets) Ausgehend von der Hauptanzeige gelangen Sie durch Drücken auf den linken Dreh-Drück-En- coder in das Menü zum Auswählen der Betriebsart (Mode). Durch Drehen des linken Encoders (SELECT) wählen Sie nun die Betriebsart GEL aus (Auswahlpfeil links beachten) und bestätigen durch Drücken auf den linken Encoder (ENTER).
- Page 42 STANDALONE BETRIEBSART USER COLOR EDITIEREN (Edit User Color) Ausgehend von der Hauptanzeige gelangen Sie durch Drücken auf den rechten Dreh-Drück- Encoder in das Hauptmenü. Durch Drehen des linken Encoders (SELECT) wählen Sie nun den Menüpunkt Edit User Color aus (Auswahlpfeil links beachten) und bestätigen durch Drücken auf den linken Encoder (ENTER).
- Page 43 STANDALONE BETRIEBSART PLAY LOOP (8-SCHRITT-FARBSEQUENZEN 1 - 8) Ausgehend von der Hauptanzeige gelangen Sie durch Drücken auf den linken Dreh-Drück-En- coder in das Menü zum Auswählen der Betriebsart (Mode). Durch Drehen des linken Encoders (SELECT) wählen Sie nun die Betriebsart Play Loop aus (Auswahlpfeil links beachten) und bestätigen durch Drücken auf den linken Encoder (ENTER).
- Page 44 Geben Sie jetzt der Farbsequenz einen individuellen, bis zu 12-stelligen Namen (Edit Loop Name), indem Sie durch Drehen des linken Encoders einen Buchstaben, den Unterstrich oder eine Zahl für die erste Stelle des Preset-Namens auswählen und durch Drücken auf den linken Encoder bestä- tigen.
- Page 45 DMX-BETRIEB Ausgehend von der Hauptanzeige gelangen Sie durch Drücken auf den linken Dreh-Drück-En- coder in das Menü zum Auswählen der Betriebsart (Mode). Durch Drehen des linken Encoders wählen Sie nun den Menüpunkt DMX aus (Auswahlpfeil links beachten) und bestätigen durch Drücken auf den Encoder (ENTER).
- Page 46 Der Strahler reagiert abrupt auf Änderungen des DMX-Werts Dimmer = Dimmverhalten Der Strahler verhält sich ähnlich Response Halogen einem Halogenstrahler mit sanften Helligkeitsänderungen Imitiert die Farbdrift deaktiviert Farbdrift beim Dimmen eines Halogenschein- werfers. Beim Herunterdimmen des Scheinwer- Red Shift fers verändert Dim To Warm Farbdrift aktiviert sich die Farbtem-...
- Page 47 Smart Zusammenführung von Factory- Color Calibration = Farbkalibrierung Calibration (Calibrated) und RAW-Kalibrierung Automatische Sperrung der Bedie- nelemente nach ca. 30 Sekunden Inaktivität. Anzeige im Display nach Bedienversuch: „Locked!“ Entsper- Automatische ren: Gleichzeitiges Drücken von Autolock Sperrung der mittlerem und rechtem Encoder für Bedienelemente ca.
-
Page 48: Aufstellung Und Montage
den linken Encoder (ENTER). Durch Drehen des linken Encoders können Sie nun die gewünschte Information anzeigen lassen (siehe Tabelle). System Info Main CPU Geräte-Firmware LED Temp. Anzeige der LED-Temperatur in Grad Celsius und Fahrenheit Op. Hours Gesamtbetriebsdauer in Stunden und Minuten Display Display-Abschaltung aktiviert/deaktiviert DMX-Fail... -
Page 49: Flügelbegrenzer Und Filterrahmen Montieren / Demontieren / Linsen Reinigen
Wichtige Sicherheitshinweise: Überkopfmontage erfordert umfassende Er- fahrung, einschließlich der Berechnung der Grenzwerte für die Arbeitslast, des verwendeten Installationsmaterials und der regelmäßigen Sicherheitsüberprüfung aller Installationsmaterialien und Scheinwerfer. Wenn Sie diese Qualifikationen nicht haben, versuchen Sie nicht, eine Installation selbst durchzuführen, sondern nutzen Sie die Hilfe von professionellen Unternehmen. -
Page 50: Pflege, Wartung Und Reparatur
Wichtiger Sicherheitshinweis! Aus sicherheitstechnischen Gründen muss sich der Filterrahmen stets in der entsprechenden Haltevorrichtung am Scheinwerfer befinden, auch wenn keine Filterfolie eingelegt ist! PFLEGE, WARTUNG UND REPARATUR Um die einwandfreie Funktion des Geräts auf Dauer zu gewährleisten, muss es regelmäßig ge- pflegt und bei Bedarf gewartet werden. -
Page 51: Technische Daten
HINWEIS! Wartungs- und Reparaturmaßnahmen dürfen nur von ausreichend qual- ifiziertem Fachpersonal durchgeführt werden. Im Zweifel wenden Sie sich an eine Fachwerkstatt. HINWEIS! Unsachgemäß ausgeführte Wartungsarbeiten können den Gewährleis- tungsanspruch beeinträchtigen. HINWEIS! Bei vom Hersteller vorgesehenen Um- oder Nachrüstsets beachten Sie unbedingt die beiliegende Einbauanleitung. -
Page 52: Mindestabstand Zur Beleuchteten Fläche
Betriebs- 100 - 240 VAC 50/60 Hz spannung: Leistungs- 250 W aufnahme Effizienz: 33 lm/W Einschaltstrom: 43 A @ 0,385 ms (220 V) Stromver- TRUE1 Kompatible Power I/O Buchse sorgung: Sicherung: T3,15A Umgebungstem- -15 bis 45 °C peratur (Betrieb): Relative Luft- 80 % (nicht kondensierend) feuchtigkeit: IP-Schutzart:... -
Page 53: Mindestabstand Zu Normal Entflammbaren Materialien
MINDESTABSTAND ZU NORMAL ENTFLAMMBAREN MATERIALIEN Dieses Symbol mit Entfernungsangabe in Metern (m) gibt den Mindestabstand des 0.5 m Geräts zu normal entflammbaren Materialien an. In diesem Beispiel beträgt der Abstand 0,5 m. Den für dieses Gerät gültigen Wert entnehmen Sie bitte den technischen Daten in dieser Anleitung! ENTSORGUNG Verpackung:... - Page 54 CE-Konformitätserklärung Konformitätserklärungen für Produkte, die der LVD, EMC, RoHS-Richtlinie unterliegen, können unter info@adamhall.com angefragt werden. Konformitätserklärungen für Produkte, die der RED-Richtlinie unterliegen, können unter www. adamhall.com/compliance/ heruntergeladen werden. Druckfehler und Irrtümer, sowie technische oder sonstige Änderungen sind vorbehalten!
-
Page 55: Français
Veuillez lire attentivement ce manuel d'utilisation afin de pouvoir utiliser rapidement et de manière optimale votre nouveau produit Cameo Light. De plus amples informations sur Cameo Light sont disponibles sur notre site web CAMEOLIGHT.COM. -
Page 56: Consignes De Sécurité
Ce pictogramme identifie les dangers qui peuvent causer un choc électrique. Ce pictogramme identifie les zones ou les situations dangereuses. Ce pictogramme indique les dangers occasionnés par les surfaces portées à haute température. Ce pictogramme indique les dangers occasionnés par des sources lumineuses intenses. - Page 57 ATTENTION : 1. Ne mettez pas immédiatement l’appareil en service s’il a été exposé à d’impor- tantes variations de température (par exemple, juste après le transport). L'humidité et la condensation internes peuvent endommager l'appareil. Ne mettez l'appareil en marche que lorsqu'il a atteint la température ambiante. 2.
- Page 58 MISE EN GARDE : 1. Les éléments mobiles, tels que les supports de montage, présentent un risque de coincement. 2. Dans le cas d'appareils comportant des composants motorisés, il existe un risque de blessure dû au mouvement de l'appareil. Un mouvement brusque de l'appareil peut provoquer des réactions de choc.
-
Page 59: Notes Pour Les Appareils Portables D'intérieur
3. Les effets stroboscopiques peuvent provoquer des crises d'épilepsie chez les personnes sensibles. 4. Ces projecteurs sont équipés de sources lumineuses installées de manière permanente. Elles ne peuvent pas être remplacées par l'utilisateur. Les sources lumineuses contenues dans ce projecteur ne peuvent être remplacées que par le fabricant, son partenaire de service ou une personne de qualification similaire. -
Page 60: Contenu Du Carton
CONTENU DU CARTON Sortez le produit du carton et retirez tous les matériaux d'emballage. Veuillez vérifier l'intégralité et l'intégrité de la livraison et informer votre partenaire de distribution immédiatement après l'achat si la livraison n'est pas complète ou si elle est endommagée. L'emballage contient les éléments suivants : X 1 projecteur LED à... -
Page 61: Connecteurs, Utilisation Et Indicateurs
CAN ICES-005(B) / NMB-005(B) Cameo ® is a brand of the Adam Hall Group · Adam-Hall-Str.1· 61267 Neu-Anspach · Germany · Designed and Engineered in Germany. Assembled in PRC. www.adamhall.com Adam Hall Ltd.The Seedbed Business Centre SS3 9QY Essex | United Kingdom POWER IN Embase d'entrée secteur Neutrik powerCON TRUE1. -
Page 62: Utilisation
UTILISATION • Dès que le projecteur est correctement raccordé au secteur, les messages suivants s'affichent successivement : "Welcome to Cameo", le nom du modèle et la version du logiciel. Après ce processus, le projecteur est opérationnel et démarre dans le mode précédemment sélectionné. - Page 63 = signal DMX présent = pas de signal DMX Mode ventilateur Adresse de départ DMX et mode DMX 5CH RGBAL Mode de fonctionnement actuellement activé Appuyez sur l'encodeur = Appuyez sur l'encodeur = Sélection du mode de ouverture du menu principal fonctionnement (Mode) (Menu) RÉGLAGE DE L'ADRESSE DE DÉPART DMX (DMX Address)
- Page 64 pouvez maintenant sélectionner le mode DMX désiré en tournant l'encodeur gauche. Confirmez votre sélection en appuyant sur l'encodeur gauche (ENTER). Ceci vous ramènera automati- quement à l'écran principal et le mode de fonctionnement DMX sera activé. Vous trouverez les tableaux d'affectation des canaux pour les différents modes DMX dans la section CONTRÔLE DMX de ce mode d'emploi.
- Page 65 en appuyant sur l'encodeur gauche (ENTER). Vous pouvez maintenant régler la luminosité (DIM), la teinte (HUE) et la saturation des couleurs (SAT) à l'aide des trois encodeurs rotatifs (voir illustra- tion). Mode de fonctionnement actuellement Mode ventilateur activé Tournez l'encodeur = Tournez l'encodeur = Réglage de la luminosité...
- Page 66 préréglage du filtre de couleur (gel) à l'aide des encodeurs gauche et central (voir illustration). Les préréglages des filtres de couleur avec les désignations des filtres Lee se trouvent dans les tableaux DMX sous DMX CONTROL (canal 16 en mode d'accès complet à 18 canaux, sans User Color 1 - 8).
- Page 67 la flèche de sélection sur la gauche) et confirmez en appuyant sur l'encodeur gauche (ENTER). Vous pouvez maintenant sélectionner l'un des 8 préréglages de couleur en tournant l'encodeur gauche et confirmer votre sélection en appuyant sur l'encodeur gauche (ENTER). Attribuez alors au préréglage un nom individuel de 12 caractères maximum (Edit User Color Name) en tournant l'encodeur gauche pour sélectionner une lettre, un tiret ou un chiffre pour le premier caractère du nom du préréglage et confirmez en appuyant sur l'encodeur gauche.
- Page 68 nosité (DIM) de la séquence de couleurs à l'aide de l'encodeur gauche, la durée du pas (de 0,1 seconde à 21 minutes et 2 modes aléatoires) et le temps de fondu (de 0 seconde à 18 minutes et 2 modes aléatoires) à l'aide des encodeurs central et droit (voir l'illustration). Les réglages indivi- duels et le changement de nom des séquences de couleurs peuvent être effectués dans l'élément de menu "Edit Loop"...
- Page 69 Sélectionnez le pas 1 de la séquence de 8 (Step1 - Step8) en tournant l'encodeur gauche pour ré- gler la couleur de l'étape (Step1, notez la flèche de sélection). Sélectionnez maintenant l'une des couleurs définies dans le mode autonome User Color en tournant l'encodeur central et confirmez la sélection du pas 1 en appuyant sur l'encodeur central.
- Page 70 PARAMÈTRES DE L'APPAREIL (Settings) À partir de l'affichage principal, appuyez sur l'encodeur rotatif pour accéder au menu principal. Tournez l'encodeur gauche (SELECT) pour sélectionner l'élément de menu Settings (notez la flèche de sélection sur la gauche) et confirmez en appuyant sur l'encodeur gauche (ENTER). Vous accédez ainsi au sous-menu permettant de régler les éléments du sous-menu (voir tableau, sélectionner avec SELECT, confirmer avec ENTER, modifier la valeur ou l'état avec SELECT, confir- mer avec ENTER ).
- Page 71 Reproduisant La dérive des couleurs fidèlement est désactivée la dérive des couleurs lors de la gradation d'un projecteur halogène Lors de la gradation du projecteur, la température de La dérive des couleurs est activée couleur passe automatique- ment à des tons blancs de plus en plus chauds et à...
- Page 72 Étalonnage d'usine des R, G, B, A et L (pour tous les modes) Sélection- nez ce paramètre pour un affichage correct des tons de couleur et des préréglages dans les modes auto- Calibration nomes CCT et gel et lorsque vous des couleurs contrôlez le CCT et les préréglages du gel via DMX.
- Page 73 COURBES DE GRADATEUR Linear Exponential Logarithmic S-curve Valeur DMX Valeur DMX Valeur DMX Valeur DMX SYSTEM INFORMATION (System Info) À partir de l'affichage principal, appuyez sur l'encodeur rotatif pour accéder au menu principal. Tournez l'encodeur gauche (SELECT) pour sélectionner l'élément de menu System Info (notez la flèche de sélection sur la gauche) et confirmez en appuyant sur l'encodeur gauche (ENTER).
-
Page 74: Montage Et Installation
sur l'encodeur central et l'encodeur droit et maintenez-les enfoncés pendant environ 3 secondes. L'écran affiche les informations précédemment affichées. MONTAGE ET INSTALLATION Grâce à ses quatre pieds en plastique, le projecteur peut être positionné à un endroit approprié sur une surface plane. Le montage sur structure métallique est possible en utilisant le support de montage pré-installé... -
Page 75: Entretien, Maintenance Et Réparation
Avis de sécurité important D'un point de vue technique, le filtre doit toujours être placé dans le logement prévu à cet effet sur le projecteur, même s'il n'y a pas de filtre à proprement parler. ENTRETIEN, MAINTENANCE ET RÉPARATION Afin de garantir son bon fonctionnement à long terme, l'appareil doit être régulièrement nettoyé et, si nécessaire, passer en maintenance. -
Page 76: Caractéristiques Techniques
4. De façon générale, n'utilisez aucun produit de nettoyage agressif ou substance abrasive, sous peine d'endommager la finition de surface de l'appareil. 5. Les appareils doivent être stockés dans un environnement sec et protégés de la poussière et de la saleté. 6. - Page 77 Entrée DMX : XLR à 5 broches Sortie DMX : XLR à 5 broches Protocoles DMX, RDM de contrôle : 1CH DIM, 2CH DIM 16Bit, 2CH CCT, 3CH RGB cal., 4CH CCT, 5CH RGBAL, 6CH Mode DMX : HSI CCT, 7CH RGB CCT, 9CH RGB CCT, 10CH HSI CCT, 10CH RGBAL 16Bit, 11CH Direct CCT, 18CH Full Access CCT, macros de couleur, paramètres du dispositif, gradateur, courbe de Fonctions DMX :...
-
Page 78: Distance Minimale Par Rapport À La Surface Éclairée
Distance mini- male par rapport aux matériaux 0,5 m inflammables ordinaires : Dimensions (L x H x P, sans sup- port de montage 302 x 433 x 442 mm et sans coupe- flux) : Poids : 9 kg UID RDM : 08A40129xxxx Autres car- Livré avec coupe-flux, porte-filtre et cordon secteur actéristiques DISTANCE MINIMALE PAR RAPPORT À... -
Page 79: Déclarations Du Fabricant
L’appareil usagé doit être éliminé par une entreprise de recyclage agréée ou une déchetterie municipale. Veillez à respecter les réglementations en vigueur dans votre pays. 2. Respectez toutes les lois et réglementations relatives à l'élimination des déchets en vigueur dans votre pays. 3. -
Page 80: Español
Este equipo está diseñado y fabricado con los estándares de calidad más exigentes, para garan- tizar un correcto funcionamiento durante muchos años. Lea atentamente este manual de usuario para poder aprovechar rápidamente toda la funcionalidad de su nuevo producto de Cameo Light. Más información sobre Cameo Light en la web CAMEOLIGHT.COM. -
Page 81: Instrucciones De Seguridad
Este símbolo indica peligro de descarga eléctrica. Este símbolo identifica las zonas o situaciones peligrosas. Este símbolo indica peligro por superficie a alta temperatura. Este símbolo indica peligro debido a fuente de luz intensa. Este símbolo indica que en el equipo no hay piezas que pueda sustituir el usuario. Este símbolo indica información complementaria sobre el uso del producto. - Page 82 ATENCIÓN: 1. Si el equipo ha estado expuesto a un cambio brusco de temperatura (por ejemplo, después del transporte), no lo encienda inmediatamente. La condensación o la humedad podrían dañar el equipo. No encienda el equipo hasta que haya alcanza- do la temperatura ambiente.
- Page 83 PRECAUCIÓN: 1. En el caso de los componentes móviles, como los soportes de montaje u otros elementos móviles, existe la posibilidad de que se atasquen. 2. En el caso de los equipos con componentes accionados por motor, existe riesgo de lesiones por el movimiento del equipo.
-
Page 84: Indicaciones Para Equipos Portátiles De Interior
4. Estos focos cuentan con una lámpara fija que no debe ser sustituida por el usuario. La lámpara incluida en este foco solo puede ser sustituida por el fabricante o uno de sus socios de servicio técnico, o por una persona cualificada. ATENCIÓN POSIBLES DAÑOS POR FUENTES DE LUZ EXTERNAS La radiación solar, la radiación láser y los haces de luz agrupados de otros focos pueden dañar la carcasa y los componentes internos, como los filtros, las ruedas de... -
Page 85: Introducción
INTRODUCCIÓN FOCO FRESNEL PROFESIONAL CON LED RGBAL CLF2FCPLUS MODOS DE CONTROL: Control DMX: 1CH Dim, 2CH Dim 16Bit, 2CH CCT, 3CH RGB cal., 5CH Direct, 4CH CCT 16Bit, 6CH HSI-CCT, 7CH RGB-CCT, 10CH Direct 16Bit, 10CH HSI-CCT, 18CH Direct CCT, 18CH Full Access Modo Maestro/Esclavo Modos Autónomo CARACTERÍSTICAS:... -
Page 86: Conexiones, Controles E Indicadores
CAN ICES-005(B) / NMB-005(B) Cameo ® is a brand of the Adam Hall Group · Adam-Hall-Str.1· 61267 Neu-Anspach · Germany · Designed and Engineered in Germany. Assembled in PRC. www.adamhall.com Adam Hall Ltd.The Seedbed Business Centre SS3 9QY Essex | United Kingdom POWER IN Entrada de alimentación Neutrik powerCON TRUE1. -
Page 87: Operación
• Una vez conectado el foco a la red eléctrica, durante el proceso de arranque se mostrarán sucesivamente los siguientes mensajes en la pantalla: «Welcome to Cameo», el modelo del equipo y la versión del software. Al terminar este proceso, el foco estará operativo y se activará en el modo de funcionamiento seleccionado previamente. - Page 88 = Hay señal DMX = No hay señal DMX Modo operativo actual Modo del ventilador Dirección inicial DMX y modo DMX 5CH RGBAL Pulsar el control giratorio = Pulsar el control giratorio = Seleccionar el modo operativo Abrir el menú principal (Menu) (Mode) AJUSTE DE LA DIRECCIÓN INICIAL DMX (DMX Address) En la pantalla principal, pulse el control giratorio derecho para ir al menú...
- Page 89 de selección en el lado izquierdo) y confirme la selección pulsando dicho control (ENTER). Ahora puede seleccionar el modo DMX deseado girando el control giratorio izquierdo. Confirme la selección pulsando el control giratorio izquierdo (ENTER); volverá automáticamente a la pantalla principal y se activará...
- Page 90 Modo operativo actual Modo del ventilador Girar el control giratorio = Girar el control giratorio = Ajustar la intensidad (DIM) Ajustar la saturación de color (SAT) Pulsar el control giratorio = Seleccionar el modo operativo Pulsar el control giratorio = (Mode) Abrir el menú principal (Menu) Girar el control giratorio = ...
- Page 91 Modo operativo actual Modo del ventilador Girar el control giratorio = Pulsar el control giratorio = Ajustar el brillo general (DIM) Abrir el menú principal (Menu) Pulsar el control giratorio = Seleccionar el modo operativo (Mode) Girar el control giratorio = Seleccionar el filtro establecido MODO AUTÓNOMO USER COLOR (Preajustes de color 1-8) En la pantalla principal, pulse el control giratorio izquierdo para acceder al menú...
- Page 92 Asigne al preajuste un nombre de hasta 12 dígitos (Edit User Colour Name) girando el control giratorio izquierdo para seleccionar una letra, el guion bajo o un número para el primer dígito del nombre del preajuste y confirme pulsando el control giratorio izquierdo. A continuación, introduz- ca el segundo carácter y así...
- Page 93 Modo operativo actual Modo del ventilador Girar el control giratorio = Girar el control giratorio = Ajustar la intensidad (DIM) Ajustar el tiempo de fundido (t-Fade) Pulsar el control giratorio = Seleccionar el modo operativo Pulsar el control giratorio = (Mode) Abrir el menú principal (Menu) Girar el control giratorio = ...
- Page 94 MODO ESCLAVO En la pantalla principal, pulse el control giratorio izquierdo para acceder al menú y seleccionar el modo operativo (Mode). Gire el control giratorio izquierdo para seleccionar la opción de menú Slave (observe la flecha de selección en el lado izquierdo) y confirme la selección pulsando dicho control (ENTER).
- Page 95 No girar la pantalla = Girar la pantalla Girar la pantalla 180° (p. ej., para montaje suspendido) Siempre encendida Retroiluminación de la pantalla Se apaga al cabo de 20 segundos de inactividad Último modo operativo Modo operativo si se interrumpe la Oscurecimiento señal DMX Activar el color de usuario 8 La intensidad del foco aumenta de...
- Page 96 Frecuencia Ajuste de la frecuencia PWM del PWM del LED R, G, B, A y L (valor máx.: 255) Pulsar control giratorio cen- RAW - Adjust tral = cambiar entre R+G y B+A (Ajuste individ- (Color). Girar control giratorio cen- ual y para to- tral= ajustar el valor de R, B o L dos los modos Pulsar el control giratorio dere-...
- Page 97 Regulación Velocidad alta y constante del del ventilador ventilador Restablecer los ajustes de fábrica (sin restablecer Restablecer valores de fábrica: con- los colores de firmar con ENTER, cancelar con ESC usuario ni los bucles) Restablecer los colores de usu- Restablecer valores de fábrica: con- ario y los bucles firmar con ENTER, cancelar con ESC a los valores de...
-
Page 98: Instalación Y Montaje
Color-Cal. A Ajuste de ámbar para todos los modos Color-Cal. L Ajuste de lima para todos los modos Bloqueo automático de los controles giratorios activado/desactivado Regulación del ventilador FUNCIÓN DE BLOQUEO MANUAL Además de la función de bloqueo automático del foco contra la operación accidental y no autor- izada («Settings»... -
Page 99: Visera Y Portafiltros
VISERA Y PORTAFILTROS MONTAJE, DESMONTAJE Y LIMPIEZA DE LA LENTE Desenchufe el equipo de la red eléctrica. Para montar o desmontar la visera y el portafiltros, presione el pin de bloqueo con resorte (D) del mecanismo de sujeción para que se levante hacia arriba. -
Page 100: Características Técnicas
¡NOTA! Un cuidado inadecuado puede deteriorar el equipo e incluso destruirlo. 1. Las superficies de la carcasa deben limpiarse con un paño limpio y húmedo. Asegúrese de que la humedad no pueda penetrar en el equipo. 2. Las entradas y salidas de aire deben limpiarse regularmente para eliminar el polvo y la suciedad. Si se utiliza aire comprimido, hay que tener cuidado para evitar que se dañe la unidad (por ejem- plo, los ventiladores deben estar tapados, ya que de lo contrario podrían girar excesivamente). - Page 101 Flujo luminoso: 8.350 lm Ángulo Ángulo de haz: 18°-53°. Ángulo de campo: 32°-87° de dispersión: Función zoom. Control manual Entrada DMX: XLR de 5 pines Salida DMX: XLR de 5 pines Control: DMX, RDM 1CH DIM, 2CH DIM 16Bit, 2CH CCT, 3CH RGB cal., 4CH CCT, 5CH RGBAL, 6CH Modos DMX: HSI CCT, 7CH RGB CCT, 9CH RGB CCT, 10CH HSI CCT, 10CH RGBAL 16Bit, 11CH Direct CCT, 18CH Full Access...
-
Page 102: Distancia Mínima A La Superficie Iluminada
Distancia mínima a la superficie 0,5 m iluminada: Distancia mínima a materiales 0,5 m normalmente inflamables: Dimensiones (an. × al. × f., sin 302 × 433 × 442 mm soporte de mon- taje ni visera): Peso: 9 kg UID de RDM: 08A40129xxxx Otras Visera, marco del filtro y cable eléctricos incluidos características DISTANCIA MÍNIMA A LA SUPERFICIE ILUMINADA Este símbolo con información de distancia en metros (m) indica la distancia 0,5 m... -
Page 103: Declaración Del Fabricante
2. Procure seguir las normas vigentes en su país sobre reciclaje de desechos. 3. Si es un particular, póngase en contacto con el distribuidor donde adquirió este producto, o con el ayuntamiento, para informarse sobre el reciclaje adecuado de este equipo. DECLARACIÓN DEL FABRICANTE Garantía del fabricante y limitación de responsabilidad Adam Hall GmbH, Adam-Hall-Str. -
Page 104: Polski
Urządzenie to zostało opracowane i wyprodukowane zgodnie z najwyższymi standardami jakości, aby zapewnić wiele lat bezawaryjnej pracy. Proszę uważnie przeczytać niniejszą instrukcję obsłu- gi, aby móc szybko optymalnie wykorzystać swój nowy produkt Cameo Light. Więcej informacji na temat Cameo Light znajdą Państwo na naszej stronie internetowej CAMEOLIGHT.COM. -
Page 105: Instrukcje Bezpieczeństwa
Ten symbol wskazuje na zagrożenia, które mogą spowodować porażenie prądem. Ten symbol oznacza niebezpieczne obszary lub niebezpieczne sytuacje. Ten symbol oznacza zagrożenia spowodowane gorącymi powierzchniami. Ten symbol oznacza zagrożenia powodowane przez intensywne źródła światła. Ten symbol oznacza urządzenie, w którym nie ma części wymienianych przez użyt- kownika. - Page 106 UWAGA: 1. Nie należy używać urządzenia, jeśli było ono narażone na duże wahania tempera- tury (na przykład po transporcie). Wilgoć i kondensacja mogą uszkodzić urządzenie. Urządzenie należy włączyć dopiero po osiągnięciu temperatury otoczenia. 2. Proszę upewnić się, że napięcie i częstotliwość sieci zasilającej odpowiadają wartościom podanym na urządzeniu.
- Page 107 PRZESTROGA! 1. Ruchome elementy, takie jak wsporniki montażowe, stwarzają ryzyko zakleszczenia. 2. W przypadku urządzeń z elementami napędzanymi silnikiem istnieje ryzyko obra- żeń spowodowanych ruchem urządzenia. Nagły ruch urządzenia może spowodo- wać reakcje wstrząsowe. 3. Zewnętrzna powierzchnia urządzenia może stać się bardzo gorąca podczas regu- larnej pracy.
-
Page 108: Uwagi Dotyczące Przenośnych Urządzeń Do Zastosowań Wewnętrznych
4. Te urządzenia oświetleniowe wyposażone zostały w źródła światła zainstalowane na stałe. Nie mogą być one wymieniane przez użytkownika. Lampy zawarte w tej jednostce oświetleniowej mogą być wymieniane wyłącznie przez producenta, jego partnera serwisowego lub podobnie wykwalifikowaną osobę. UWAGA: POTENCJALNE USZKODZENIE PRZEZ ZEWNĘTRZNE ŹRÓDŁA ŚWIATŁA! Promieniowanie słoneczne, promieniowanie laserowe i wiązki światła z innych reflek- torów mogą... -
Page 109: Wprowadzenie
WPROWADZENIE PROFESJONALNY REFLEKTOR FRESNELA Z DIODAMI LED RGBAL CLF2FCPLUS FUNKCJE KONTROLNE: 1-kanałowy Dim, 2-kanałowy Dim 16 bit, 2-kanałowy CCT, 3-kanałowy RGB, 4-kanałowy CCT, 5-kanałowy RGBAL, 6-kanałowy HSI CCT, 7-kanałowy RGB CCT, 9-kanałowy RGB CCT, 10-kana- łowy HSI CCT, 10-kanałowy RGBAL 16 bit, 11-kanałowy Direct CCT, 18-kanałowy pełny dostęp do sterowania DMX Praca w trybie Master/Slave Funkcje w trybie Standalone:... -
Page 110: Przyłącza, Elementy Obsługi I Wskaźniki
CAN ICES-005(B) / NMB-005(B) Cameo ® is a brand of the Adam Hall Group · Adam-Hall-Str.1· 61267 Neu-Anspach · Germany · Designed and Engineered in Germany. Assembled in PRC. www.adamhall.com Adam Hall Ltd.The Seedbed Business Centre SS3 9QY Essex | United Kingdom POWER IN Gniazdo zasilania sieciowego Neutrik powerCON TRUE1. -
Page 111: Obsługa
OBSŁUGA • Gdy tylko lampa zostanie prawidłowo podłączona do zasilania, wyświetlone zostaną kolejno: "Welcome to Cameo", nazwa modelu i wersja oprogramowania. Po zakończeniu tego procesu urządzenie jest gotowe do pracy i uruchamia się w uprzednio wybranym trybie. - Page 112 = sygnał DMX jest obecny = brak sygnału DMX Aktualnie aktywowany tryb pracy Tryb wentylatora Adres startowy DMX i tryb DMX 5CH RGBAL Proszę nacisnąć koder = Proszę nacisnąć koder = Wybór trybu pracy (Mode) otworzyć menu główne (Menu) USTAWIANIE ADRESU STARTOWEGO DMX (DMX Address) Zaczynając od wyświetlacza głównego, proszę...
- Page 113 na strzałkę wyboru po lewej stronie) i potwierdzić, naciskając lewe pokrętło (ENTER). Można teraz wybrać żądany tryb DMX, obracając lewe pokrętło. Proszę potwierdzić wybór, naciskając lewe pokrętło (ENTER). Spowoduje to również automatyczny powrót do głównego wyświetlacza i akty- wację trybu pracy DMX. Tabele z przypisaniem kanałów dla różnych trybów DMX można znaleźć w niniejszej instrukcji w sekcji DMX CONTROL.
- Page 114 Aktualnie aktywowany tryb pracy Tryb wentylatora Obrócić enkoder = Obrócić enkoder = Ustawianie jasności (DIM) Ustawianie nasycenia kolorów (SAT) Proszę nacisnąć koder = Proszę nacisnąć koder = Wybór trybu pracy (Mode) otworzyć menu główne (Menu) Przekręcenie enkodera = ustawienie odcienia koloru (HUE) TRYB PRACY STANDALONE DIRECT LED (Mieszanie kolorów RGBAL) Począwszy od głównego wyświetlacza, naciśnięcie lewego pokrętła powoduje przejście do menu wyboru trybu pracy (Mode).
- Page 115 Aktualnie aktywowany tryb pracy Tryb wentylatora Obrócić enkoder = Proszę nacisnąć koder = Ustawianie całkowitej jasności otworzyć menu główne (DIM) (Menu) Proszę nacisnąć koder = Wybór trybu pracy (Mode) Obrócić pokrętło = wybrać ustawienie wstępne filtra TRYB PRACY STANDALONE USER COLOR (Indywidualne ustawienia kolorów 1 - 8) Począwszy od głównego wyświetlacza, naciśnięcie lewego pokrętła powoduje przejście do menu wyboru trybu pracy (Mode).
- Page 116 Teraz proszę nadać ustawieniu wstępnemu indywidualną, maksymalnie 12-cyfrową nazwę (Edit User Color Name), przekręcając lewe pokrętło, aby wybrać literę, podkreślenie lub cyfrę jako pierwszą cyfrę nazwy ustawienia wstępnego i potwierdzić, naciskając lewe pokrętło. Następ- nie wprowadzana jest druga cyfra i tak dalej. Po zakończeniu wprowadzania nazwy ustawienia wstępnego proszę...
- Page 117 Aktualnie aktywowany tryb pracy Tryb wentylatora Obrócić enkoder = Obrócić enkoder = Ustawianie jasności (DIM) Ustawianie czasu zanikania (t-fade) Proszę nacisnąć koder = Wybór trybu pracy (Mode) Proszę nacisnąć koder = otworzyć menu główne Obrócić enkoder = (Menu) Ustawić czas trwania kroku (t-krok) Proszę...
- Page 118 TRYB SLAVE Począwszy od głównego wyświetlacza, naciśnięcie lewego pokrętła powoduje przejście do menu wyboru trybu pracy (Mode). Przekręcić lewe pokrętło, aby wybrać pozycję menu Slave (proszę zwrócić uwagę na strzałkę wyboru po lewej stronie) i potwierdzić, naciskając pokrętło (ENTER). Tryb Slave jest teraz włączony i automatycznie wyświetlany jest ekran główny. Połączyć urządze- nia podrzędne i nadrzędne (ten sam model, ta sama wersja oprogramowania) za pomocą...
- Page 119 Brak rotacji wyświetlacza Obrót wyświe- tlacza Obrót wyświetlacza o 180° (np. w przypadku montażu nad głową) Stale włączone Podświetlenie wyświetlacza Dezaktywuje się po około 20 sekun- dach bezczynności Zachowywane jest ostatnie pole- Status operacyjny cenie z błędem sygnału Aktywuje zaciemnienie Aktywuje kolor użytkownika 8 Intensywność...
- Page 120 Dokładnie naśla- Dryft kolorów jest wyłączony duje dryf kolorów przy ściemnianiu światła haloge- nowego. Podczas ściemniania reflektora tempe- ratura barwowa Dryft kolorów jest włączony zmienia się automatycznie na coraz cieplejsze odcienie bieli i bursztynu (i od- wrotnie). Częstotliwość Konfiguracja częstotliwości PWM PWM LED diod LED R, G, B, A i L...
- Page 121 Automatyczne blokowanie elemen- tów sterujących po około 30 sekun- dach bezczynności. Wskazanie na wyświetlaczu po próbie uruchomie- Automatyczne nia: "Zablokowane!" Odblokowanie: blokowanie Proszę nacisnąć jednocześnie elementów steru- środkowy i prawy enkoder przez ok. jących 3 sekundy Automatyczne blokowanie elemen- tów sterujących jest wyłączone Automatyczne sterowanie wentyla- torem Dezaktywowany wentylator ze...
-
Page 122: Konfiguracja I Instalacja
gę na strzałkę wyboru po lewej stronie) i potwierdzić, naciskając lewe pokrętło (ENTER). Przekrę- cając lewe pokrętło, można teraz wyświetlić żądane informacje (patrz tabela). Oprogramowanie sprzętowe urządzenia Wyświetlacz LED temperatury w stopniach Celsjusza i Fahrenheita Całkowity czas pracy w godzinach i minutach Wyłączanie wyświetlacza włączone/wyłączone Status operacyjny z błędem sygnału DMX Krzywa ścieniania... -
Page 123: Ogranicznik Skrzydełkowy I Rama Filtra Montaż / Demontaż / Czyszczenie Soczewek
Ważna uwaga: Montaż podwieszany wymaga dużego doświadczenia, w tym obliczania limitów obciążenia roboczego, stosowanych materiałów instalacyjnych i regularnych kontroli bezpieczeństwa wszystkich materiałów instalacyjnych i os- przętu. Jeśli nie posiadają Państwo takich kwalifikacji, nie należy podejmować prób samodzielnej instalacji. Proszę zwrócić się do wykwalifikowanego specjalisty. OGRANICZNIK SKRZYDEŁKOWY I RAMA FILTRA MONTAŻ... -
Page 124: Pielęgnacja, Konserwacja I Naprawa
Ważna uwaga dotycząca bezpieczeństwa! Ze względów bezpieczeństwa tech- nicznego, filtr musi być umieszczony w odpowiednim uchwycie na reflektorze, nawet jeśli nie jest zainstalowany żaden filtr! PIELĘGNACJA, KONSERWACJA I NAPRAWA Aby zapewnić długotrwałe i prawidłowe działanie urządzenia, należy je regularnie czyścić i w razie potrzeby serwisować. -
Page 125: Specyfikacje Techniczne
UWAGA: Nieprawidłowo wykonane prace konserwacyjne mogą mieć wpływ na roszczenia gwarancyjne. UWAGA: W przypadku zestawów do konwersji lub modernizacji dostarczonych przez producenta, należy bezwzględnie przestrzegać załączonych instrukcji montażu. SPECYFIKACJE TECHNICZNE Numer produk- CLF2FCPLUS Typ produktu: Reflektor LED Fresnel Typ: Fresnel teatralny Spektrum RGBAL kolorów:... - Page 126 Elementy Wyświetlacz 1.51" wyświetlacza Napięcie robocze: 100 - 240 VAC 50/60Hz Pobór mocy: 250 W Wydajność: 33 lm/W Prąd rozruchowy: 43A @ 0,385ms (220V) Podłączenie Gniazdo wejścia/wyjścia zasilania zgodne z TRUE1 zasilania: Bezpiecznik: T3.15A Temperatura oto- czenia (podczas -15 do 45 °C pracy): Wilgotność...
-
Page 127: Minimalna Odległość Od Oświetlanej Powierzchni
MINIMALNA ODLEGŁOŚĆ OD OŚWIETLANEJ POWIERZCHNI Ten symbol z odległością podaną w metrach (m) oznacza minimalną odległość 0,5 m oprawy oświetleniowej od oświetlanej powierzchni. W tym przykładzie odległość wynosi 0,5 m. Wartość obowiązującą dla tego urządzenia można znaleźć w specyfikacjach technicznych w niniejszej instrukcji i jest wydrukowana na urządzeniu! MINIMALNA ODLEGŁOŚĆ... - Page 128 Zgodność z CE Adam Hall GmbH niniejszym potwierdza, że niniejszy produkt spełnia następujące wytyczne (w stosownych przypadkach): Dyrektywa niskonapięciowa (2014/35/EU) Dyrektywa EMC (2014/30/EU) RoHS (2011/65/EU) RED (2014/53/EU) Deklaracja zgodności EC Deklaracje zgodności dla produktów podlegających dyrektywie LVD, EMC, RoHS można zamówić pd adresem info@adamhall.com Deklaracje zgodności dla produktów podlegających RED można pobrać...
-
Page 129: Italiano
Questo dispositivo è stato sviluppato e prodotto in conformità con elevati standard qualitativi che ne garantiscono il regolare funzionamento per molti anni. Leggere attentamente questo manuale d’istruzioni per utilizzare subito al meglio il nuovo prodotto Cameo Light. Per maggiori informazio- ni su Cameo Light, consultare il nostro sito web CAMEOLIGHT.COM. -
Page 130: Indicazioni Sulla Sicurezza
Questo simbolo indica pericoli che possono causare scosse elettriche. Questo simbolo indica punti di pericolo o situazioni pericolose. Questo simbolo indica pericoli dovuti a superfici calde. Questo simbolo indica pericoli dovuti a sorgenti luminose intense. Questo simbolo indica un dispositivo che non contiene parti sostituibili dall’utente. Questo simbolo indica informazioni complementari sull’utilizzo del prodotto. - Page 131 ATTENZIONE: 1. Non mettere in funzione il dispositivo se ha subito forti sbalzi di temperatura (ad esempio dopo il trasporto). Umidità e condensa potrebbero danneggiare il dispositi- vo. Accendere il dispositivo solo dopo che ha raggiunto la temperatura ambiente. 2. Verificare che la tensione e la frequenza della rete elettrica corrispondano ai valori indicati sul dispositivo.
- Page 132 CAUTELA 1. I componenti mobili, come le staffe di montaggio o componenti mobili di altro tipo, comportano il rischio di schiacciamento. 2. Nei dispositivi con componenti azionati a motore sussiste il pericolo di lesioni pro- vocate dal movimento del dispositivo stesso. Movimenti improvvisi del dispositivo possono causare reazioni da shock.
-
Page 133: Avvertenze Per Dispositivi Portatili Per Interni
4. In queste lampade sono installate lampadine fisse che non devono essere sosti- tuite dall’utente. La sorgente luminosa contenuta in questa lampada può essere sostituita solo dal produttore, da un suo partner di assistenza o da una persona con qualifica analoga. ATTENZIONE! DANNI POTENZIALI DA SORGENTI LUMINOSE ESTERNE Le radiazioni solari, le radiazioni laser e i fasci di luce di altri fari possono danneggia- re l’alloggiamento e i componenti interni, come i filtri, le ruote gobo, le ruote colori, i... -
Page 134: Introduzione
INTRODUZIONE FARO FRESNEL PROFESSIONALE CON LED RGBAL CLF2FCPLUS FUNZIONI DI COMANDO Controllo DMX: 1CH Dim, 2CH Dim 16Bit, 2CH CCT, 3CH RGB Cal., 5CH Direct, 4CH CCT 16Bit, 6CH HSI CCT, 7CH RGB CCT, 10CH Direct 16Bit, 10CH HSI CCT, 18CH Direct CCT, 18CH Full Access Funzionamento master/slave Funzioni standalone... -
Page 135: Connessioni, Elementi Di Comando E Indicatori
CAN ICES-005(B) / NMB-005(B) Cameo ® is a brand of the Adam Hall Group · Adam-Hall-Str.1· 61267 Neu-Anspach · Germany · Designed and Engineered in Germany. Assembled in PRC. www.adamhall.com Adam Hall Ltd.The Seedbed Business Centre SS3 9QY Essex | United Kingdom POWER IN Presa di ingresso Neutrik powerCON TRUE1. -
Page 136: Utilizzo
• Non appena il faro è correttamente allacciato alla rete elettrica, durante la procedura di avvio sul display appaiono in successione il messaggio “Welcome to Cameo”, l’indicazione del modello e la versione del software. Al termine della procedura il faro è pronto per essere utilizzato e si avvia nella modalità operativa attivata in precedenza. - Page 137 SCHERMATA PRINCIPALE DELLA MODALITÀ DMX SUL DISPLAY La schermata principale nella modalità DMX mostra l’indirizzo di avvio DMX attualmente imposta- to, la modalità DMX e altre informazioni (v. figura). = Segnale DMX presente = Segnale DMX assente Modalità operativa corrente attivata Modalità...
- Page 138 IMPOSTAZIONE DELLA MODALITÀ DMX (DMX Mode) Premendo il codificatore a manopola a pressione destro, dalla schermata principale si accede al menu principale. Ruotare il codificatore sinistro (SELECT) per selezionare la voce di menu DMX Mode (v. la freccia di selezione a sinistra) e confermare premendo il codificatore sinistro (ENTER). Ora è...
- Page 139 MODALITÀ STAND-ALONE HSI (Hue, Saturation, Intensity) Premendo il codificatore a manopola a pressione sinistro, dalla schermata principale si accede al menu per la selezione della modalità operativa (Mode). Ruotare il codificatore sinistro (SELECT) per selezionare la modalità HSI (v. la freccia di selezione a sinistra) e confermare premendo il codificatore sinistro (ENTER).
- Page 140 MODALITÀ STANDALONE GEL (Preset filtri colore) Premendo il codificatore a manopola a pressione sinistro, dalla schermata principale si accede al menu per la selezione della modalità operativa (Mode). Ruotare il codificatore sinistro (SELECT) per selezionare la modalità GEL (v. la freccia di selezione a sinistra) e confermare premendo il codificatore sinistro (ENTER).
- Page 141 MODALITÀ STANDALONE MODIFICA USER COLOR (Edit User Color) Premendo il codificatore a manopola a pressione destro, dalla schermata principale si accede al menu principale. Ruotare il codificatore sinistro (SELECT) per selezionare la voce di menu Edit User Color (v. la freccia di selezione a sinistra) e confermare premendo il codificatore sinistro (ENTER).
- Page 142 MODALITÀ STAND-ALONE PLAY LOOP (Sequenze dei colori in 8 passi 1-8) Premendo il codificatore a manopola a pressione sinistro, dalla schermata principale si accede al menu per la selezione della modalità operativa (Mode). Ruotare il codificatore sinistro (SELECT) per selezionare la modalità Play Loop (v. la freccia di selezione a sinistra) e confermare premen- do il codificatore sinistro (ENTER).
- Page 143 il codificatore sinistro e premerlo per confermare. Continuare inserendo la seconda posizione e così via. Dopo aver digitato il nome del preset, premere il codificatore centrale (Save&Next) per passare alla fase di elaborazione successiva. Se prima di selezionare una lettera, un trattino basso o un numero per la prima posizione si preme “Save&Next”, rimane il nome precedente del preset e si accede subito alla fase di elaborazione successiva.
- Page 144 MODALITÀ DMX Premendo il codificatore a manopola a pressione sinistro, dalla schermata principale si accede al menu per la selezione della modalità operativa (Mode). Ruotare il codificatore sinistro per selezionare la voce di menu DMX (v. la freccia di selezione a sinistra) e confermare premendo il codificatore (ENTER).
- Page 145 Il proiettore reagisce immediata- mente alle variazioni del valore DMX. Comportamento dimmer Il proiettore si comporta in maniera analoga a un proiettore alogeno con variazioni di luminosità graduali. Imita la varia- Variazione di colore disattivata zione di colore quando si regola la luminosità...
- Page 146 Calibrazione Unione della calibrazione di fabbrica del colore (Calibrated) e RAW Blocco automatico degli elementi di comando dopo circa 30 secondi di inattività. Visualizzazione sul display dopo un tentativo di utilizzo: Blocco automati- “Locked!”. Per sbloccare, premere co degli elementi contemporaneamente il codificatore di comando centrale e quello destro per circa 3 secondi...
-
Page 147: Installazione E Montaggio
INFORMAZIONI DI SISTEMA (System Info) Premendo il codificatore a manopola a pressione destro, dalla schermata principale si accede al menu principale. Ruotare il codificatore sinistro (SELECT) per selezionare la voce di menu System Info (v. la freccia di selezione a sinistra) e confermare premendo il codificatore sinistro (ENTER). Ruotando il codificatore sinistro è... -
Page 148: Deflettore Ad Alette E Portafiltro Montaggio, Smontaggio, Pulizia Delle Lenti
Nota importante: per eseguire il montaggio sopratesta è necessaria una vasta esperienza, che include il calcolo dei valori limite per il carico di lavoro, il materiale di installazione utilizzato e la verifica periodica della sicurezza di tutti i materiali di installazione e dei fari. -
Page 149: Cura, Manutenzione E Riparazione
Importante indicazione sulla sicurezza! Per motivi tecnici e di sicurezza, il portafiltro deve rimanere sempre nel relativo dispositivo di blocco sul faro, anche se il filtro non è inserito. CURA, MANUTENZIONE E RIPARAZIONE Per garantire il corretto funzionamento del dispositivo nel tempo, è necessario sottoporlo a una pulizia regolare e, se necessario, a manutenzione. -
Page 150: Dati Tecnici
NOTA! Gli interventi di manutenzione non eseguiti correttamente possono invalidare la garanzia. NOTA! Nel caso di set di conversione o retrofitting, oppure di accessori forniti dal produttore, seguire sempre il manuale di montaggio accluso. DATI TECNICI Codice articolo: CLF2FCPLUS Tipo di prodotto: Faro LED Fresnel Tipo: Fresnel per teatro... -
Page 151: Distanza Minima Dalla Superficie Illuminata
Connessione Presa I/O di alimentazione compatibile con TRUE1 alimentazione: Fusibile: T 3,15 A Temperatura ambiente da −15 a 45 °C (in esercizio): Umidità relativa: 80% senza formazione di condensa Classe IP20 di protezione IP: Materiale cassa: Alluminio pressofuso Colore Nero alloggiamento: Raffreddamento Combinazione di tubo di calore e ventola termocontrollata cassa: Distanza minima... -
Page 152: Smaltimento
SMALTIMENTO Imballaggio 1. Gli imballaggi possono essere riciclati attraverso i consueti canali di smaltimento. 2. Separare l’imballaggio in conformità alle leggi sullo smaltimento e i regolamenti sui materiali riciclabili in vigore nel proprio Paese. Dispositivo 1. Questo dispositivo è soggetto alla Direttiva europea sui rifiuti di apparecchiature elettriche ed elettroniche nella versione in vigore (Direttiva RAEE sui rifiuti di apparecchiature elettriche ed elettroniche). - Page 153 Dichiarazione di conformità CE Le dichiarazioni di conformità per i prodotti soggetti alle direttive LVD, EMC e RoHS possono esse- re richieste all’indirizzo info@adamhall.com. Le dichiarazioni di conformità per i prodotti soggetti alla direttiva RED possono essere scaricate da www.adamhall.com/compliance/. Con riserva di errori di stampa e refusi, nonché...
-
Page 154: Dmx Control / Dmx Steuerung / Pilotage Dmx / Control Dmx / Sterowanie Dmx / Controllo Dmx
DMX CONTROL / DMX STEUERUNG / PILOTAGE DMX / CONTROL DMX / STEROWANIE DMX / CONTROLLO DMX 1CH Dim 2CH Dim User 16Bit Color 1 User Color 1 Channel Channel Function Values Dimmer 000 - 255 0% to 100% Dimmer fine 000 - 255 Channel Channel Function Values... - Page 155 HSI CCT RGB CCT Channel Channel Function Values Dimmer 000 - 255 0% to 100% Dimmer fine 000 - 255 000 - 255 0% to 100% Green 000 - 255 0% to 100% Blue 000 - 255 0% to 100% 000 - 255 0°...
- Page 156 069 - 079 Ramp down random slow to fast 080 - 102 Random Strobe effect slow to fast Strobe Break effect 5s to 1s Strobe Functions 103 - 127 (short burst with break) 128 - 250 Strobe slow to fast (<1Hz to 20Hz) 251 - 255 Open 000 - 255 0% to 100% Green...
- Page 157 054 - 057 35 Light Pink 058 - 061 134 Golden Amber 062 - 065 17 Surprise Peach 066 - 069 746 Brown 070 - 073 105 Orange 074 - 077 20 Medium Amber 078 - 081 768 Egg Yolk Yellow 082 - 085 15 Deep Straw 086 - 089 767 Nectarine 090 - 093 101 Yellow...
- Page 158 232 - 237 User Color 6 238 - 243 User Color 7 244 - 249 User Color 8 Color Crossfade 250 - 255 No function (affects HSI, 000 - 005 0s (Off) CCT and Color 006 - 105 0,1s - 10s (0,1s Steps) Presets) 106 - 214 11s - 119s (1s Steps) 215 - 244 2m - 4m50s (10s Steps)
- Page 159 140 - 141 Display Always On 142 - 143 Display Off after 20s 144 - 163 No Function Device settings 164 - 165 Dimmer Curve Linear (all settings ex- 166 - 167 Dimmer Curve Exponential ecuted are after 168 - 169 Dimmer Curve Logarithmic holding value for 170 - 171 Dimmer Curve S-Curve 3 seconds)
- Page 160 Ramp up random 046 - 056 slow to fast 057 - 068 Ramp down slow to fast Ramp down random 069 - 079 slow to fast Multi- Random Strobe Strobe Functions 080 - 102 functional effect slow to fast Strobe Strobe Break effect 5s to 103 - 127 1s (short burst with break)
- Page 161 000 - 005 No function 006 - 009 46 Dark Magenta 010 - 013 29 Plasa Red 014 - 017 26 Bright Red 018 - 021 127 Smokey Pink 022 - 025 36 Medium Pink 026 - 029 19 Fire 030 - 033 135 Deep Golden Amber 034 - 037 778 Millennium Gold 038 - 041 21 Gold Amber...
- Page 162 343 Special Medium 166 - 169 Lavender 170 - 173 798 Chrysalis Pink 174 - 177 701 Provence 178 - 181 797 Deep Purple 182 - 185 48 Rose Purple 186 - 189 345 Fuchsia Pink 190 - 193 795 Magical Magenta Color Presets 194 - 197 128 Bright Pink (override Color...
- Page 163 098 - 099 Fan Auto 100 - 101 Fan Off 102 - 103 Fan Constant Low Settings 104 - 105 Fan Constant Medium 106 - 107 Fan Constant High 108 - 119 No function 120 - 121 PWM Frequency 600Hz 122 - 123 PWM Frequency 1200Hz 124 - 125 PWM Frequency 2000Hz PWM Fre-...
- Page 167 CAMEOLIGHT.COM Adam Hall GmbH Adam-Hall-Str. 1 | 61267 Neu-Anspach | Germany Phone: +49 6081 9419-0 | adamhall.com Adam Hall Ltd. | The Seedbed Business Centre | SS3 9QY Essex | United Kingdom REV: 01...
Need help?
Do you have a question about the F Series and is the answer not in the manual?
Questions and answers