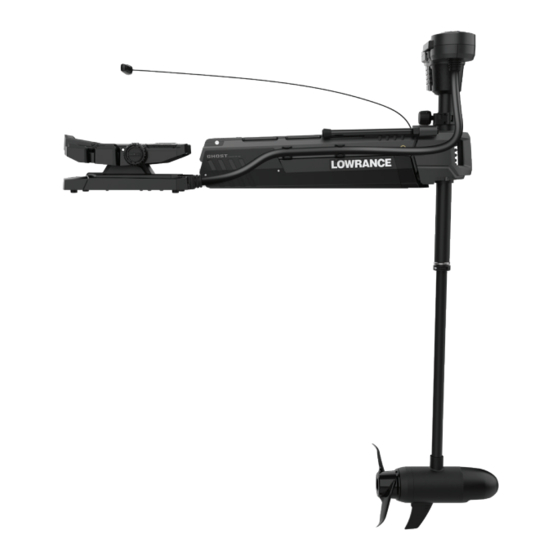
Lowrance Ghost Series Operator's Manual
Hide thumbs
Also See for Ghost Series:
- Installation manual (32 pages) ,
- Operator's manual (25 pages) ,
- Installation manual (28 pages)
Table of Contents
Advertisement
Advertisement
Table of Contents
Troubleshooting

Related Manuals for Lowrance Ghost Series


Summary of Contents for Lowrance Ghost Series
- Page 1 Ghost Series ® OPERATOR MANUAL ENGLISH www.lowrance.com...
- Page 3 ®Reg. U.S. Pat. & Tm. Off, and ™ common law marks. Visit www.navico.com/intellectual-property to review the global trademark rights and accreditations for Navico Group and other entities. • Navico ® is a trademark of Navico Group. • Lowrance ® is a trademark of Navico Group. • Ghost ®...
-
Page 5: Table Of Contents
Select a mode or action Service and maintenance General maintenance Maintenance schedule Propeller replacement Configuration mode Factory reset Lowrance App Software updates Update from MFD Update from the app Force a software upgrade Troubleshooting Direction indicator LED and audible feedback Error codes and troubleshooting... -
Page 6: Product Overview
INTRODUCTION This manual is a reference guide for installation and operation of the trolling motor. ⚠ WARNING: This product is intended to be used in freshwater only and a sacrificial anode (sold separately) is required for use in brackish water. Use of the product in brackish water (without the anode) or saltwater will void the warranty. -
Page 7: Safe Operation With The Trolling Motor
Foot pedal Foot pedal M Toe end N Momentary switch O Mode and action keys P Heel end Q Power key and battery capacity indicator R Speed adjustment knob Safe operation with the trolling motor Do not use automatic steering when: •... -
Page 8: Deploy And Stow The Trolling Motor
Deploy and stow the trolling motor Stowed position Deployed position Deploy 1 Release the stow strap (C) and pull the braided stainless steel pull cable by its handle (A) to unlatch the trolling motor from the stowed position. 2 Lift the trolling motor from the stowed position and tilt it down until it is locked in the deployed position. If the trolling motor is turned ON, the lower unit will position itself according to the foot pedal position. - Page 9 Stow The trolling motor should be turned ON during the stowing operation. This will ensure that the lower unit is adjusted to the correct stowing angle. 1 Pull the Braided stainless steel pull cable and handle (A) to unlatch the trolling motor from the deployed position. 2 Lift the pull cable up and backward to slowly lift the trolling motor into the stowed position.
-
Page 10: Adjust The Trolling Motor
ADJUST THE TROLLING MOTOR Depth adjustment 1 Loosen the depth adjustment knob (A). 2 Raise or lower the propulsion motor unit to the desired level. The motor unit should be at least 300 mm (12 in) below the surface of the water. 3 Tighten the depth adjustment knob (A). -
Page 11: Adjust The Flipswitch
Adjust the FlipSwitch The FlipSwitch allows you to move the momentary switch (propeller ON switch) from the left side to the right side of the foot pedal. Tools required • 1x Phillips screwdriver #2 Procedure to move the FlipSwitch 1 Remove the lock screw (A) that secures the cover plate (B). The underside (heel end) of the foot pedal is shown. 2 Press the locking tab (C) upwards and slide the cover plate (B) forward until it is free. - Page 12 3 Remove the screws (D) that secure the FlipSwitch assembly. 4 Turn the FlipSwitch assembly (E) 180° and fasten the screws (D) that secure the FlipSwitch assembly. 5 Slide the cover plate (B) back in place and fasten the lock screw (A).
-
Page 13: Adjust The Braided Stainless Steel Pull Cable Length
Adjust the braided stainless steel pull cable length Tools required • 2x small flathead screwdrivers • ¼” wrench/socket (or adjustable wrench) • 1x side-cutting pliers Procedure 1 Use two small flathead screwdrivers to apply pressure to both sides (B and C) of the locking tabs (A) to remove the handle top cover. -
Page 14: Operation
OPERATION This section describes how to operate the trolling motor using the foot pedal. It is also possible to control the trolling motor from a compatible multifunction display unit (MFD). Refer to the documentation supplied with your MFD for more information. Power the trolling motor ON or OFF Press the power key (A) to power the trolling motor ON or OFF. -
Page 15: Steer With The Foot Pedal
Steer with the foot pedal The direction indicator (A) shows the direction in which the lower unit (B) is pointing. Turn to starboard (right) by pushing the toe end (C) of the foot pedal down. Turn to port (left) by pushing the heel end (D) of the foot pedal down. Activate the propeller The propeller will run as long as the momentary switch (A) is pressed, provided the speed adjustment knob is not in the OFF position. -
Page 16: Adjust The Speed
Use a compatible multifunction display (MFD) to access modes and actions. Refer to the documentation for your MFD for more information. Note: Visit www.lowrance.com to ensure your MFD is compatible and its software is up to date. The trolling motor and ¼... - Page 17 Modes and actions Some modes of operation for the trolling motor are described below. Refer to the documentation for your display unit for more information about modes and actions. Note: The direction indicator is illuminated when in Course lock, Heading lock, or Propeller constant ON mode. ¼...
- Page 18 Adjust speed Change speed by turning the speed adjustment knob on the side of the foot pedal. Note: When the mode is activated, the motor will automatically run to the speed level indicated on the speed adjustment ¼ knob. Adjust Course or Heading When you are in Course lock or Heading lock mode, press and hold the momentary switch, then use the foot pedal to adjust the course or heading.
-
Page 19: Service And Maintenance
SERVICE AND MAINTENANCE For service contact information, spare parts and accessories refer to www.lowrance.com. General maintenance ⚠ WARNING: Neglecting to inspect, maintain, or repair your trolling motor can result in product damage or serious injury. Do not perform maintenance or service on your trolling motor if you are not familiar with the correct procedures. -
Page 20: Maintenance Schedule
Maintenance schedule Item Occurrence Description Batteries Weekly Check terminals for any corrosion or dirt. Clean if necessary. Mount Front latch block Yearly Grease the contact surface (A) of the front latch block with calcium sulfonate marine grease. Braided stainless steel pull Before each use Visually inspect. - Page 21 Item Occurrence Description Bushings As necessary Lubricate brass bushing points (A) with a multi-purpose lubricant. Remove excess quickly to avoid discoloration or collection of dirt. Foot pedal Electrical terminals Yearly Check that terminal screws are not loose. If needed, reapply Tef-Gel to the terminals.
-
Page 22: Propeller Replacement
Propeller replacement Tools required • 17 mm deep socket ⚠ WARNING: Do not use power tools to remove or install the propeller nut. Only hand tools should be used for removal and installation of the nut. Procedure Remove the propeller and inspect the drive pin (A) and propeller shaft (B) for damage. If the shaft is damaged, contact a service center. -
Page 23: Configuration Mode
Configuration mode All setup is done in configuration mode. Enter or exit configuration mode To enter configuration mode, press and hold both Configurable keys 2 and 3 (C and D) until the Power LEDs (E) start blinking. The direction indicator on the upper unit flashes two times and two long beeps sound. You need to exit configuration mode once you have completed the procedures. To exit configuration mode, press and hold both Configurable keys 2 and 3 (C and D) until the Power LEDs (E) stop blinking. The direction indicator on the upper unit flashes three times and three long beeps sound. - Page 24 Calibration of the TMC-1 compass Calibration compensates for the local magnetic field on board the boat, and adapts the sensors to Earth’s magnetic field strength (deviation) for optimal resolution. Note: For optimal performance, recalibrate if the boat has traveled far from the location where the TMC-1 was last ¼ calibrated. This is because the strength of Earth’s magnetic field varies in different locations. The calibration of the compass should be done in calm conditions, with minimal wind and current, to obtain good results.
-
Page 25: Factory Reset
Use the Lowrance: Fishing & Navigation app to register your Ghost trolling motor for support and software updates. Download the Lowrance: Fishing & Navigation app from your favorite application store, or use your phone or tablet to scan the QR code below. -
Page 26: Troubleshooting
TROUBLESHOOTING Problem Action Check battery connections for proper polarity. Make sure terminals are clean and corrosion free. Use fine sandpaper or emery cloth to clean terminals. Motor not running Check the condition of the battery, refer to the battery suppliers recommendations. Check for proper battery voltage. Make sure the trolling motor is in the deployed position. Check battery charge level. -
Page 27: Direction Indicator Led And Audible Feedback
Direction indicator LED and audible feedback The direction indicator light (A) is the set of three illuminated arrows on the top surface of the upper unit. Audible tones Direction indicator light Status/description ON (steady) Propeller is running. 1 short beep Enabling anchor mode. -
Page 28: Error Codes And Troubleshooting
Error codes and troubleshooting Audible tones and Error Troubleshooting Resolution direction indicator flashes 3 short beeps Missing GPS/invalid Check the TMC-1 (compass If the issue persists after heading puck) connection, and performing calibration, 2 short flashes recalibrate bow offset (see please contact a service Missing GPS signal, or page 23). -
Page 29: Foot Pedal Led Indicators
Foot pedal LED indicators The trolling motor power LEDs (A,B) and the battery capacity indicator LEDs (C,D,E) are under the heel, at the rear of the foot pedal. The Anchor mode key (F) is on the top surface of the foot pedal. Routine use (24 V system) Routine use (36 V system) 24 V... -
Page 30: Serial Number
SERIAL NUMBER The serial number of the trolling motor can be found underneath the heel end (A) and the toe end (B) of the foot pedal. - Page 32 ©2024 Navico Group. All Rights Reserved. Navico Group is a division of Brunswick Corporation. ®Reg. U.S. Pat. & Tm. Off, and ™ common law marks. Visit www.navico.com/intellectual-property to review the global trademark www.lowrance.com rights and accreditations for Navico Group and other entities.
Need help?
Do you have a question about the Ghost Series and is the answer not in the manual?
Questions and answers