
Related Manuals for Critical Environment Technologies FCS-4


Summary of Contents for Critical Environment Technologies FCS-4
- Page 1 Installation Manual Rev. C | Firmware 2.2 onwards | 2024.05 Flexible Control System Controllers www.critical-environment.com...
- Page 2 FCS - Installation Manual Rev. C | 2024.05 NEED MORE INFORMATION? This is the FCS Installation Manual for the FCS Flexible Control System with firmware v2.2 onwards. For information on the following topics, please refer to the applicable FCS Operation Manual: •...
-
Page 3: Table Of Contents
Rev. C | 2024.05 FCS - Installation Manual TABLE OF CONTENTS 1 POLICIES ......................5 1.1 Important Note ......................... 5 1.2 Warranty Policy ......................... 5 1.3 Service Policy ..........................6 1.4 Copyrights and Registered Trademarks ................6 1.5 Disclaimer ..........................6 1.6 Revisions ............................ - Page 4 FCS - Installation Manual Rev. C | 2024.05 6.13 Wiring Digital Inputs (CGAS-D, LPT-P and LPT-M Transmitters) .........28 6.13.1 Digital Wire Gauge vs Run Length for CGAS-D ..........29 6.14 Wiring LNK-XT Network Extender Peripheral Device Connections ......30 6.15 Wiring to Building Automation System (BAS)..............32 6.16 Wiring Remote Strobe / Horn Using Output Terminal ..........32 6.17 Wiring Internal Relay Connections ..................32 6.18 Wiring Remote Relay Connections (RLY-4 and RLY-8) ..........33...
-
Page 5: Policies
__________________________________________________________ 1.2 Warranty Policy Critical Environment Technologies Canada Inc. warrants the products we manufacture (excluding sensors, battery packs, batteries, pumps, and filters) to be free from defects in materials and workmanship for a period of two years from the date of purchase from our facility. -
Page 6: Service Policy
FCS - Installation Manual Rev. C | 2024.05 1.3 Service Policy CETCI maintains an instrument service facility at the factory. Some CETCI distributors / agents may also have repair facilities; however, CETCI assumes no liability for service performed by anyone other than CETCI personnel. Repairs are warranted for 90 days after date of shipment (sensors have individual warranties). -
Page 7: Introduction
Rev. C | 2024.05 FCS - Installation Manual Critical Environment Technologies Canada Inc. Unit 145, 7391 Vantage Way, Delta, BC, V4G 1M3, Canada Toll Free: +1.877.940.8741 Telephone: +1.604.940.8741 Email: sales@cetci.com Website: www.critical-environment.com In no event will CETCI, its officers or employees be liable for any direct, special, incidental or consequential damages resulting from any defect in any manual, even if advised of the possibility of such damages. -
Page 8: Instrument Specifications
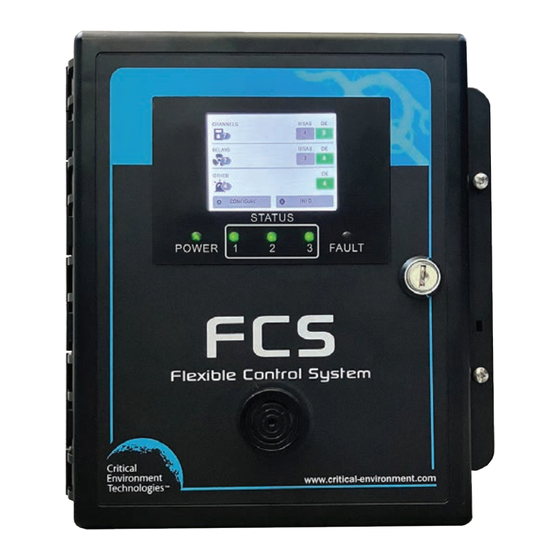
FCS - Installation Manual Rev. C | 2024.05 output signal for WAN communications (for communicating with a BAS) • Supports Modbus® driven VFDs • Flexible configuration of analog outputs • Enhanced logic control, zoning and priority structure capabilities • With the optional Analog Output board(s) (Option -AO or -2AO) installed, the FCS can be configured to have up to 8 internal 4-20 mA or 0-10 volt outputs* for VFD control or usable by any other device requiring a signal representing the levels of gases detected... - Page 9 Rev. C | 2024.05 FCS - Installation Manual USER INTERFACE 8.1 cm / 3.2 in graphic, 1/4 VGA full colour resistive touch LCD Display display and LED indicators for “POWER”, “STATUS 1, 2 and 3” , “FAULT” INPUT/OUTPUT - Modbus® RTU RS-485 Inputs - 4 or 8 internal 4-20 mA analog inputs (Option -AI or -2AI) - Peripheral devices on Modbus®...
- Page 10 -20°C to 40°C (-4°F to 104°F) Operating Humidity 15 - 90% RH non-condensing CERTIFICATION Models: FCS-M-xx, FCS-B-x, FCS-4-M-xx, FCS-4-B-xx, FCS-8-M-xx, FCS-8-B-xx, FCS-32-M-xx, FCS-32-B-xx S/N: FCS4M1603B00001 (example) Rating: 90-240 VAC, 50-60 Hz, 75 W CERTIFIED FOR ELECTRIC SHOCK & ELECTRICAL FIRE HAZARD ONLY. LA CERTIFICATION ACNOR COUVRE UNIQUEMENT LES RISQUES DE CHOC ELECTRIQUE ET D’INCENDIE...
-
Page 11: Maximums By Model
Rev. C | 2024.05 FCS - Installation Manual 3.2 Maximums by Model FCS-4 FCS-8 FCS-32 FCS 128 Gas Channels Analog Inputs Analog Outputs 4 internal 4 internal Relays 4 remote 8 remote 2 internal 2 internal Horn/Strobe Drives 2 remote... -
Page 12: List Of Compatible Devices
FCS - Installation Manual Rev. C | 2024.05 4 LIST OF COMPATIBLE DEVICES NOTE: The FCS does not have any internal gas sensors. It is strictly a controller that can accept digital and analog inputs (ie. transmitters and other remote and/or peripheral devices). -
Page 13: Instrument Features
Rev. C | 2024.05 FCS - Installation Manual RDM Remote Display Modbus® Displays gas readings Four relays, 5 Amp, 120/240 VAC RLY-4 Remote Relay Modbus® Two strobe/horn outputs (0.5 Amp @ 24 VDC) Eight relays, 5 Amp, 120/240 VAC RLY-8 Remote Relay Modbus®... -
Page 14: Interior System Layout (Bottom) Shown With Options -Ai And Ao Installed
FCS - Installation Manual Rev. C | 2024.05 Key Lock (Option -DL) Allows enclosure to be locked Door Screws Secures the door of the enclosure Audible buzzer that sounds when a channel has Door Mounted Alarm gone into alarm 5.2 Interior System Layout (Bottom) Shown with Options -AI and -AO Installed ... -
Page 15: Interior System Layout (Door)
Rev. C | 2024.05 FCS - Installation Manual Connection for up to four 4-20 mA Analog Input Terminal transmitters Optional board for Analog Option -AO shown with 4 analog outputs Output or Analog Input Connection for up to four 4-20 mA or 0-10 volt ... -
Page 16: Optional Internal Analog Inputs And Analog Outputs (Options -Ai And -Ao)
FCS - Installation Manual Rev. C | 2024.05 Programming Port For factory system programming Buzzer Terminal Connection for door mounted buzzer Earth / safety ground connection Earth Ground Buzzer Internal audible alarm 5.4 Optional Internal Analog Inputs and Analog Outputs (Options -AI and -AO)) The FCS does not have any internal analog inputs or analog outputs without the optional -AI and -AO boards installed. -
Page 17: Installation
• One –AI board, adding 4 Analog Inputs (Option -AI) • Two –AI boards, adding 8 Analog Inputs (Option -2AI) (not available with FCS-4) • One –AO board, adding 4 Analog Outputs (Option -AO) • Two AO boards, therefore 8 Analog Outputs (Option -2AO) •... -
Page 18: Location Of System Installation
FCS - Installation Manual Rev. C | 2024.05 6.4 Location of System Installation The FCS should be installed vertically and upright on a flat surface like a wall or a column. Do not mount it upside down, sideways or flat on the floor or other surface. The FCS can be ordered with a key lock (Option -DL). -
Page 19: Standard Enclosure Mounting Components
Rev. C | 2024.05 FCS - Installation Manual 6.5 Standard Enclosure Mounting Components 6.5.1 Enclosure Interior Base NUMBER FUNCTION Molded-in mounting holes Conduit entry points Secure the controller using the four 0.175in / 4.4mm diameter mounting holes provided to maintain watertight status. -
Page 20: Enclosure Top And Bottom
FCS - Installation Manual Rev. C | 2024.05 Allow enough room to allow the end user to open the door fully to access the internal adjustments, approximately 9in / 226mm of space on the left side of the enclosure. 6.5.2 Enclosure Top and Bottom There are ten 0.5in / 12.7mm conduit entry points - three are located along the top of the enclosure, three are located along the bottom and four are located on the back. -
Page 21: Wiring Power Supply Connections
Rev. C | 2024.05 FCS - Installation Manual NUMBER FUNCTION Molded-in mounting bracket Conduit entry points When finished installing or servicing it is recommend you perform a test to ensure the unit and all relays are working properly. 6.6 Wiring Power Supply Connections The FCS requires a 90 - 240 VAC power supply (line voltage power). - Page 22 FCS - Installation Manual Rev. C | 2024.05 306 to 457 1,001 to 1,500 AWG # 458 to 914 1,501 to 3,000 AWG # NOTE: WARRANTY MAY BE VOID IF DAMAGE OCCURS TO CIRCUIT BOARD COMPONENTS FROM THE USE OF SOLID CORE WIRE ATTACHED DIRECTLY TO THE WIRING TERMINALS. When using solid core wiring for distribution (in the conduit), use stranded wire pigtails 18 awg within the enclosure to connect to the circuit board.
- Page 23 Rev. C | 2024.05 FCS - Installation Manual LPT-P or LPT-M with internal sensor(s) 1 watt LPT-P or LPT-M with an ESH-A remote sensor 3 watts CXT2-D Explosion Proof (all relays energized) 6.5 watts Analog Gas Detectors* CGAS-A-CO, CGAS-A-AP-CO 1.7 watts CGAS-A-CO2, CGAS-AP-CO2 1.8 watts CGAS-A-NO2...
-
Page 24: Wiring A Remote Power Supply (Rps-24Vdc)
FCS - Installation Manual Rev. C | 2024.05 long wiring runs that may present a voltage loss condition. (If the overall length of wiring is more than 609 m / 2,000 ft or if the area is electronically noisy, an LNK-XT Network Extender is required to extend the range of the Modbus®... -
Page 25: Wiring Internal Analog Outputs (Option -Ao)
Rev. C | 2024.05 FCS - Installation Manual Devices connected to the LAN Terminal on the main FCS board. Refer to Section 6.12 Wiring LNK-AI Peripheral Device (additional Analog Inputs). A1 through A4 on the Analog Output Terminal on the -AO board provides up to four connections designed to be used for VFD control, BAS / DDC / control panel monitoring, connecting analog remote displays, etc. -
Page 26: Wiring Internal Analog Inputs (Option -Ai)
FCS - Installation Manual Rev. C | 2024.05 NOTE: If two -AI boards are installed, there cannot be any internal analog outputs (Option -AO). If required, remote analog outputs may be added by using one or more LNK-AO Peripheral Devices connected to the LAN Terminal on the main FCS board. Refer to Section 6.11 Wiring LNK-AO Peripheral Device (additional Analog Outputs) for wiring the LNK-AO to the FCS. -
Page 27: Wiring Lnk-Ai Peripheral Device (Additional Analog Inputs)
2 - 10V by using a 500 ohm resistor between the output terminal (e.g. A1) and the ground terminal (GND). Multiple LNK-AO Peripheral Devices can be connected to each other in a daisy-chain fashion. Maximum number of LNK-AO peripheral devices by FCS model: FCS-4 FCS-8 FCS-32 FCS 128... -
Page 28: Wiring Digital Inputs (Cgas-D, Lpt-P And Lpt-M Transmitters)
FCS - Installation Manual Rev. C | 2024.05 For more information on the LNK-AI, refer to the LNK-AI Analog Input Peripheral Device Operation Manual. 6.13 Wiring Digital Inputs (CGAS-D, LPT-P & LPT-M Transmitters) The FCS provides 24 VDC (low voltage power) at the two LAN Terminals on the main board. Any additional power requirements of the system will need to be supplied by RPS-24VDC Remote Power Supply devices. -
Page 29: Digital Wire Gauge Vs Run Length For Cgas-D
Rev. C | 2024.05 FCS - Installation Manual means, four wires run from one end of the digital network to the other, through the same connections along the entire run. From one digital device to the next digital device, A goes to A;... -
Page 30: Wiring Lnk-Xt Network Extender Peripheral Device Connections
FCS - Installation Manual Rev. C | 2024.05 The addition of an RPS-24VDC Remote Power Supply is recommended as follows: For single channel and low consumption dual channel devices, an RPS-24VDC Remote Power Supply should be installed every 32 devices (ie. CGAS-D-CO-NO2). For transmitters connected to ESH-A remote sensors, a remote power supply should be installed every 16 devices (pairs of devices ie. - Page 31 Rev. C | 2024.05 FCS - Installation Manual Maximum number of LNK-XT peripheral devices by FCS model: FCS-4 FCS-8 FCS-32 FCS 128 unlikely to need, unlikely to need 1 max **If more than 3 LNK-XT Network Extenders are required, contact CETCI for more information) For more information about the LNK-XT, refer to the LNK-XT Peripheral Device Operation Manual.
-
Page 32: Wiring To Building Automation System (Bas)
FCS - Installation Manual Rev. C | 2024.05 6.15 Wiring to a Building Automation System (BAS) The WAN Terminal is used to connect the FCS to a Building Automation System (BAS) or other type monitoring system or control panel. Refer to Section 5.2 Interior System Layout (Bottom) for the location of the WAN Terminal. -
Page 33: Wiring Remote Relay Connections (Rly-4 And Rly-8)
Rev. C | 2024.05 FCS - Installation Manual • System relays are SPDT (single pole, double throw) thereby providing one set of usable dry contacts. Because the FCS series systems are designed to be fail-safe, the relay coils are normally energized in non-alarm state for failsafe operation. If required, the FCS can be configured for normal Relay operation. -
Page 34: Wiring Rdm Remote Display Connections
FCS - Installation Manual Rev. C | 2024.05 Maximum number of RLY-4 and RLY-8 remote relay devices by FCS model: FCS-4 FCS-8 FCS-32 FCS 128 1 max 2 max (no RLY-8) Total # of available relays (internal + RLY-4 remote) plus strobe/horn drives is 64. - Page 35 Rev. C | 2024.05 FCS - Installation Manual Similarly, in order for the controller to communicate with the RDM, the two devices must have the same baud rate. The factory default baud rate for all CETCI Modbus® devices is 19,200. If you need to change the baud rate, refer to the RDM Operation Manual for instructions.
-
Page 36: Wired Example Of An Fcs Gas Detection System
FCS - Installation Manual Rev. C | 2024.05 6.20 Wired Example of an FCS Gas Detection System © 2024 All rights reserved. Data subject to change without notice. -
Page 37: Basic System Operation
Rev. C | 2024.05 FCS - Installation Manual 7 BASIC SYSTEM OPERATION NOTE: For functions that do not appear in this section, refer to the FCS Operation Manual. 7.1 Power Up and Warm-up Upon power up, the FCS delays the initializing start-up sequence with a 30 second countdown while it waits to make sure there isn’t a power issue with the system. - Page 38 FCS - Installation Manual Rev. C | 2024.05 priority statuses will be displayed. The statuses below are listed in order of priority from lowest to highest. CHANNELS The CHANNELS category on the main display of the FCS shows a summary of the status of the channels.
- Page 39 Rev. C | 2024.05 FCS - Installation Manual STATUS STATUS DESCRIPTION ABBREVIATION Relay is not tripped by alarm level, time, fault, etc. DISAB Disabled Triggers when a relay is set to disabled SILENC Silenced Relay has been tripped and silenced ON TD In On Time Delay Relay will trip after the on delay...
-
Page 40: Changing The Summary Display To The Channel Display
FCS - Installation Manual Rev. C | 2024.05 LED INDICATORS There are 5 LED lights on the front of the FCS that indicate the following: LED INDICATORS* DESCRIPTION All channels are not detecting gas at any alarm level, the air All are Green is safe Status 1 is Red... -
Page 41: Display Touch Location Calibration
Rev. C | 2024.05 FCS - Installation Manual Press the - or + buttons to change Summary to Channel. Change the scroll rate as desired. Press ENTER. Press HOME and the main display will now look like this: 7.2.2 Display Touch Location Calibration The FCS has a 1/4 VGA full colour resistive touch LCD display. -
Page 42: Accessing The Menu
FCS - Installation Manual Rev. C | 2024.05 7.3 Accessing the Menu From the Summary Display or the Channel Display screen press CONFIGURE to bring up the ENTER PASSWORD screen. Enter one of the following passwords below and then press SUBMIT. •... -
Page 43: Silencing The Internal Audible Alarm, Terminal Connected And/Or Remote Horns And Strobes
Rev. C | 2024.05 FCS - Installation Manual When a value is changed, the SAVE button will turn green. Press it to save the changes and it will change to its standard colour indicating the change has been made. Many of the channel, relay and priority set up screens have an autosave function. If you are going through more channels (or relays or priorities) on the same screen, the system will autosave when you press the + or - to proceed or return to the next channel (relay, priority) number. -
Page 44: Test Menu Functions
FCS - Installation Manual Rev. C | 2024.05 To let the alarm(s) continue sounding, don’t press Silence All. Each alarm will continue sounding until the cause of the alarm comes to an end. NOTE: The Silencing functionality applies to ALL relays that have been configured as silenceable. -
Page 45: Test Strobe
Rev. C | 2024.05 FCS - Installation Manual 7.6.2 Test Strobe NOTE: Before testing the strobe, warn people in the vicinity of where the strobe will be seen so it does not cause unnecessary distress or response. Press CONFIGURE and enter password 2020. Press the SUBMIT button. Press TEST and then TEST STROBE. -
Page 46: Basic Settings And Configurations
FCS - Installation Manual Rev. C | 2024.05 Press CONFIGURE and enter password 2020. Press the SUBMIT button. Press TEST and then TEST ANALOG OUTPUTS. Enter the corresponding number for the analog output that you want to test and enter the length of time you want to test the test to last. -
Page 47: Set Clock
Rev. C | 2024.05 FCS - Installation Manual LAN Modbus® 19,200 changing is not recommended Baud Rate WAN Modbus® Baud Rate 19,200 See FCS Operations Manual for list Modbus ID 1 to 127 WAN BACnet® Baud Rate 76,800 Refer to Section 7.1 MAC Address 1 to 127 Instance ID... -
Page 48: Enable / Disable Data Logging And Changing Logging Interval
FCS - Installation Manual Rev. C | 2024.05 8.3 How to Enable / Disable Data Logging and Change Logging Interval NOTE: The correct time and date should be set prior to enabling data logging. Refer to Section 8.2 Set Clock for more information. The FCS comes standard with an SD card installed and data logging disabled.You can enable data logging and change the defaul the logging interval as required. -
Page 49: How To Clear A Data Logging Failure Fault
Controller, such as a refrigeration application where there are two entrances to the chiller room. This setting allows you to tell the FCS how many RDMs are connected to it, choose the display mode and a scroll rate. Maximum number of RDM Remote Displays by FCS model: FCS-4 FCS-8 FCS-32 FCS 128... -
Page 50: Enable / Disable Channels
FCS - Installation Manual Rev. C | 2024.05 • Page Scroll - ALL channels in the system will be displayed and the four line display will scroll up page by page (four lines at a time) • High Channels - the four line display will show the FOUR channels with the current highest gas readings in order of highest to lowest (based on percentage of range, not measure of unit). -
Page 51: Enable / Disable Relays, Audible, Horns And Strobes
Rev. C | 2024.05 FCS - Installation Manual Use the + or - button or enter the specific channel number by pressing the yellow field and using the keypad to choose the desired channel. Press Enabled or Disabled for that channel. The Save button will turn green after a change has been made. -
Page 52: Options And Accessories
FCS - Installation Manual Rev. C | 2024.05 Use the + and - buttons or enter the specific relay number by pressing the yellow field and using the keypad to choose the relay number, Audible, Strobe or Horn you want to disable. Press Enabled or Disabled. -
Page 53: Manual Shutoff Switch (Option -Sw)
Rev. C | 2024.05 FCS - Installation Manual Operating Temperature -20°C to 65°C (-4°F to 149°F) Certification IP65 rated, NEMA 4X and UL recognized 9.2 Manual Shutoff Switch (Option -SW) An optional emergency stop, push button switch that is factory installed on the side of the FCS enclosure. -
Page 54: Enclosure Door Lock And Keys (Option -Dl)
FCS - Installation Manual Rev. C | 2024.05 9.3 Enclosure Door Lock and Keys (Option -DL) The optional door lock is factory installed at the time of order. Together with the password protected menus, the lock prevents unauthorized access and eliminates tampering within the system. -
Page 55: Maintenance
Rev. C | 2024.05 FCS - Installation Manual 10 MAINTENANCE The FCS requires no assembly and virtually no maintenance. Check the unit for wear and tear, tampering, accidental or deliberate damage; for cracks, water damage, loose screws or wires and make sure there isn’t a buildup of dust on the outside or inside of the enclosure. It is important to ensure that water and/or dust is not somehow entering the enclosure and physically damaging the circuit board or internal components. - Page 56 SAFER AIR EVERYWHERE. www.critical-environment.com FCS20240501-C Unit 145, 7391 Vantage Way, Delta, BC V4G 1M3 Canada Tel: +1.604.940.8741 Toll Free: +1.877.940.8741 © 2024 All rights reserved. Data subject to change without notice.
Need help?
Do you have a question about the FCS-4 and is the answer not in the manual?
Questions and answers