
Related Manuals for Wine Enthusiast S 15


Summary of Contents for Wine Enthusiast S 15
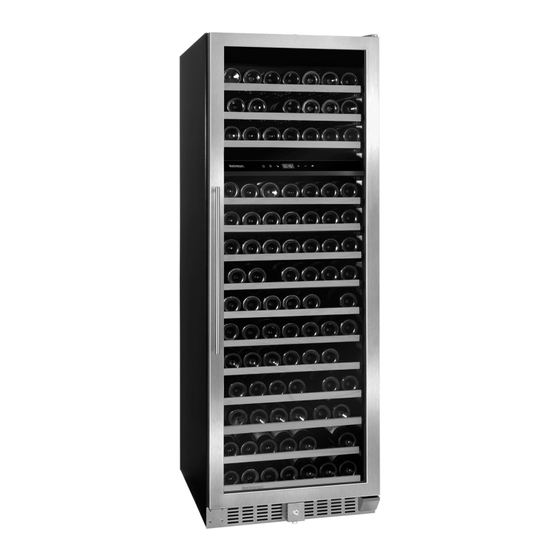
- Page 1 Dual Zone Wine Cellars Models: S 15", S 24" and LX 26" Use and Care Manual features and sizes may vary please read this manual carefully before installing and operating save these instructions...
- Page 2 A Message from Wine Enthusiast: Thank you for purchasing your wine cellar from Wine Enthusiast. We have been dedicated to developing and offering the best selection of wine products for more than 40 years. Our devoted team of wine experts apply their knowledge and passion to develop high-quality, innovative cellars to protect and showcase wines for every wine drinker.
-
Page 3: Table Of Contents
Installation as a Built-In 15" Wine Cellar ............................7 Installation as a Built-In 24" Wine Cellar ............................8 Installation as a Built-In 26" Wine Cellar ............................9 Reversing the Door Swing (S 15" and S 24" Models) ......................10 Reversing the Door Swing (LX Model) ............................. 12 Installing the Handle .....................................14 Operating Your Wine Cellar ..................................15... -
Page 4: Important Safeguards
Important Safeguards When using this appliance, always exercise basic safety precautions, including the following: 1. Read all of the instructions before using this appliance. 2. This appliance is not intended for use by persons (including children) with reduced physical, sensory or mental capabilities, or lack of experience and knowledge, unless they have been given supervision or instruction concerning use of the appliance by a person responsible for their safety. -
Page 5: Safety Precautions
Safety Precautions Electrical Requirement • Make sure there is a suitable power outlet with proper grounding to power the wine cellar. • Avoid the use of three plug adapters or cutting off the third grounding in order to accommodate a two plug WARNING! outlet. -
Page 6: Wine Cellar Features And Use
Handle Upper Zone Lower Zone Gasket Door Shallow Shelf Control Panel Lower Hinge Front Venting Grill Door Lock Leveling Foot (2) S 15" Undercounter Handle Lower Zone Upper Hinge Door Gasket Upper Zone Control Panel Handle Lower Zone Gasket Shallow Shelf... -
Page 7: Shelving (Type And Number Of Shelves Will Vary Per Model)
Shelving (Type and number of shelves will vary per model) Your cabinet was designed to store a maximum number of bottles securely. We recommend that you observe the tips below to optimize loading: • Remove all packing materials from shelves once unit is stable and ready for bottle storage. •... -
Page 8: Installation As A Built-In 15" Wine Cellar
25 " 16 " 34" 5¼" WI N E EN THUSIA ST S 15 " U N D ER CO U N T ER D UAL ZO N E WI N E CELL AR MODEL CELLAR DIMENSIONS DIMENSIONS OF BUILT-IN AREA SINGLE UNIT 34"H x 15"... -
Page 9: Installation As A Built-In 24" Wine Cellar
Installation as a Built-In 24" Cellar These cut out dimensions show the minimum space required for your wine cellar to perform as designed, 34½ " 23½ " 23 " 25 " 24½ " 34" 5¼" WI NE EN THUSI A ST S 24" U N DER CO U N T ER D UAL ZO N E WI N E CELL AR MODEL CELLAR DIMENSIONS DIMENSIONS OF BUILT-IN AREA... -
Page 10: Installation As A Built-In 26" Wine Cellar
Installation as a Built-In 26" Cellar These cut out dimensions show the minimum space required for your wine cellar to perform as designed, ⁄ " ⁄ " ⁄ " ⁄ " ⁄ " ⁄ " WI N E EN THUSIA ST L X 26 " DUAL ZO NE WI NE CELL AR MODEL CELLAR DIMENSIONS DIMENSIONS OF BUILT-IN AREA... -
Page 11: Reversing The Door Swing (S 15" And S 24" Models)
Reversing the Door Swing (Models S 15" & S 24") Before you begin: Tape down shelves to avoid movement during the process The door of this appliance can be hung to open on the left or right side. To reverse the door swing of your cooler and open from the opposite side, please follow the instructions and diagram below. - Page 12 Reversing the Door Swing (Models S 15" & S 24") (continued) 5. Pry out the plastic caps at the left side of the cabinet, and move them to the right side. 6. Install the hinge set which are packed as accessories with the instruction manual to the opposite side.
-
Page 13: Reversing The Door Swing (Lx Model)
Reversing the Door Swing (Model LX) Before you begin: Tape down shelves to avoid movement during the process. The door of this appliance can be hung to open on the left or right side. To reverse the door swing of your cooler and open from the opposite side, please follow the instructions and diagram below. - Page 14 Reversing the Door Swing (Model LX) (continued) 3. Figure 3. Remove the Bottom Hinge Cover (6) by prying it off gently with small flat screwdriver. Remove the Bottom Hinge by unscrewing the Hex Head Screw (3c). Unscrew the Pan Head Screws (7) from bottom left side.
-
Page 15: Installing The Handle
Installing the Handle 1. Pull back the door seal/gasket behind handle location. 2. Insert screws into pre-drilled screw holes. 3. Attach handle and tighten screws. 4. Press door seal back into place. 800.648.6058 WineEnthusiast.com... -
Page 16: Operating Your Wine Cellar
Operating Your Wine Cellar Each wine cellar includes an operating panel on the front of the unit. This operating panel includes several features to operate and control the temperature. POWER LIGHT DISPLAY ZONE LOCK TEMP. TEMP. WINDOW SELECT DOWN Power: Turns the Wine Cellar System ON and OFF (Hold for 3 sec.). -
Page 17: Control Panel Display And Icon Glossary
Control Panel Display The control panel has a ‘sleep mode’ feature to hide the control buttons and display digits. Gently touching the POWER button will cause all of the control buttons to darken (hide), then gently touching any of the controls will wake up and illuminate all of the buttons. -
Page 18: Before You Start
Before You Start The wine cellar should be placed in a location where the ambient temperature is between 60-80° Fahrenheit. If the ambient temperature is above or below this range, the performance of the unit may be affected. For example, placing your unit in extreme cold or hot conditions may cause interior temperatures to fluctuate. -
Page 19: Adjusting The Light Intensity
Door Lock • This unit comes with key lock. • The keys are located inside the plastic bag along with the user manual. To unlock the door, insert the key into the lock and turn counter clockwise. • To lock the door, simply reverse the operation making sure the metal pin is engaged completely. •... -
Page 20: Technical Data
Technical Data DUAL ZONE WINE CELLARS S 15" S 24" INSTALLATION T YPE Freestanding or Built-In ELECTRICAL REQUIREMENTS 115 ~ 60Hz PROTECTION CLASS CLIMATE CLASS AMBIENT TEMPERATURE 60°F – 80°F TEMPERATURE CONTROL RANGE Upper Zone: 41°F – 54°F* • Lower Zone: 46°F – 66°F TOTAL VOLUME 3.1 Cu. -
Page 21: Proper Wine Cellar Care, Cleaning And Maintenance
Proper Wine Cellar Care, Cleaning & Maintenance General • Prepare a cleaning solution of 3-4 tablespoons of baking soda mixed with 2 cups of warm water or use one part Borax for ten parts water (about one cup per gallon). Use sponge or soft cloth, dampened with the cleaning solution, to wipe down your wine cellar. -
Page 22: Troubleshooting Guide
Troubleshooting Guide Many common issues with your wine cellar can be easily solved. Try the troubleshooting tips below if you experience any problems. Wine Cellar Does Not Operate: • Check if wine cellar is plugged in. • Check if there is power in the AC outlet, by checking the circuit breaker. Wine Appears Too Warm: •... -
Page 23: Limited Warranty
Limited Warranty. Exclusion of Certain Damages: Wine Enthusiast’s liability is limited to replacement or repair of the defective wine cellar. Wine Enthusiast shall not be liable for any damages, whether incidental, consequential or otherwise, because of any defective wine cellar. - Page 24 Your Cheat Sheet to Wine Serving Temperatures Too many people pour wine at the wrong temperature destroying its decadent flavors and aromas. Serve your bottlings at perfect temperatures. Here’s everything you need to know. R E CO M M E N DE D ST YLE O F WI N E E X AM PLE SER VI NG TE M PER AT U R E...
Need help?
Do you have a question about the S 15 and is the answer not in the manual?
Questions and answers