
Related Manuals for Wine Enthusiast 264 01 59 03


Summary of Contents for Wine Enthusiast 264 01 59 03
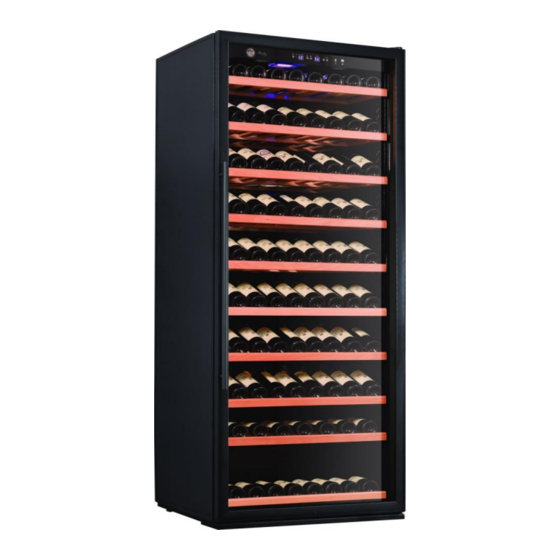
- Page 1 Classic XL Wine Cellar (Features and Size May Vary) User Manual Model # 264 0X 59 0Y X= 1 (Black) or 2 (Stainless Steel) Y= 3 (Right Hinge) or 4 (Left Hinge) PLEASE READ THIS MANUAL CAREFULLY BEFORE INSTALLING AND OPERATING...
-
Page 2: Important Safeguards
IMPORTANT SAFEGUARDS When using this appliance, always exercise basic safety precautions, including the following: 1. Read all of the instructions before using this appliance. 2. This appliance is not intended for use by persons (including children) with reduced physical, sensory or mental capabilities, or lack of experience and knowledge, unless they have been given supervision or instruction concerning use of the appliance by a person responsible for their safety. - Page 3 Risk of child entrapment. Before you throw away your old wine cellar, take off the doors. Leave the shelves in place so that children may not easily climb inside. Thank you for using our Wine Enthusiast product. This easy-to-use manual Model number will guide you in getting the best use of your wine cellar.
-
Page 4: Table Of Contents
Table of Contents IMPORTANT SAFEGUARDS .........................2 Wine Cellar Features and Use ........................5 Initial Setup ...............................5 Temperature Adjustment ..........................6 Shelving ................................6 Installing the Handle ............................8 Operating Your Wine Cellar ........................9 Before You Start ...............................9 Setting the Temperature Control ......................10 Temperature Settings for Serving Wine ....................10 Interior Light ..............................10 Normal Operating Sounds You May Hear .....................11 Technical Data..............................11... -
Page 5: Wine Cellar Features And Use
Electrical Requirement • Make sure there is a suitable power Outlet (115 volts, 15 amps outlet) with proper grounding to power the wine cellar. • Avoid the use of three plug adapters or cutting off the third grounding in order to accommodate a two plug outlet. -
Page 6: Temperature Adjustment
Temperature Adjustment • When the wine cellar is plugged in for the first time, the LED display will show the factory preset temperature of 61°F. • The wine cellar can be set to any temperature between 41° and 72°F to accommodate your wine storage requirements. - Page 7 Rearranging the Shelf Layout You can rearrange the configuration of your wine cellar by moving the location of your shelf brackets. To move a sliding shelf, first remove all bottles then remove the rolling shelf as illustrated above. You are now ready to remove the shelf guide rails.
-
Page 8: Installing The Handle
Reposition guide rail to the new location and reinstall in reverse order. Installing the Handle 1. Pull back the door seal behind handle location. 2. Insert screws into pre-drilled screw holes. 3. Attach handle and tighten screws. 4. Press door seal back into place. -
Page 9: Operating Your Wine Cellar
Operating Your Wine Cellar Each wine cellar includes an operating panel on the front of the unit. This operating panel includes several features to operate and control the temperature. Turns the light ON and OFF. Set temperature display, shows the factory preset or use the UP or DOWN controls to change to your preferred setting. -
Page 10: Setting The Temperature Control
Setting the Temperature Control NOTE: The left side temperature readout indicates set temperature while the right side temperature readout indicates actual current temperature. 1. Make sure power cord is connected to a properly grounded outlet. 2. Turn power ON. 3. Set the desired temperature by pushing the UP or DOWN button. 4. -
Page 11: Normal Operating Sounds You May Hear
Normal Operating Sounds You May Hear • Boiling water, gurgling sounds or slight vibrations that are the result of the refrigerant circulating through the cooling coils. • The thermostat control will click when it cycles on and off. Technical Data Model # 264 0X 59 0Y Wine Cooler X= 1 (Black) or 2 (Stainless Steel) -
Page 12: Proper Wine Cellar Care And Cleaning
Proper Wine Cellar Care and Cleaning Cleaning and Maintenance Warning: To avoid electric shock always unplug your wine cellar before cleaning. Ignoring this warning may result in death or injury. Caution: Before using cleaning products, always read and follow manufacturer’s instructions and warnings to avoid personal injury or product damage. -
Page 13: Troubleshooting
• When moving always move the wine cellar vertically. Do not move with the unit lying down, as possible damage to the sealed system could occur. Note: After moving, wait for 24 hours before plugging in the wine cellar. Troubleshooting Many common issues with your wine cellar can be easily solved. - Page 14 Moisture build-up on interior or exterior of the wine cellar: • This is normal during high humidity periods. • Prolonged or frequent door openings. • Check door gaskets for proper seal. Wine cellar door does not shut properly: • Level the wine cellar. •...
-
Page 15: Limited Warranty
All costs for labor and materials thereto shall be covered during the Limited Warranty Period. If Wine Enthusiast deems the wine cellar is not repairable, Wine Enthusiast will use the value of your original order toward a replacement; provided, however, that the purchaser will be responsible for all shipping and handling costs with respect to the replacement after the initial ninety (90) days after the date of receipt of original purchase. - Page 16 Limited Warranty. Exclusion of Certain Damages: Wine Enthusiast’s liability is limited to replacement or repair of the defective wine cellar. Wine Enthusiast shall not be liable for any damages, whether incidental, consequential or otherwise, because of any defective wine cellar.
Need help?
Do you have a question about the 264 01 59 03 and is the answer not in the manual?
Questions and answers