
Subscribe to Our Youtube Channel
Related Manuals for Midea EM136ALQ


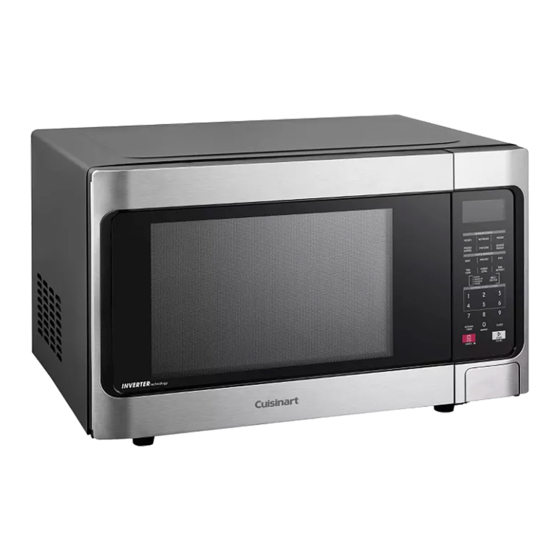
Summary of Contents for Midea EM136ALQ
- Page 1 Microwave Oven Use & Care Guide Models: EM136ALQ Sears Canada Inc. Toronto, Ontario, Canada, M5B 2C3 isit us on the internet at: www.sears.ca P/N:316902436...
-
Page 2: Table Of Contents
Table of Contents Kenmore Appliance Warranty..................3 Important Safety Instructions..................4-6 Microwave Features.....................7 Setting Up Your Oven....................8 Countertop Installation....................9 Microwave Operation....................10 Setting the Clock......................11 Setting the Timer......................11 Microwave Cooking.....................12 Defrosting by Weight....................13 Defrosting by Time......................13 Memory Cooking......................13 Multi-Stage Cooking....................14 Express Cooking......................14 Sensor Cooking......................16-17 Changing Your Overlay to French................18 Solutions to Common Problems..................19 Repair..........................20... -
Page 3: Kenmore Appliance Warranty
KENMORE APPLIANCE WARRANTY One Year Limited Warranty When installed, operated and maintained according to all instructions supplied with the product, if this appliance fails due to a defect in material and workmanship within one year from the date of purchase, call 1-800-4-MY-HOME® for replacement. NOT FOR COMMERCIAL USE. -
Page 4: Important Safety Instructions
IMPORTANT SAFETY INSTRUCTIONS WARNING PRECAUTIONS TO AVOID POSSIBLE EXPOSURE TO EXCESSIVE MICROWAVE ENERGY A ) D o n o t a t t e m p t t o o p e r a t e t h i s o v e n w i t h t h e d o o r o p e n s i n c e o p e n - d o o r o p e r a t i o n c a n r e s u l t i n h a r m f u l e x p o s u r e t o m i c r o w a v e e n e r g y . - Page 5 IMPORTANT SAFETY INSTRUCTIONS WARNING To reduce the risk of burns, electric shock, fire, injury to persons or exposure to excessive microwave oven energy when using your appliance, follow basic safety precautions, including the following: 10. Do not operate this oven if it has a damaged Read all instructions before using the cord or plug, if it is not working properly or if it appliance.
- Page 6 IMPORTANT SAFETY INSTRUCTIONS RADIO INTERFERENCE 1. Operation of the microwave oven may cause interference to your radio, TV or similar equipment. 2. When there is interference, it may be reduce or eliminated by taking the following mea- sures: A. Clean door and sealing surface of the oven. B.
-
Page 7: Microwave Features
MICROWAVE FEATURES UTENSILS CAUTION PERSONAL INJURY HAZARD Tightly-closed utensils could explode. Closed containers should be opened and plastic pouches should be pierced before cooking. See the instructions on "Materials you can use in microwave oven or to be avoided in microwave oven." There may be certain non-metallic utensils that are not safe to use for microwaving. -
Page 8: Setting Up Your Oven
SETTING UP YOUR OVEN Parts and Accessories A) Control Panel B) Turntable shaft C) Turntable ring assembly D) Glass tray E) Observation window F) Door assembly G) Safety interlock system Installation Notes: Never place the glass tray upside down. The glass tray should never be restricted. Both glass tray and turntable ring assembly must always be used during cooking. -
Page 9: Countertop Installation
COUNTERTOP INSTALLATION Remove all packing material and accessories. Examine the oven for any damage such as dents or broken door. Do not install if oven is damaged. Remove any protective film found on the microwave oven cabinet surface. Do not remove the light brown Mica cover that is attached to the oven cavity to protect the magnetron. -
Page 10: Microwave Operation
MICROWAVE OPERATION (1) popcorn (13) express cook (3 instant settings) (2) sensor reheat (14) number pads (0 thru 9) (3) frozen pizza (15) power level (4) favorite (16) cook time (5) fish (17) clock (6) meat (18) timer (7) time defrost (19) STOP/CANCEL - during cooking, press this pad once to pause cooking function, press this pad twice (8) fresh veggie... -
Page 11: Setting The Clock
OPERATION SETTING THE CLOCK When the microwave oven is plugged in, the oven displays “0:00”, and beeps once. The time you enter must be between 1:00 - 12:59. Example: to set 12:12 1. Press the clock button, the oven displays 00:00, the first 0 flashes, and the clock icon Clock lights. -
Page 12: Microwave Cooking
OPERATION MICROWAVE COOKING Select different microwave power level and set cooking time as desired. There are ten power levels from which to choose. Level Power 100% 90% 80% 70% 60% 50% 40% 30% 20% 10% Display PL10 PL9 PL8 PL7 PL6 PL5 PL4 When a power level between level 8-10 is chosen, the... -
Page 13: Defrosting By Time
OPERATION DEFROST BY TIME 1. Press Time Defrost. The oven displays 00:00. Time icons light up. Defrost 2. Press the number keys to set defrosting time. 3. Press Start/+30sec button to start defrosting. 4. The default power level is PL3 and cannot be changed. -
Page 14: Multi-Stage Cooking
OPERATION MULTI-STAGE COOKING You may set a maximum of two cooking stages. If one of the stages is defrost, it will be the first stage. The microwave oven will beep twice after each of the cooking stages, then the next stage will begin. Note: Auto Menu cannot be set as one of the multi-stage options. - Page 15 POPCORN Popcorn 1. Touch Popcorn once for 2. Touch Popcorn twice for 1.75 3. Touch Popcorn three times for 3.5 oz. 4. Touch START/+30 SEC to begin cooking.
-
Page 16: Sensor Cooking
SENSOR COOKING The microwave oven sensor automatically adjusts the cooking time to the type and amount of cooking desired. For example, if a frozen entree is selected, SC-8 is displayed. Press Start/+30sec to start the sensor reheat function, and SC-8 flashes. You do not need to set the time. The sensor beeps 5 times when finished. - Page 17 OPERATION Sensor Cook Menu Chart Menu Weight Initial Additional Temperature Instructions SC-1 8-12 oz. + 41° F This feature reheats a dinner plate. It may (5 C) ° Sensor Reheat (225-340g) be covered, but must have a vent for escaping steam. While cooking time counts down, press Stop/Cancel to pause in order to mix food.
-
Page 18: Changing Your Overlay To French
OPERATION Changing the overlay for your Kenmore oven from English to French is very simple. Follow the steps below to make the change. 1. Your microwave comes with a default English version of the overlay. 2. Peel the overlay from the top. 3. -
Page 19: Solutions To Common Problems
BEFORE YOU CALL SOLUTIONS TO COMMON PROBLEMS Troubleshooting Check your problem using the chart below and try the solutions. If the oven still does not work properly, contact the nearest authorized service center. Trouble Possible Cause Possible Remedy Oven will not start Electrical cord for oven is not Plug into the outlet plugged in. -
Page 20: Repair
Get it fixed, at your home or ours! YOUR HOME F o r r e p a i r - i n y o u r h o m e - o f a l l m a j o r b r a n d a p p l i a n c e s , l a w n a n d g a r d e n e q u i p m e n t , o r h e a t i n g a n d c o o l i n g s y s t e m s , n o m a t t e r w h o m a d e i t , n o m a t t e r w h o s o l d i t ! F o r t h e r e p l a c e m e n t p a r t s , a c c e s s o r i e s a n d o w n e r ’... -
Page 21: Kenmore Microwave Warranty
WARRANTY KENMORE MICROWAVE WARRANTY For ONE YEAR from date of purchase, Sears will replace with the same unit if there is any defect in material or workmanship, subject to the exclusions below. This warranty is in addition to any statutory warranty SERVICE TYPE MICROWAVE SIZE Carry In... - Page 22 Four à microondes Manuel d’utilisation et d’entretien ALQ-P0HA Modèles Sears Canada Inc. Toronto, Ontario, Canada, M5B 2C3 Visitez notre site Internet à l’adresse www.sears.ca P/N:316902436...
- Page 25 AVERTISSSEMENT AVERTISSSEMENT ATTENTION...
- Page 26 AVERTISSSEMENT...
- Page 27 AVERTISSSEMENT...
- Page 28 ATTENTION...
- Page 29 Installation de la plaque tournante Moteur (face inf rieure) Plateau de verre Axe de la plaque tournante Ensemble de plaque tournante...
- Page 30 12 pouces(30cm) 3.0 pouces(7.5cm) OUVERT 3.0 pouces(7.5cm) AVERTISSSEMENT...
- Page 31 STOP/CANCEL pause...
- Page 32 clock Clock 1 2 1 2 Clock clock Timer...
- Page 33 Cook time 1 0 0 0 power level Power Level Weight Defrost...
- Page 34 Time Defrost Favorite Cook time § 5 0 0 Power power level Level § § Cook time 1 0 0 0 power level § Favorite...
- Page 35 Cook time 5 0 0 Cook time 1 0 0 0...
- Page 36 POPCORN Popcorn START/+30 SEC...
- Page 37 Stop/Cancel § § § § § § Stop/Cancel § §...
- Page 38 Stop/Cancel Stop/Cancel Stop/Cancel Stop/Cancel Stop/Cancel...
Need help?
Do you have a question about the EM136ALQ and is the answer not in the manual?
Questions and answers
What are the codes flashing across the top of control panel
On the Midea EM136ALQ microwave, flashing codes on the control panel indicate selected power levels or modes:
- When a power level between PL8 and PL10 is selected, the corresponding code (e.g., PL8 for 80% power) flashes to confirm the setting.
- During cooking, the time and relevant icons also flash to show the oven is operating.
- In Defrost by Weight mode, the first digit flashes while entering the weight.
Flashing indicates the microwave is ready for the next input or is in operation.
This answer is automatically generated