
Related Manuals for Midea EM134A2WP


Summary of Contents for Midea EM134A2WP
- Page 1 Owner’s Manual Microwave Oven Household Use Only Model No. EM134A2WP READ ALL INSTRUCTIONS CAREFULLY BEFORE USING THE OVEN. us via the web at: ance, p contact u ia the web at: ASSIST LEASE Printed in China Canada Inc., 2022...
- Page 2 CONTENTS Safety Information IMPORTANT SAFETY INSTRUCTIONS ........................1-3 Utensils ....................................Radio Interference ................................3 Grounding Instructions ..............................4 Installation ................................5 Food Preparation ..............................5-6 Cookware Guide................................ 7 Location of Controls ..............................8 Operation Using the Microwave for the First Time ........................9 Setting the Clock ...............................
- Page 3 IMPORTANT SAFETY INSTRUCTIONS Your safety and the safety of others are very important. We have provided important safety messages in this manual and on your appliance. Always read and obey all safety messages. This is the safety alert symbol. It is used to alert you to potential hazards that can kill or hurt you and others. All safety messages will follow the safety alert symbol and either the word “DANGER”, “WARNING”...
- Page 4 IMPORTANT SAFETY INSTRUCTIONS (con�nued) 10. DO NOT allow children to use this appliance, unless closely supervised by an adult. DO NOT assume that because a child has mastered one cooking skill he/she can cook everything. 11. DO NOT operate this appliance if it has a damaged cord or plug, if it is not working properly, or if it has been damaged or dropped. 12.
- Page 5 IMPORTANT SAFETY INSTRUCTIONS (con�nued) 3. DO NOT dry clothes, newspapers or other 2. DO NOT operate the oven without the Glass Tray fully materials in the oven, or use newspaper or engaged on the drive hub. Improper cooking or damage to paper bags for cooking.
- Page 6 GROUNDING INSTRUCTIONS WARNING WARNING Electric Shock Hazard: Improper use of the grounding can result in a risk of electric Improper use of the grounding can result in electric shock. shock. Consult a qualified electrician or serviceman if the A short power-supply cord is provided to reduce the risks grounding instruc�ons are not completely understood, or if resul�ng from becoming entangled in or tripping over a longer doubt exists as to whether the appliance is properly grounded.
- Page 7 Installation Examine Your Oven Installation Unpack oven, remove all packing material and examine the oven for DO NOT block air vents. If they are blocked during operation, the any damage such as dents, broken door latches or cracks in the door. oven may overheat.
- Page 8 Food Preparation (continued) 3) DEEP FAT FRYING 8) THERMOMETERS • DO NOT deep fat fry in your microwave oven. Cooking oils • DO NOT use a conventional meat may burst into flames and may cause damage to the oven and thermometer in may result in burns.
- Page 9 Cookware Guide This section answers the question, “Can I use in the Microwave?” Aluminum Foil Glass Jars Check Microwave Safe manufacturers’ directions for recommended uses. Some microwave safe It is not recommended No. Most glass jars are not plastic containers are not suitable for cooking to use.
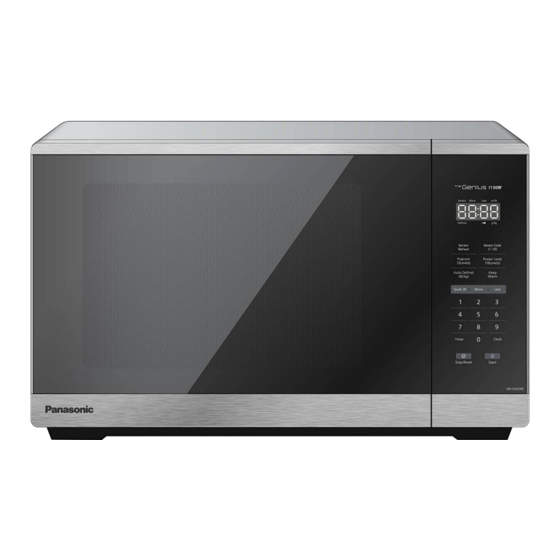
- Page 10 Location of Controls Auto Defrost Pad External Air Vent (See page 13) Internal Air Vent Stop/Reset Pad is pressed once Keep Warm Pad (See page 11) Door Safety Lock System during oven operation, Start Quick 30 Pad (See page 11) Exhaust Air Vent Pad must be pressed again to More Pad (See page 12)
- Page 11 Operation Setting the Child Setting the Clock Using the Microwave Safety Lock for the First Time Press Timer to cycle between the sound switch system. Beep On or Beep Off. Display Window Plug into a properly grounded electrical outlet. The oven When the time of day appears automatically defaults to the in the display, press Start three...
- Page 12 Operation (continued) Cooking Setting a Standing Time Somerecipescallfor a standing timeaftercooking. To do this, repeatsteps 1 and 2 in the Cooking section on previous page.Thenpress Timer . Press Start; the cooking will Note: Do not skip step 1, evenuse If cooking at high power (PL10), start and the time will count high power PL10.
- Page 13 Operation (continued) Quick 30 Keep Warm Setting a Delayed (Will keep food warm for up to (Set or add cooking time in Start 30 minutes after cooking) 30 seconds increments) Press Keep Warm. The start time can be delayed to start cooking at a later time. To do this, first press Timer .
- Page 14 Operation (continued) Popcorn (Example: To pop 3.5 oz (100 g). of popcorn) NOTES: Pop one bag at a time. Place bag in oven according to manufacturers’ directions. Start with popcorn at room Press Popcorn until the desired temperature. size appears in the display. Allow popped corn to Once for 3.5 oz (100g ), twice for sit unopened for a few...
- Page 15 Operation (continued) Auto Conversion Defrosting Tips & Techniques Defrost Follow the chart to convert Preparation For Freezing: 5. Drainliquidsduringdefrosting. ounces or hundredths of a 1. Freeze meats, poultry, and fish in 6. Turn over (invert) items during packages with only one or two defrosting.
- Page 16 Operation (continued) Sensor Cook Sensor Reheat NOTES: NOTES: 1. After having used the Sensor 1. After having used the Sensor Cook feature a few times, you Reheat feature a few times, you may decide you would prefer may decide you would prefer your food cooked to a different your food cooked to a different doneness –...
- Page 17 Operation (continued) Sensor Cook Chart Setting the Timer See the chart below for Sensor Cook categories. Recipe Hints Serving/Weight Pierce each potato with a fork 6 times spacing around 1 - 4 potatoes surface. Place potato or potatoes around the edge of (6 - 8 oz.
- Page 18 Operation (continued) MICROWAVE RECIPES OMELET Basic Omelet Recipe Yield: 1 Serving 1 tablespoon butter or margarine 2 eggs 2 tablespoons milk Salt and ground black pepper, if desired Heat butter in a microwave safe 8-inch round dish, 20 seconds at PL10, or until melted. Turn the dish to coat the bottom with butter.
- Page 19 Food Characteristics Food Characteristics Covering As with conventional cooking, moisture evaporates during microwave Bone and Fat cooking. Casserole lids or plastic wrap are used for a tighter seal. When using Both bone and fat affect cooking. Bones may cause plastic wrap, vent the plastic wrap by folding back part of the plastic wrap irregular cooking.
- Page 20 Care and Cleaning of Your Microwave Oven Please see below and the following page for particular cleaning instructions for each section of the oven. BEFORE CLEANING: Unplug oven at wall outlet. If outlet is inaccessible, leave oven door open while cleaning. AFTER CLEANING: Be sure to place the Roller Ring and the Glass Tray in the proper position and press Stop/Reset Button to...
- Page 21 Before Requesting Service See below before calling for service, as most problems can easily be remedied by following these simple solutions: Some radio and TV interference might occur when you cook with the microwave The oven causes TV oven. This interference is similar to the interference caused by small appliances interference.
- Page 22 Limited Warranty (Only for Canada) Canada Inc. 5770 Ambler Drive, Mississauga, Ontario L4W 2T3 PRODUCT – LIMITED WARRANTY Canada Inc. warrants this product to be free from defects in material and workmanship under normal use and for a period as stated below from the date of original purchase agrees to, at its option either (a) repair your product with new or refurbished parts, (b) replace it with a new or a refurbished equivalent value product, or (c) refund your purchase price.
- Page 23 Specifications Power Source ............................................120 V, 60 Hz Power Consumption ........................................13.5 Amps, 1,500 W Cooking Power* ............................................1,100 W Outside Dimensions (W x H x D) ................................20 ⁄ ”x 12 ⁄ ” x 16 ⁄ ” (519 mm x 315 mm x 410 mm) Oven Cavity Dimensions (W x H x D) ..............................
- Page 24 User’sRecord The serial number of this product may be found on the back side of the oven or on the left side of the control panel. You should note the model number and the serial number of this oven in the space provided and retain this book as a permanent record of your purchase for future reference.
Need help?
Do you have a question about the EM134A2WP and is the answer not in the manual?
Questions and answers