Table of Contents
Advertisement
Quick Links
Watch Quick Setup Videos at
www.skylinkhome.com/videos
or scan
IMPORTANT:
• Please read this manual and the enclosed safety materials carefully!
• Safety Beam Sensor MUST BE INSTALLED and aligned properly.
• Periodic checks of the openers are required to ensure safe operation.
• Save this manual for future reference.
• This Equipment meets or exceeds all Federal, State and UL325
Safety requirements.
• For more information updates and useful links, please visit our website
https://www.skylinkhome.com
DO NOT RETURN TO THE STORE, CONTACT OUR CUSTOMER SERVICE
1-800-304-1187 M-F 9am-5pm Online Chat: www.skylinkhome.com
support@skylinkhome.com
™
S
M
O
Owner's Manual
Garage Door Opener
For residential use only
Advertisement
Table of Contents

Related Manuals for SkyLink SMO


Summary of Contents for SkyLink SMO
- Page 1 ™ Garage Door Opener Owner’s Manual For residential use only Watch Quick Setup Videos at www.skylinkhome.com/videos or scan IMPORTANT: • Please read this manual and the enclosed safety materials carefully! • Safety Beam Sensor MUST BE INSTALLED and aligned properly. •...
-
Page 2: Table Of Contents
INTRODUCTION CONTENTS Important Safety Information Congratulations on your purchase of a Skylink Garage Door Opener. The documentation provided with Introduction ............1 your opener has been carefully designed and organized to make the assembly, operation, and continued Pre-Installation Checklist ......3 maintenance of your product as easy and safe as possible. Make sure the garage door opener is installed, Parts And Accessories ........4... - Page 3 INTRODUCTION (continued) IMPORTANT INSTALLATION INSTRUCTIONS WARNING - To reduce the risk of severe injury or death: 1. READ AND FOLLOW ALL INSTALLATION INSTRUCTIONS. 3. Remove or disable all pull ropes, and all locks connected to the garage door before installing the opener. 5.
-
Page 4: Pre-Installation Checklist
PRE-INSTALLATION CHECKLIST Check the following items before assembling the opener: • Identify the door type: sectional door. • Ensure your garage door is balanced and is not sticking or binding. • Here is how to check the door balance: • From outside the garage, slowly open the door all the way and close it all the way- DOOR SHOULD NOT BIND OR RUB. -
Page 5: Parts And Accessories
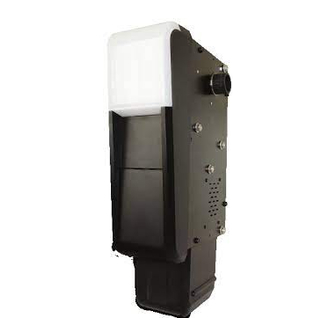
PARTS AND ACCESSORIES Save the carton and packing material until the installation and adjustment is complete. Instructions for the accessories will be attached to the accessory and are not included in this manual. The images throughout this manual are for reference only, your product may look different. Accessories J1. - Page 6 PARTS AND ACCESSORIES (continued)
-
Page 7: Important Instructions
IMPORTANT INSTRUCTIONS To reduce the risk of severe injury or death: 1. Read and follow all installation instructions. 6. Do not connect the opener to a power source until instructed to do so. 2. Check with the door manufacturer to determine if additional 7. - Page 8 IMPORTANT INSTRUCTIONS (continued) Planning: Survey your garage area to see if any of the conditions below apply to your installation. Depending on your requirements, additional materials may be required. This garage door opener is compatible with: Doors that use a torsion bar and springs. The torsion bar must be 1 inch (2.5 cm) in diameter.
-
Page 9: Assemble The Smo
ASSEMBLE THE SMO 1. Attach the Coupler to the Garage Door Opener Motor Shaft The garage door opener can be installed on either side of the door (see Planning section page 7}. The illustrations shown are for installation on the left side. -
Page 10: Attach Mounting Bracket To Garage Door Opener
ASSEMBLE THE SMO (continued) 2. Attach Mounting Bracket to Garage Door Opener Loosely attach slotted side of mounting bracket to the same side of the garage door opener as the coupler, using screws provided. NOTE Do not tighten screws until instructed. -
Page 11: Installation
INSTALLATION Step 1. Position and Mount the Garage Door Opener NOTE. For additional mounting options refer to the accessories page. 1. Close the garage door completely. 2. Slide the garage door opener onto the end of the torsion bar. If the torsion bar is too long or damaged, you may need to cut the torsion bar. - Page 12 INSTALLATION (continued) 0.25” min. space between bearing and coupler Torsion Bar Set screws Bearing Plate (Torsion Bar) NOTE. After fastening the screws to the wood or wall, align the leveler and tighten the nut on the side of the bracket.
-
Page 13: Attach The Emergency Release Rope And Handle
INSTALLATION (continued) Step 2. Attach the Emergency Release Rope and Handle 1. Thread one end of the rope through the hole in the top of the red handle so "NOTICE" reads right side up. Secure with an overhand knot at least 1 inch (2.5 cm) from the end of the rope to prevent slipping. 2. -
Page 14: Install Door Lock
INSTALLATION (continued) 2*Ø 1/4” Step 3. Install Door Lock 1-1/8” (0.65 cm) (2.84 cm) The door lock is used to prevent the garage door from being manually opened once the door is fully closed. 1. The door lock must be mounted within 4.2’ (1.3 m) of garage door opener with approximately a 3 inch (7.6 cm} 3-11/16”... -
Page 15: Attach The Cable Tensioner
INSTALLATION (continued) Step 4. Attach the Cable Tensioner Cable Insert and tighten the two screws 23-5/8” (40~60 cm) -
Page 16: Install The Battery Backup (Optional)
INSTALLATION (continued) Step 5. Install the Battery Backup (Optional) Connect the Battery Screws 2* M4x8mm NOTE. To install the backup battery, open the cover, the back and middle of the opener). Finally fasten the battery with two screws and check that it is secure. Then attach the connector to the main board. -
Page 17: Install The Door Control
INSTALLATION (continued) Step 6. Install the door control WARNING Install door control within sight of garage door. to garage door opener Never permit children to operate door control. Always keep garage door in sight until door is fully closed. Do not operate door unless it can be seen clearly. Deluxe Wall Console 1. -
Page 18: Wire The Door Control To The Garage Door Opener
INSTALLATION (continued) Step 7. Wire the door control to the garage door opener 1. Uncoil the wires and run them from the door control to the garage door opener. If you attach the wire to the wall and ceiling with staples (not provided), do not pierce the wire with the staple as this may cause a short or an open circuit.
Need help?
Do you have a question about the SMO and is the answer not in the manual?
Questions and answers