Stealth Cam STC-G45NGMAX - Scouting Camera Manual
- Instruction manual (54 pages)
Advertisement
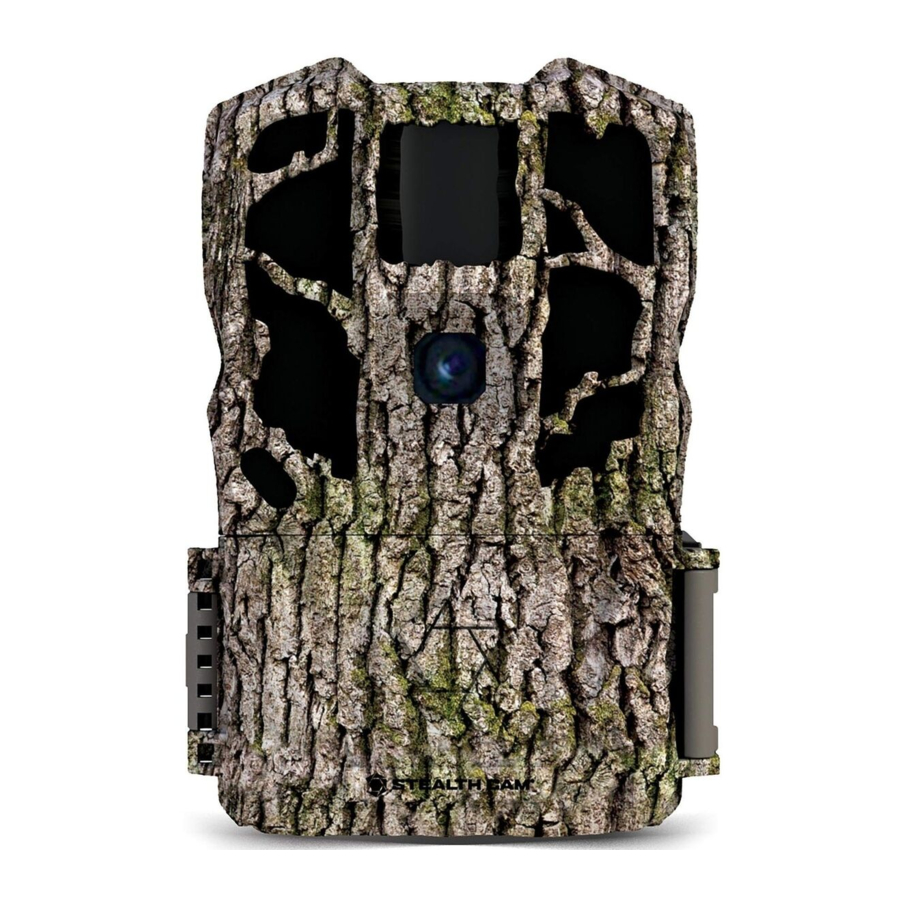
CAMERA OVERVIEW


GENERAL INFORMATION
Storing conditions
- Operating Environment: 14 to 104 deg F (- ‐10 to 40 deg C). 20- ‐85% relative humidity, non- ‐condensing.
Special care instructions!!
- The camera is designed to be weather resistant. Never attempt to immerse the unit in water or any other liquid. This will damage the unit and void the warranty.
- Do not mix old and new batteries.
- Do not mix alkaline, standard, or rechargeable batteries.
- Use a soft lens cloth for cleaning lens. Avoid touching lens with fingers.
- Remove dirt or stains with a soft cloth dampened with water or neutral detergent. Keep your camera in a dry and cool dust- ‐free environment or container when it is NOT used.
- Remove batteries when camera is NOT in use for an extended period of time.
- Avoid dropping your camera on to a hard surface.
- Do not disassemble your camera.
- Do not access the camera's internal components compartment for unauthorized service, as this could cause serious damage to the unit and WILL void the warranty.
NOTE: This camera is a precision electronic device. Do not attempt to service this camera yourself, as opening or removing covers may expose you to dangerous voltage points or other risks.
CAMERA PROGRAMMING
The G45NGMAX features six distinct modes of operation: OFF / Q1 / Q2 / Q3 / CUSTOM / TEST. Each setting is activated based upon the position of the switch on the inside of the unit.

OFF – This position completely powers down the unit.
Q1 – This is the first Quick Set programming mode. When the camera is changed to the this mode, the display screen will give a digital read out of how the camera is preprogrammed. It will scroll across the display as follows:
PHOTO...8.0MP...30 S DELAY...3 PHOTO BURST
With this setting the camera is preprogrammed to take photos at 8.0MP resolution, a 30 second timeout delay between activations and takes a burst of 3 photos every trigger activation.
Q2 – This is the second Quick Set programming mode. This setting is preprogrammed to take photos as 8.0MP resolution, 30- ‐second timeout delay and take a single photo per trigger activation.
Q3 – This is the third Quick Set programming mode. This setting the camera is preprogrammed to take a 720P HD Video with audio, have a 30 second timeout delay between activations, and each video will be 10 seconds in length.
CUSTOM – This is the fifth setting and is defined by the user. When the camera is changed to this mode, the display screen will reflect the last program setting: Number of images on the memory card, Countdown timer and Battery percentage.
| PHOTO | 00000 |
| 00:30 |  100% 100% |
The system default programming is set to 8.0MP, 5-second timeout delay and 1 Photo Burst. The 30- ‐second timer on the lower left of the display will count down towards 0 showing how much time is left to enter the Custom configuration mode. Should no change be made, the system will give an additional 30 seconds for the operator to move out of the coverage area before the camera becomes active.
To make changes to the programming, press the MENU button to enter the configuration menu before the countdown reaches zero. When in the MENU configuration, pressing the DOWN arrow button will move the configuration to the next setting option. Pressing the ENTER button on the listed configuration option will cause the option to blink and allow it to be changed. Pressing ENTER again once an option has been changed will set the new configuration, save it to the camera's memory, and return to selection section of the MENU configuration. Once all the settings have been changed to the operator's desired settings pressing the MENU button will return to the initial display and the 30- ‐second timer will start the countdown again. The following are the options and descriptions of how to change the configuration:
- SETUP DATE – 01/01/18 (default): This setting is used to give the camera the correct date to use on the Info Bar of the images. The format is in a MM/DD/YY setup. With the MM (month) setting blinking, use the UP and DOWN arrows to be change the setting from 1 to 12. Once this setting is on the appropriate month, press the RIGHT arrow key to move to the DD (day) setting and it will start to blink. Using the UP and DOWN arrows will allow the setting to be change from 1 to 31 based upon the MM that has previously set. Again when this setting is on the appropriate day, press the RIGHT arrow key to move to the YY (year) setting and it will start to blink. Using the UP and DOWN arrows will allow the setting to be changed from 14 to 35.
- SETUP TIME – 12:00AM (default): This setting is used to give the camera the correct time to use on the Info Bar of the images. By default it will be setup for Central Standard Time (CST). The default format is in a HH/MM/AP setup. With the HH (hour) setting blinking, use the UP and DOWN arrows to change from 1 to 12. Once this setting is on the appropriate hour, press the RIGHT arrow key to move to the MM (minute) setting and it will start to blink. Using the UP and DOWN arrows will allow the setting to be change from 00 to 59. Again when this setting is on the appropriate minute, press the RIGHT arrow key to move to the AP (am/pm) setting and it will start to blink. Using the UP and DOWN arrows will allow the setting to be changed from AM to PM.
- TIME ZONE – CST (default): This allows you to set your camera to different time zones. By pressing the ENTER button and choosing between the following options below and pressing Enter again, you will save your selection. Eastern, Central, Mountain, Pacific, Alaskan, Hawaiian.
- TIME FORMAT – 12 HOUR (default): This setting is used to tell camera if the time programmed and displayed on the Info Bar should be in the basic 12 hour (AM/PM) format or the 24 hour (military) format. With this option blinking, pressing the UP or DOWN arrow buttons will cause the camera to cycle between the two options. NOTE: Should the format be changed to 24 hour, the previous SETUP TIME will now be adjusted as such and remove the AM/PM part of the time.
- MODE – This setting is used to tell the camera how it should take its images. The camera is equipped with TRIAD Technology, allowing for 3 different options to be selected by the user. With this option blinking, use the UP or DOWN arrow key to move between the options of: PIR PHOTO, PIR VIDEO, or TIME LAPSE. Based upon the selection chosen the menus for the camera will change.
- OPERATING HOURS: This new function allows you to choose when you'd like the camera to be active and working. By pressing the ENTER button and choosing between the two options below and pressing Enter again, you will save your selection.
- 24/7 (default): This puts the camera in normal 24 hours a day working mode.
- SCHEDULED: This allows you to tell the camera what time range it should be operational and not to be operational.
- START TIME (HH:MM): Start time you want the camera to be active. (Default - 08:00AM)
- END TIME (HH:MM): End time you want the camera to be non- ‐active. (Default - 05:00PM)
- PIR PHOTO (default): In this mode the camera will take a designated amount of pictures with a designated timeout when the camera senses activity in front of the unit. This mode is available for both day and night activities.
- PHOTO RES – 8.0 MP (default): This setting is used to determine the Megapixel resolution of each image taken by the camera. With this option blinking, use the UP or DOWN arrow key to move between the options of: 26MP, 16MP 8MP, or 4MP. The higher the resolution of an image the more space the file will take on the SD memory card.
- PIR DELAY – 00min 05sec (default): This setting is used to determine the length of the time that the camera will wait before it reinitializes its PIR sensor for the next activation. With the TL mode this setting is only active if TL Delay is set to 1 min or greater. This setting can be changed between the numbers of 00min 02sec to 59min 59sec. With this option blinking, use of the UP and DOWN arrows will allow the minutes setting to be changed from 00 to 59. Once this setting is on the appropriate minutes, press the RIGHT arrow key to move to the seconds setting and it will start to blink. Use of the UP and Down arrows will allow the seconds setting to be changed from 00 to 59 min (02 to 59 seconds if minutes = 00).
- PIR RANGE – STANDARD (default): This setting allows you to control the sensitivity distance the PIR will be activated. These distances can vary depending on environmental conditions. This setting will change between EXTENDED which will trigger about 1/3 further than the STANDARD setting, the STANDARD setting, or NEAR FIELD that will only trigger on movement closest to the camera.
- REDUCE BLUR – ADVANCED (default): This setting is used to determine if the camera should use the MATRIX Blur reduction technology to dramatically reduce the blur effect resulting in clearer night time infrared shots. (STANDARD) Minimizes blurring effect in images while retaining long-range night image capability. (ADVANCED) Enhanced blur reduction providing a balance between brightness and image sharpness. (PROGRESSIVE) Maximum blur reduction achieved through faster shutter speed. This setting may cause a slight reduction in night time range and increased grain in the image. With this option blinking, pressing the UP or DOWN arrow buttons will cause the camera to cycle between the three options of STANDARD, ADVANCED, and PROGRESSIVE.
- PHOTO BURST – 1 PHOTO (default): This setting is used to determine the number of photos the camera will take during its activation. This setting can be changed between 1 PHOTO up to 9 PHOTOS. With this option blinking, use the UP or DOWN arrow key to move between the value range in increments of 1.
- BURST INTERVAL - 1 Second (default): This setting is used to determine the delay between multiple burst of photos. This setting can be changed between 1 SECOND and 5 SECONDS. With this option blinking, use the UP or DOWN arrow key to move between the settings.
- IR BRIGHTNESS CONTROL – FULL (default): This setting is used to adjust the brightness of the IR LEDS. With this option blinking, use the UP or DOWN arrow key to move between FULL and HALF brightness. On FULL brightness the LEDs have a further flash range making it ideal for large open areas. HALF brightness is ideal for close up shots preventing the subject from being overexposed.
- SMART IR - ON (default): This setting is used to to toggle Smart IR ON and OFF. With this option blinking, use the UP or DOWN arrow to move between ON and OFF. While enabled the camera will take color images during the dusk and dawn lighting conditions. While Smart IR is ON, Photo Burst is limited to (1) image per triggering.
- PIR VIDEO: In this mode the camera will take a video clip at a designated resolution for a designated length with a designated time out when the camera senses activity in front of the unit. This mode is available for both day and night activities.
- PIR DELAY – 00min 05sec (default): This setting is used to determine the length of the time that the camera will wait before it reinitializes its PIR sensor for the next activation. With the TL mode this setting is only active if TL Delay is set to 1 min or greater. This setting can be changed between the numbers of 00min 02sec to 59min 59sec. With this option blinking, use of the UP and DOWN arrows will allow the minutes setting to be changed from 00 to 59. Once this setting is on the appropriate minutes, press the RIGHT arrow key to move to the seconds setting and it will start to blink. Use of the UP and Down arrows will allow the seconds setting to be changed from 00 to 59 (02 to 59 seconds if minutes = 00).
- PIR RANGE – STANDARD (default): This setting allows you to control the sensitivity distance the PIR will be activated. These distances can vary depending on environmental conditions. This setting will change between EXTENDED which will trigger about 1/3 further than the STANDARD setting, the STANDARD setting, or NEAR FIELD that will only trigger on movement closest to the camera. The AUTO setting will adjust the PIR range based on temperature to best select the most effective range.
- PIR AUTO ADJUST - ON (default): When this setting is ON, the camera will automatically adjust the PIR sensitivity to keep the PIR range consistent at different temperatures.
- VIDEO RES – 1920 x 1080 (default): This setting is used to determine the resolution of each video taken by the camera. With this option blinking, use the UP or DOWN arrow key to move between the options of: 1280 x 720 or 1920 x 1080. The higher the resolution of a video the more space the file will take on the SD memory card.
- VIDEO LENGTH – 010 S (default): This setting is used to determine the length of time, in seconds, of the video recording. This setting can be changed between MAV to 180 seconds. With this option blinking, use the UP or DOWN arrow key to move between the value range in increments of 5. The maximum night video is 30 seconds to conserve the batteries. MAV Video length will continue to record subject(s) if the camera continues to get PIR triggers during recording.
- VIDEO AUDIO – ON (default): This setting is used to determine if the camera should record audio (sound) with its video recording. With this option blinking, pressing the UP or DOWN arrow buttons will cause the camera to cycle between the two options of ON or OFF.
- OPERATING HOURS: This new function allows you to choose when you'd like the camera to be active and working. By pressing the ENTER button and choosing between the two options below and pressing Enter again, you will save your selection.
- TIME LAPSE (TL): In this mode the camera will take a designated amount of pictures with a designated time out between the designated hours of operation even if there is no activity in front of the camera.
- PHOTO RES – 8.0 MP (default): This setting is used to determine the Megapixel resolution of each image taken by the camera. With this option blinking, use the UP or DOWN arrow key to move between the options of: 26MP, 16MP, 8MP or 4MP. The higher the resolution of an image the more space the file will take on the SD memory card.
- PIR DELAY – 00min 05sec (default): This setting is used to determine the length of the time that the camera will wait before it reinitializes its PIR sensor for the next activation. With the TL mode this setting is only active if TL Delay is set to 1 min or greater. This setting can be changed between the numbers of 00min 02sec to 59min 59sec. With this option blinking, use of the UP and DOWN arrows will allow the minutes setting to be changed from 00 to 59. Once this setting is on the appropriate minutes, press the RIGHT arrow key to move to the seconds setting and it will start to blink. Use of the UP and Down arrows will allow the seconds setting to be changed from 05 to 59 (02 to 59 seconds if minutes = 00).
- PIR RANGE – STANDARD (default): This setting allows you to control the sensitivity distance the PIR will be activated. These distances can vary depending on environmental conditions. This setting will change between EXTENDED which will trigger about 1/3 further than the STANDARD setting, the STANDARD setting, or NEAR FIELD that will only trigger on movement closest to the camera.
- REDUCE BLUR – ADVANCED (default): This setting is used to determine if the camera should use the MATRIX Blur reduction technology to dramatically reduce the blur effect resulting in clearer night time infrared shots. (STANDARD) Minimizes blurring effect in images while retaining long-range night image capability. (ADVANCED) Enhanced blur reduction providing a balance between brightness and image sharpness. (PROGRESSIVE) Maximum blur reduction achieved through faster shutter speed. This setting may cause a slight reduction in night time range and increased grain in the image. With this option blinking, pressing the UP or DOWN arrow buttons will cause the camera to cycle between the three options of STANDARD, ADVANCED, and PROGRESSIVE.
- IR BRIGHTNESS CONTROL – FULL (default): This setting is used to adjust the brightness of the IR LEDS. With this option blinking, use the UP or DOWN arrow key to move between FULL and HALF brightness. On FULL brightness the LEDs have a further flash range making it ideal for large open areas. HALF brightness is ideal for close up shots preventing the subject from being overexposed.
- SMART IR - OFF (default): This setting is used to to toggle Smart IR ON and OFF. With this option blinking, use the UP or DOWN arrow to move between ON and OFF. While enabled the camera will take color images during the dusk and dawn lighting conditions. While Smart IR is ON, Photo Burst is limited to (1) image per triggering.
- TL DELAY – 00min 30sec (default): This setting is used to set a delay between TIME LAPSE images. This setting can be changed between the numbers of 00min 05sec to 59min 59sec. With this option blinking, use of the UP and DOWN arrows will allow the minutes setting to be changed from 00 to 59. Once this setting is on the appropriate minutes, press the RIGHT arrow key to move to the seconds setting and it will start to blink. Use of the UP and Down arrows will allow the seconds setting to be changed from 00 to 59 (05 to 59 if minutes = 00). If the TL Delay is greater than or equal to 1 min, then the PIR sensor will be active between time-lapse photos.
- TL START – 06:00PM (default): This setting is used to give the camera the start time for when to start the time* lapse photography. The default format is in a HH/MM/AP setup, should the time format be in 24 hour the format it will show HH/MM. With the HH (hour) setting blinking, use the UP and DOWN arrows to allow the setting to be changed from 1 to 12. Once this setting is on the appropriate hour, press the RIGHT arrow key to move to the MM (minute) setting and it will start to blink. Using the UP and DOWN arrows will allow the setting to be change from 00 to 59. Again when this setting is on the appropriate minute, press the RIGHT arrow key to move to the AP (am/pm) setting and it will start to blink. Using the UP and DOWN arrows will allow the setting to be changed from AM to PM.
- TL STOP – 08:00AM (default): This setting is used to give the camera the stop time for when to end the time- lapse photography. The default format is in a HH/MM/AP setup, should the time format be in 24 hour the format will be HH/MM. With the HH (hour) setting to blinking, use the UP and DOWN arrows to allow the setting to be changed from 1 to 12. Once this setting is on the appropriate hour, press the RIGHT arrow key to move to the MM (minute) setting and it will start to blink. Using the UP and DOWN arrows will allow the setting to be change from 00 to 59. Again when this setting is on the appropriate minute, press the RIGHT arrow key to move to the AP (am/pm) setting and it will start to blink. Using the UP and DOWN arrows will allow the setting to be changed from AM to PM.
EXAMPLE: Data Stamping on the bottom portion of the picture indicates the camera took a picture in Time Lapse (TL) mode.

- CAMERA NAME – STEALTH CAM (default): This setting is used to identify the camera on the Info Bar. It can be up to 13 characters long in the form of alpha (A- ‐Z), numeric (0- ‐9), or spaces. With this option blinking, use the UP or DOWN arrow buttons to change the initial character. Once the blinking character has been changed, use the RIGHT arrow button to continue to the next character. Repeat until the desired name is entered. When finished press the ENTER button again to confirm and store the new camera name. Pressing the DOWN arrow key will move the display to the next configuration option.
- TEMPERATURE – FAHRENHEIT (default): This setting is used to tell camera if the temperature reading on the Info Bar should be in Fahrenheit or Celsius. With this option blinking, pressing the UP or DOWN arrow buttons will cause the camera to cycle between the two options.
- INFO BAR – ON (default): This setting is used to tell camera if the Info Bar should be displayed at the bottom of images and video or not. With this option blinking, pressing the UP or DOWN arrow buttons will cause the camera to cycle between the two options of ON or OFF.
- DVR MODE – OFF (default): This setting allows you to perform loop recordings. When turned ON, this mode will allow the camera to overwrite the earliest recorded files when the SD card reaches full capacity. When turned OFF, the camera is not allowed to write over existing files. Once SD card is full the camera stops recording.
- LATITUDE – 000.000000N (default): This setting is used for the GEO- ‐TAG of the camera. It will not be displayed on the images directly, but rather on the background image information. The coordinates can be changed from 000.000000 to 179.999999 and either N (North) or S (South). With this option blinking, use the UP or DOWN arrow buttons to change the initial number blinking. Once the number is correct use the RIGHT arrow button to continue to the next value. Repeat until the final desired numeric sequence is entered.
- LONGITUDE – 000.000000E (default): This setting is used for the GEO- ‐TAG of the camera. It will not be displayed on the images directly, but rather on the background image information. The coordinates can be changed from 000.000000 to 179.999999 and either E (East) or W (West). With this option blinking, use the UP or DOWN arrow buttons to change the initial number blinking. Once the number is correct use the RIGHT arrow button to continue to the next value. Repeat until the final desired numeric sequence is entered.
- FACTORY RESET – NO (default): This setting is used to reset the camera to its factory defaults. With this option blinking, pressing the UP or DOWN arrow buttons will cause the camera to cycle between the two options of NO or YES. When the YES option is chosen and the ENTER button is press the camera will default all configurations made up to this point.
- SECURITY KEY – OFF (default): This setting allows the owner of the camera to program a four (4) character alphanumeric code to keep unauthorized people from accessing their camera settings. To turn this feature on press the ENTER button, then press the UP or DOWN arrow buttons to change to the YES option. Once chosen, press the ENTER button and the camera will now engage this feature. Pressing the DOWN arrow key will move to the security key configuration.
- SECURITY KEY – 0000 (default): To change the key to an owner operated one press the ENTER button. With this option blinking, use the UP or DOWN arrow buttons change the first digit to the preferred number or letter. Then using the LEFT button, move to the second digit and change it to the preferred number or letter as well. Continue this until all 4 digits are correctly set. Finally press the ENTER button to secure the new code.
NOTE: The camera owner is responsible for remembering the code. Should the code be forgotten the owner must call in to Customer Service (877- ‐269- ‐8490) for directions on getting the unit restored to factory defaults. In order for the owner to be authorized for the reset, this camera must be registered with Stealth Cam.
- FORMAT CARD – NO (default): This setting is used to format the SD memory card installed. With this option blinking, pressing the UP or DOWN arrow buttons will cause the camera to cycle between the two options of NO or YES. When the YES option is chosen and the ENTER button is press the camera will format the card, deleting any previous information that was on the card. Pressing the DOWN arrow key will move the display back to the starting option of SETUP DATE.
- LANGUAGE – ENGLISH (default): This new feature allows you to select which language you prefer to use in the menu. By pressing the ENTER button you will be able to scroll through the following choices: English / German / French / Spanish. Once selected press the ENTER button again to save your setting.
TEST – This is the final switch setting, and is used to test the camera's PIR sensor coverage area.
When moved to this setting the display will display:
TEST
VXX.XX.XX
The number listed at the bottom of the display shows the current version of the firmware that is installed on the camera. The first two XX indicates which model version you have and the last four XX.XX indicates the firmware version. This is very important information when performing an update. Please check the Stealth Cam website to see if any firmware updates are available.
When in this mode the Test Mode light will blink green when the camera detects motion. This will help determine if the camera is positioned at a location that will sense motion as it passes by causing the camera to activate in its PIR and video mode.
MEMORY CARD INSTALLATION
To insert the SD memory card into the camera: first locate the SD card slot on the right hand side of the of the camera case.
Next with the SD card label facing towards the front of the camera, insert the SD card.
When the card has been pressed in fully there will be a noticeable resistance as the spring locking mechanism activates to hold on the SD card.
No force should be required to insert the card, should it feel as though the card will not freely slide into the slot, remove the card and check for any obstructions.

Image Capacity – varies based upon photo/video resolution and SD Card storage size. For more information please visit www.stealthcam.com
FORMATTING SD CARD
It always best to format your SD cards from the actual device your using, in this case the camera. This will allow the camera to format the card in the proper fashion.
- First insert your SD memory card into the camera.
- Slide the switch to the Custom setting.
- Press the Menu.
- Press the Up Arrow until the display shows "Format Card – No"
- Press the Enter button. The word "No" will start to blink.
- Press the Down Arrow once. The word "Yes" will start blinking.
- Press the Enter button to delete and format the card. The display will read "Format Card - ‐ Deleting...."
- Once the card has been formatted the screen will go back to read "Format Card – No"
- Press the Menu key to return back to ready mode.
BATTERY REMOVAL & INSTALLATION
To remove the batteries from the unit; open the case and press the EJECT button on the lower right hand corner. This will cause the battery tray to be released and slide downwards.

New, Alkaline or Lithium, 'AA' batteries must be inserted with the orientation as shown on the tray. As with most electronic devices the negative ( - ‐ ) orientation of the batteries should be against the springs. Failure to insert the batteries properly will cause damage to the unit.

To reinsert the battery tray; position the tray so the base of the tray matches with the opening at the bottom of the camera. The tray is notched so that incorrect insertion of the battery tray is not possible. With the orientation correct simply slide the battery tray into its final locked position. Should the battery tray not willingly slide into it destination, remove the tray and examine the area of possible debris that may be causing the issue.
NOTE: Replacing the batteries will not reset the cameras current configurations.

Do not mix new and old batteries.
Remove batteries from the tray if the unit will not be in use for extended period of time.
VIEW & DELETING IMAGES
The camera allows for two (2) ways to view your images. First is the direct connection for the camera to the computer via a USB cable (not included). This is a USB mini to standard USB (type A/B) cable. By simply turning the unit to the OFF position, and plugging the USB mini end into the camera and the standard USB end into the computer, the computer will register the camera as a card reading device. Once connection with the computer has been established the files may be review based upon the software installed on the computer. Please refer to the software's Owner's Manual for exact viewing of images.
NOTE: Support for this operation is limited to but not exclusive to the Windows Vista operating system and above, and also the Mac OS 10.6 and above. Any operating systems below the above- ‐mentioned are not guaranteed to be compatible and may result in system errors.
The second option is to remove the SD memory card from the camera, and using a card reading device to view the images. Please refer to the Owner's Manual for the particular device in use for viewing the files.
NOTE: SD memory card viewers not manufactured by Stealth Cam may create conflicts on the memory card. Should this occur and the card is no longer working properly with the unit, the SD memory card will need to be reformatted.
DEFINITIONS
MATRIX (Blur Reduction Technology) – Advanced blur reduction dramatically reduces blur effects resulting in sharper, clearer images.
RETINA (Sub 14 Second Trigger) – Superior low light performance for extended nighttime range.
MULTI4 ZONE DETECTION * Provides for more accurate coverage at angle & distance, maximizing the cameras triggering capability.
TRIAD (34 in4 1 Technology)
- Hi4 Res still images: The basis upon which scouting cameras were designed, today's Stealth Cam's shoot highresolution still images (day & night) with unmatched clarity and detail. Coupled with Burst Mode (multiple exposures per triggering).
- HD Video: Stealth Cam's ability to shoot HD video with audio brings a whole new dimension to scouting by giving the user a true glimpse into the animal's behavior and vocalizations.
- Time Lapse: The option to set the camera to take images at predetermined intervals over a selected time periods (day or night) is the cornerstone behind Stealth Cam's Time Lapse function.
Motion Sensor Override – if a subject matter enters the cameras coverage zone between time- lapse shots the sensor will override the setting, trigger & capture the image when TL delay is greater than or equal to 1 min.
BURST (Rapid Fire Mode) - Multiple exposures per triggering delivers a sequence of images capturing subject movement.
BURST INVETVAL - Delay between image captures on multiple burst mode.
QUICK SET (Fast, Simple Setup) - Pre-programmed setting switches which allows the user to literally set their trail cam up in a matter of seconds.
SECURE LOCK (Digital Protection) – Secure Lock offers password protection rendering the camera access nearly impossible.
GEO-TAG (GPS Meta-Tagging) - Allows the entry of GPS coordinates into the camera. These coordinates do not appear on the time date stamp but rather in the background image data. When GPS tagged image is opened with a location enabled program such as iPhoto or Picasa images are plotted on a map.
Smart Illumination Technology - The Camera constantly monitors light conditions during the dusk & dawn transition periods adjusting the IR illumination to provide the best possible color images before switching in and out of night mode. While Smart IR is ON, Photo Burst is limited to (1) image per triggering.
Motion Active Video - (MAV) The Camera will continue to record video if the subject(s) re-trigger the PIR sensor. this allows the camera to capture the entire event without ending prematurely.
FREQUENTLY ASKED QUESTIONS
Can I mix batteries together?
A: NO, you should never mix old with new OR Alkaline with Lithium with Rechargeable.
Is my game camera Mac compatible?
A: Yes, This camera model works with 10.6 and above.
Can I use rechargeable batteries in the camera?
A: Rechargeable batteries are fine for the unit; regular alkaline batteries designed for digital electronics are recommended for best performance.
Q: When I use a memory card can I view the pictures on my personal digital camera?
A: We do not recommend viewing SD memory card images taken in your game camera on any other digital camera. You may experience compatibility issues.
Q: Will I lose my images and setting when the batteries die?
A: The images are stored on your external SD memory card so your images will be intact only on your card. However you will need to reset your settings.
Q: What are my options if my camera is past its warranty?
A: We have an out of warranty program in which you may purchase a refurbished / reconditioned replacement unit for 50% or more off (based on retail price of unit) discount exchange of your old unit.
Q: Can I use my game camera through a window or glass door?
A: Glass may disrupt your sensor beam we don't advise using the camera in this fashion.
Q: Do I need to recharge my 12V Battery Kit during the seasons if it's not in use?
A: The 12V Battery Kit should be recharge at least every 3 months, regardless if it is being used or not, in order to preserve the working condition of the battery inside the unit.

To ensure the product is being utilized to its full potential, we recommend checking our website for new product updates. If your unit is having trouble, please check the website to determine you are using the latest firmware or software version.
TECHNICAL SUPPORT
EMAIL: Stealthcam@gsmorg.com
Please allow 48 hours for email response.
STEALTH CAM LLC
P.O. Box 535189
Grand Prairie, TX 75053-9504
CUSTOMER SERVICE
CONTACT & HOURS
Toll Free: 877- ‐269- ‐8490
CALL CENTER HOURS
Mon – Fri / 8 AM – 5 PM (CST)
www.stealthcam.com ;
877-269-8490
Documents / Resources
References
Download manual
Here you can download full pdf version of manual, it may contain additional safety instructions, warranty information, FCC rules, etc.
Advertisement


Need help?
Do you have a question about the STC-G45NGMAX and is the answer not in the manual?
Questions and answers